Platform Usage
Welcome to the ResellPortal.com platform guide. This documentation will help you navigate and use the platform effectively to manage your resale business.
ResellPortal.com offers tools to streamline product sourcing, inventory tracking, order management, and performance analysis—all in one place. Whether you're just starting or scaling up, this guide provides the essentials to get the most out of your experience.
- Introduction to the Resell Portal Platform
- How to Manually Add Services & Clients
- How to setup your Storefront & Enable Client Purchases on your Store
- Requesting Support & Using the Ticket System
- How to Manage Services and Clients
- White Label Settings User Guide
- Coupon manager User Guide
Introduction to the Resell Portal Platform
Welcome to your Resell Portal! This guide will walk you through the essential first steps to set up your account and prepare your digital storefront for sales. Follow these instructions to get your reselling business up and running.
Platform Menu Overview
| Tab Name | Key Features | Description & Purpose |
| Getting Started | Launch Checklist, Wallet Top-up, Branding Setup | Your step-by-step guide to moving from "Draft" to "Live." Includes the New User Bonus ($10 for your first $20+ top-up). |
| Dashboard | Operational Runway, Recurring Revenue, Analytics | Monitor your business health. Track how many days of funding you have left and view your monthly/annual profit statistics. |
| Marketplace | 13+ Digital Services, Client Onboarding | The wholesale shop where you manually purchase services for new or existing clients using your wallet balance. |
| Clients | Client Database, Order History | A centralized list of your customers. View their contact details, active subscriptions, and every order they’ve ever placed. |
| Services | Suspend, Reactivate, Remove, View Credentials | Manage active fulfillment. This is where you retrieve login details for your clients or handle administrative holds on services. |
| White-Label Settings | Custom Domains, Storefront Design, Email Branding | The core branding engine. Upload logos, set brand colors, and connect your own professional domain (e.g., shop.yourbrand.com). |
| Coupon Manager | Discount Codes, Sticky Site Banners | Create percentage-based promotions to drive sales. Use the "Sticky Top Bar" to display codes prominently on your storefront. |
| AI Landing Page | HTML Generator, AI Sales Copy, Layout Styles | Use AI to build high-converting sales pages in seconds. Choose a style (Modern, Cyber, Glass) and let the AI write your copy. |
| Billing & Auto Top-Up | Auto-Replenish, Email Notifications | Ensure services never expire by enabling Auto Top-Up. This automatically adds funds to your wallet when your balance runs low. |
| Transaction Logs | Financial History, Balance Tracking | A detailed ledger of every purchase, refund, and top-up. Includes "Balance After" values for easy bookkeeping. |
| Affiliate Center | Referral Link, 10% Lifetime Commission | Earn passive income by referring other resellers. Track your 10% lifetime commission on every top-up they make. |
| Support Tickets | Ticket Creation, Inquiry History | Get technical help directly from our team. Open new tickets or view past conversations regarding your agency. |
Getting Started
To understand how the platform works, it's important to familiarize yourself with its three main components:
-
Your Reseller Dashboard: This is your central hub for managing your entire business. From here, you can oversee clients, track your profits, and configure your store settings. The topic you are currently on is part of your dashboard.
-
Your Public Storefront: This is the professional, customer-facing website where your clients will browse and purchase products and services. While we host the storefront, it is branded with your company's identity, not ours.
-
Your Wallet Balance: This is a pre-paid account used to cover the wholesale cost of the products you sell. When a customer makes a purchase on your storefront, the wholesale price is automatically deducted from this wallet, and you instantly receive the difference as profit. You can also use this balance to manually add services for clients.
Launch Your Business
To launch your business and begin making sales, follow these four essential steps. You can find all the necessary settings in the navigation menu on the left side of your dashboard.
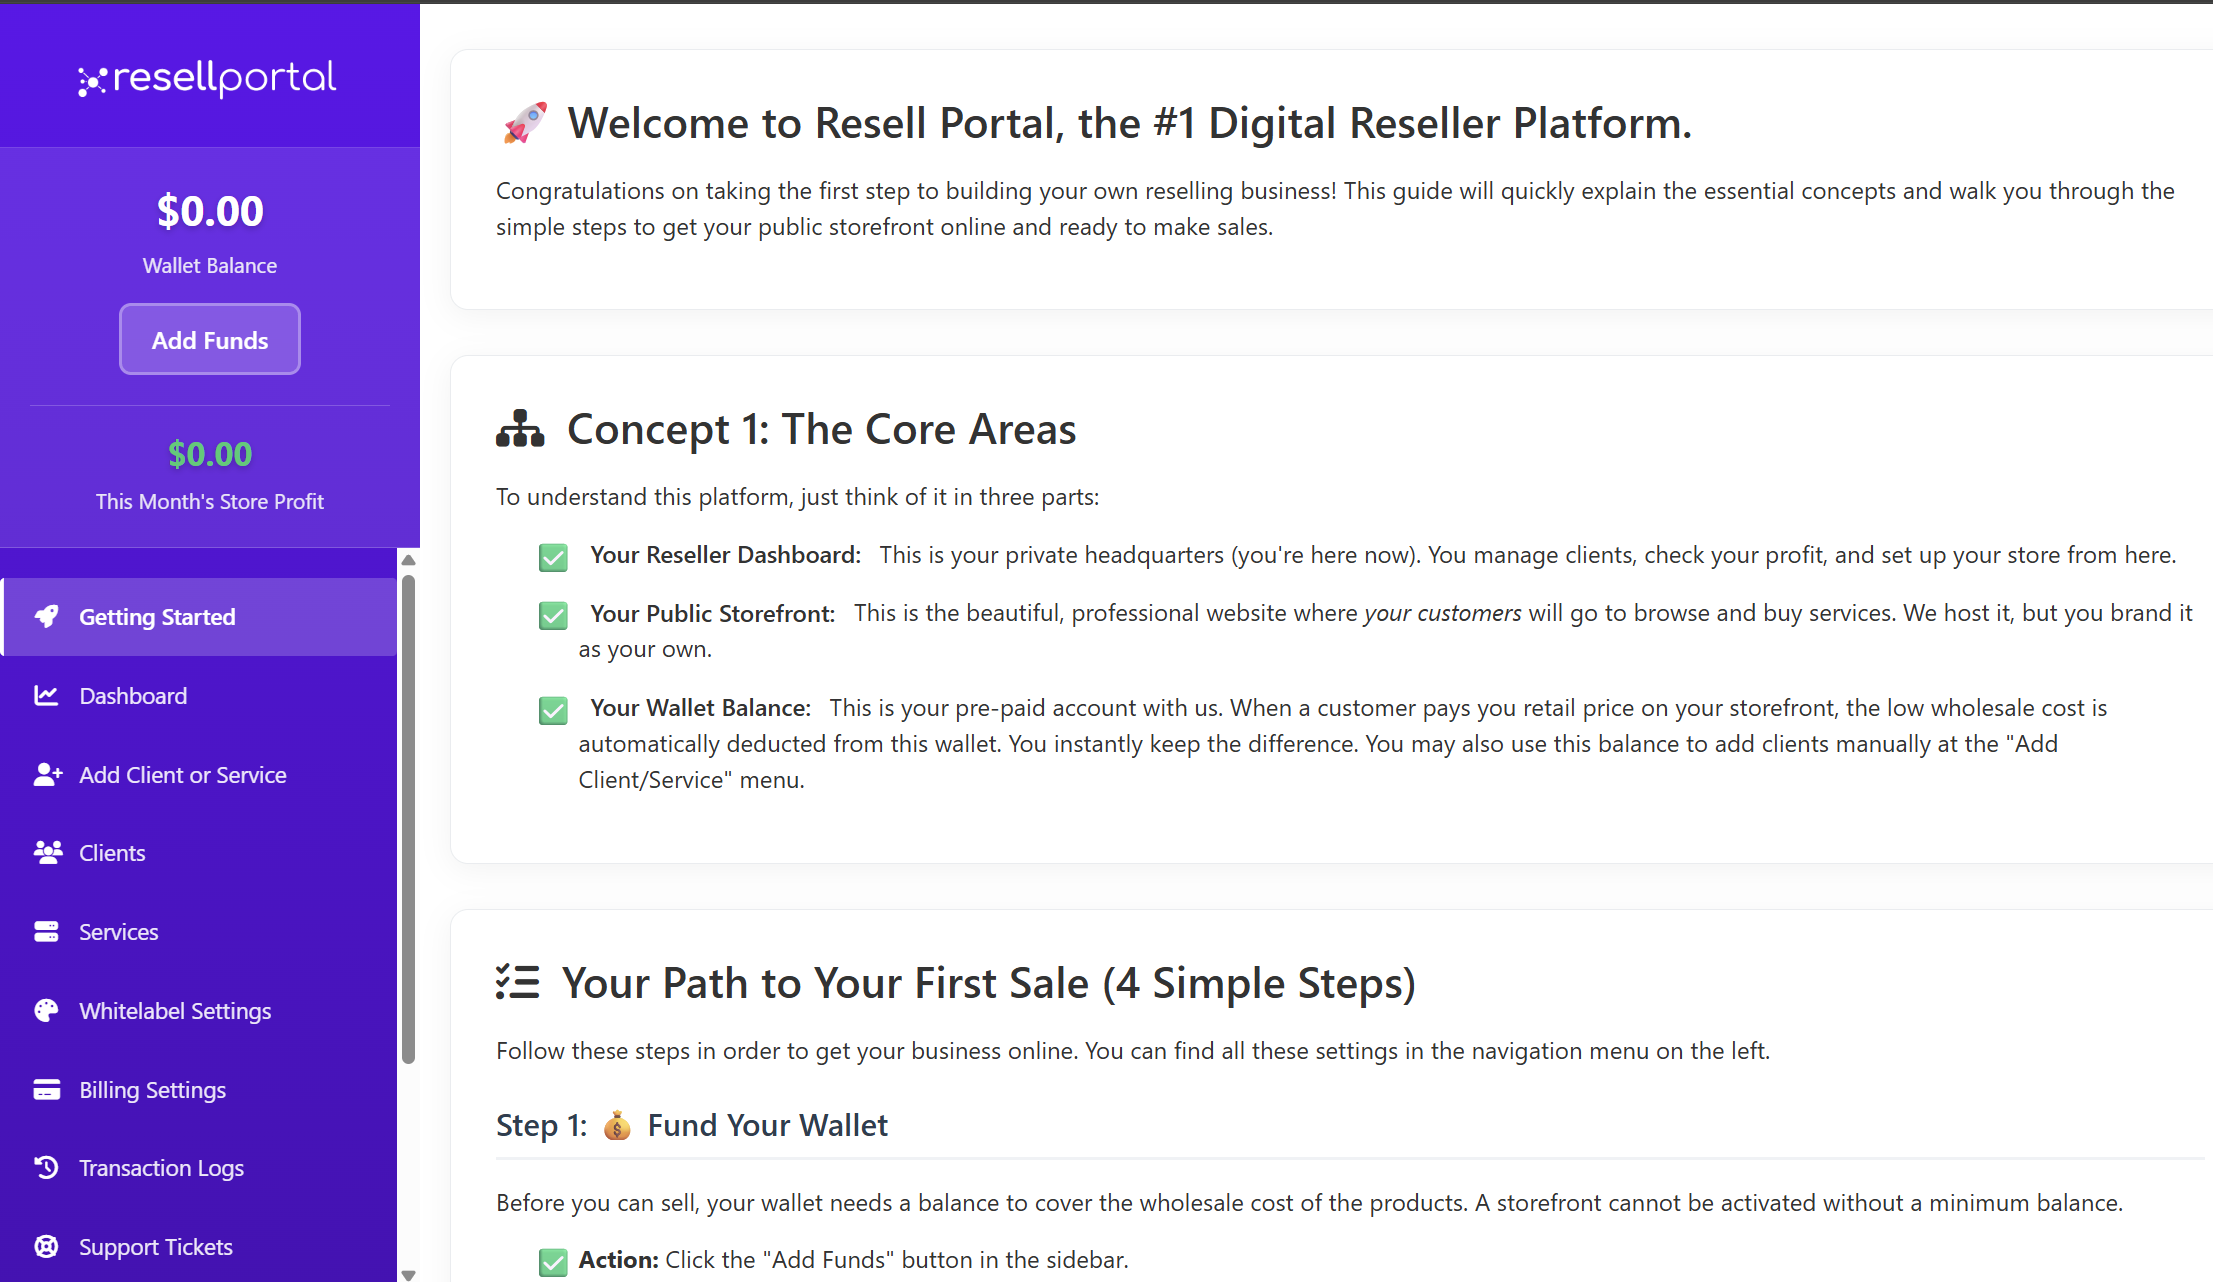
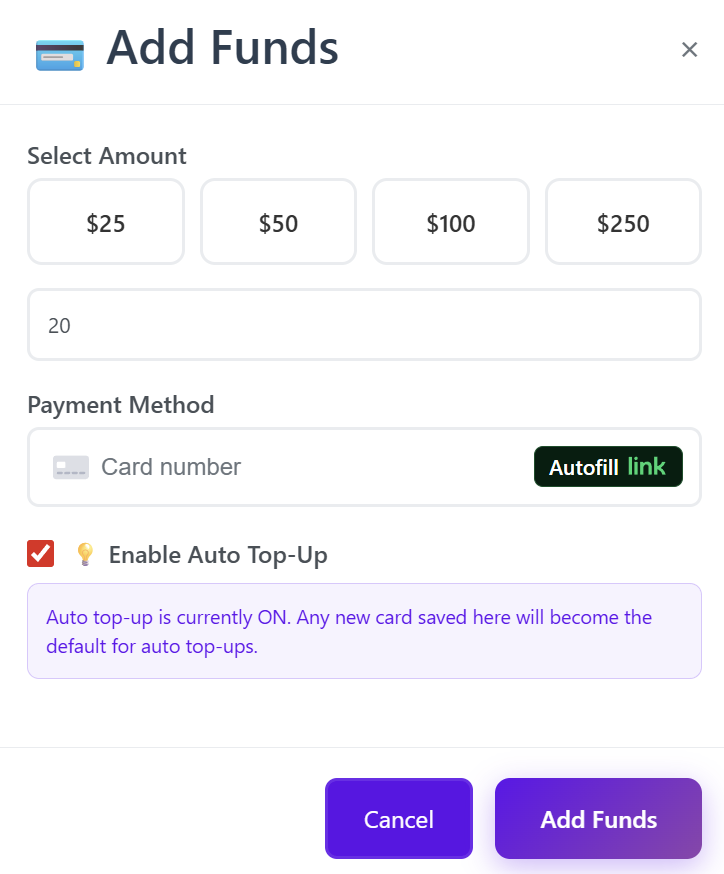
Step 1: Fund Your Wallet
Before you can offer products to customers, your wallet needs a balance to cover the wholesale costs. A storefront cannot be activated without a minimum balance.
-
Click the "Add Funds" button located in the sidebar on the left.
-
Recommendation: A minimum of $20.00 is required to activate your storefront, but we suggest starting with at least $50.00 to ensure smooth initial operations.

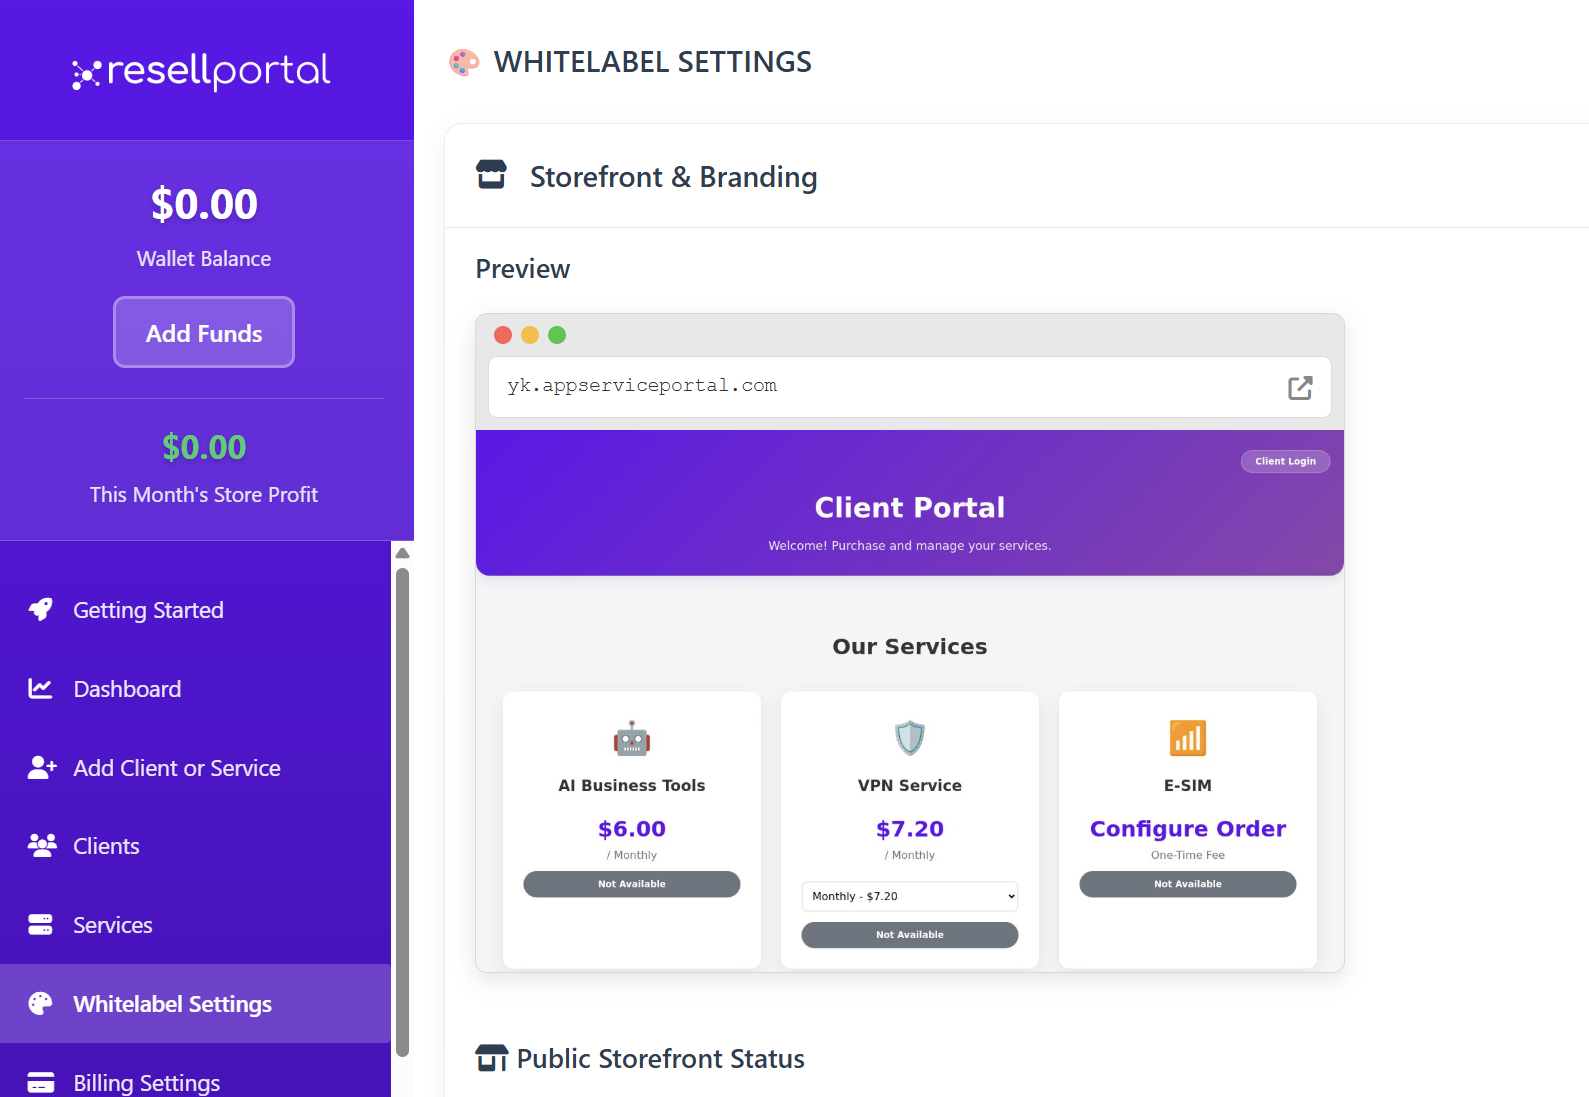
Step 2: Brand Your Store & Choose Your Domain
This step focuses on customizing your storefront to reflect your brand. This is what your customers will see.
-
Navigate to the Whitelable Settings topic - first section Storefront & Branding.
-
Most Important: Upload your company logo and select a unique domain for your storefront. This can be a custom domain you own or a subdomain provided by us (e.g., your-store.appserviceportal.com). This URL is how your customers will find you.

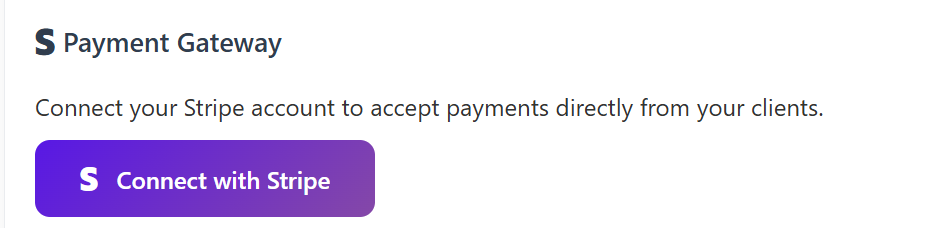
Step 3: Connect a Payment Gateway
To get paid by your customers, you need to connect a payment processor. When a customer buys from your storefront, their payment will go directly into your own Stripe account. We never handle your customers' money.
-
On the Store & Branding section under Whitelabel topic, find and click the "Connect with Stripe" button.
-
Note: Stripe is a leading platform for secure online payments. If you don't have a Stripe account, you will be prompted to create one for free during this process.

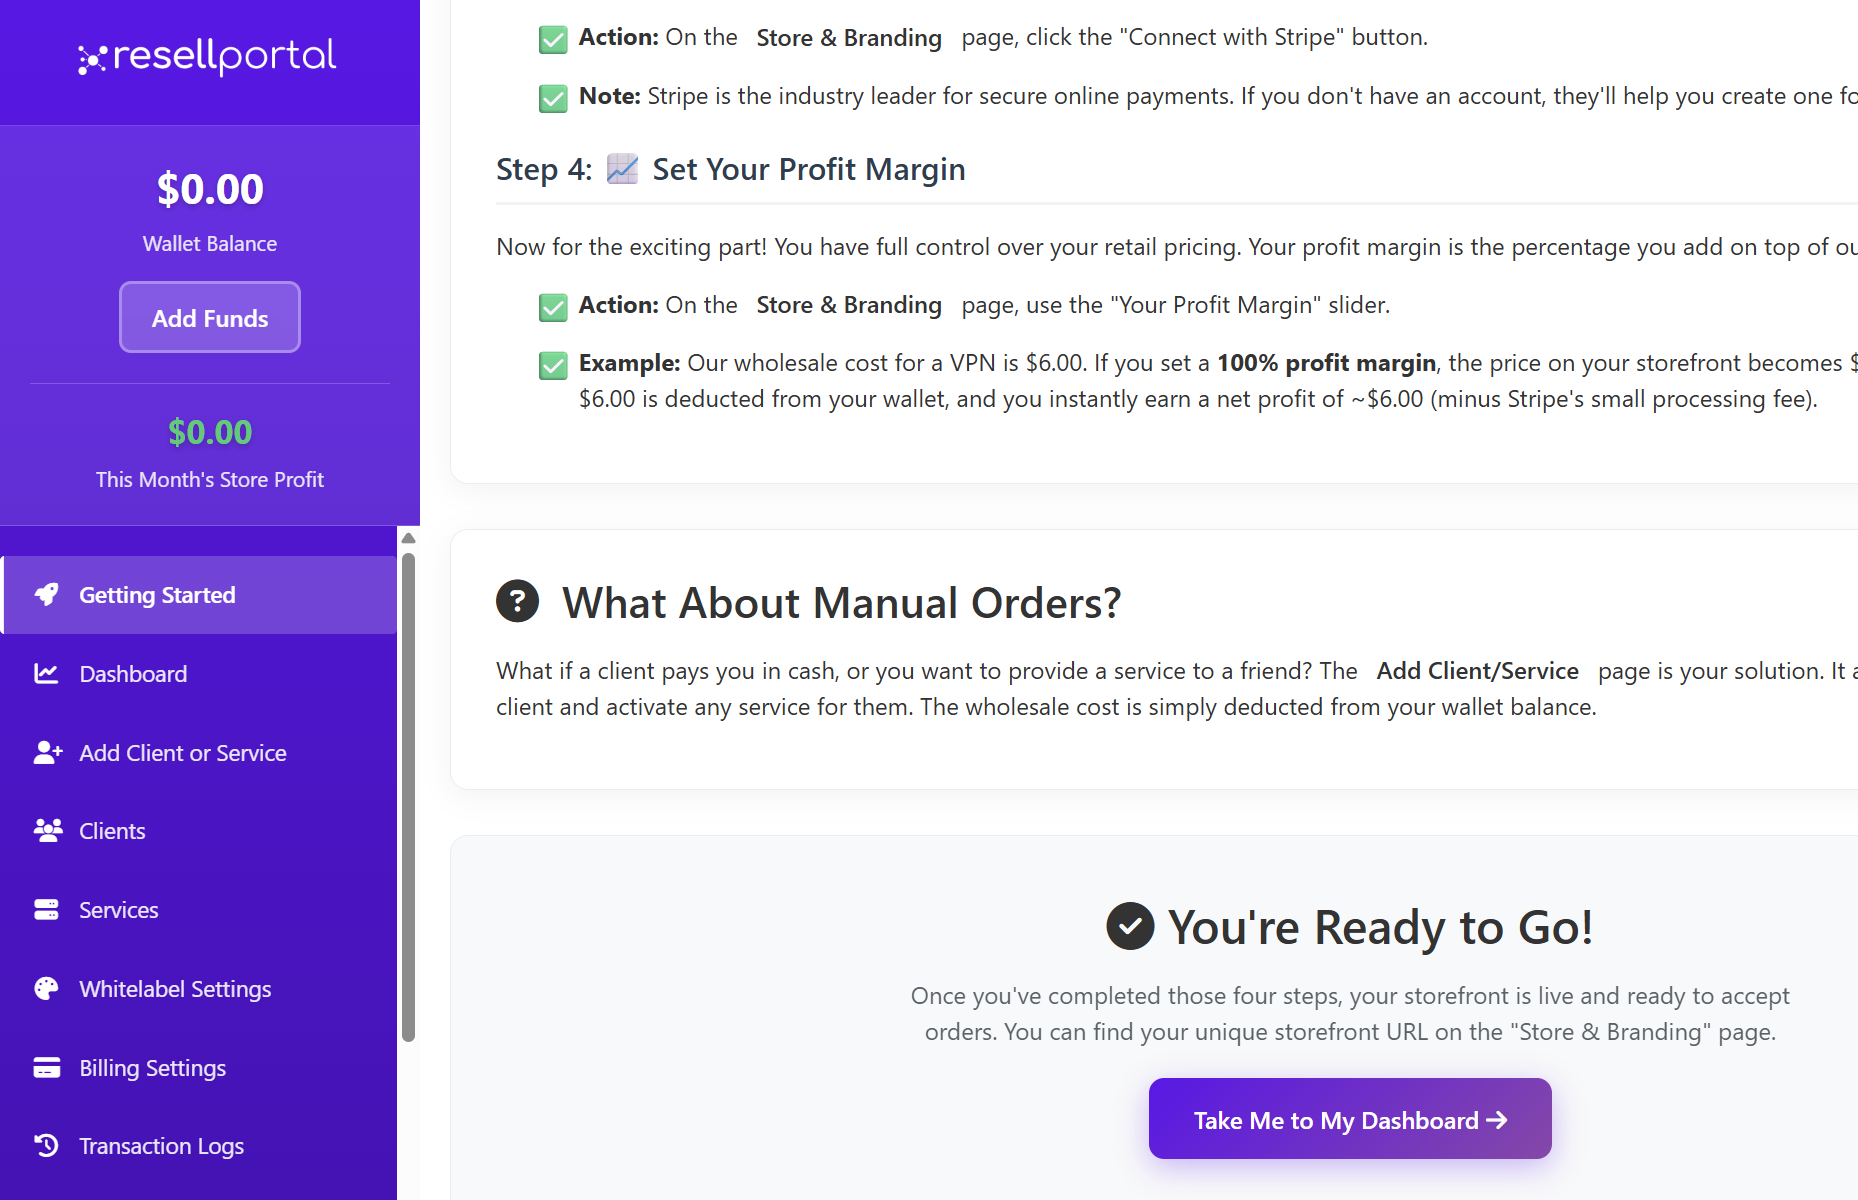
Step 4: Set Your Profit Margin
This is where you determine your pricing and profitability. You have complete control over the retail prices by setting a profit margin, which is the percentage you add on top of our wholesale costs.
-
Storefront & Branding section-> use the "Your Profit Margin" slider to set your desired margin.
-
Example: If a product has a wholesale cost of $6.00 and you set a 100% profit margin, the price on your storefront will be $12.00. When a customer purchases it, $6.00 is deducted from your wallet, and you instantly earn a net profit of $6.00.


What About Manual Orders?
If you need to manually create an order for a client—for instance, if they pay you in cash or you want to provide a service to a friend—you can do so easily.
-
The Add Client/Service topic allows you to manually create a client and activate any service for them. The wholesale cost for the service will be deducted from your wallet balance.

You're Ready to Go!
Once you have completed these four steps, your storefront will be live and ready to accept orders. You can find your unique storefront URL on the "Store & Branding" topic.
Now you are all set! Click the "Take Me to My Dashboard" button to continue exploring your Resell Portal.
How to Manually Add Services & Clients
The Add Client or Service section allows you to create new clients, manage existing clients, and assign digital products or AI services directly from your reseller wallet. This feature is designed for agencies, resellers, and service providers who deliver white-labeled solutions on behalf of their clients.
What This Section Allows You To Do
-
Add a new client or select an existing client
-
Assign one or more services, products, or AI tools to that client
-
Deduct wholesale costs directly from your wallet balance
-
Deliver fully white-labeled, branded services
-
Manage individual client subscriptions and activations
How to Add a Client or Service
1. Accessing the Section
-
Log in to your ResellPortal dashboard
-
In the left sidebar, click “Add Client or Service”
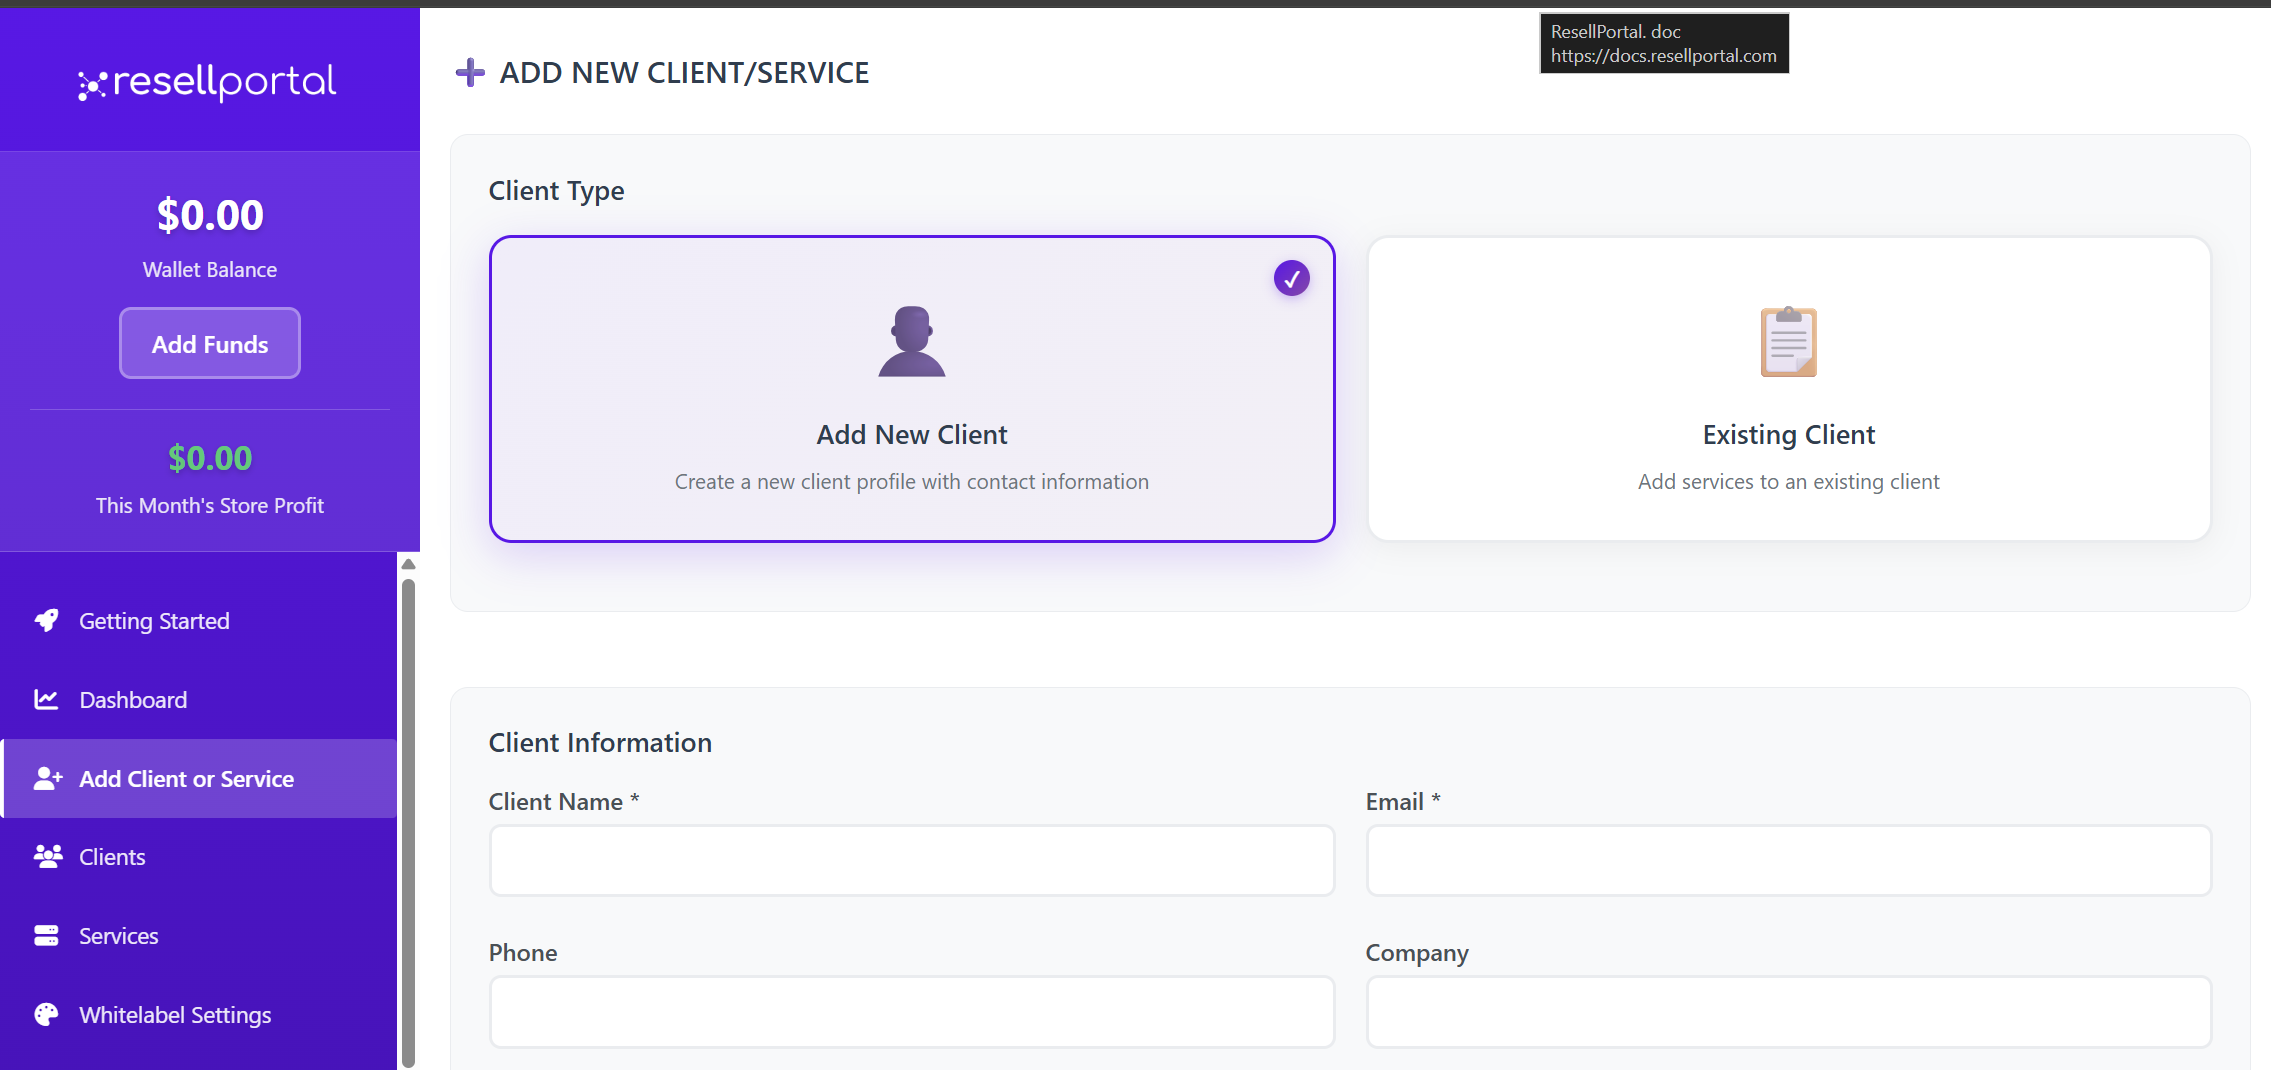
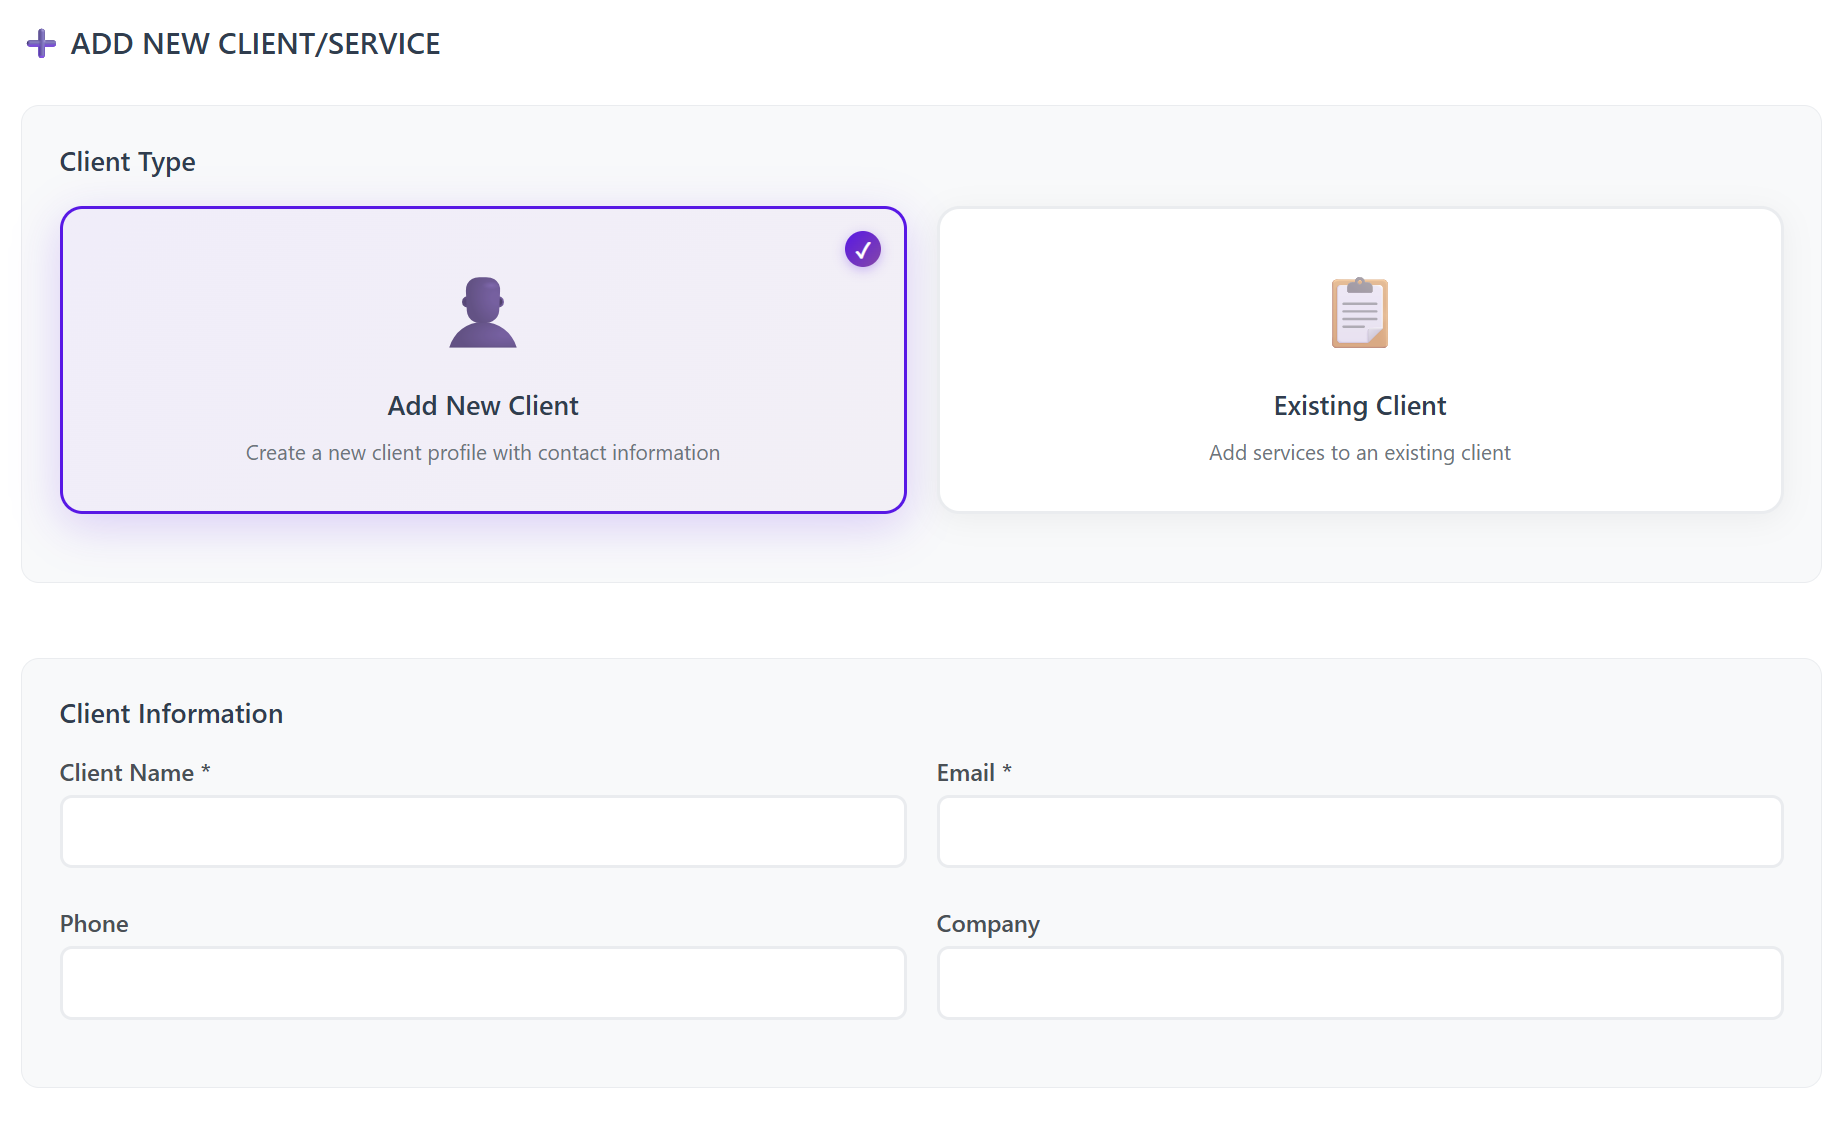
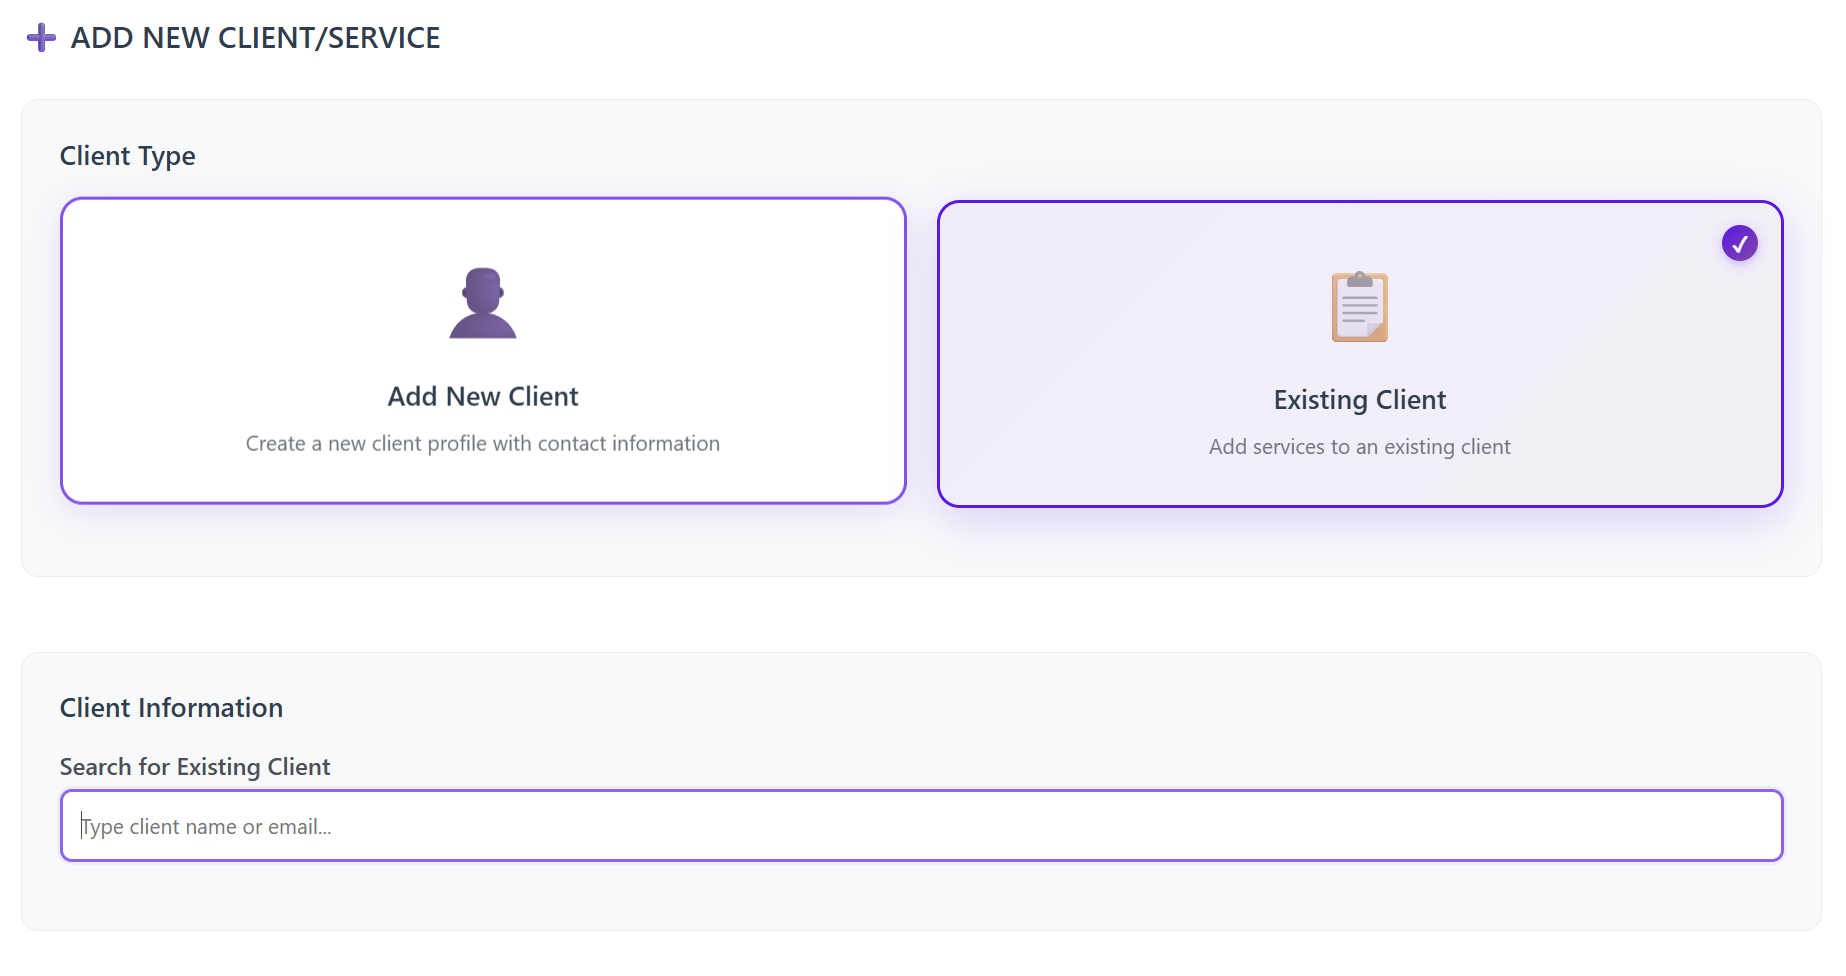
2. Choose Client Type
You will be prompted to choose:
Add New Client or Use Existing Client
3. Enter or Select Client Information
If Adding a New Client
Required:
-
Client Name
-
Client Email Address
Optional:
-
Phone number
-
Company name
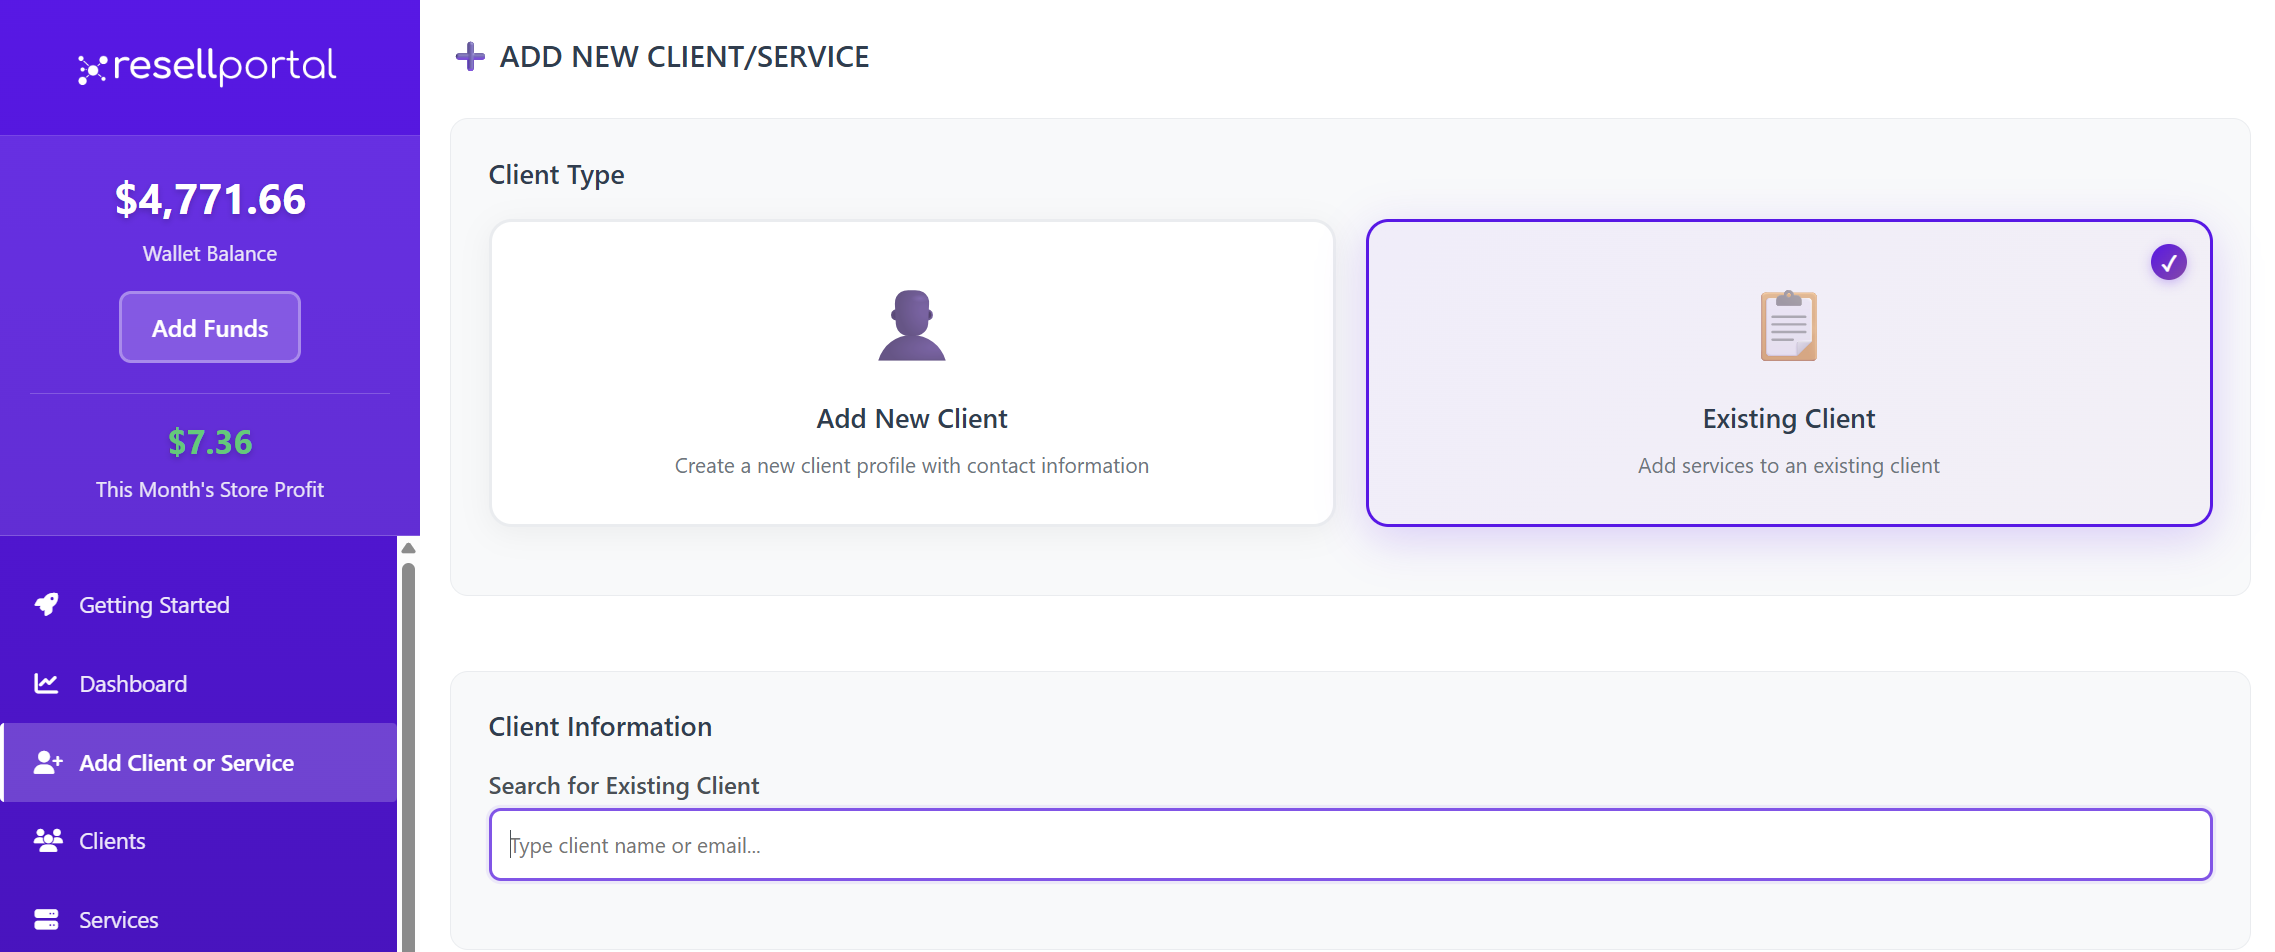
If Selecting an Existing Client
-
Search by email address
-
Select the matching client record
4. Toggle the Services/Products to Assign
After selecting a client, you will see a full list of services and AI tools.
Toggle ON the services you want to activate for the client.
Once confirmed, the wholesale amount is deducted from your wallet balance, so make sure your balance is funded before activation.
Important: AI Tools Branding Setup
Before activating any AI Business Tools, you must configure your AI Whitelabel Branding:
Go to:
Settings → Whitelabel Settings → AI Branding
This ensures that your client’s AI dashboards, chatbots, and portals display your brand, not the default branding.
Available Services & Pricing
Below is the updated list of all wholesale products you can assign to a client from the Add Client or Service topic.
AI Business Tools Suite
From $5.00/mo (base)
Monthly wholesale cost increases based on selected tools.
Available AI Tools:
-
AI Live Chat Bot — $15.00
-
AI FAQ Assistant — $10.00
-
AI Lead Capture Bot — $12.00
-
AI Appointment Scheduler — $10.00
-
AI Product Recommender — $15.00
-
AI Business Intelligence — $20.00
-
AI Email Auto-Responder — $8.00
-
AI CRM Assistant — $15.00
-
AI Review Responder — $10.00
-
AI Competitor Monitor — $20.00
-
AI Market Domination — $20.00
-
AI Local Leads Finder — $18.00
-
AI Blog Generator — $12.00
-
AI Website Health Monitor — $8.00
-
AI QR Code Generator — $5.00
The final monthly wholesale cost is automatically calculated based on selected tools.
VPN Service
-
$6/month
-
Includes global servers, apps, and multi-device support
E-SIM Data Plans
-
Select package
-
Instant QR code activation
-
Worldwide support
SMM Services (Likes, Followers, etc.)
-
Configure order
-
Wholesale rates available
-
Supports multiple platforms
Website Builder
-
$10/month
-
Drag-and-drop builder with templates and AI assistance
WordPress Plugin Installer Pack
-
$10/month
-
White-label bundle of 1500+ plugins & themes
Social Media Automation
-
$15/month
-
Schedule posts & generate AI content
Web Hosting
-
$15/month
-
cPanel, SSD hosting, 24/7 uptime monitoring
Web Design Service
-
Starting at $50.00
-
Professional custom website builds
Monthly SEO Service
-
$200/month
-
Ongoing white-labeled SEO
Using Your Wallet Balance
Whenever you assign a service:
-
The wholesale amount is immediately deducted from your wallet
-
The product is automatically provisioned
-
Access details are emailed to your client (unless manual deployment is required)
Make sure to top up your wallet before adding multiple services.
Best Practices for Resellers
-
Always check your wallet balance before activating services
-
Use unique emails per client to avoid cross-account access
-
Set up AI branding before enabling AI tools
-
Double-check service configurations—some cannot be changed later
-
Bundle services (e.g., Hosting + Website Builder + SEO) to increase revenue
-
Use existing clients when possible for cleaner management
Summary Table
| Section | Purpose |
|---|---|
| Add Client or Service | Add or select clients and assign paid services |
| Client Form | Input required contact details |
| Product Toggles | Enable or disable services per client |
| Wallet Deduction | Wholesale cost deducted instantly after activation |
| Whitelabel Settings | Configure branding for AI tools |
How to setup your Storefront & Enable Client Purchases on your Store
Use the Storefront feature to enable automatic client purchases from your webstore.
The Storefront (Auto) system allows you to launch a fully automated, branded SaaS store without needing to manually activate products for clients. Once your storefront is active, customers can browse, purchase, and subscribe to digital services instantly, while Stripe handles all billing and payouts directly.
This feature is ideal for resellers who want to:
-
Sell at scale
-
Offer 24/7 automated self-service
-
Avoid manual deployments
-
Run a fully branded SaaS storefront without building a website
Location of Storefront Settings
All storefront configuration is found under:
Whitelabel Settings → Storefront & Branding
This includes domain settings, Stripe connection, branding, profit margins, and portal appearance.
Before You Begin — Requirements
Your storefront becomes automatically enabled as soon as the following requirements are met:
1. Stripe Account Connected
You must connect your Stripe account for client billing.
Go to:
Whitelabel Settings → Storefront & Branding → Payment Gateway
Click Connect Stripe

2. Wallet Balance ≥ $20
A minimum wallet balance of $20 is required to keep your storefront online.
Once both conditions are met, your storefront automatically activates.
If either requirement is missing or becomes invalid, the storefront becomes inactive.
Section 1: Domain Setup
You can choose how your storefront is accessed:
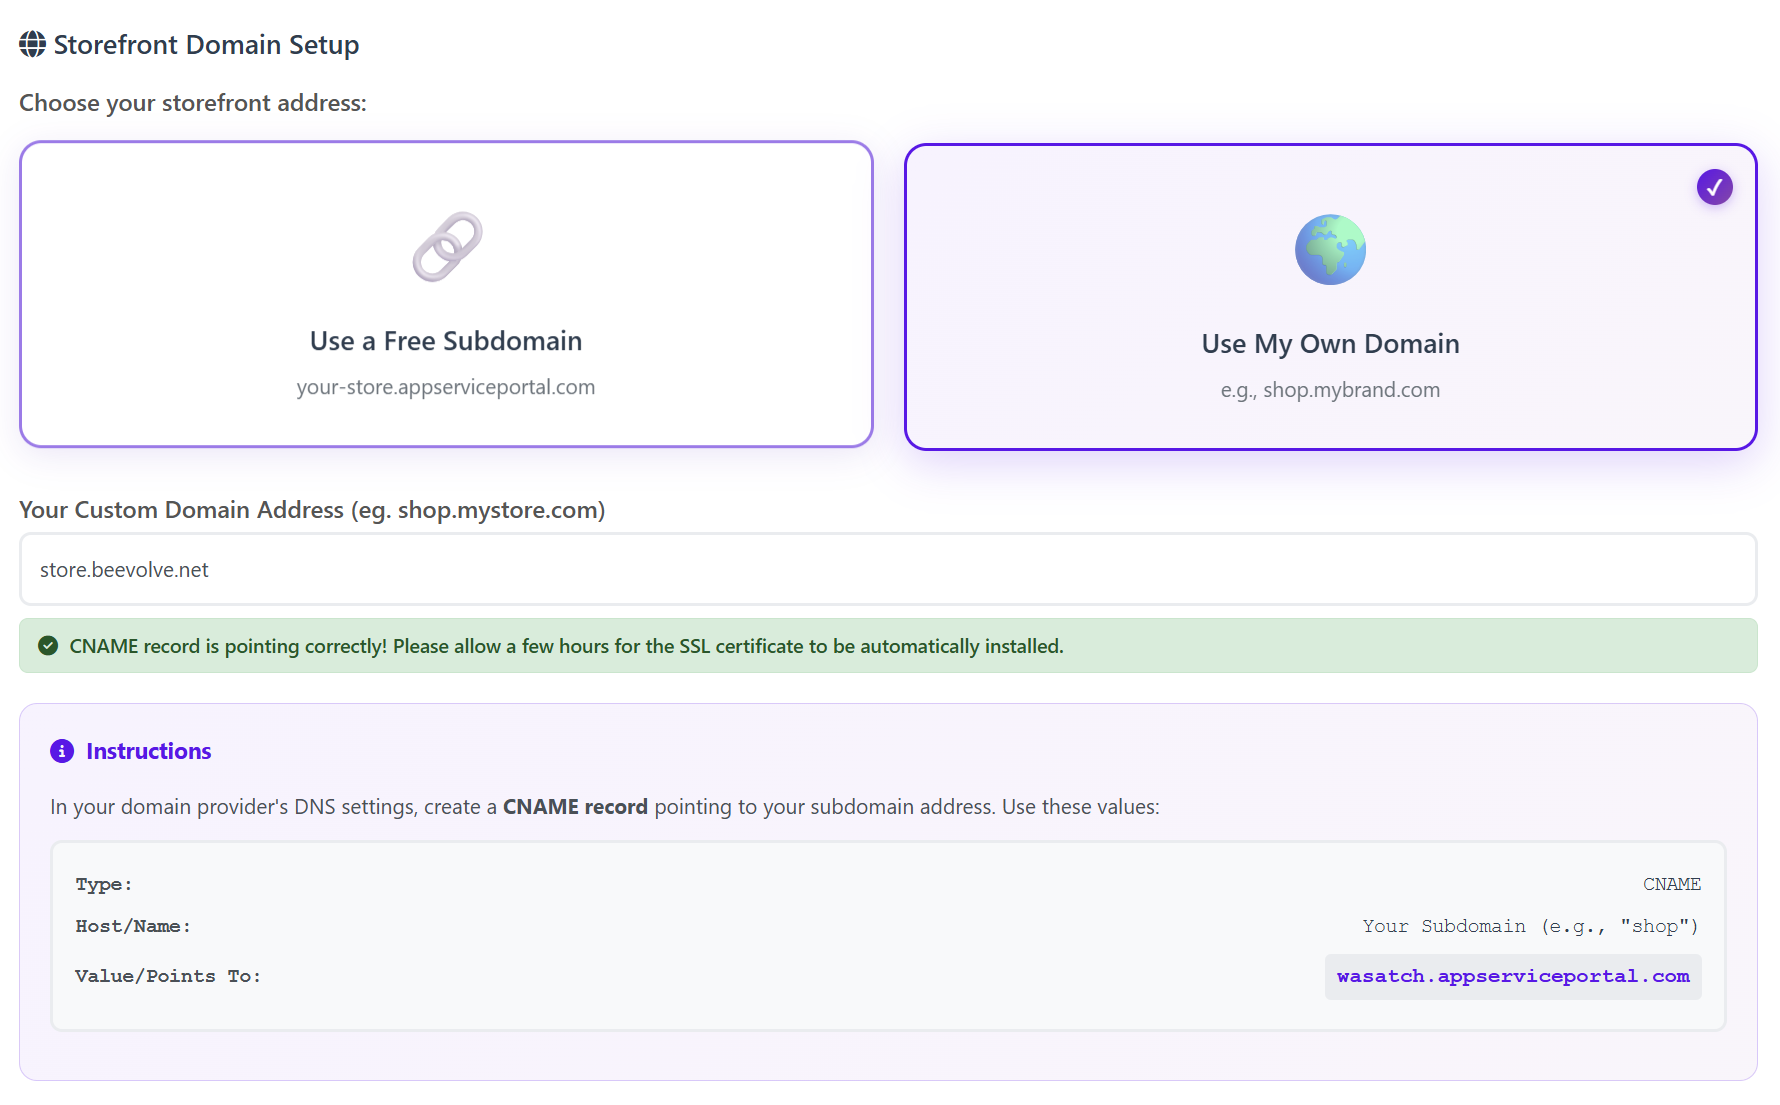
A. Free Subdomain (Instant Setup)
Use a free, hosted subdomain such as:yourstore.custom.appserviceportal.com
Just enter your subdomain name and save.
B. Custom Domain
You can use your own domain, such as:shop.mybrand.com
To connect it:
-
Go to your DNS provider
-
Create a CNAME record
-
Point it to the generated domain shown in your dashboard
-
Save changes
-
Wait for SSL to automatically install (usually a few hours)
The system will show if your CNAME is correctly pointing.
Section 2: Storefront Profit Margin
Set your global profit percentage.
This margin applies to all storefront products automatically.
-
Range: 0% – 200%
-
Recommended: 100% (doubles your wholesale price, competitive)

Example Pricing
Wholesale: $10
Profit Margin: 100%
Customer Pays: $20
Your Profit: $10 (Paid out directly by Stripe via payouts)
Products automatically use this formula — no manual pricing required.
Section 3: Store Appearance & Branding
Customize how your storefront and client portal look:
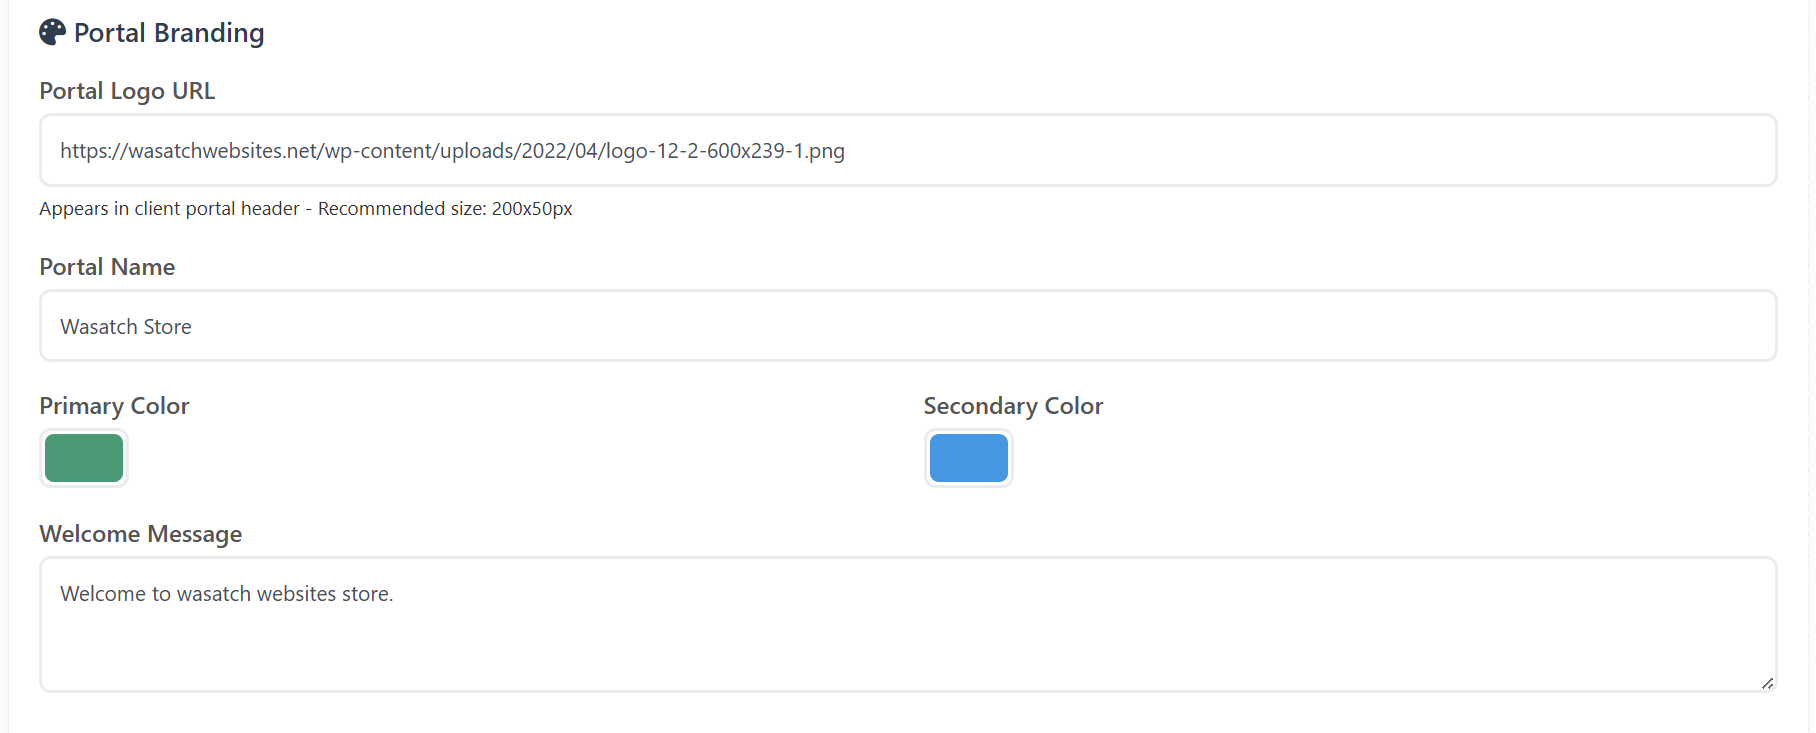
Branding Options
-
Portal Logo URL
-
Portal Name
-
Primary Color
-
Secondary Color
-
Welcome Message (client portal welcome text)
Homepage Description
You can set your storefront’s main introduction text to:
-
Explain your services
-
Introduce your brand
-
Highlight what customers get
This text appears on your storefront homepage.
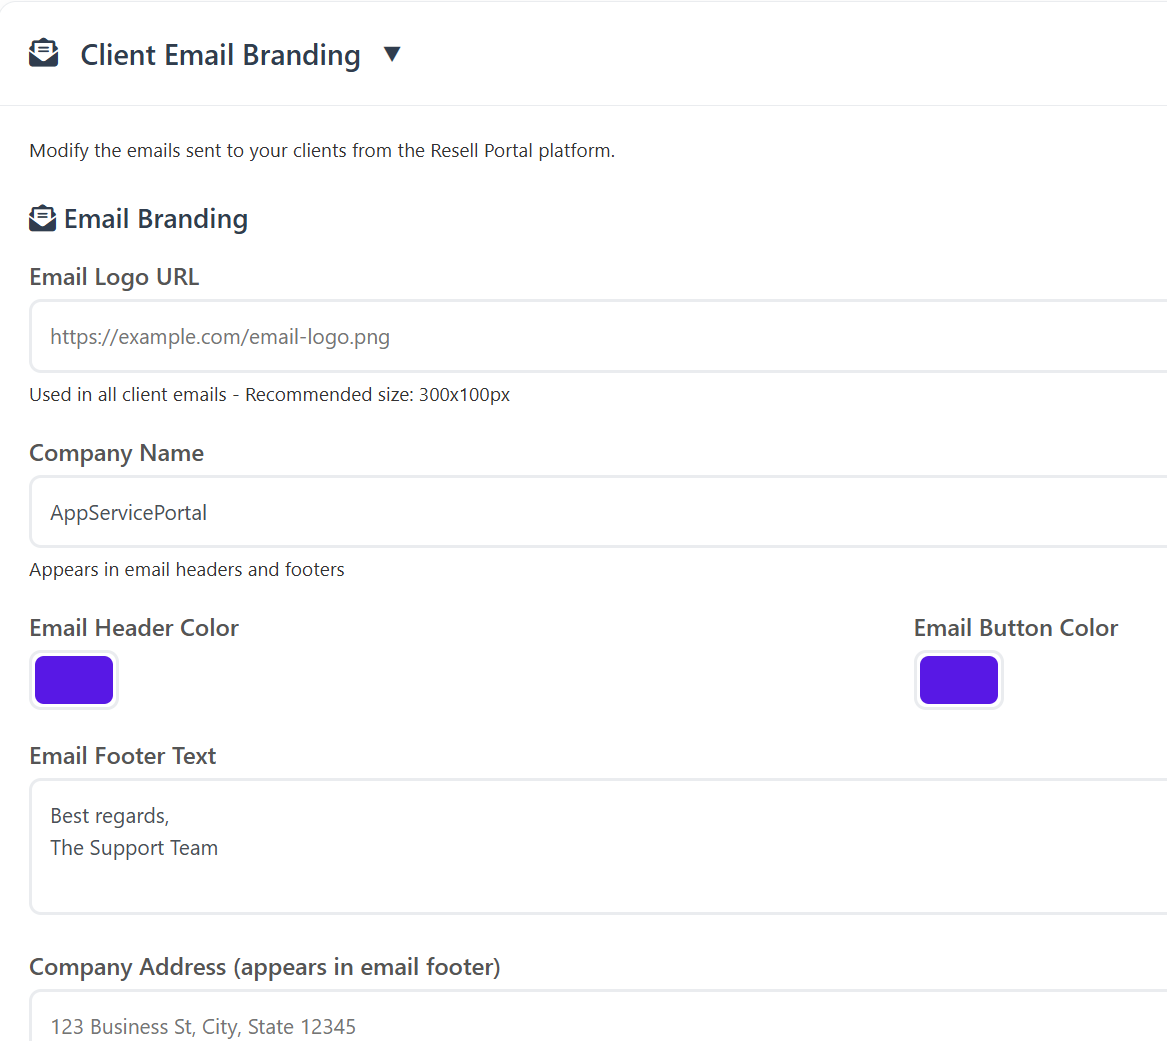
Section 4: Client Email Branding
Email branding is now located separately under:
Whitelabel Settings → Client Email Branding
You can customize:
-
Email Logo URL
-
Company Name
-
Email Header Color
-
Email Button Color
-
Email Footer Text
-
Company Address
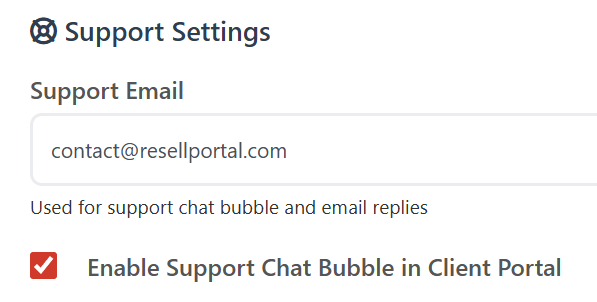
-
Support Email
-
Enable/Disable Support Chat Bubble
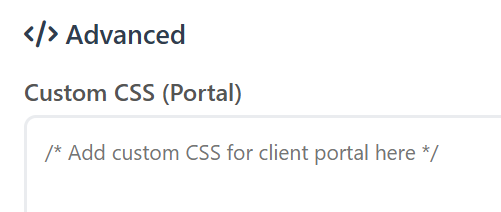
-
Custom CSS for the client portal
All emails sent to your clients (login credentials, product activation, receipts, notifications) reflect your branding.
Section 5: Payment Gateway (Stripe)
Your storefront uses your connected Stripe account for:
-
All customer payments
-
Subscription billing
-
Refunds (if you choose to issue them inside Stripe)
-
Payouts to your bank account
Since Stripe handles payouts, the platform no longer shows payout history.
All payouts appear in your Stripe Dashboard.
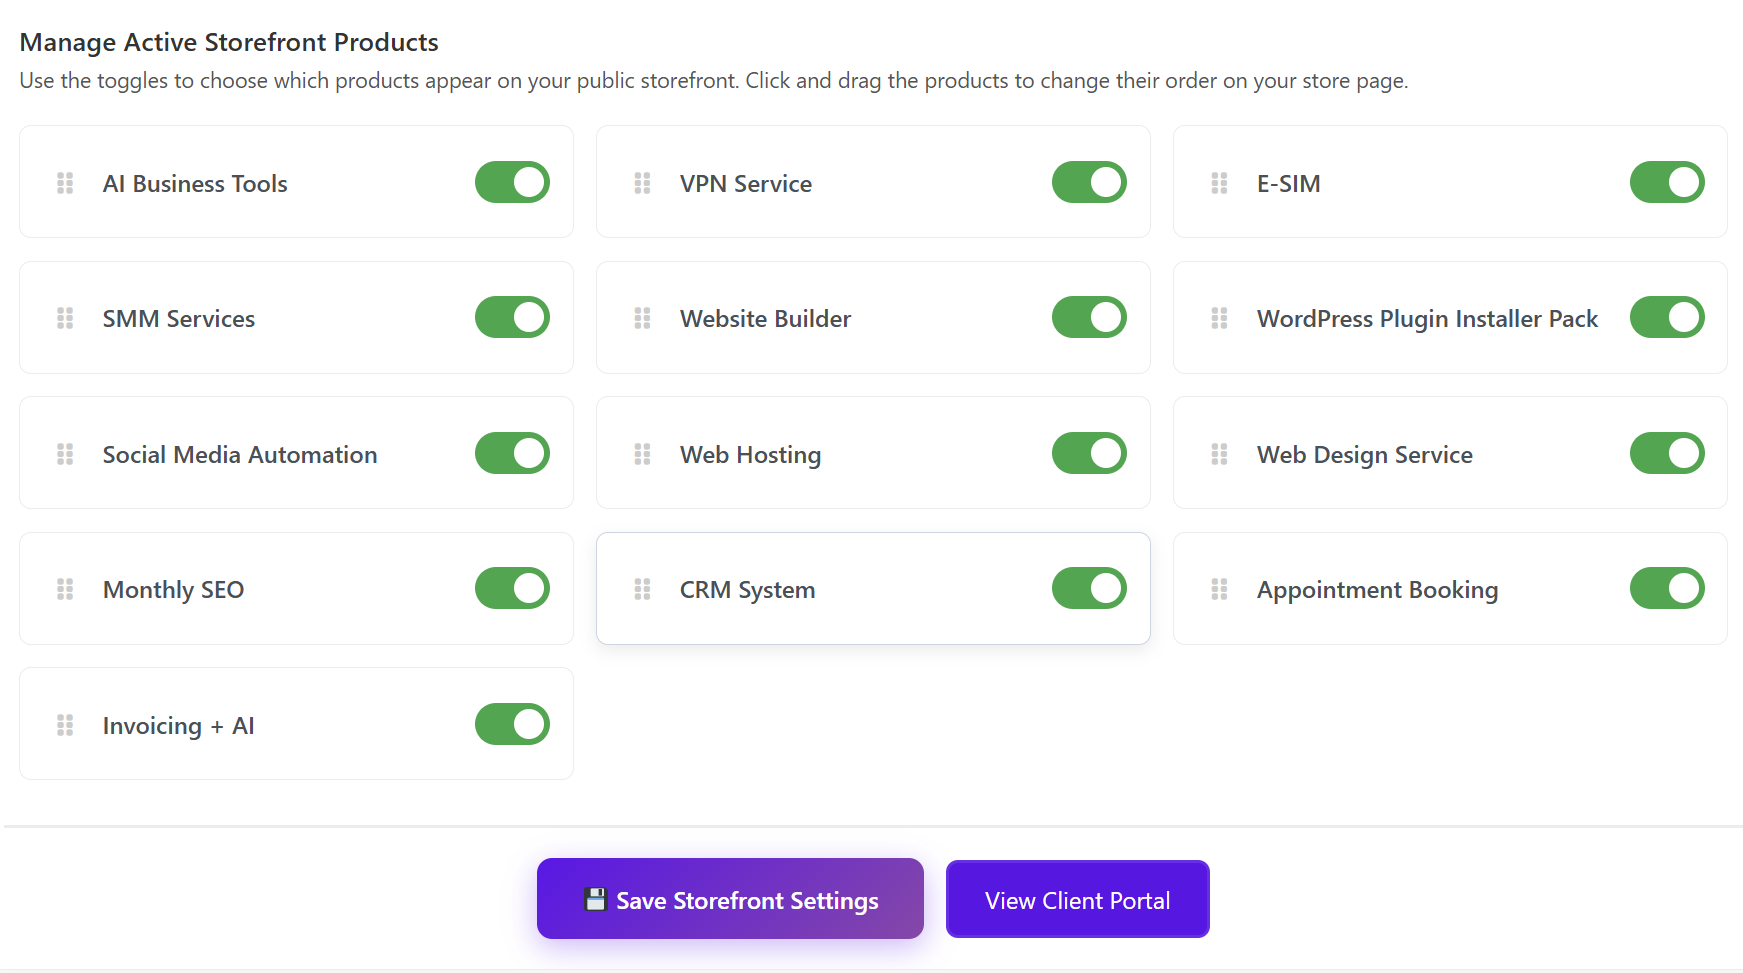
Section 6: Enabling Products & Services
You can choose which services or products you want available on your store by going to the Manage Active Storefront Products section in the white label settings topic.

Section 7: How the Storefront Works
Once your Stripe account is connected and your wallet has $20+:
-
Your storefront is automatically activated
-
Your domain becomes publicly accessible
-
Customers can browse your product catalog
-
They purchase using Stripe checkout
-
Services are automatically provisioned
-
Clients receive branded emails
-
Stripe sends your payouts directly to your bank account
No manual activation is required.
Summary of Benefits
| Feature | Benefit |
|---|---|
| Automatic Activation | Storefront turns on automatically when requirements are met |
| Stripe Billing | Fast, secure, automated payments |
| Custom Domain | Create a fully branded SaaS storefront |
| Global Profit Margin | Set your pricing once for all products |
| Automated Delivery | No manual activation required |
| Email Branding | All client communication uses your brand |
| No Website Needed | Your storefront is instantly deployed and hosted |
Requesting Support & Using the Ticket System
Request Support
Need help? The Support Tickets system in your ResellPortal dashboard gives you a direct line to our team. You can submit questions, report technical issues, request new features, or resolve billing problems — all from inside your account.
This guide shows you exactly how to open, manage, and close a support ticket in the new platform.

How to Open a Support Ticket
Step 1: Log in to ResellPortal
Go to:
https://app.resellportal.com
Log in using your reseller credentials.
Step 2: Access Support Tickets
From your dashboard:
-
Go to the left-side menu
-
Click Support Tickets
This will take you to your support center where you can view open and past tickets.
Step 3: Create a New Ticket
In the upper-right corner, click:
Create New Ticket
This will open the ticket submission form.
Choose the Correct Ticket Type
Select the most relevant category from the dropdown:
-
Billing Inquiry — Wallet balance issues, charges, Stripe billing, invoices, or subscription related questions
-
Technical Issue — Bugs, errors, broken features, activation issues, or system problems
-
Feature Request — Suggestions for improvements or new features
-
Other — Anything that doesn't fall into the above categories
Choosing the correct category helps your ticket get routed to the right team.
Describe Your Issue Clearly
In the message box, include:
-
What you were trying to do
-
What happened (or what went wrong)
-
Any error messages (if shown)
-
The specific client, store, domain, or service involved (if applicable)
The more detail you provide, the faster our team can resolve your issue.
✅ You can also attach screenshots when needed.
Once complete, click Submit Ticket.
After You Submit a Ticket
Once submitted:
-
Your ticket is received instantly by our support system
-
It is routed to the appropriate department
-
A support agent will review and respond inside the ticket thread
-
You will be notified in your dashboard when there is a reply
How to View, Reply to, or Close Tickets
Return to Support Tickets at any time to:
-
See all open tickets
-
View replies from the support team
-
Add more information or screenshots
-
Close the ticket once your issue has been resolved
Ticket status may display as:
-
Open
-
In Progress
-
Awaiting Your Response
-
Closed
Expected Response Time
We aim to respond to all tickets within 24 business hours.
Many tickets are answered much sooner, depending on complexity and queue priority.
Best Practices for Faster Support
| Tip | Why It Helps |
|---|---|
| Choose the correct category | Sends your issue to the right team faster |
| Include screenshots | Makes technical issues easier to identify |
| Be specific and detailed | Reduces back-and-forth messages |
| Include client or domain info | Helps pinpoint the issue quickly |
When to Use the Support Ticket System
Use tickets for:
✅ Billing questions
✅ Wallet or Stripe issues
✅ Technical problems
✅ Platform bugs
✅ Feature improvement requests
✅ Storefront or domain issues
Avoid using tickets for:
❌ Non-ResellPortal services
❌ Third-party login issues
❌ General tutorials already covered in documentation
Final Note
The Support Ticket system is your primary communication channel with the ResellPortal team. Use it anytime you need help, clarification, or technical assistance. We're committed to helping you run your business smoothly and scale successfully.
How to Manage Services and Clients
Managing Clients & Services — ResellPortal (New Platform)
ResellPortal makes it easy to manage your customers and the services connected to them. The Clients and Services sections in your dashboard give you complete control over accounts, subscriptions, and access details.
You can view, update, pause, or remove services at any time.
Where to Find It
In the left-hand menu of your dashboard you will see:
-
Clients — Manage people or companies
-
Services — Manage all active services
These two sections work together to give you full visibility and control.
Clients Section
The Clients section is where you manage individual customer accounts.
From here you can:
-
View all of your clients
-
See their contact information (name, email, phone, company, etc.)
-
View how many active services they have
-
See total orders and account history
-
Open an individual client profile to manage their services
Click on any client to open their full account view.
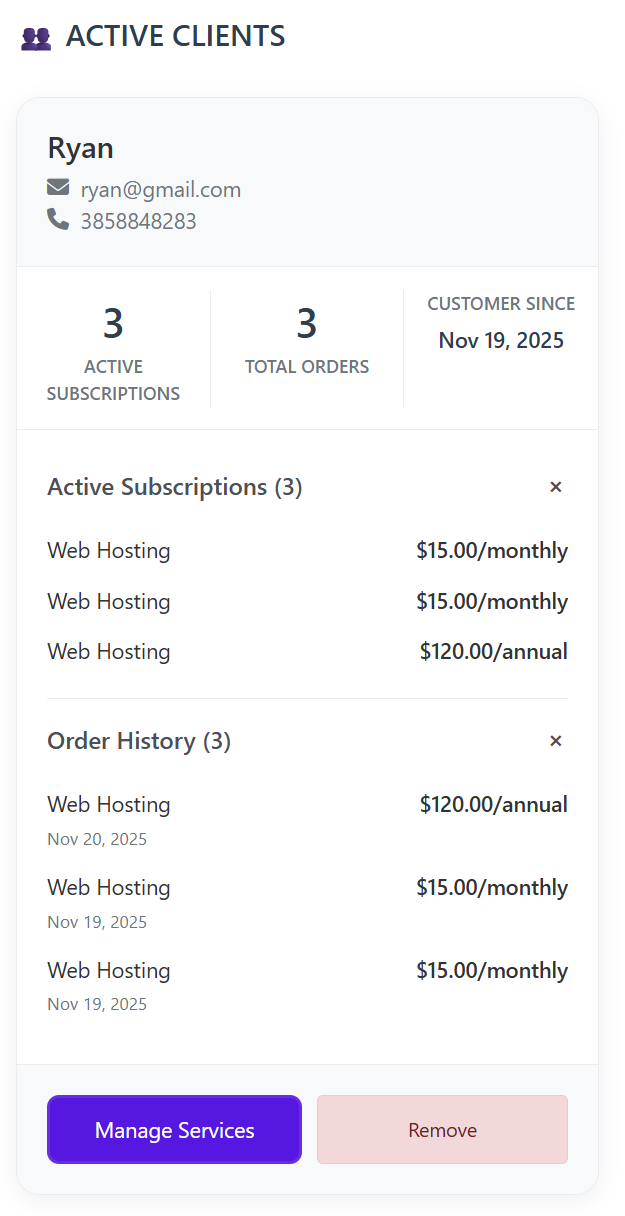
Inside a client’s profile, you can:
-
View all active subscriptions for that client
-
View order history (past purchases and renewals)
-
Click on any service to view details and credentials
-
Suspend a service if needed
-
Remove a service permanently
-
Remove the entire client (only after all services have been removed)
✅ A client can only be deleted once all of their services have been removed.
Services Section
The Services section shows every service you have active, across all clients, in one place.
This is useful if you prefer to manage by service instead of by client.
From this topic you can:
-
View each service’s status (active, suspended, etc.)
-
See which client it is assigned to
-
Open the service to view details and login credentials
-
Suspend or remove the service
-
Quickly manage large numbers of services
This is ideal for audits, bulk management, and troubleshooting.
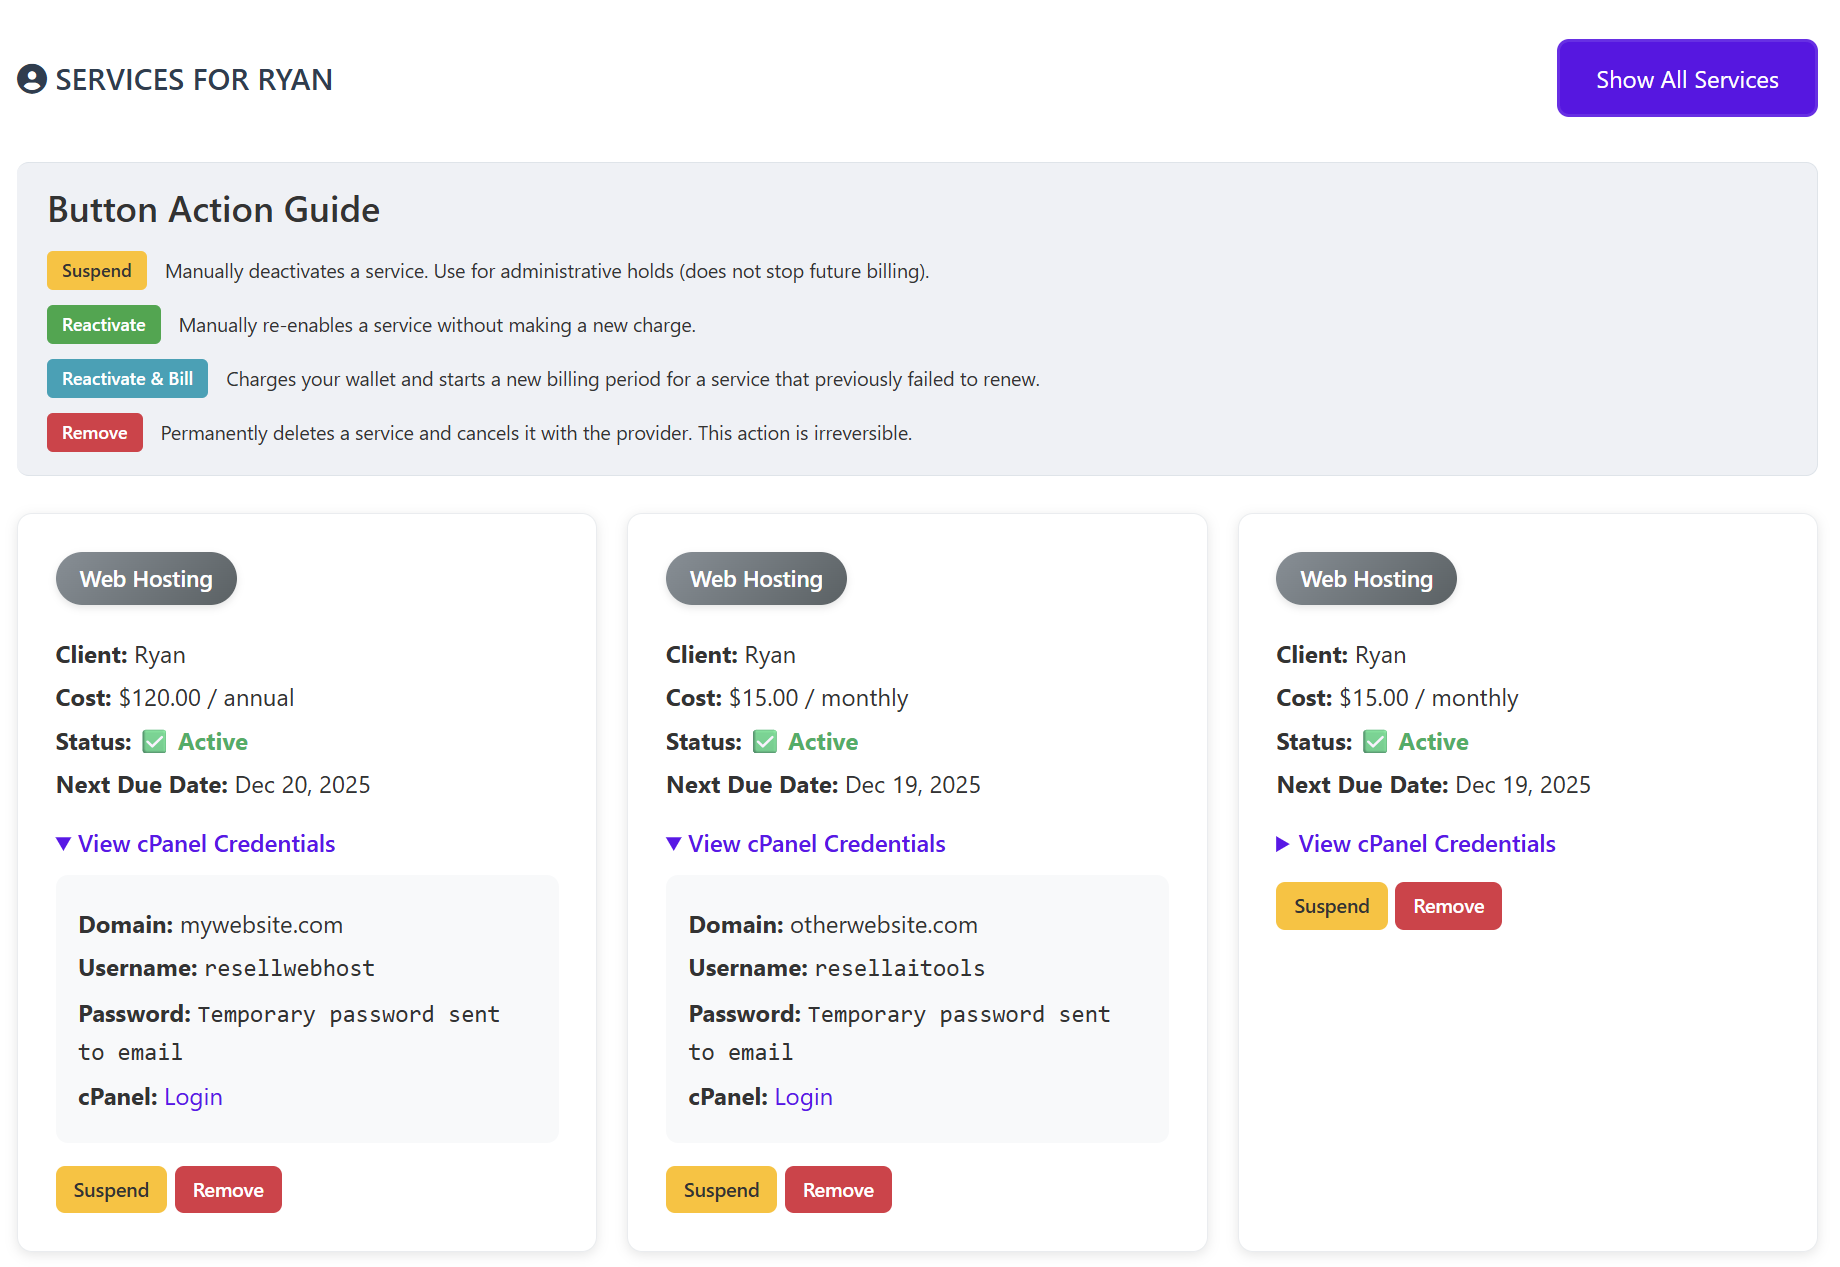
Viewing Service Details & Credentials
Whether accessed from a client profile or from the Services topic, you can click a dropdown or View Details button on any service to see:
-
The associated client
-
Billing term (monthly or annual)
-
Current status
-
Next renewal date
-
Login information (when available)
-
Direct login links (such as cPanel, dashboards, or tools)
Some services send temporary passwords to the client’s email for security.
Service Management Options
Each service includes management controls:
-
Suspend — Temporarily pause the service without deleting it
-
Remove — Permanently delete the service from the system
Use suspend if the service might return.
Use remove when the service is no longer needed.
Best Practices
-
Always try suspend first before removing, if unsure
-
Remove services before attempting to remove a client
-
Keep client contact details up to date
-
Use the Services topic for faster bulk management
-
Review your list regularly to keep your account clean and organized
Summary
| Section | What it’s for |
|---|---|
| Clients | View & manage individual customer accounts |
| Services | View & manage all services across all clients |
| Service Details | Access credentials, billing, and status |
| Suspend / Remove | Control access and clean up accounts |
| Remove Client | Only allowed when no services remain |
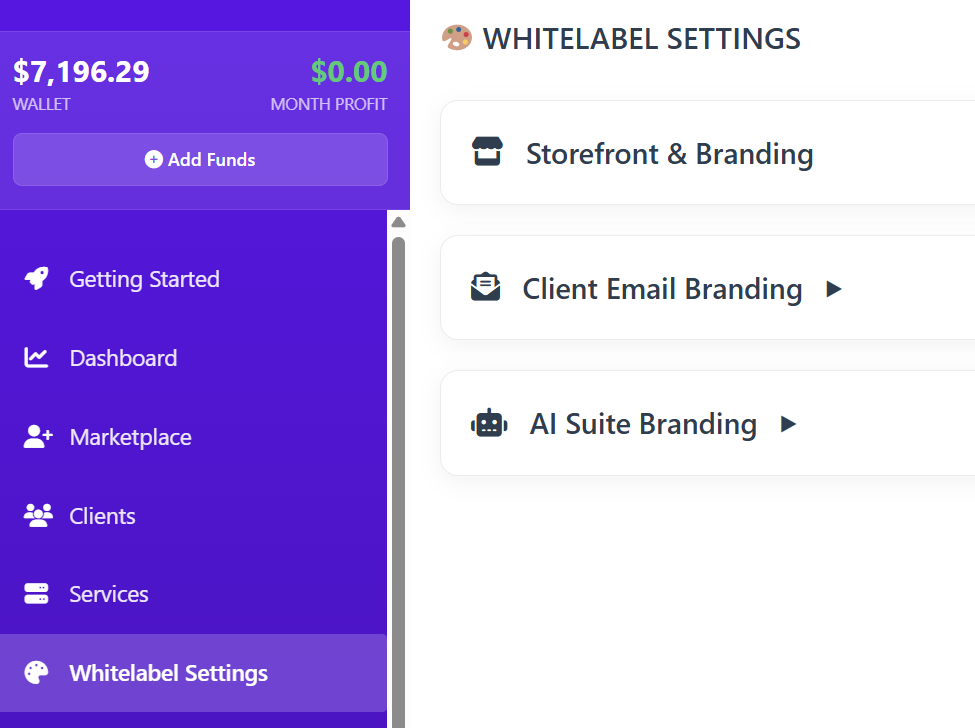
White Label Settings User Guide
The Whitelabel Settings allow you to remove the "Resell Portal" branding and replace it with your own. This ensures your clients see your brand name, logo, and colors throughout their entire journey—from browsing your store to receiving support emails.
There are three main sections to configure:
-
Storefront Branding: Your public-facing shop.
-
Client Email Branding: Communications sent to your customers.
-
AI Suite Branding: The login and dashboard for AI-specific tools.

1. Storefront Branding
This section controls your public website where customers browse and purchase services.
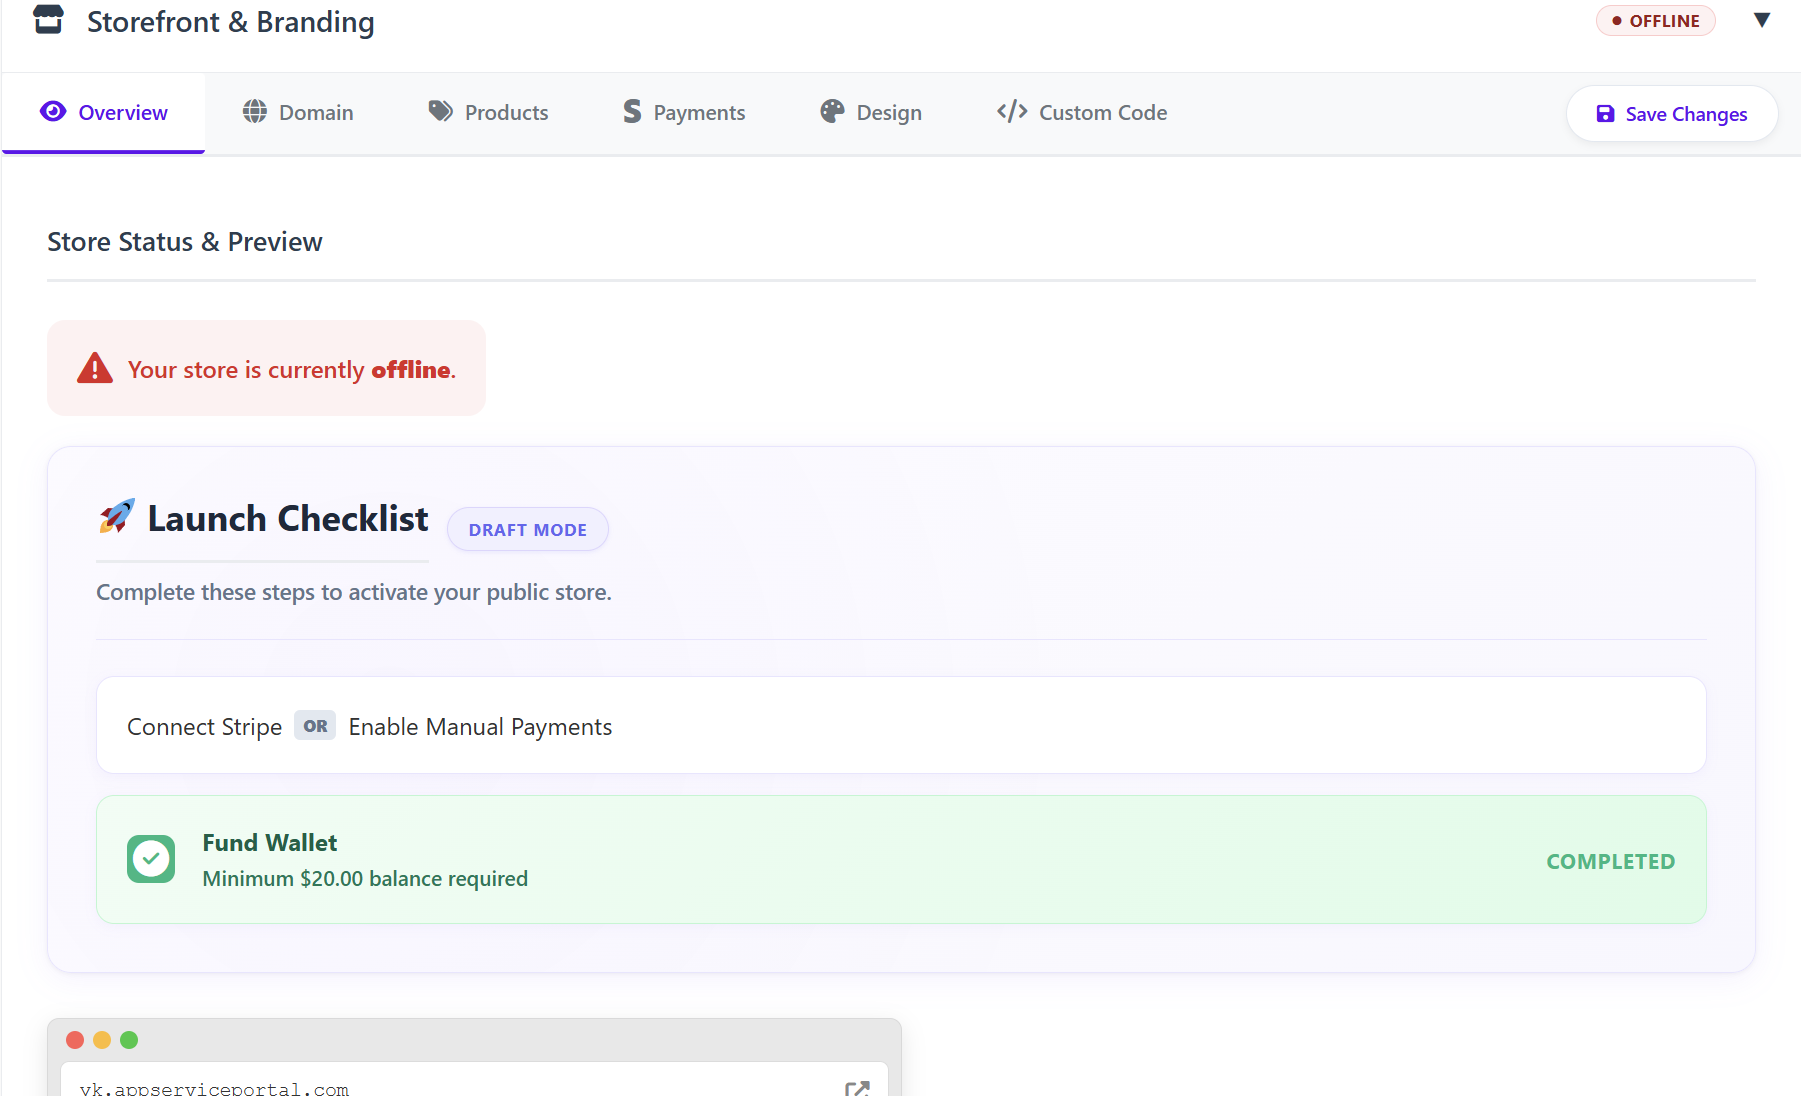
A. Overview Tab
The Overview serves as your command center. Before your store can go live, you must complete the Launch Checklist:
-
Connect Stripe or Enable Manual Payments: You must have a way to collect money.
-
Fund Wallet: A minimum balance of $20.00 is required in your reseller wallet to activate the storefront.
-
Store Status: Displays whether your store is in "Draft Mode" (offline) or "Live."
-
Preview: Once online, you can see a live preview of your site here.

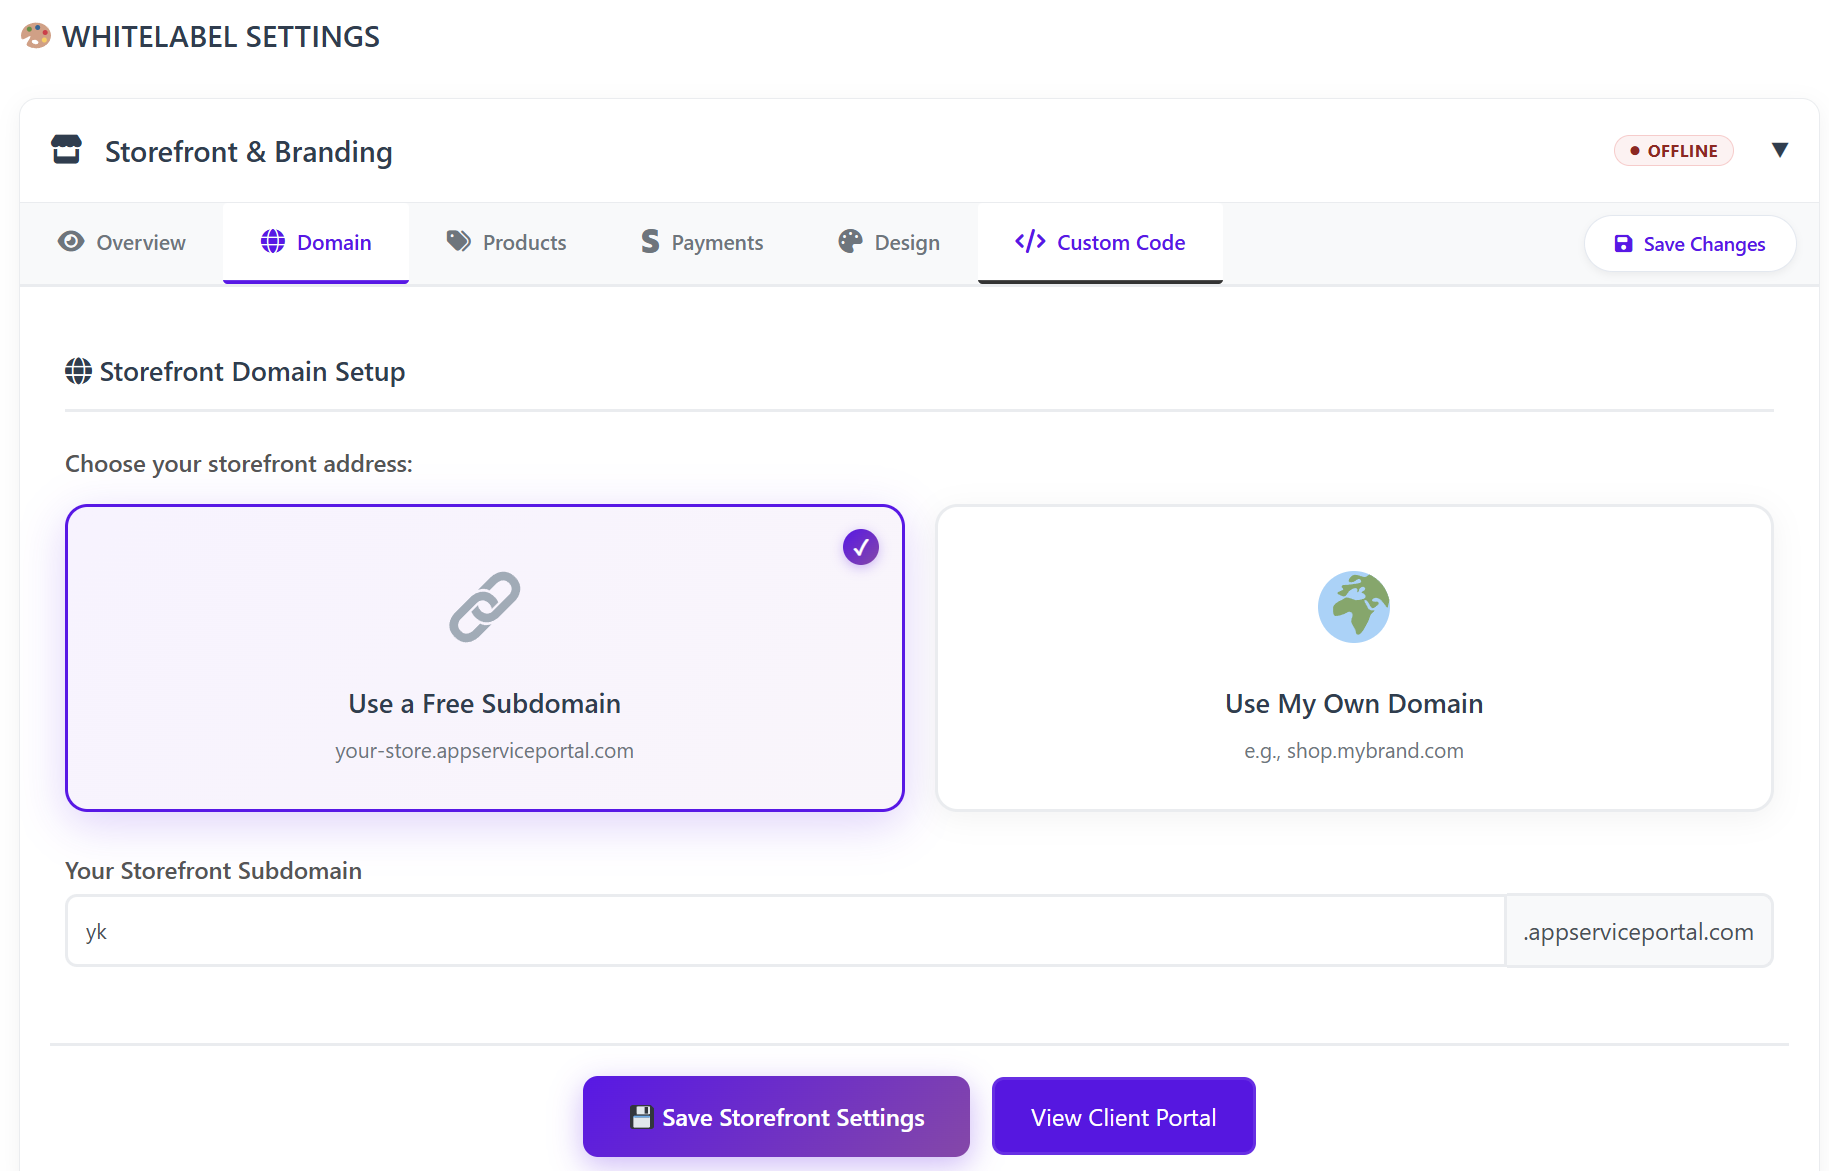
B. Domain Tab
Decide where your customers will go to visit your store:
-
Free Subdomain: Use a complimentary address like yourbrand.appserviceportal.com.

-
Use My Own Domain: Connect a professional domain (e.g., shop.yourbrand.com) to increase brand authority.
Connecting Your Custom Domain
While Resell Portal provides a free subdomain (e.g., brand.appserviceportal.com), using your own domain (e.g., shop.mybrand.com) is highly recommended for brand authority and SEO.
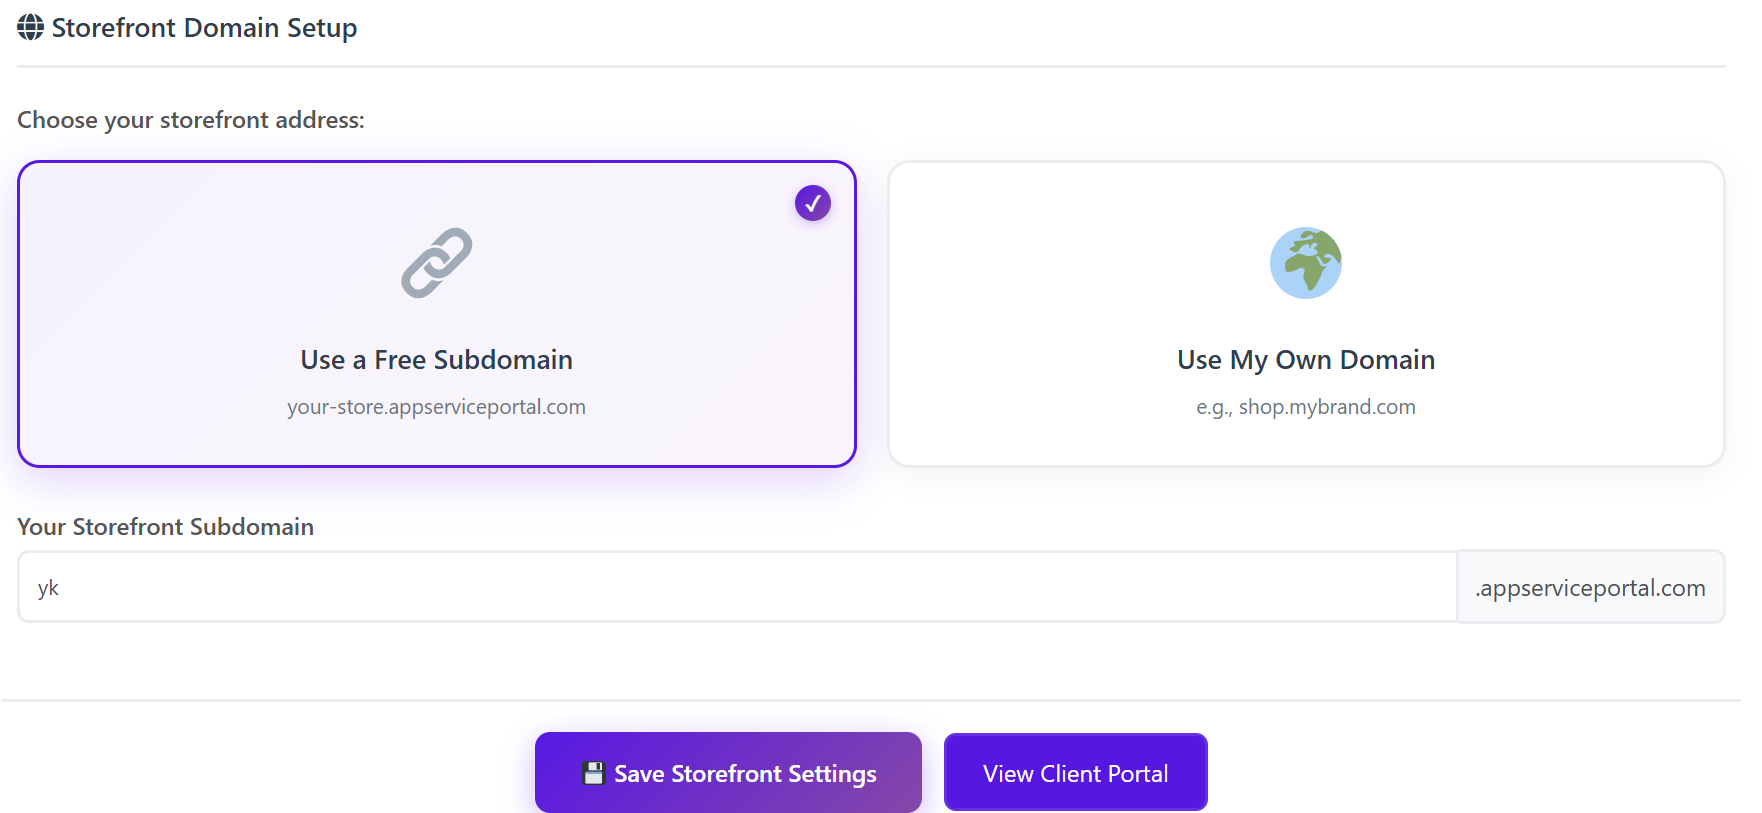
Step 1: Choose Your Address Type
Navigate to Whitelabel Settings > Storefront & Branding > Domain. Select the box labeled "Use My Own Domain."
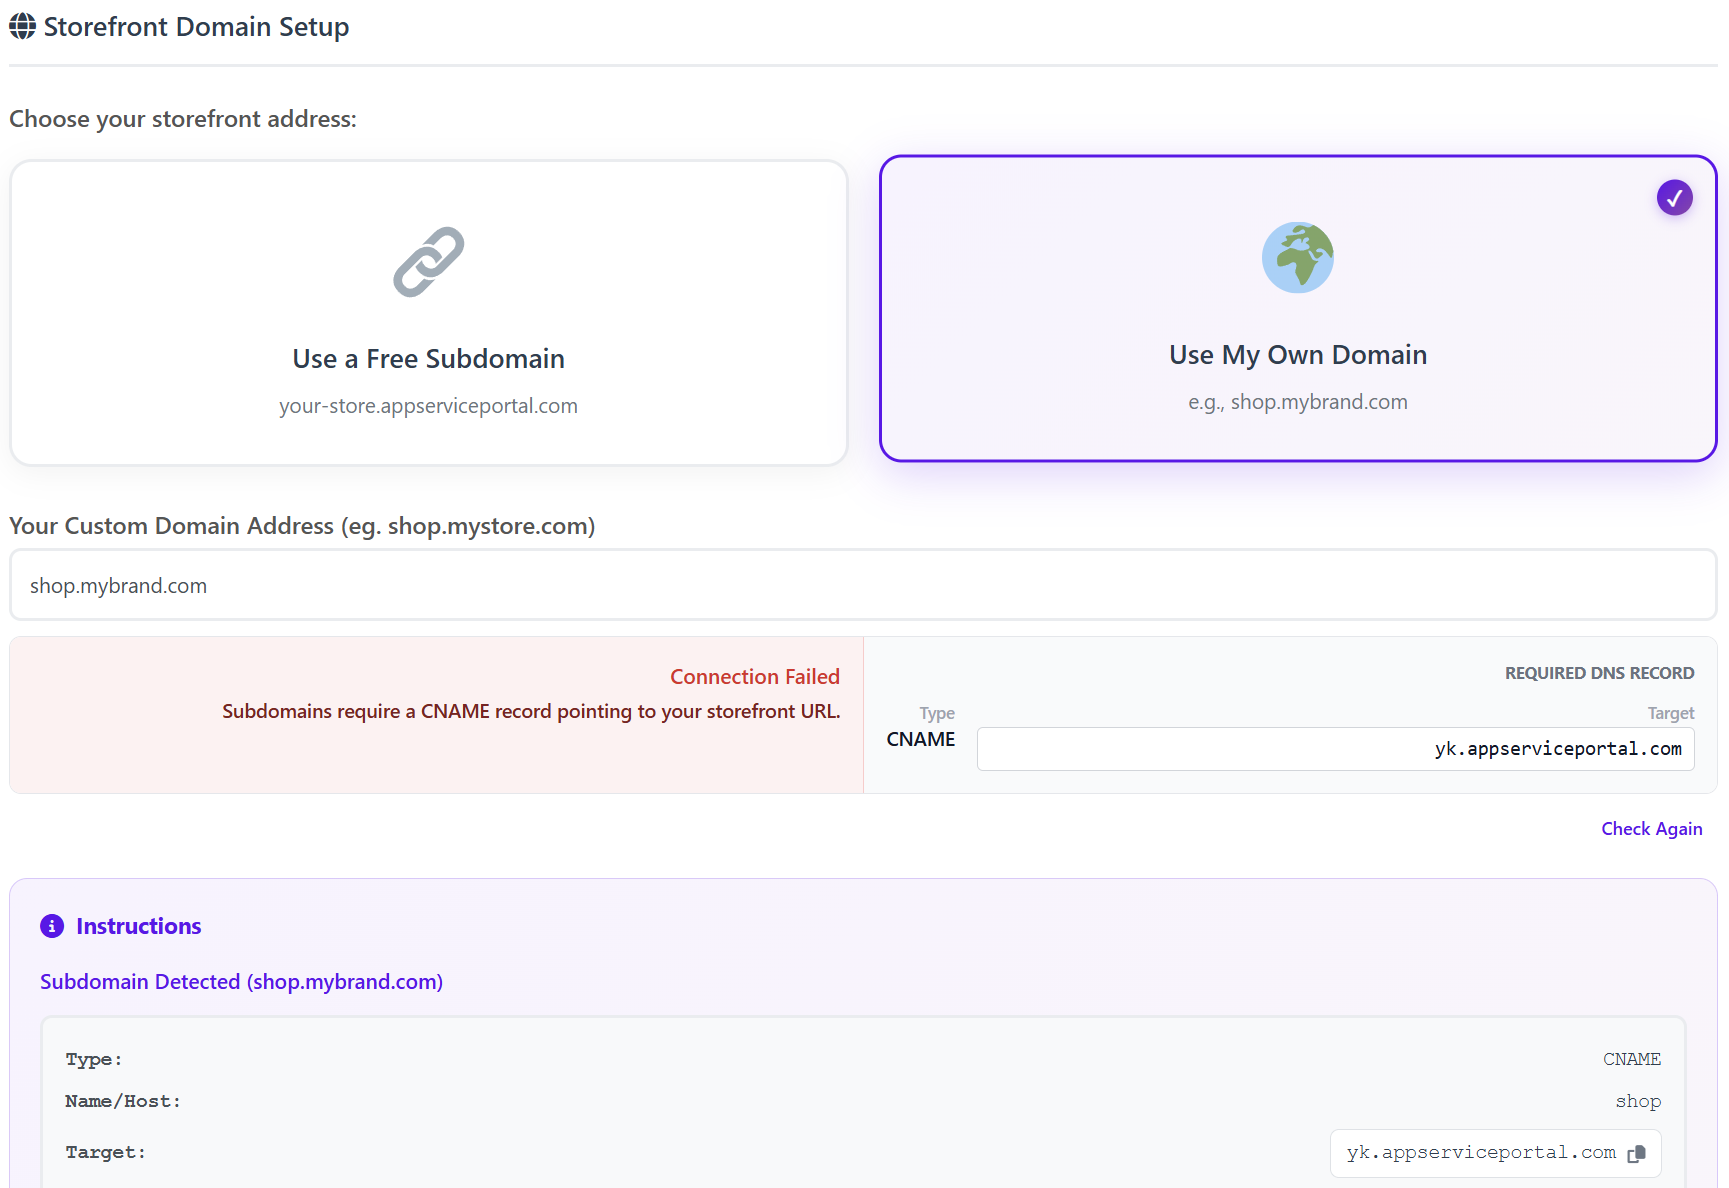
Step 2: Enter Your Custom Address
Type your desired domain into the input field. Our system will automatically detect whether you are trying to use a Subdomain or a Root Domain and will provide the specific DNS instructions you need.
Case A: Using a Subdomain (Recommended)
Example: shop.yourbrand.com or portal.yourbrand.com
This is the most common setup for resellers who already have a main website and want their store to live on a separate section of that domain.
Required DNS Record:
-
Type: CNAME
-
Name/Host: Enter only the prefix (e.g., if your domain is shop.mybrand.com, enter shop).
-
Target: yourname.appserviceportal.com (Copy this exactly from your dashboard).

Case B: Using a Root Domain
Example: yourbrand.com
Use this if you want your Resell Portal storefront to be your primary website.
Required DNS Record:
Depending on your domain provider, the system will display instructions for a root record.-
Root Record: Usually, this involves an A Record pointing to our server IP or a CNAME record for the @ host if your provider supports "CNAME Flattening" or "Alias" records.
-
Follow the specific values provided in your dashboard for the most accurate setup.

Step 3: Update Your DNS at Your Registrar
To make your domain work, you must log in to your domain provider (e.g., GoDaddy, Namecheap, Cloudflare, Google Domains) and follow these steps:
-
Find the DNS Management or Advanced DNS section for your domain.
-
Add a New Record.
-
Select the Type (CNAME or A) indicated by the Resell Portal dashboard.
-
Enter the Host/Name and the Target/Value exactly as shown in your portal.
-
Save the record.
Step 4: Verification & Propagation
Once you have added the records at your registrar, go back to your Resell Portal dashboard and click "Check Again."
-
Connection Failed? Don't worry. DNS changes can take anywhere from 5 minutes to 48 hours to "propagate" across the internet. If it fails initially, wait an hour and try again.
-
Success! Once the status turns green, your storefront is officially connected to your professional brand domain.
Pro-Tip for Cloudflare Users
If you use Cloudflare to manage your DNS, ensure that the "Proxy Status" (the orange cloud icon) is set to "DNS Only" (Grey Cloud) for this specific record to ensure our SSL certificate can issue correctly.
-
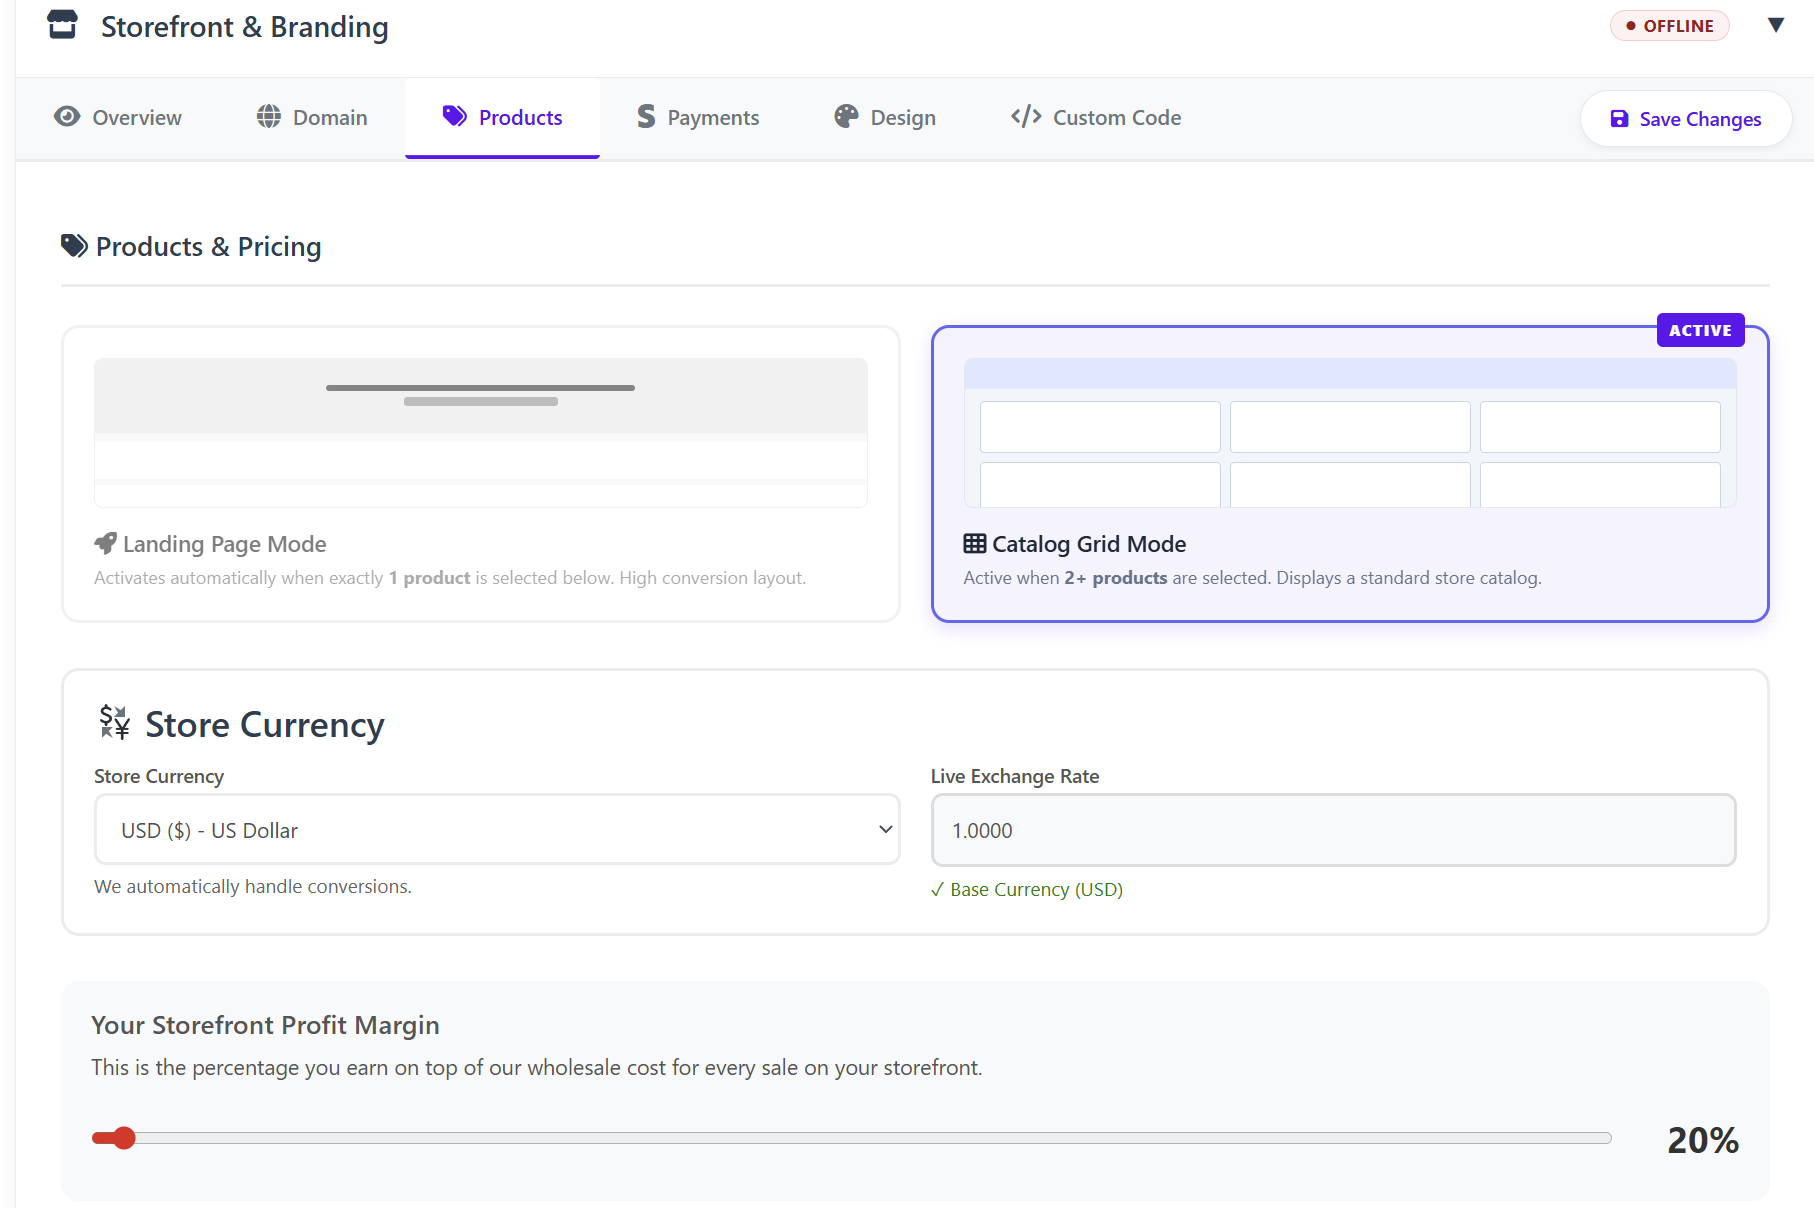
C. Products & Pricing Tab
Control what you sell and how much profit you make.
-
Display Modes:
-
Landing Topic Mode: Automatically activates if you select only one product. Best for high-conversion single-service sales.
-
Catalog Grid Mode: Activates when two or more products are selected. Displays a standard store layout.
-
-
Store Currency: Set your preferred currency. The system handles live exchange rate conversions automatically.
-
Profit Margin: Enter the percentage you wish to earn on top of the wholesale cost (e.g., 20%).
-
Inventory Management: Use the toggles to enable/disable services like VPN, E-SIM, SEO, or Web Design. You can drag and drop items to change their display order.


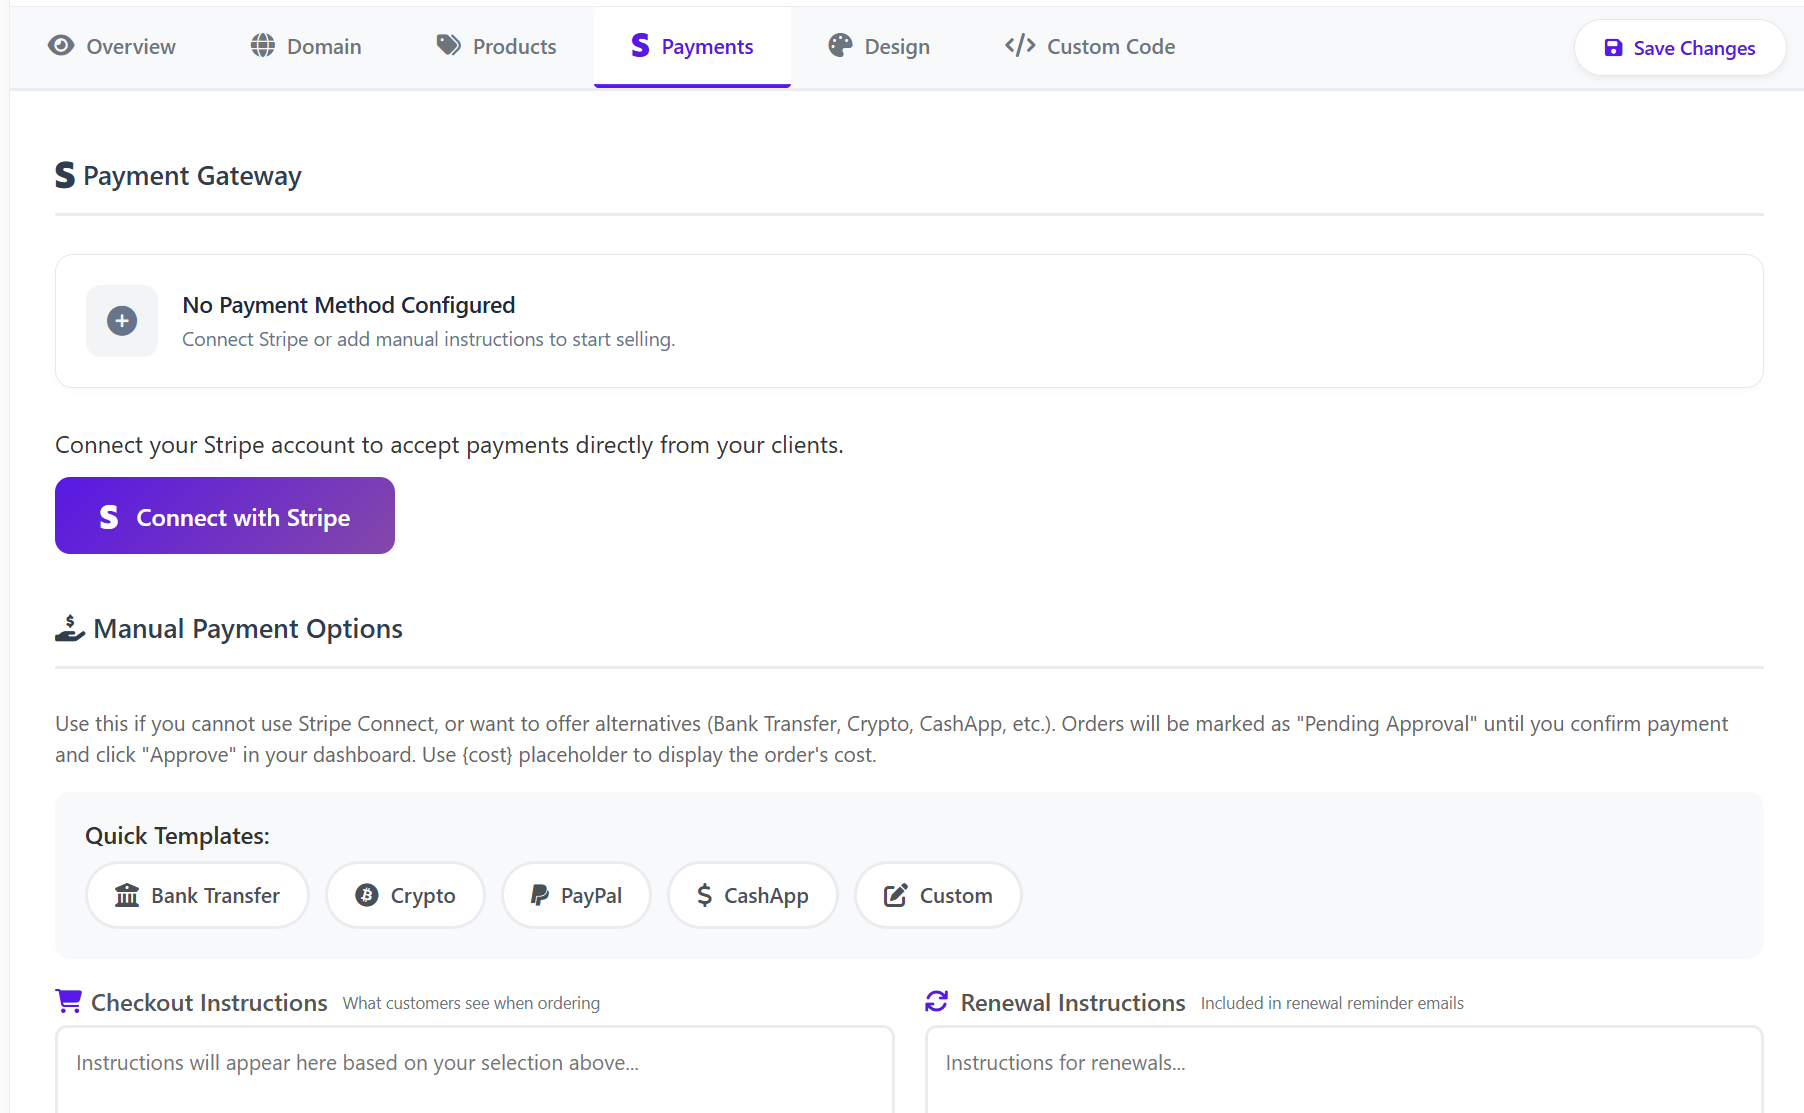
D. Payments Tab
Set up how you receive funds from your customers.
-
Stripe Connect: The fastest way to automate payments. Connect your Stripe account to receive credit card payments directly.
-
Manual Payment Options: Use this for Bank Transfers, Crypto, or apps like CashApp.
-
Note: Orders placed via manual payment remain "Pending Approval" until you manually confirm receipt of funds in your dashboard.

Pro Tip: Use the {cost} placeholder in your instructions to automatically show the customer the exact amount they need to pay.
-
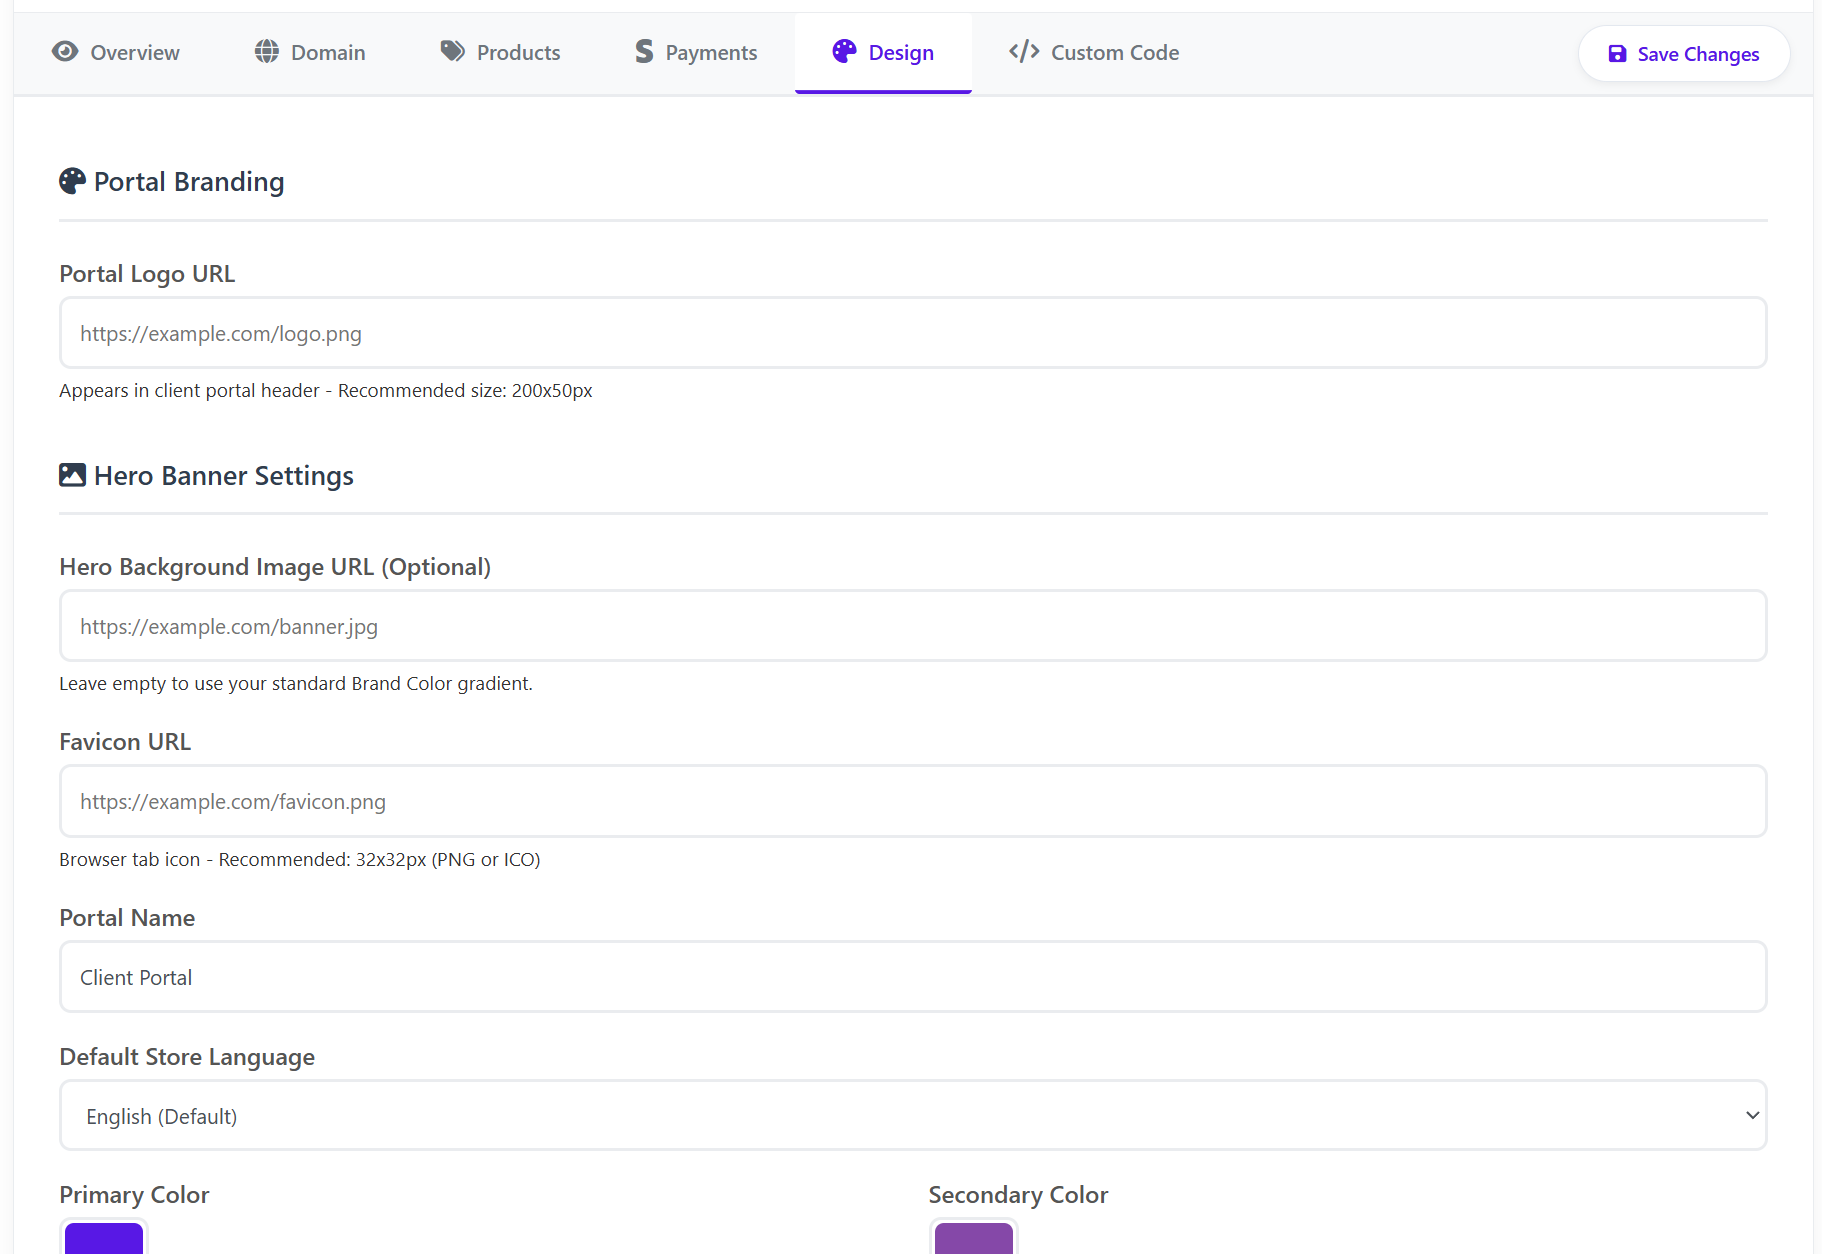
E. Design Tab
Customize the visual "look and feel" of your portal.
-
Logos & Favicons: Upload your company logo (200x50px) and a favicon (32x32px) for the browser tab.
-
Hero Banner: Upload a custom background image or keep it clean with your brand color gradient.
-
Color Scheme: Set your Primary and Secondary colors. These will be applied to buttons, links, and the navigation bar.
-
Navigation Links: Add custom links to your header, such as "Contact Us" or "Portfolio."


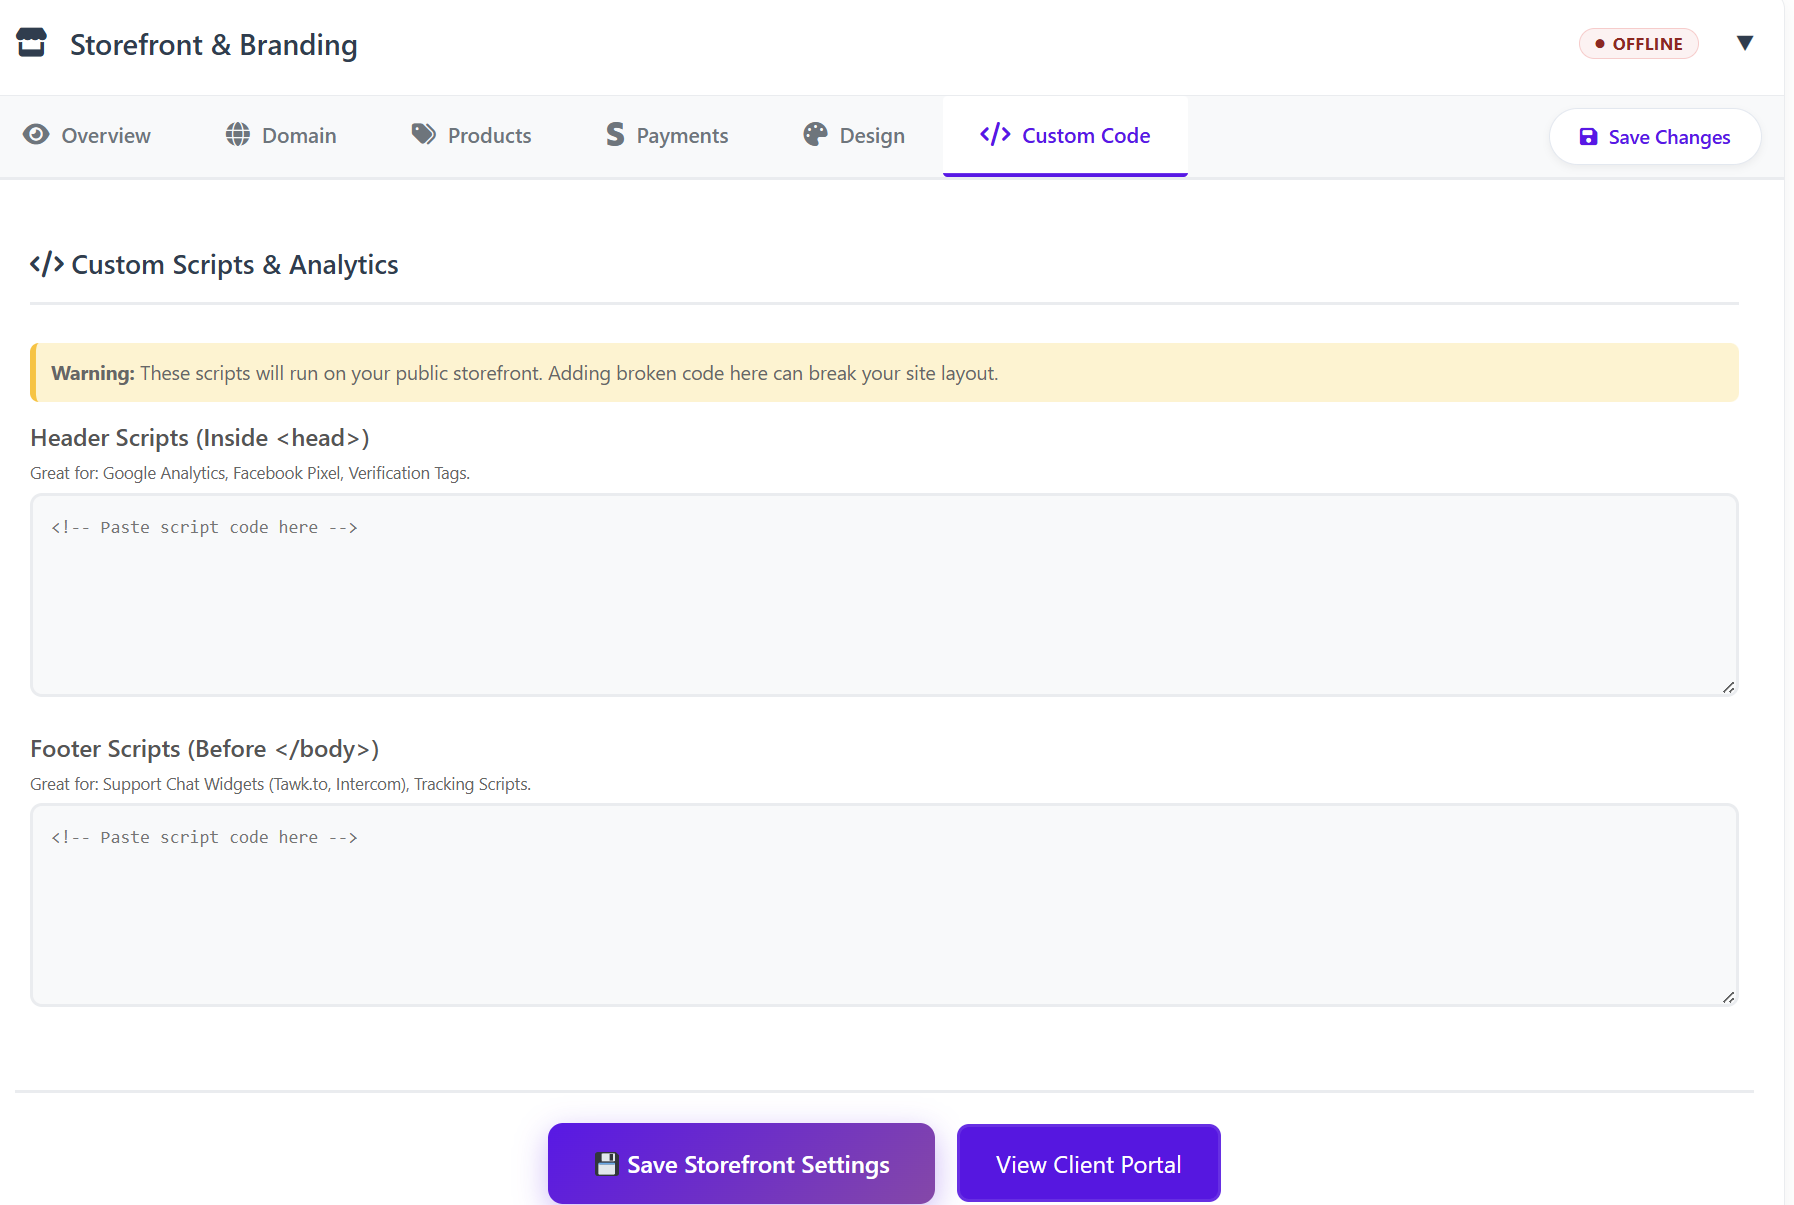
F. Custom Code Tab
For advanced users who want to add tracking or extra features.
-
Header Scripts: Best for Google Analytics, Facebook Pixel, or domain verification tags.
-
Footer Scripts: Best for live chat widgets (like Tawk.to or Intercom) and tracking scripts.

2. Client Email Branding
This section ensures that every automated email your client receives (order confirmations, renewal reminders, etc.) looks like it came from you.
-
Email Visuals: Upload an Email Logo (300x100px) and set the Header and Button colors to match your brand.
-
Company Info: Set your "From" Name and the physical address that appears in the email footer for legal compliance.

-
Support Settings: Provide a Support Email. This address is used for the support chat bubble and as the "Reply-To" address for emails.

-
Advanced CSS: If you have technical skills, you can add Custom CSS to further style the client portal interface.

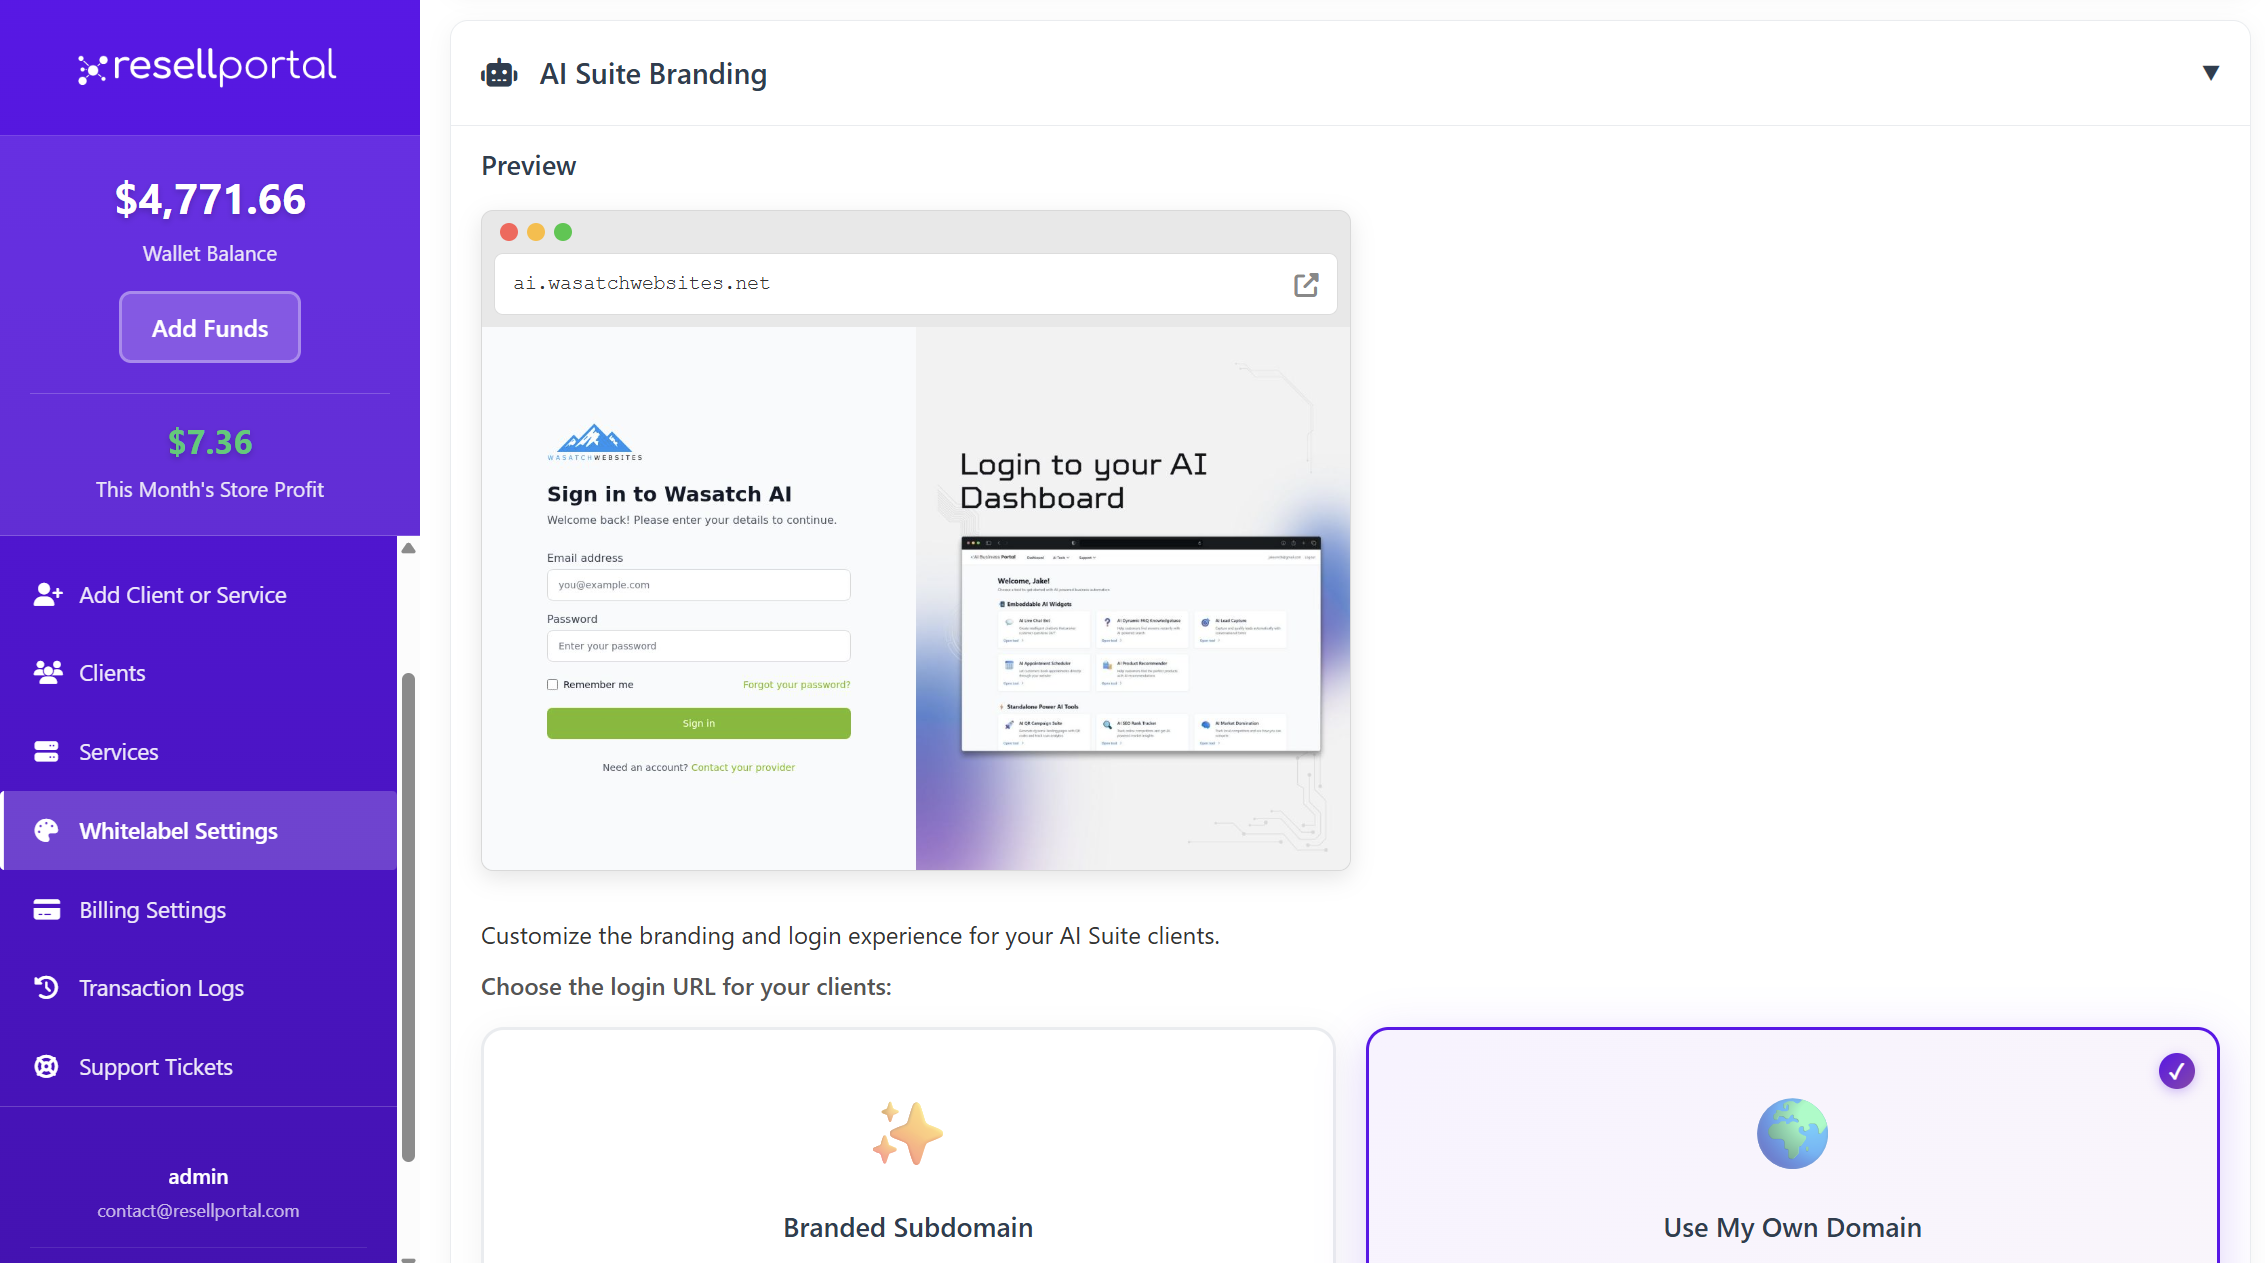
3. AI Suite Branding
If you are reselling the AI Business Tools, this section allows you to create a dedicated experience for those users.
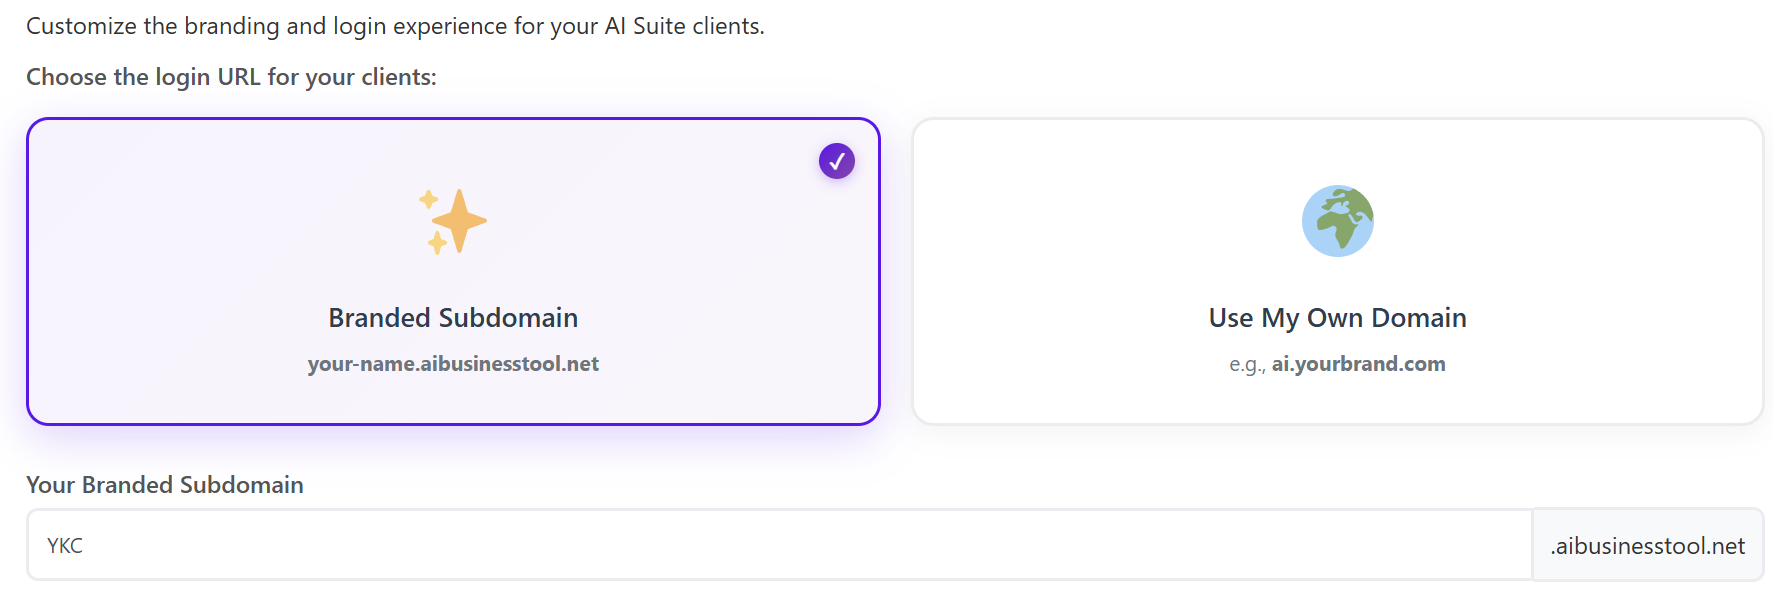
-
Login URL: Choose between a branded subdomain (e.g., brand.aibusinesstool.net) or your own custom domain (e.g., ai.yourbrand.com).

-
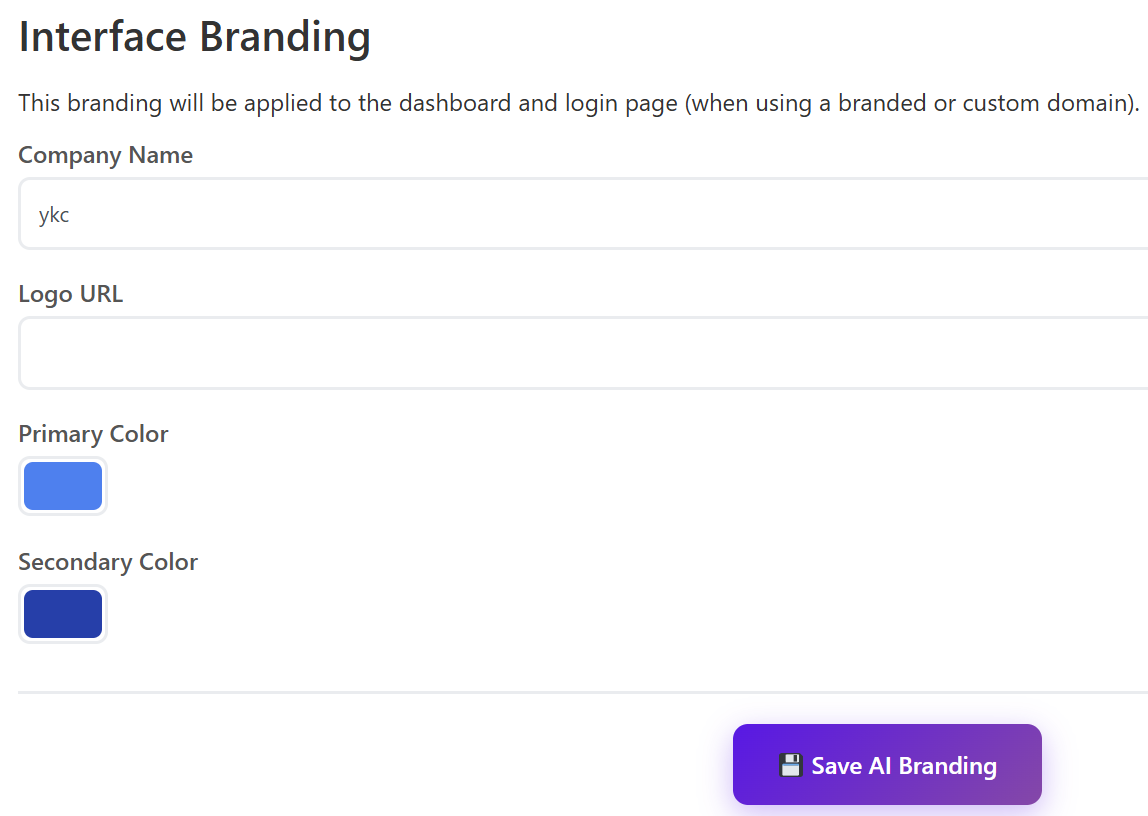
Interface Branding: Customize the dashboard and login topic specifically for the AI Suite.
-
Set a specific Company Name and Logo.
-
Define unique Primary and Secondary colors for the AI dashboard to differentiate it from your main storefront.

-
-
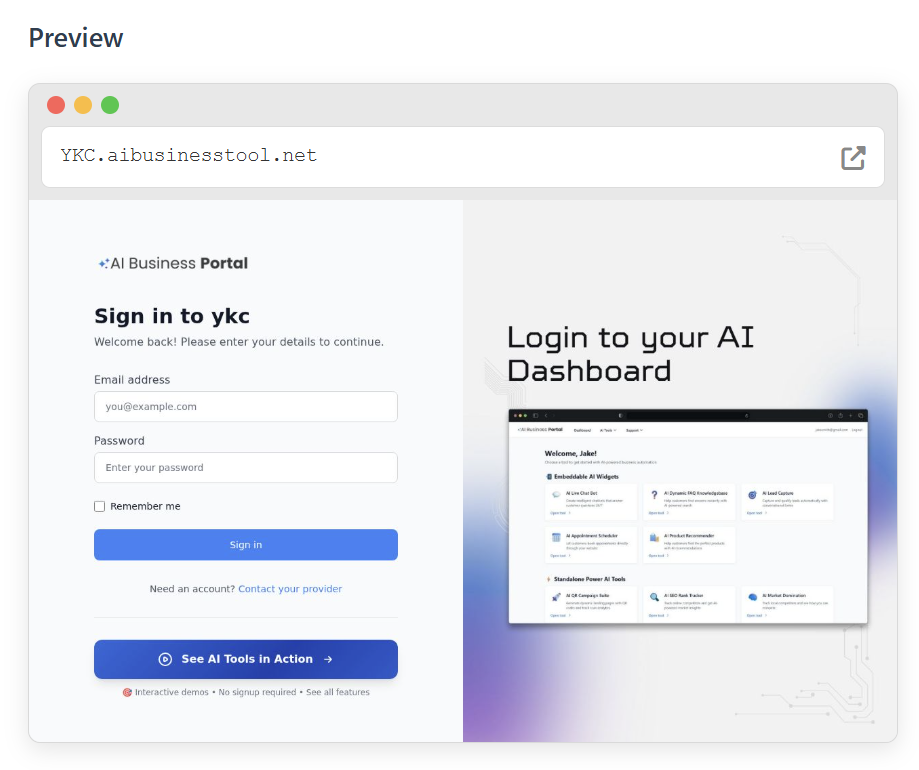
Preview: Use the built-in previewer to see how the login topic will look to your clients before saving.

Coupon manager User Guide
The Coupon Manager is a powerful marketing tool that allows you to drive sales, run seasonal promotions, and reward loyal customers by offering percentage-based discounts on your services.
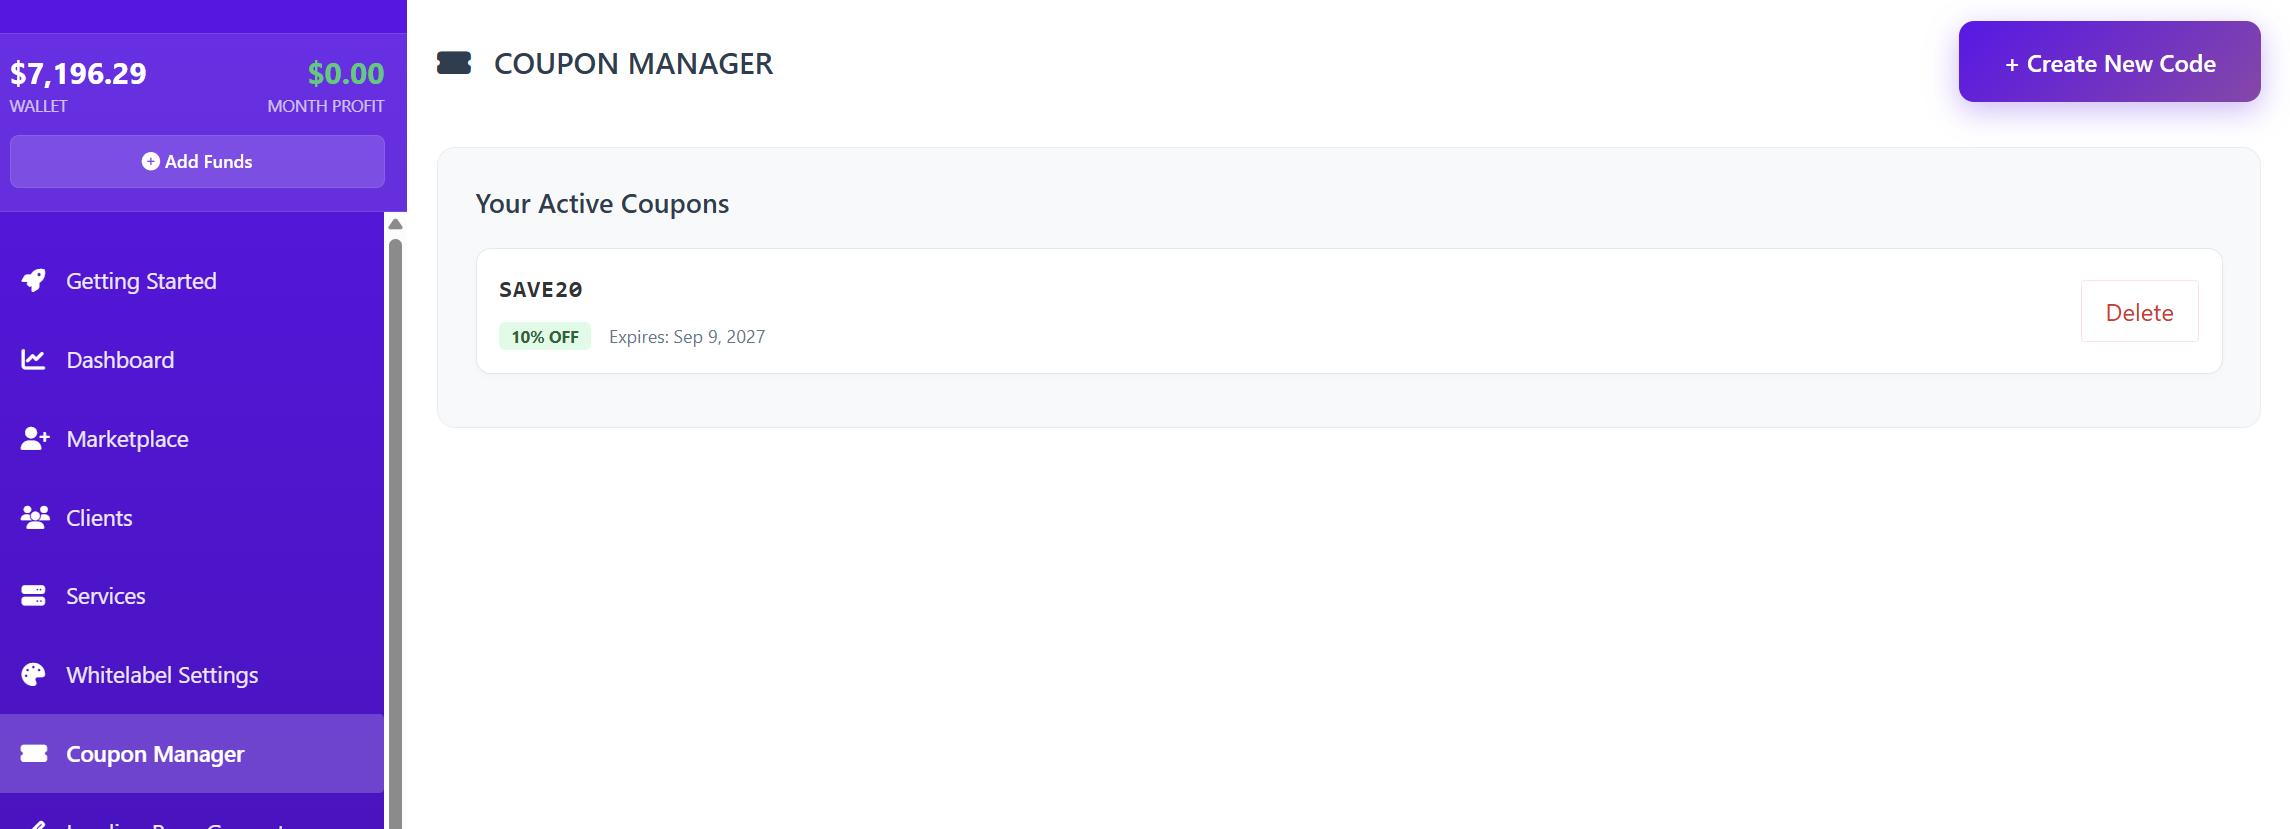
Overview
From the Coupon Manager dashboard, you can view all your Active Coupons at a glance. If you haven't created any yet, you will see a prompt to get started.
To create your first promotion, click the "+ Create New Code" button in the top right corner.
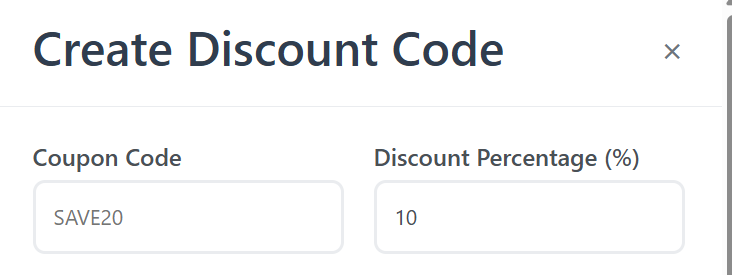
Creating a Discount Code
When you click to create a new code, a setup window will appear with the following configuration options:
1. Coupon Details
-
Coupon Code: Enter the text your customers will type at checkout (e.g., WELCOME10 or SUMMER2024).
-
Discount Percentage (%): Define how much of a discount to apply.
-
Note: This discount is deducted from the retail price you set in your "Products & Pricing" tab.

-
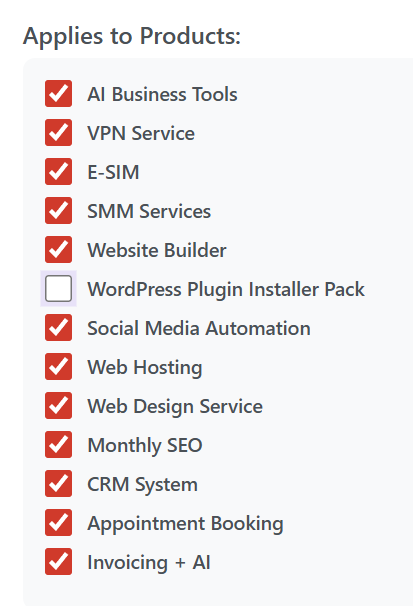
2. Product Selection
You have full control over which services the coupon can be used for. You can "Select All" or check specific boxes for services such as:
-
AI Business Tools & SMM Services
-
VPN & E-SIM Services
-
Web Hosting, Web Design, & SEO
-
CRM, Invoicing, and Appointment Booking

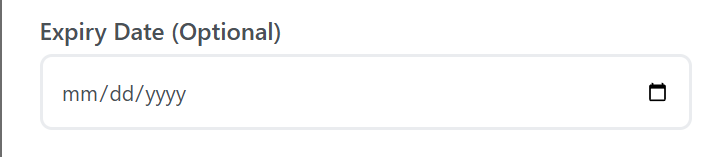
3. Expiry Date (Optional)
You can set a specific date for the coupon to automatically deactivate. This is perfect for "Limited Time Offers" or holiday weekend sales. If left blank, the coupon will remain active indefinitely until you manually delete it.
4. Site Banner (Sticky Top Bar)
This is a high-visibility feature. By checking the "Display as Site Banner?" box, a sticky notification bar will appear at the very top of your public storefront.
-
Why use this? It ensures that every visitor to your site immediately sees your promotion without needing to find it in an email or social media post.


Managing Your Coupons
Once created, your coupons will appear in a list on the main Coupon Manager page. From here, you can monitor which codes are active and manage them as your marketing strategy evolves.
Pro-Tip: Use the Sticky Top Bar for your most aggressive offer to lower the barrier to entry for new clients visiting your store for the first time!