CRM
Activating the CRM Package:
- Go to the Marketplace and select "CRM".
- Select the plan time period: Monthly, Quarterly, Bi-Annually, Annually. Costs are deducted automatically, and low balance disables the package.
- Type the client's desired Username and Password.
- Click Activate Service. Provisioning occurs within minutes. Check status under "Subscriptions" in your Dashboard.
- Use the Edit icon next to the subdomain to update passwords, upgrade, or disable.
CRM Features
- Manages contacts and leads effectively.
- Automates workflows and processes.
- Provides detailed reports and analytics.
- Integrates with other applications.
Using CRM (Intro)
Welcome to the ResellPortal CRM documentation. This guide provides comprehensive insights into managing your customer relationships, optimizing workflows, and leveraging the features of ResellPortal’s CRM system. Inspired by the powerful functionality of EspoCRM, ResellPortal CRM is tailored to streamline resellers’ operations, making it easier to track, manage, and grow your business relationships.
1. Introduction to ResellPortal CRM
ResellPortal CRM is a customer relationship management platform designed to help resellers streamline their business processes. It provides tools for managing customer data, tracking sales, automating workflows, and generating reports to drive informed decision-making.
Whether you’re tracking potential leads or managing ongoing client relationships, ResellPortal CRM is built to improve efficiency and foster growth.
Key Benefits:
-
Centralized customer data management
-
Enhanced sales tracking and forecasting
-
Seamless task and activity management
-
Advanced reporting and insights
-
Flexible customization options
2. Getting Started
System Requirements
To use ResellPortal CRM effectively, ensure your system meets the following requirements:
-
Web Browser: Chrome, Firefox, Safari, or Edge (latest versions recommended)
-
Internet Connection: Stable, high-speed connection
-
Screen Resolution: Minimum 1024x768 pixels for optimal display
User Access and Roles
ResellPortal CRM employs a role-based access control system. Common roles include:
-
Administrator: Full access to all features and settings
-
Sales Manager: Access to sales data, lead management, and reporting
-
Customer Support: Access to accounts and activity tracking
To ensure data security, users should be assigned appropriate roles based on their responsibilities.
Logging In
If you forget your password, use the “Forgot Password” link to reset it.
3. Core Features
Dashboards
Dashboards provide an overview of your business’s key metrics and activities. They can be customized to display:
-
Sales performance
-
Upcoming tasks
-
Recent activity logs
-
Key performance indicators (KPIs)
Accounts and Contacts
The Accounts and Contacts modules are central to managing your relationships:
-
Accounts: Represent businesses or organizations.
-
Contacts: Represent individuals associated with accounts.
Actions:
-
Add new accounts or contacts
-
Link contacts to accounts
-
View detailed interaction history
Leads and Opportunities
Track potential customers and convert them into sales with these tools:
-
Leads: Capture initial interest and qualification details.
-
Opportunities: Monitor sales prospects, including estimated revenue and closing dates.
Sales Management
Manage your entire sales pipeline in one place:
-
Visualize your sales funnel.
-
Track deal progress across stages (e.g., prospecting, negotiation, closed-won).
-
Assign tasks to team members to ensure timely follow-ups.
Task and Activity Tracking
Stay organized with integrated task and activity management:
-
Schedule calls, meetings, or follow-ups.
-
Assign tasks to team members.
-
Set reminders and track completion statuses.
4. Customization
Every business is unique, and ResellPortal CRM offers extensive customization options:
-
Fields: Add or modify data fields in modules to capture the information you need.
-
Layouts: Adjust module layouts for a more user-friendly experience.
-
Dashboards: Personalize dashboards with widgets relevant to your role.
5. Advanced Features
Reports and Analytics
Gain insights into your performance with powerful reporting tools:
-
Generate pre-built or custom reports.
-
Visualize data with charts and graphs.
-
Export reports in multiple formats (e.g., PDF, Excel).
Automation and Workflows
Automate repetitive tasks to save time and reduce errors:
-
Set up automated notifications and reminders.
-
Create workflows for tasks like lead assignment or email follow-ups.
-
Define triggers based on specific actions (e.g., status changes).
Integrations
Expand functionality with third-party integrations:
-
Email Integration: Sync with Gmail, Outlook, or other email clients.
-
Calendar Sync: Integrate with Google Calendar or Microsoft Outlook for scheduling.
-
API Access: Connect ResellPortal CRM with your existing tools and platforms.
6. Troubleshooting and Support
Common Issues
-
Unable to Login:
-
Ensure you’re using the correct username and password.
-
Reset your password if necessary.
-
Contact support if issues persist.
-
-
Slow Performance:
-
Check your internet connection.
-
Clear browser cache and cookies.
-
Ensure your browser is up to date.
-
-
Missing Data:
-
Verify access permissions.
-
Check filters or search settings in the module.
-
Support Options
ResellPortal CRM offers several support channels:
-
Knowledge Base: Access detailed articles and tutorials.
-
Email Support: Contact our team at support@resellportal.com.
-
Live Chat: Available during business hours via our website.
Using Accounts
The Accounts module in ResellPortal CRM is designed to help you manage and organize businesses or organizations you interact with. Each account acts as a central hub where you can store essential information, track interactions, and link related contacts, leads, and opportunities. Here’s a detailed guide to using the Accounts section effectively.
1. Navigating to the Accounts Module
-
Log in to your ResellPortal CRM dashboard.
-
Locate the main navigation menu on the left-hand side.
-
Click on Accounts to access the module.
You’ll see a list view displaying all existing accounts.
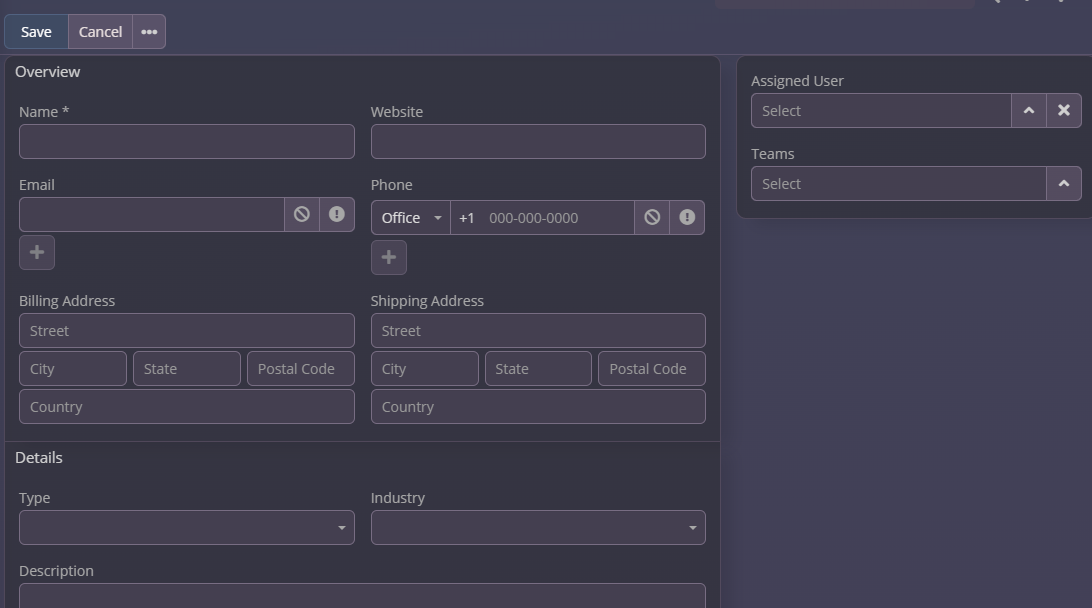
2. Creating a New Account
To add a new account:
-
Click the "Create" Button:
-
In the Accounts module, click the + Create button at the top-right corner.

-
-
Fill Out the Account Details:
-
Account Name (Required): Enter the name of the business or organization.
-
Industry: Select the industry category (e.g., Retail, Technology).
-
Type: Indicate whether it’s a customer, prospect, partner, or vendor.
-
Billing Address: Enter the billing address of the account.
-
Shipping Address: If different, specify the shipping address.
-
Phone Number: Add the main contact number for the account.
-
Website: Enter the account’s website URL.
-
-
Save the Account:
-
Click the Save button at the bottom to store the new account.

Note: You can Link Related Records by Using the "Contacts," "Opportunities," or "Tasks" sections to link relevant records that appear after saving.

-

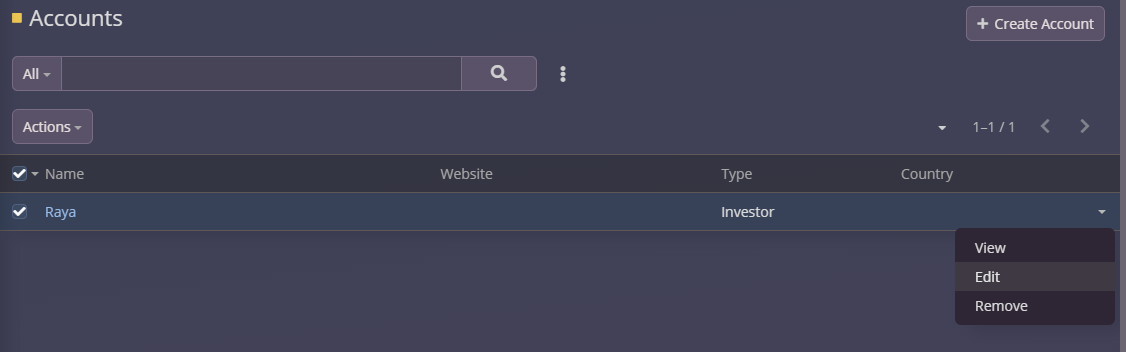
3. Viewing and Editing Accounts
Accessing an Account Record:
-
From the Accounts list view, click on the desired account’s name to open its detailed record view.
Editing Account Information:
-
In the account record view, click the Edit button at the top-right corner.
-
Update the necessary fields (e.g., phone number, address, or industry).
-
Click Save to apply the changes.

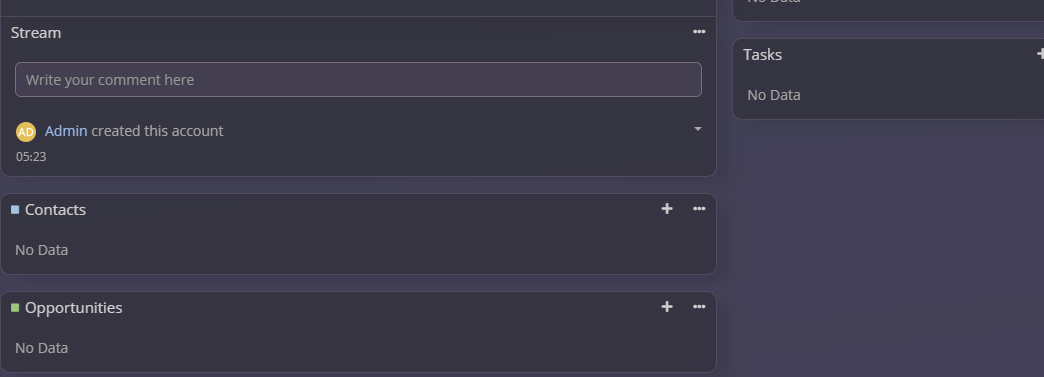
4. Linking Contacts to an Account
Contacts represent individuals associated with an account. To link contacts:
-
Open the desired account record.
-
Scroll down to the Contacts subpanel.
-
Click the Link button to associate an existing contact or the + Create button to add a new one.
-
If creating a new contact, enter the individual’s details (e.g., name, email, phone).
-
Save the contact. It will now appear in the Contacts subpanel.


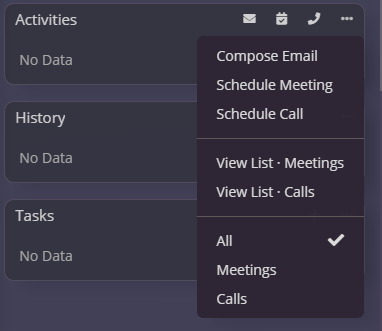
5. Managing Interactions and Activities
The Accounts module allows you to track interactions and activities, such as meetings, calls, and tasks:
-
Adding Activities:
-
In the account record, locate the Activities subpanel.
-
Click + Create to add a new activity, such as a call, meeting, or task.
-
Enter relevant details like date, time, and description.
-
Save the activity.

-
-
Viewing Interaction History:
-
The History subpanel displays completed activities, emails, and notes linked to the account.
-
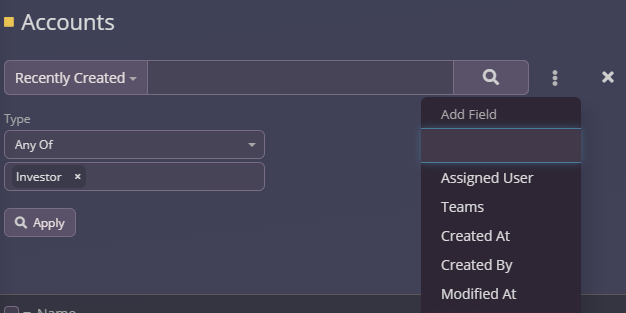
6. Filtering and Searching Accounts
Use filters and search options to locate specific accounts quickly:
-
Search Bar:
-
Use the search bar at the top of the Accounts list to find an account by name, industry, or type.
-
-
Filters:
-
Click the Filters button to apply advanced filters based on criteria like creation date, assigned user, or status.

-
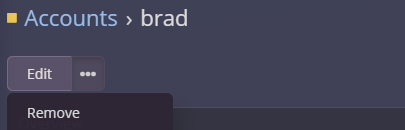
7. Deleting Accounts
Deleting an Account:
-
Use this option only if the account is no longer needed, as deletion is permanent.
-
Open the account record.
-
Click the Remove button.
-
Confirm the deletion.

8. Best Practices for Managing Accounts
-
Keep Data Updated: Regularly review and update account information to ensure accuracy.
-
Use Notes: Add notes to account records to document key interactions or insights.
-
Leverage Automations: Set up workflows to automate tasks like follow-up reminders or email notifications.
-
Collaborate: Use the "Assigned To" field to delegate account ownership and tasks effectively within your team.
Using Contacts
The Contacts module in ResellPortal CRM is designed to help you manage individual relationships linked to businesses or organizations (Accounts). Each contact holds key details about the person, including their role, communication preferences, and interaction history. This guide will walk you through effectively using the Contacts module.
1. Navigating to the Contacts Module
-
Log in to your ResellPortal CRM dashboard.
-
Locate the main navigation menu on the left-hand side.
-
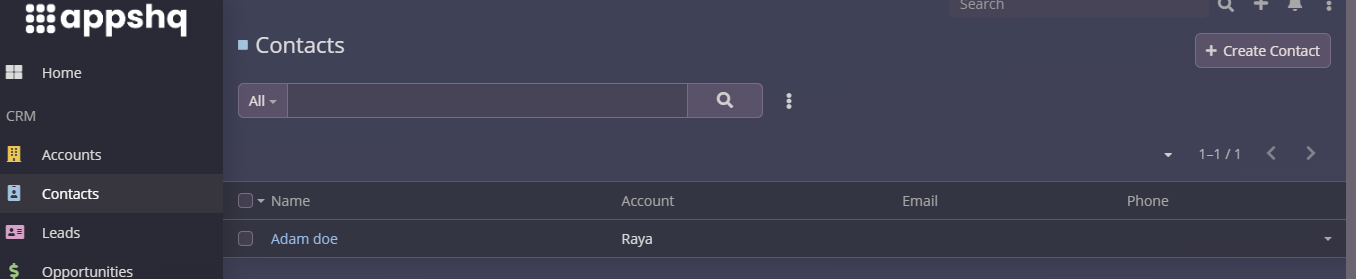
Click on Contacts to access the module.
You’ll see a list view displaying all existing contacts, including names, associated accounts, and email addresses.
2. Creating a New Contact
To add a new contact:
-
Click the "Create" Button:
-
In the Contacts module, click the + Create button at the top-right corner.
-
-
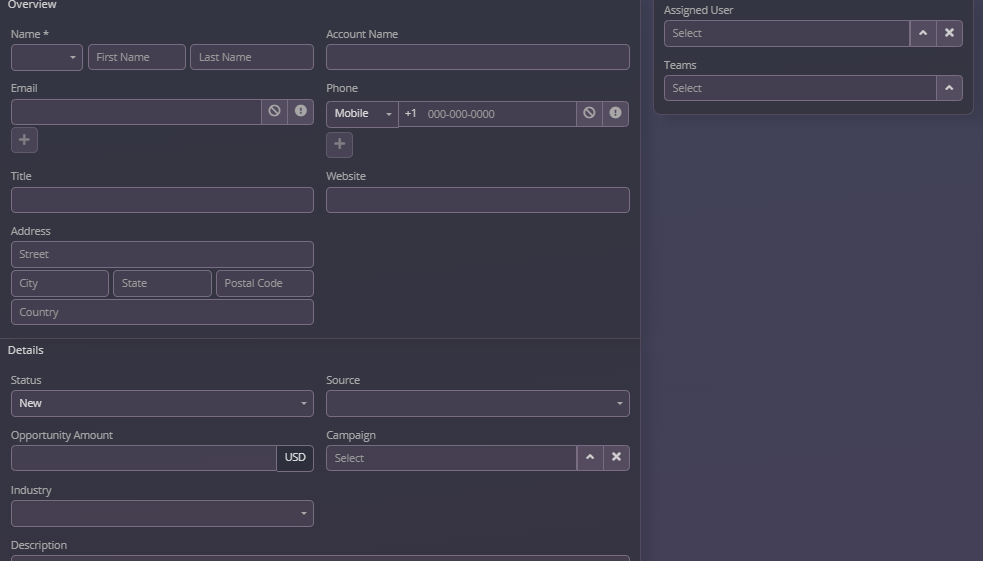
Fill Out the Contact Details:
-
First Name and Last Name (Required): Enter the individual’s name.
-
Email Address: Add the primary email address for communication.
-
Phone Number: Include the main contact number.
-
Associated Account: Link the contact to an existing account for better organization.
-
Address: Enter the contact’s physical or mailing address, if applicable.
-
-
Save the Contact:
-
Click the Save button to store the new contact.

-
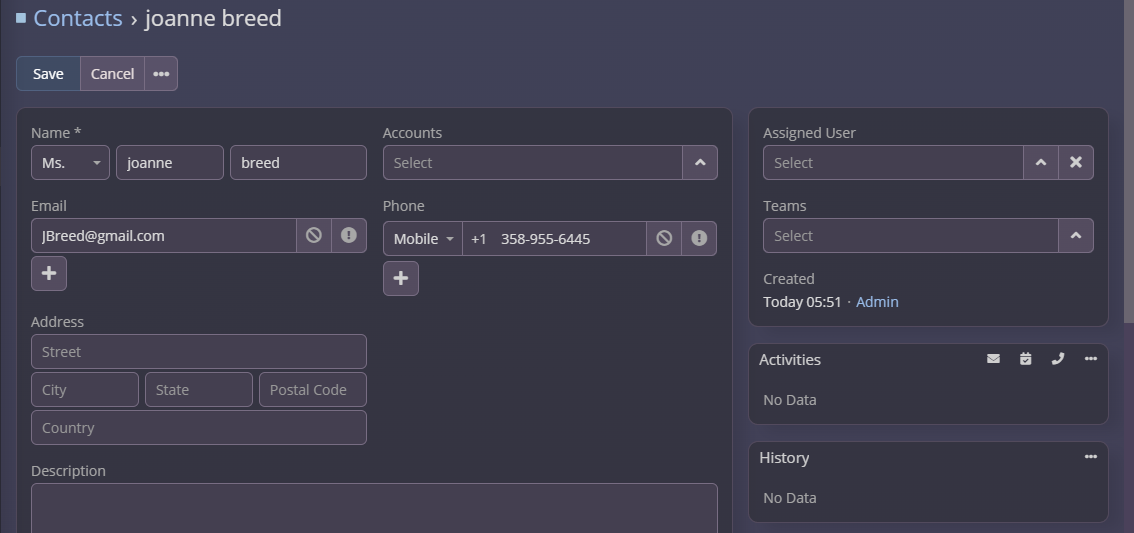
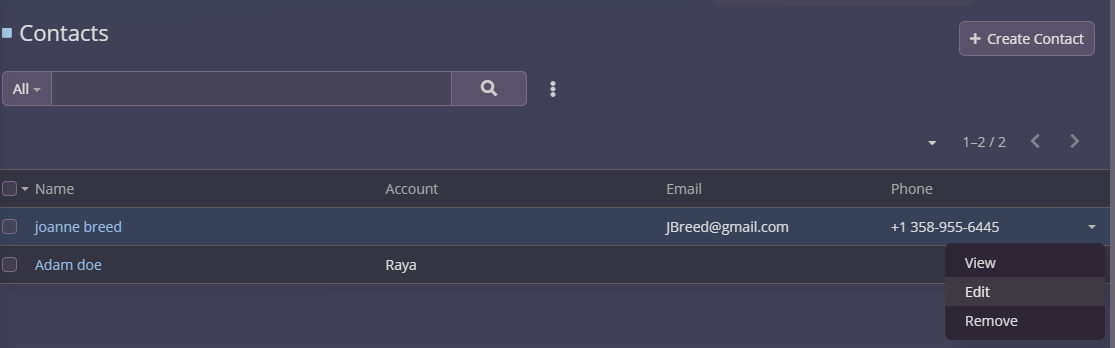
3. Viewing and Editing Contacts
Accessing a Contact Record:
-
From the Contacts list view, click on the desired contact’s name to open their detailed record.
Editing Contact Information:
-
In the contact record view, click the Edit button at the top-right corner.
-
Update any necessary fields, such as email, phone number, or associated account.
-
Click Save to apply the changes.

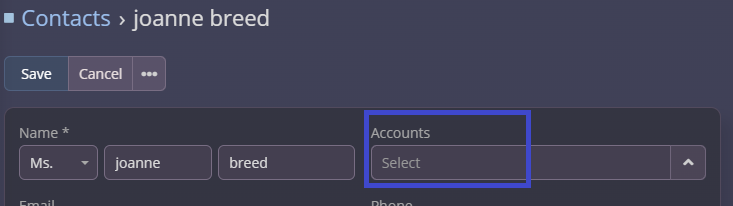
4. Linking Contacts to Accounts
Each contact should be associated with an account for better data organization and tracking. To link a contact to an account:
-
Open the desired contact record.
-
Locate the Account field in the record.
-
Select an existing account or create a new one directly from the dropdown.
-
Save the changes.

5. Tracking Interactions and Activities
The Contacts module allows you to log and monitor all interactions with individuals:
-
Adding Activities:
-
In the contact record, locate the Activities subpanel.
-
Click + Create to add an activity such as a call, email, or meeting.
-
Enter details like the date, time, and description of the interaction.
-
Save the activity.

-
-
Viewing Interaction History:
-
The History subpanel displays completed activities, notes, and emails linked to the contact.
-
-
Logging Notes:
-
Use the Stream section to document key insights or conversations related to the contact.
-
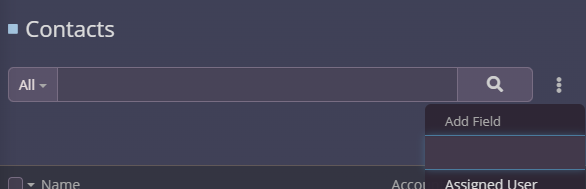
6. Searching and Filtering Contacts
Quickly locate contacts using the search and filter options:
-
Search Bar:
-
Use the search bar at the top of the Contacts list to find a contact by name, email, or phone number.
-
-
Filters:
-
Click the Filters button to apply advanced criteria, such as account association, title, or location.

-
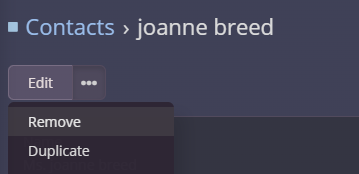
7. Deleting Contacts
Deleting a Contact:
-
Deleting permanently removes the contact from the CRM. Use this option carefully.
-
Open the contact record.
-
Click the remove button.
-
Confirm the deletion.

8. Best Practices for Managing Contacts
-
Keep Contact Details Current: Regularly review and update email addresses, phone numbers, and titles.
-
Document Interactions: Use notes and activity tracking to maintain a history of communications.
-
Link Contacts to Accounts: Always associate contacts with relevant accounts for better organization.
-
Segment Your Contacts: Use filters and tags to categorize contacts based on industry, location, or status.
-
Leverage Automation: Set reminders or workflows for follow-ups and scheduled calls.
By mastering the Contacts module, you can strengthen individual relationships, improve communication efficiency, and drive your business goals forward. For further assistance, contact our support team or explore the full ResellPortal CRM documentation.
Using Leads
The Leads module in ResellPortal CRM is designed to help you capture, track, and manage potential customers effectively. Leads are individuals or organizations that have shown interest in your product or service but are not yet fully qualified. This guide will walk you through how to use the Leads module to convert prospects into long-term customers.
1. Navigating to the Leads Module
-
Log in to your ResellPortal CRM dashboard.
-
Locate the main navigation menu on the left-hand side.
-
Click on Leads to access the module.
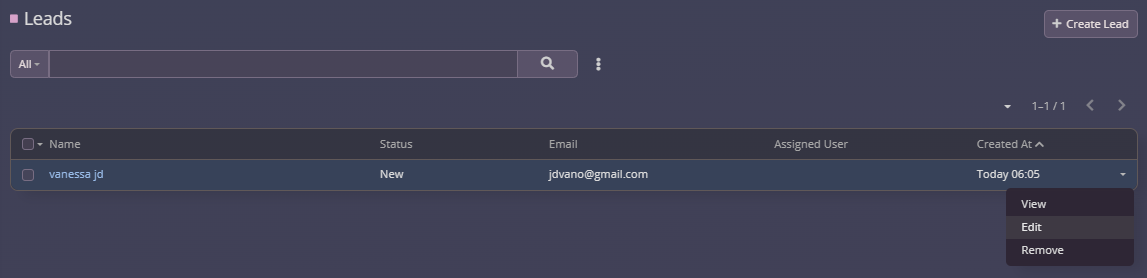
You’ll see a list view displaying all existing leads, including their names, statuses, and associated accounts or contacts.
2. Creating a New Lead
To add a new lead:
-
Click the "Create" Button:
-
In the Leads module, click the + Create button at the top-right corner.
-
-
Fill Out Lead Details:
-
First Name and Last Name: Enter the lead’s personal information.
-
Company/Organization: If applicable, enter the lead’s associated company.
-
Email Address and Phone Number: Provide contact details for communication.
-
Lead Source: Indicate how the lead was acquired (e.g., website inquiry, referral, trade show).
-
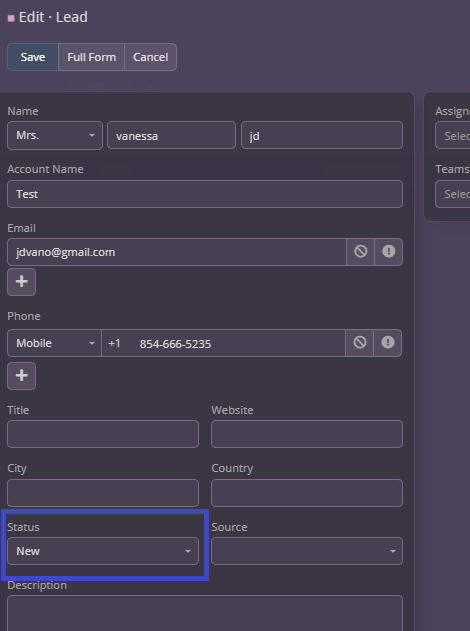
Status: Select the current status (e.g., New, In Progress, Qualified, Disqualified).
-
Industry: Specify the industry if applicable.
-
-
Add Additional Information:
-
Include notes about the lead’s needs, timeline, or any relevant context.
-
-
Save the Lead:
-
Click the Save button to store the new lead.


-

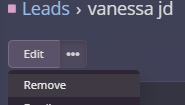
3. Viewing and Editing Leads
Accessing a Lead Record:
-
From the Leads list view, click on the desired lead’s name to open their detailed record.
Editing Lead Information:
-
In the lead record view, click the Edit button at the top-right corner.
-
Update any necessary fields, such as email, status, or notes.
-
Click Save to apply the changes.

4. Qualifying a Lead
Qualifying a lead means assessing their potential to become a customer. To qualify a lead:
-
Open the lead record.
-
Review the lead’s details and interaction history.
-
Update the Status field to reflect their progression (e.g., Converted).
-
If the lead is ready to convert, link them to an account and/or contact or create a new one.


5. Tracking Interactions and Activities
To maintain a comprehensive history of your engagement with a lead:
-
Adding Activities:
-
In the lead record, locate the Activities subpanel.
-
Click + Create to schedule calls, meetings, or tasks.
-
Enter relevant details like date, time, and description.
-
Save the activity.

-
-
Logging Notes:
-
Use the stream section to document important conversations or observations about the lead.
-
6. Filtering and Searching Leads
Quickly locate specific leads using the search and filter options:
-
Search Bar:
-
Use the search bar at the top of the Leads list to find a lead by name, company, or email.
-
-
Filters:
-
Click the Filters button to apply criteria such as status, lead source, or assigned user.

-

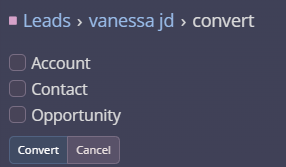
7. Converting Leads
Once a lead is qualified, you can convert it into an account, contact, or opportunity:
-
Open the lead record.
-
Click the Convert button.
-
Choose the desired action:
-
Create Account and Contact: Automatically generate an account and contact record based on the lead’s details.
-
Create Opportunity: Link the lead to a new sales opportunity.
-
-
Review and confirm the information, then complete the conversion process.


8. Deleting or Archiving Leads
Deleting a Lead:
-
Deleting permanently removes the lead from the CRM. Use this option carefully.
-
Open the lead record.
-
Click the Delete button.
-
Confirm the deletion.

9. Best Practices for Managing Leads
-
Follow Up Promptly: Timely communication can significantly improve lead conversion rates.
-
Qualify Leads Effectively: Use clear criteria to assess whether a lead is worth pursuing further.
-
Document Interactions: Keep a detailed record of communications and activities to maintain continuity.
-
Segment Leads: Use filters and tags to categorize leads based on their industry, status, or source.
-
Automate Workflows: Set up reminders and automated tasks for follow-ups to ensure no leads fall through the cracks.
Using Opportunities
The Opportunities module in ResellPortal CRM is designed to help you manage and track potential revenue-generating deals. Opportunities represent sales prospects that you’re actively working on, allowing you to monitor progress, forecast revenue, and prioritize efforts effectively. This guide will walk you through the features and best practices for using the Opportunities module.
1. Navigating to the Opportunities Module
-
Log in to your ResellPortal CRM dashboard.
-
Locate the main navigation menu on the left-hand side.
-
Click on Opportunities to access the module.
You’ll see a list view displaying all existing opportunities, including their names, stages, and expected close dates.
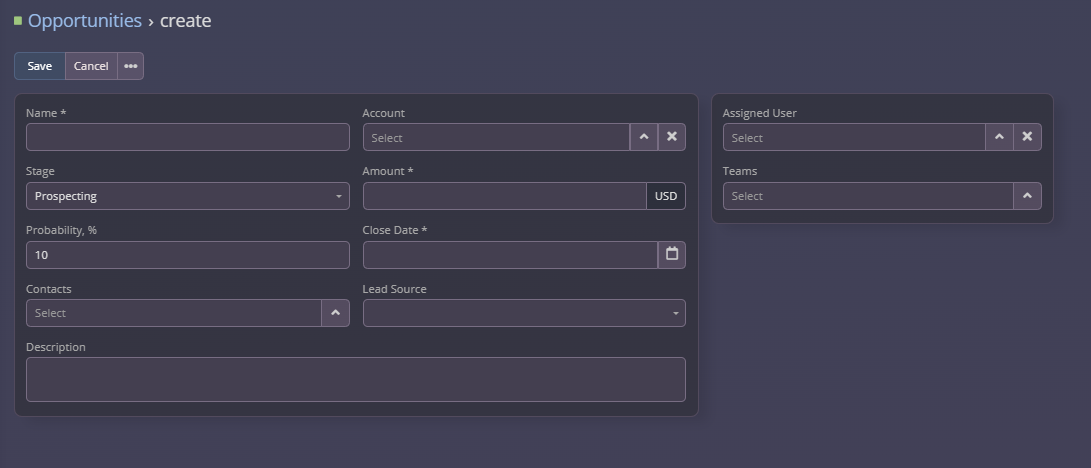
2. Creating a New Opportunity
To add a new opportunity:
-
Click the "Create" Button:
-
In the Opportunities module, click the + Create button at the top-right corner.

-
-
Fill Out Opportunity Details:
-
Opportunity Name (Required): Provide a descriptive name for the opportunity.
-
Account: Link the opportunity to an existing account.
-
Expected Close Date: Specify the anticipated date for closing the deal.
-
Stage: Select the current stage of the sales process (e.g., Prospecting, Negotiation, Closed-Won, Closed-Lost).
-
Probability: Enter the potential revenue value for this opportunity.
-
Assigned User: Designate a team member responsible for managing the opportunity.
-
-
Add Additional Information:
-
Include notes about the opportunity’s background, client requirements, or key stakeholders. in the description field.
-
-
Save the Opportunity:
-
Click the Save button to store the new opportunity.

-

3. Viewing and Editing Opportunities
Accessing an Opportunity Record:
-
From the Opportunities list view, click on the desired opportunity’s name to open its detailed record.
Editing Opportunity Information:
-
In the opportunity record view, click the Edit button at the top-right corner.
-
Update any necessary fields, such as stage, expected close date, or amount.
-
Click Save to apply the changes.


4. Tracking Progress Through Sales Stages
The Opportunities module uses stages to track where each deal stands in the sales pipeline. Common stages include:
-
Prospecting: Initial contact or discovery phase.
-
Qualification: Assessing the lead’s needs and fit.
-
Proposal: Presenting solutions or quotes.
-
Negotiation: Finalizing terms and addressing objections.
-
Closed-Won: Successfully closed deals.
-
Closed-Lost: Opportunities that did not result in a sale.

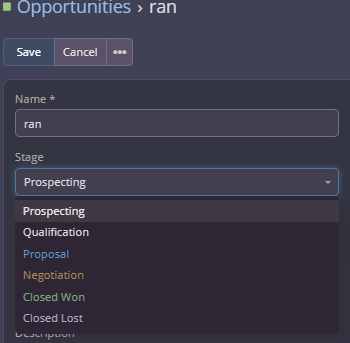
To update the stage:
-
Open the opportunity record.
-
Select the new stage from the Stage dropdown.
-
Save your changes.
5. Adding Activities and Notes
Keep a detailed record of all interactions and activities related to each opportunity:
-
Adding Activities:
-
In the opportunity record, locate the Activities subpanel.
-
Click + Create to schedule tasks, calls, or meetings.
-
Enter details like date, time, and description.
-
Save the activity.

-
6. Searching and Filtering Opportunities
Quickly locate specific opportunities using the search and filter options:
-
Search Bar:
-
Use the search bar at the top of the Opportunities list to find an opportunity by name, account, or stage.
-
-
Filters:
-
Click the Filters button to apply criteria such as expected close date, assigned user, or amount.

-

7. Closing Opportunities
When an opportunity reaches its conclusion, mark it as either "Closed-Won" or "Closed-Lost":
-
Open the opportunity record.
-
Update the Stage field to "Closed-Won" or "Closed-Lost." s shown above point 4.
-
Add a note explaining the outcome (e.g., reasons for loss or feedback from the client).
-
Save the record.
8. Best Practices for Managing Opportunities
-
Prioritize High-Value Deals: Focus on opportunities with the highest potential revenue or strategic importance.
-
Regularly Update Stages: Keep pipeline stages current to ensure accurate forecasting.
-
Collaborate: Use the "Assigned User" field to delegate opportunities effectively and maintain accountability.
-
Leverage Insights: Use reporting tools to identify trends and refine your sales strategies.
-
Automate Follow-Ups: Set reminders and workflows to ensure consistent communication with prospects.
Using Activities
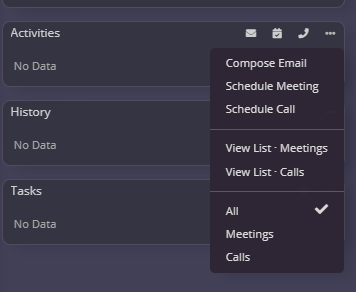
The Activities module in ResellPortal CRM allows you to schedule, track, and manage all interactions and tasks related to your business. From emails and meetings to calls and tasks, the Activities module ensures that you stay organized and never miss an important follow-up. The built-in calendar provides a centralized view of your upcoming commitments. This guide will walk you through each component of the Activities section.
1. Navigating to the Activities Module
-
Log in to your ResellPortal CRM dashboard.
-
Locate the main navigation menu on the left-hand side.
-
Click on Activities to access the module.
You will see a categorized list view of emails, meetings, calls, tasks, and other scheduled activities.
2. Managing Emails
Emails are a crucial part of client communication. The CRM allows you to send, receive, and track emails directly within the system.
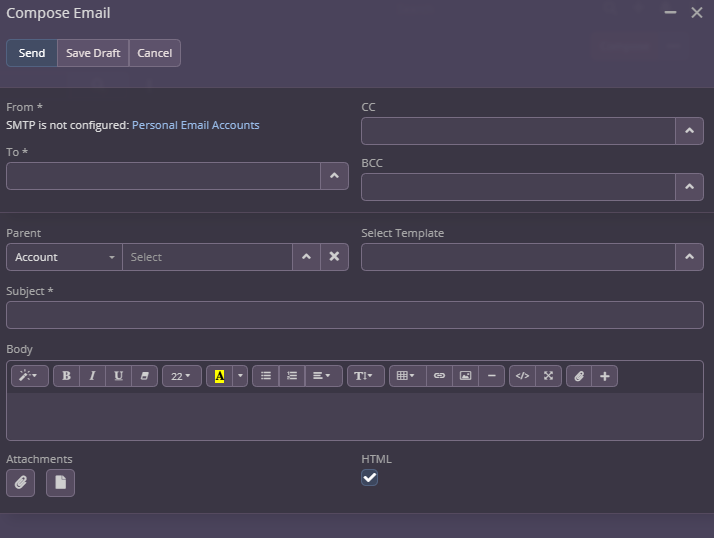
Sending an Email:
-
Navigate to the Emails section under Activities.
-
Click the + Compose button to create a new email.
-
Fill out the required fields:
-
Recipient: Add the email address of the contact or lead.
-
Subject: Enter a subject line.
-
Message Body: Write your email content.
-
-
Attach any necessary files.
-
Click Send to deliver the email.


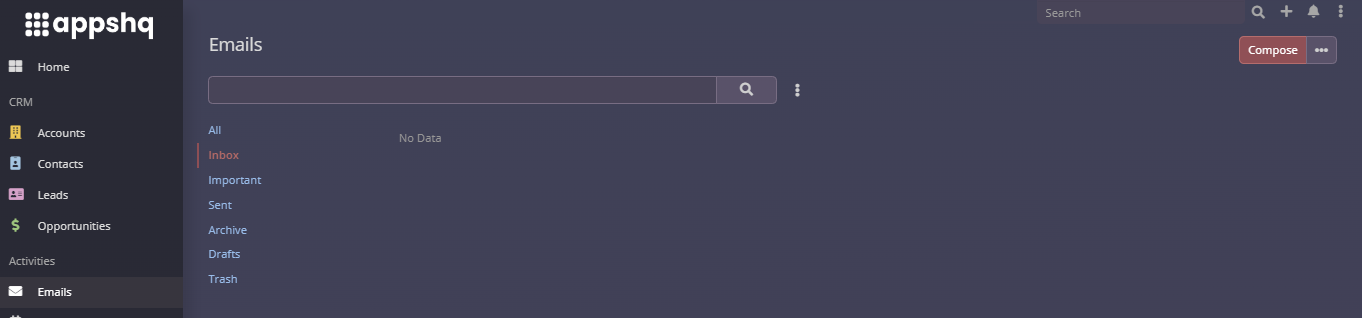
Tracking Emails:
-
Sent and received emails are automatically linked to the associated contact, lead, or opportunity for easy tracking.
-
Use the search bar to find specific emails by subject or recipient.
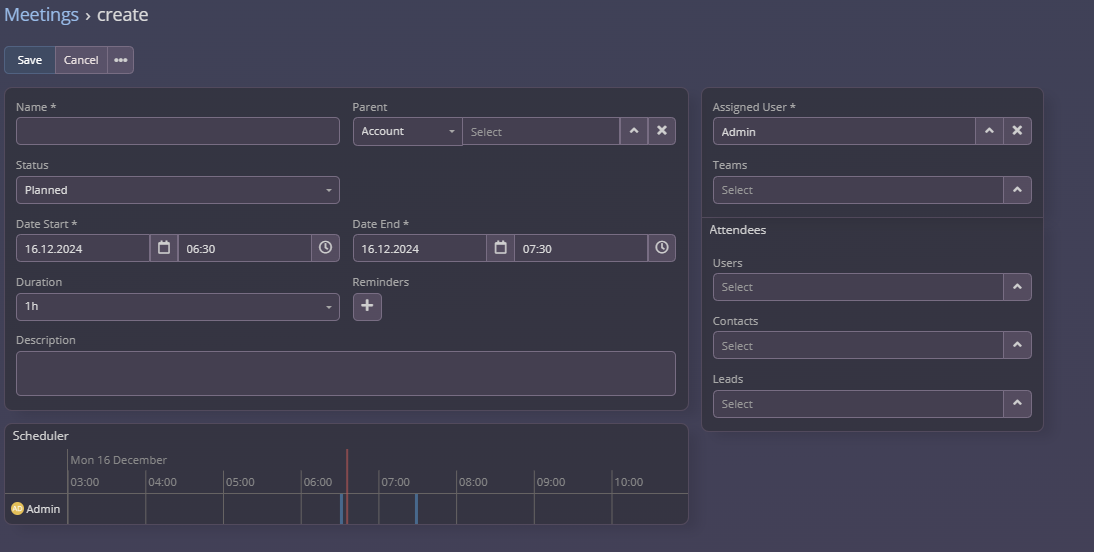
3. Scheduling and Managing Meetings
Meetings help you maintain direct communication with clients or team members. The Meetings section allows you to create and track all scheduled appointments.
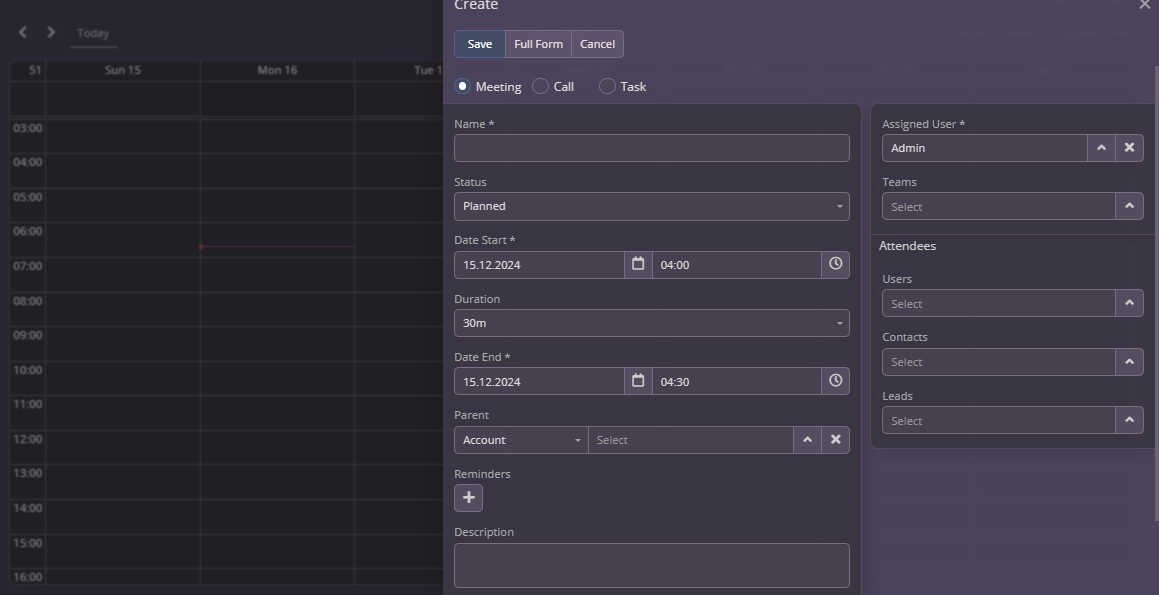
Creating a Meeting:
-
In the Activities module, navigate to the Meetings section.
-
Click the + Create button.
-
Fill out the meeting details:
-
Title: Add a descriptive title for the meeting.
-
Date and Time: Specify the start and end times.
-
Participants: Add attendees from your contacts or team members.
-
Location: Enter the meeting venue or provide a video conferencing link.
-
-
Save the meeting.


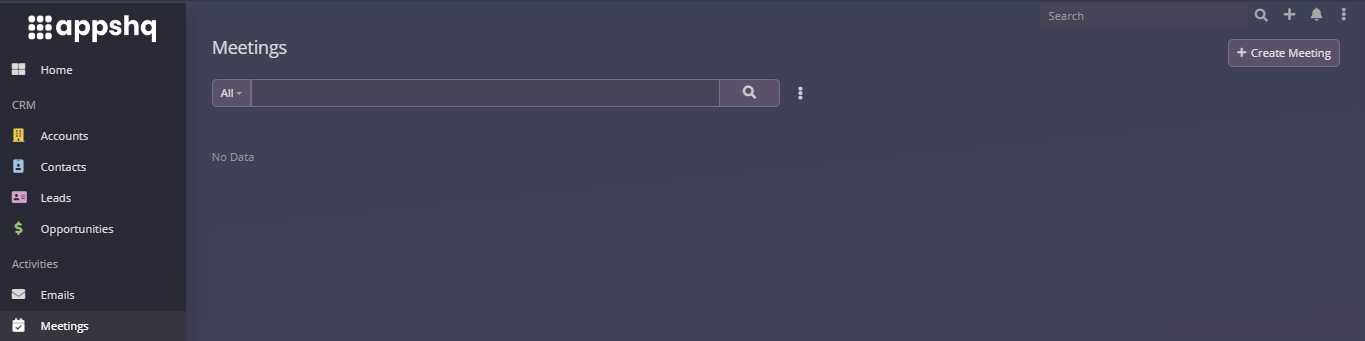
Managing Meetings:
-
View upcoming meetings in the Calendar section.
-
Reschedule or update meeting details by opening the meeting record and clicking Edit.
-
Mark meetings as completed once they are finished.
4. Logging and Tracking Calls
Calls are essential for follow-ups and quick resolutions. The Calls section allows you to log both completed and scheduled calls.
Logging a Completed Call:
-
Navigate to the Calls section under Activities.
-
Click the + Create button.
-
Enter the following details:
-
Subject: Add a title for the call.
-
Date and Time: Specify when the call occurred.
-
Duration: Record how long the call lasted.
-
Notes: Summarize the conversation.
-
-
Save the call record.


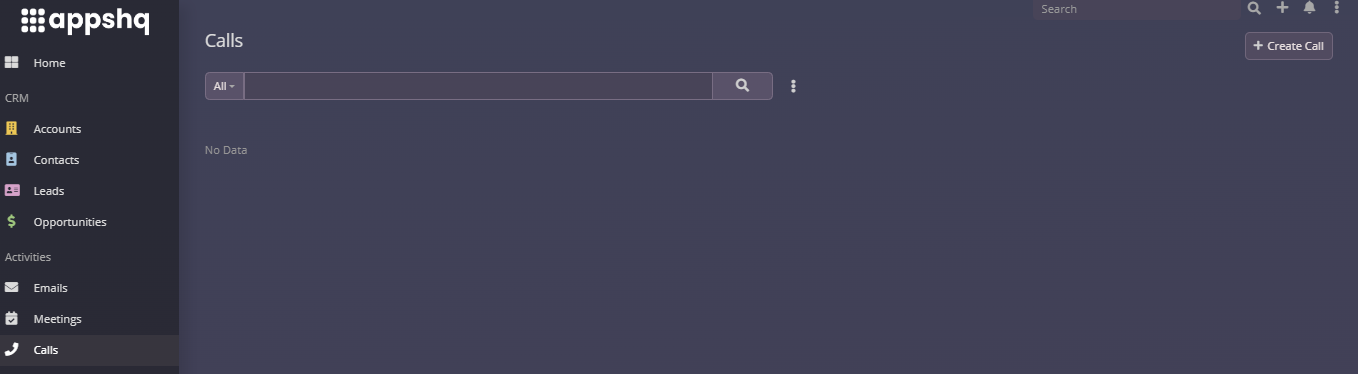
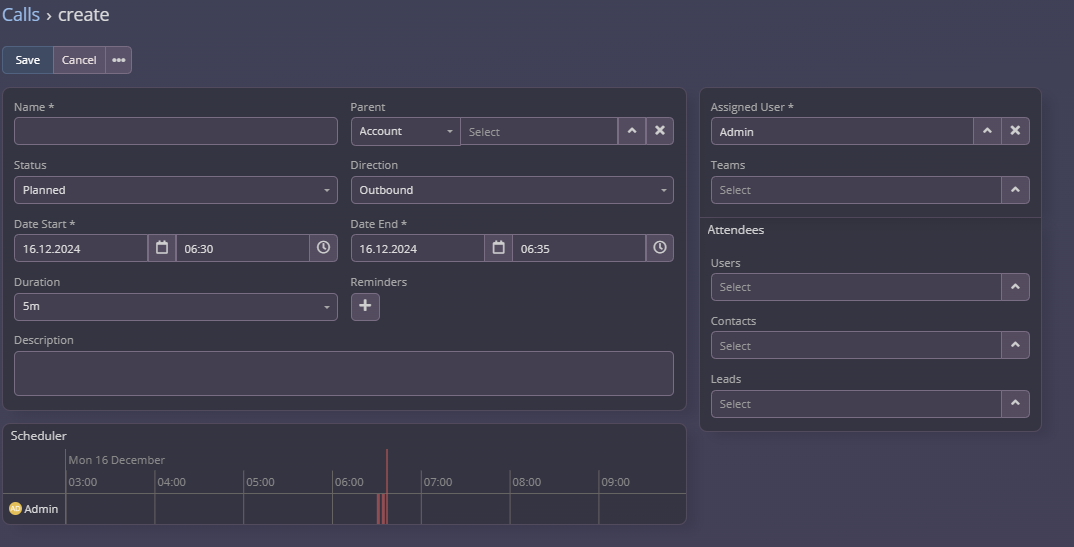
Scheduling a Call:
-
Follow the same steps as logging a call but set the call status to Scheduled.
-
Assign a reminder to ensure timely follow-up.
5. Managing Tasks
Tasks help you stay on top of to-dos and deadlines. The Tasks section allows you to create, assign, and monitor progress.
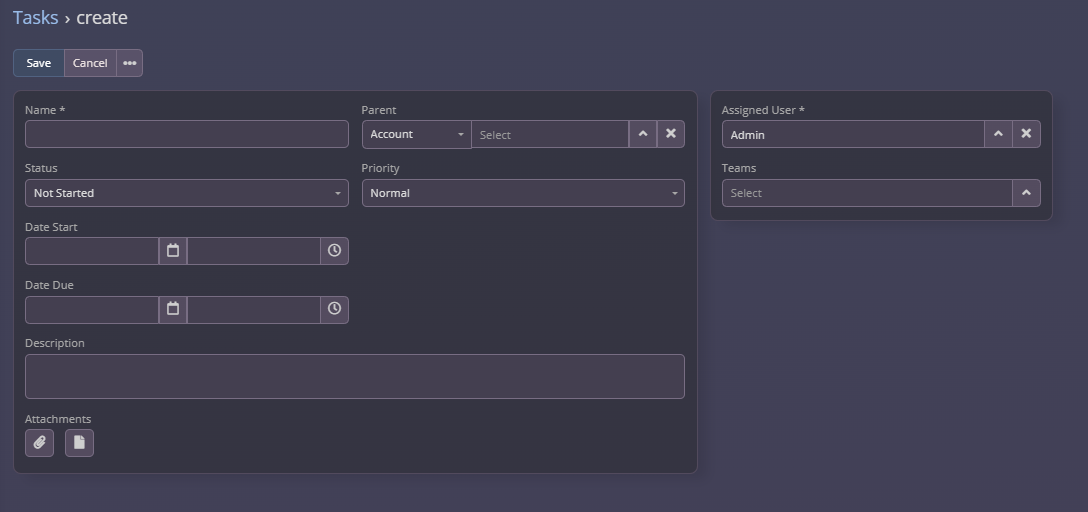
Creating a Task:
-
Navigate to the Tasks section in Activities.
-
Click the + Create button.
-
Fill out the task details:
-
Subject: Describe the task.
-
Due Date: Specify the deadline.
-
Priority: Set the priority level (e.g., Low, Medium, High).
-
Assigned User: Assign the task to a team member.
-
-
Save the task.


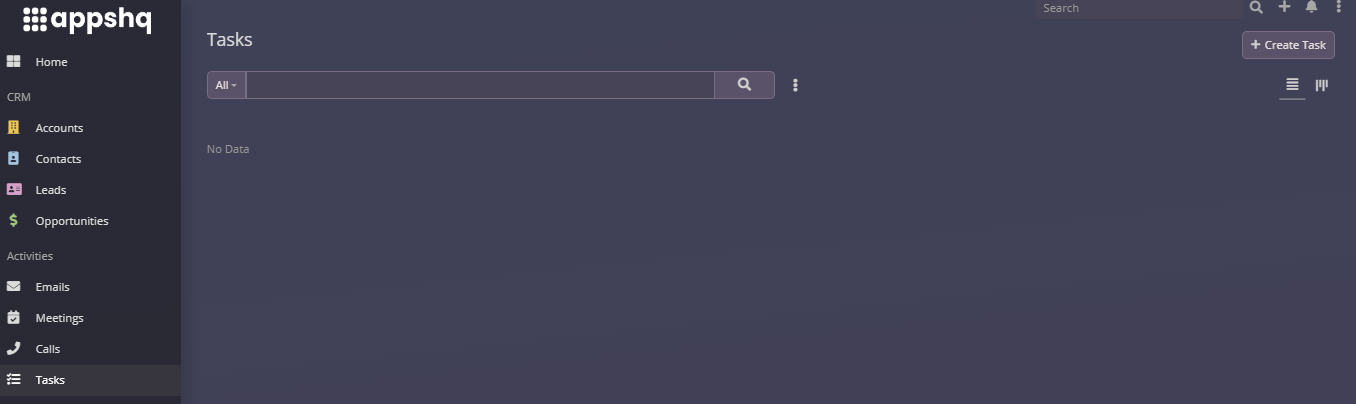
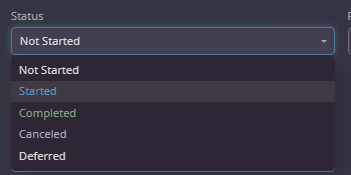
Tracking Task Progress:
-
Mark tasks as In Progress or Completed as you work through them.
-
Use filters to view tasks by due date, priority, or assigned user.

6. Using the Calendar
The Calendar provides a centralized view of all scheduled activities, including meetings, calls, and tasks.
Accessing the Calendar:
-
Navigate to the Calendar section in the main menu.
-
Use the Day, Week, or Month views to customize your display.

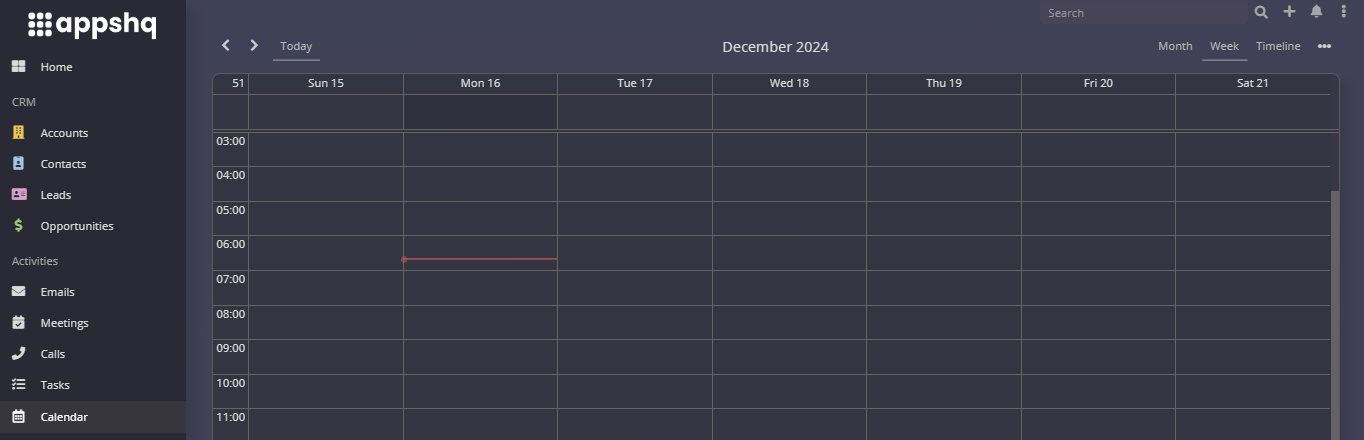
Adding Events to the Calendar:
-
Any meeting, call, or task scheduled in the Activities module is automatically added to the calendar.
-
You can also create events directly in the calendar by clicking on a specific date and time slot.

7. Best Practices for Managing Activities
-
Set Reminders: Use reminders to ensure no activity is missed.
-
Prioritize Tasks: Focus on high-priority items to stay efficient.
-
Document Everything: Keep detailed records of calls, emails, and meetings for future reference.
-
Collaborate: Assign tasks and share meeting schedules with team members to enhance coordination.
-
Use Filters: Leverage filtering options to focus on specific types of activities or timeframes.