E-Commerce
Activating the E-Commerce Package:
- Go to the Marketplace and select "E-Commerce".
- Select the plan time period: Monthly, Quarterly, Bi-Annually, Annually. Costs are deducted automatically, and low balance disables the package.
- Type the client or company's email and subdomain.
- Click Activate Service. Provisioning occurs within minutes. Check status under "Subscriptions" in your Dashboard.
- Use the Edit icon next to the subdomain to update passwords, upgrade, or disable.
Features of E-Commerce:
- A modern and responsive E-Commerce shop.
- Customize shipping, attributes, and products.
- Add your brand logo to the backend.
- Stripe & PayPal payment methods for checkout.
Set up and configure E-Commerce
Welcome to ResellPortal, provifing the ultimate e-commerce platform for resellers. Whether you’re launching a new store or migrating an existing one, ResellPortal provides all the tools you need to create, manage, and grow a successful online business. This documentation will guide you through setup, configuration, and advanced features to maximize your store’s potential.
1. Setup and Configuration
Creating a Compelling Landing Page
A strong landing page is the cornerstone of your online store. Follow these steps to create a page that engages visitors and drives conversions:
-
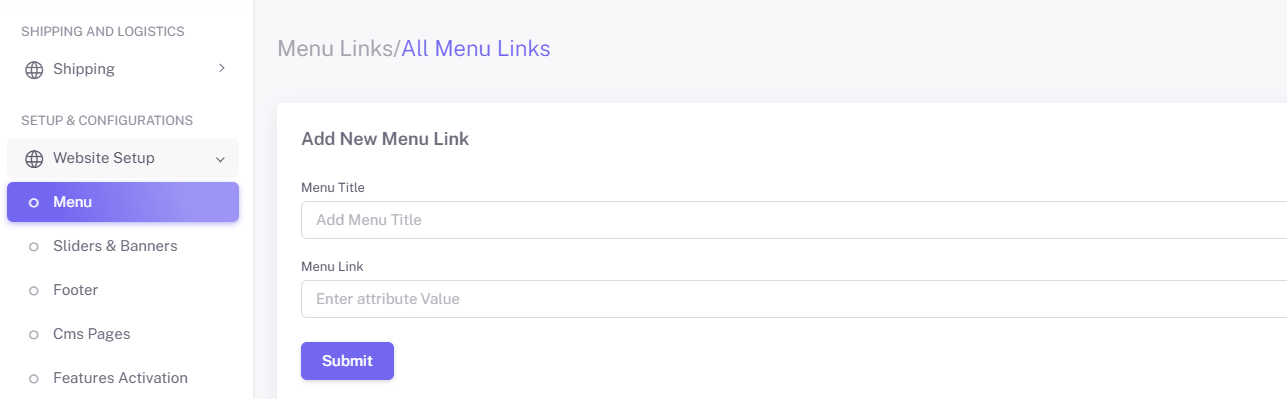
Start with setting the menu: Navigate to the "Website Setup" section and choose a 'menu', add the link and title.

-
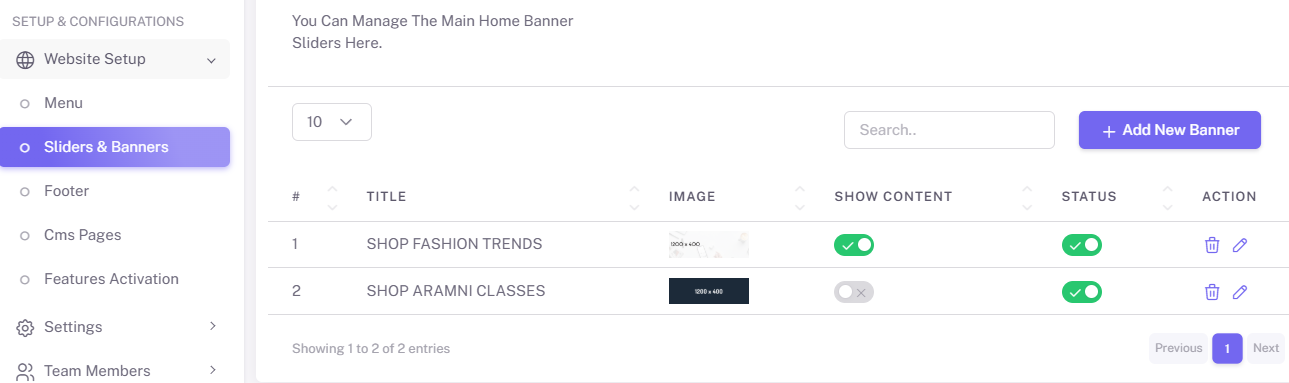
Sliders and Banners:
-
Upload high-quality images and videos.
-
Include a clear call-to-action (e.g., "Shop Now" or "Learn More").
- Can also add middle page banners.

-
-
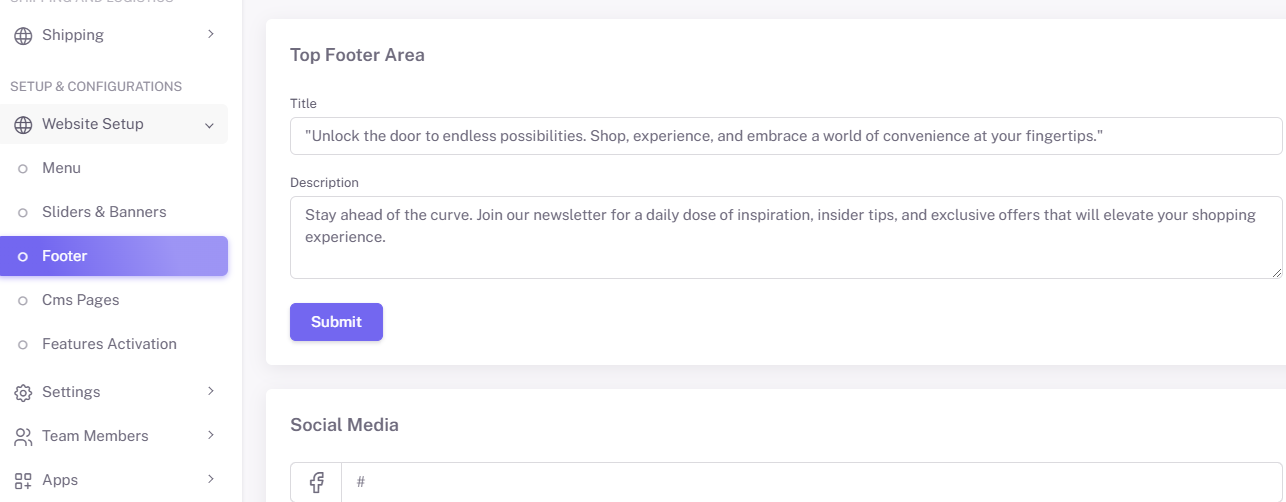
Footer:
-
Add the footer title, and description.
- Add Social media accounts.
- You can add up to three widget links.

-
-
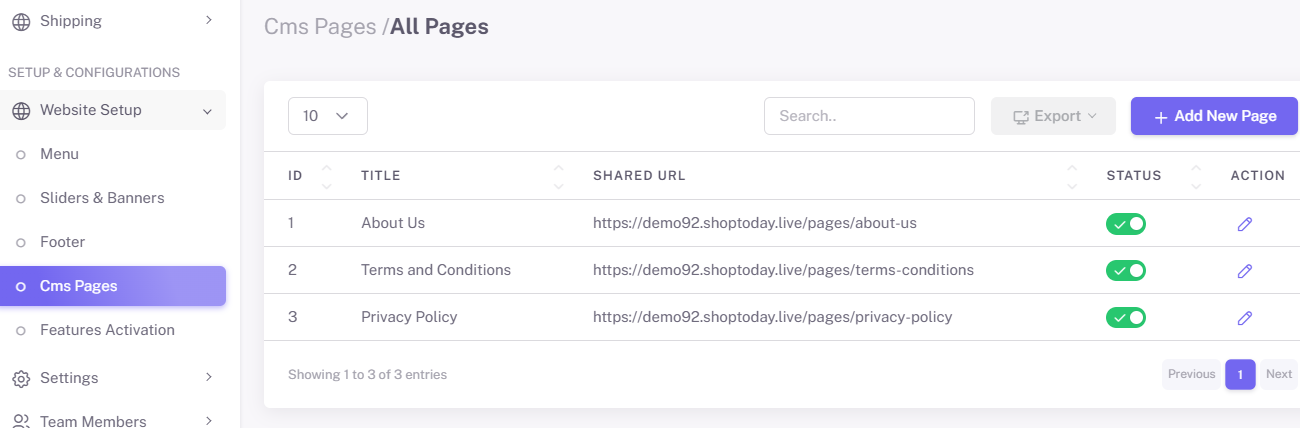
CMS Pages :
-
Manage and Add pages.

-
-
Features Activation:
select which features you want to activate for the user section , header section and landing page section.

Configuring System Settings
Proper system settings ensure your store operates smoothly. Here’s how to configure them:
-
Access System Settings:
-
Go to the "Settings" menu from the dashboard under 'Set up and configuration'.
-
-
System Settings:
-
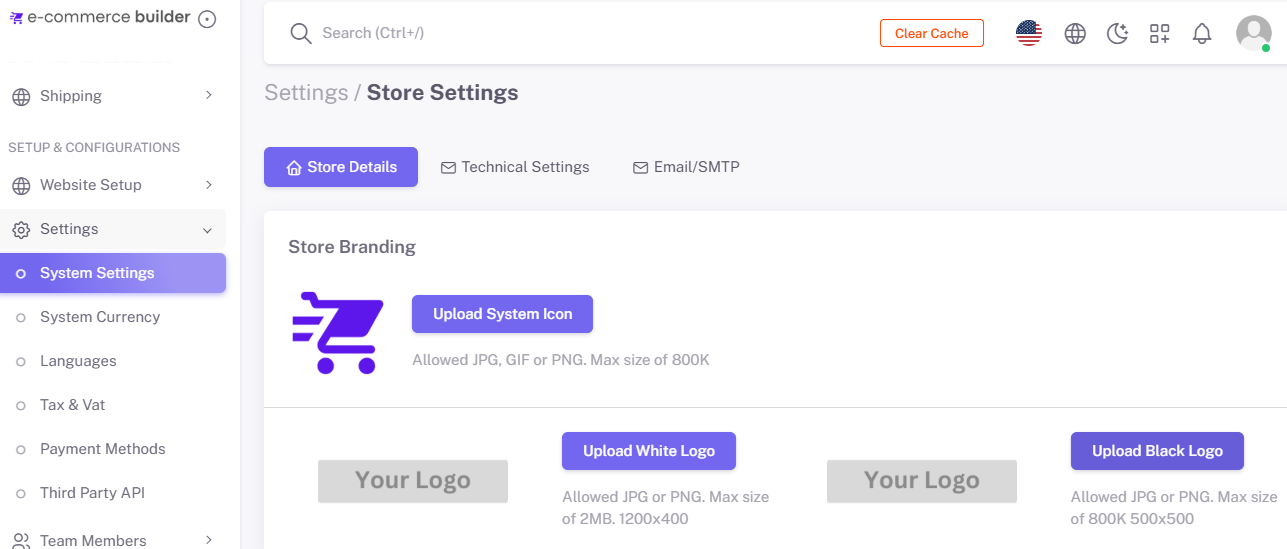
Set your store details - store name, logo, and favicon.

-
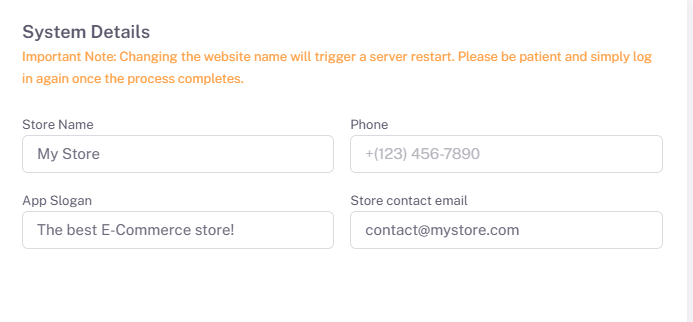
Define your business email and contact information under 'System Settings -> System Details'.

-
-
Regional Settings:
-
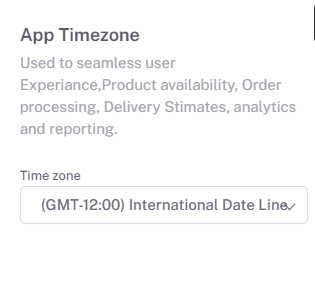
Configure the default language and time zone under 'System Settings -> App Timezone'.

-
- Billing Settings: Set up You billing information under the system settings tab.

-
Tax Settings:
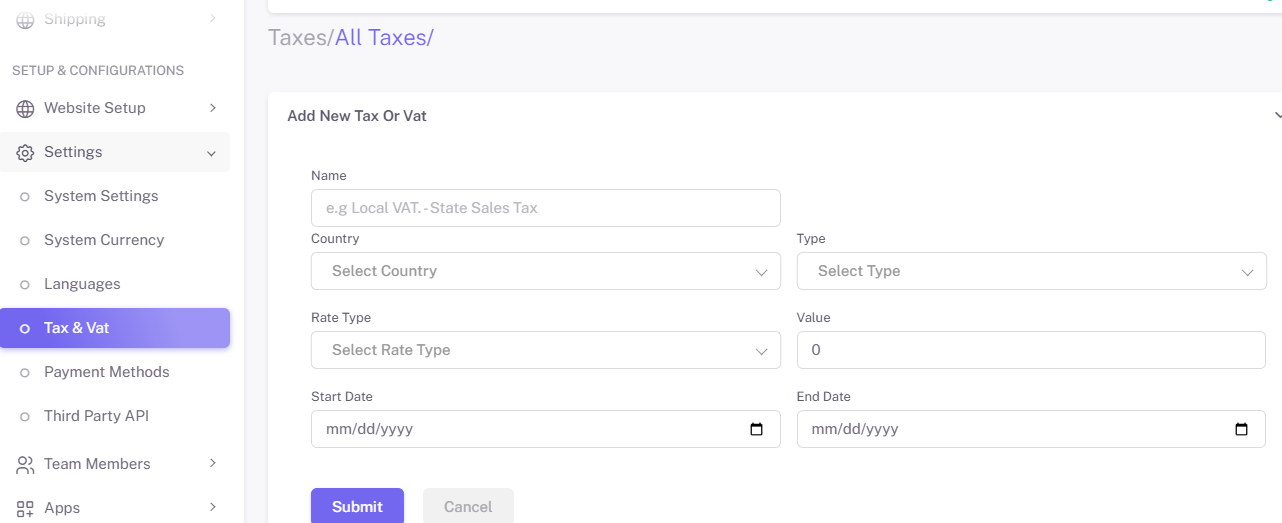
- Go to 'Tax & Vat' tab under 'Setup and configuration' section.
-
Enable tax calculations and define regional tax rates.


Pro Tip: Regularly review and update settings to ensure they reflect current business needs.
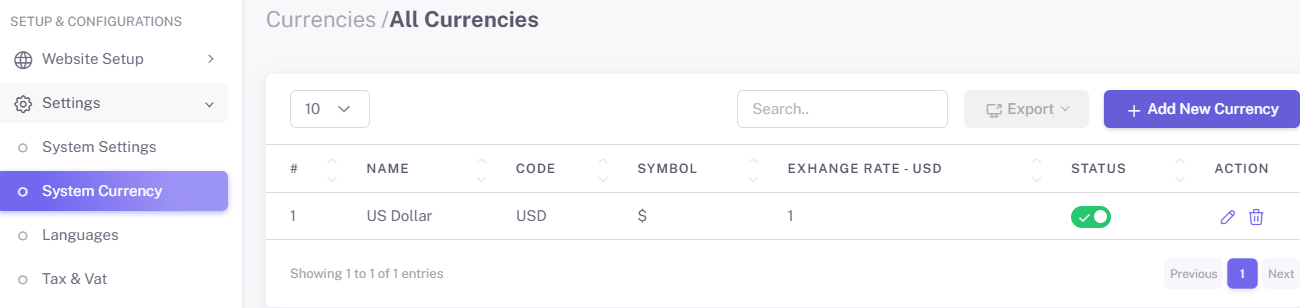
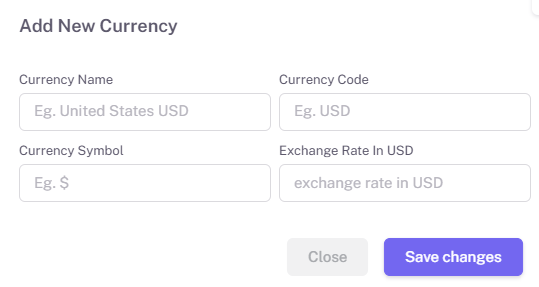
Setting Up System Currencies
Offering multi-currency options can expand your global reach. Here’s how to set up system currencies:
-
Navigate to Currencies:
-
Go to 'Setup and Configuration'' -> "Settings" then select the 'System Currencies' tab.
-
-
Add Currencies:
-
Select from a list of supported currencies.
-
Set the exchange rate manually or enable automatic updates.
-
-
Define a Default Currency:
-
Choose the primary currency for your store.
-
-
Display Options:
-
Select whether to show currency symbols and separators (e.g., $1,000 vs. 1000 USD).


-
Pro Tip: Use a reliable currency API for real-time exchange rate updates.
Managing Shipping Options
Streamlined shipping management ensures timely delivery and a positive customer experience.
First Visit to the Shipping Settings:
-
- Visit the 'Shipping' tab under 'Shipping and Logistics' section.
- Choose the shipping method ( Active methods, Delivery Options, Shipping Countries, Shipping states, Shipping Cities)
-
Choose shipping providers and configure flat-rate or weight-based options.
Follow these steps:
-
Set Up Shipping Zones:
-
Define regions or countries you’ll ship to.
-
Assign shipping rates to each zone.
-
-
Configure Shipping Methods:
-
Enable flat-rate, free shipping, or dynamic shipping options based on weight or cart value.
-
Integrate with carriers like FedEx, UPS, or DHL for real-time rates.
-
-
Enable Tracking:
-
Provide tracking numbers to customers via automated emails.

-
Pro Tip: Offer free shipping for orders above a specific value to encourage larger purchases.
2. Managing Your Online Store
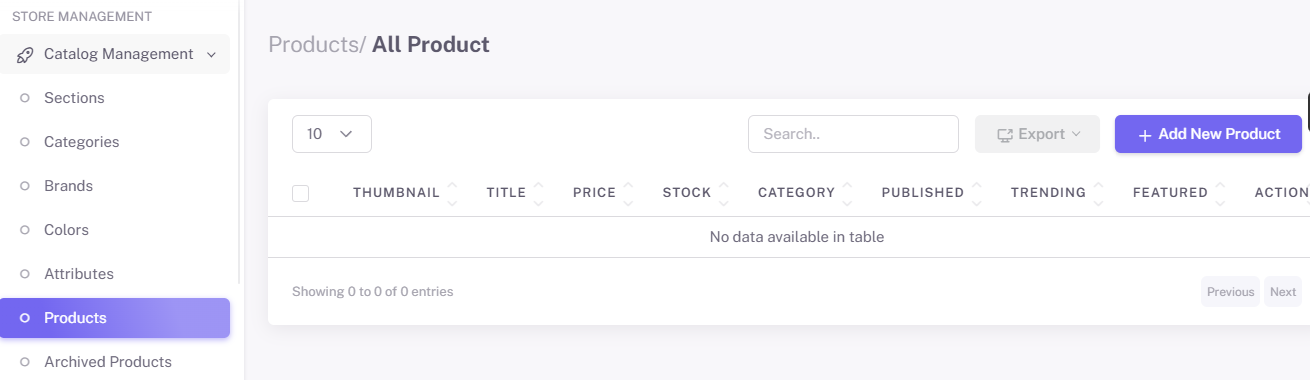
Product Catalog Management
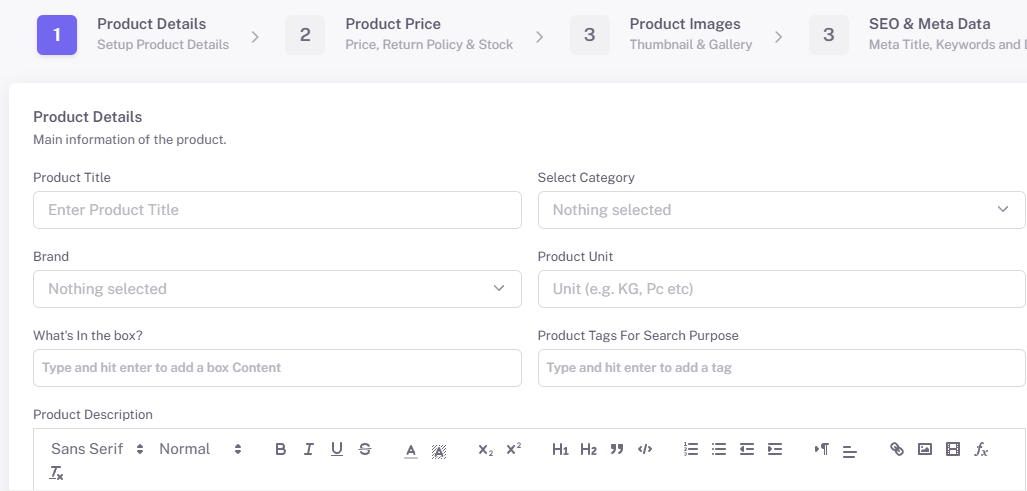
Manage products under the 'Store Management' section in the dashboard. Go to 'Catalog Management' -> 'Products'.
-
Add Products:
-
Enter product details like name, description, price, and SKU.
-
Upload high-resolution images.


-
-
Organize Products:
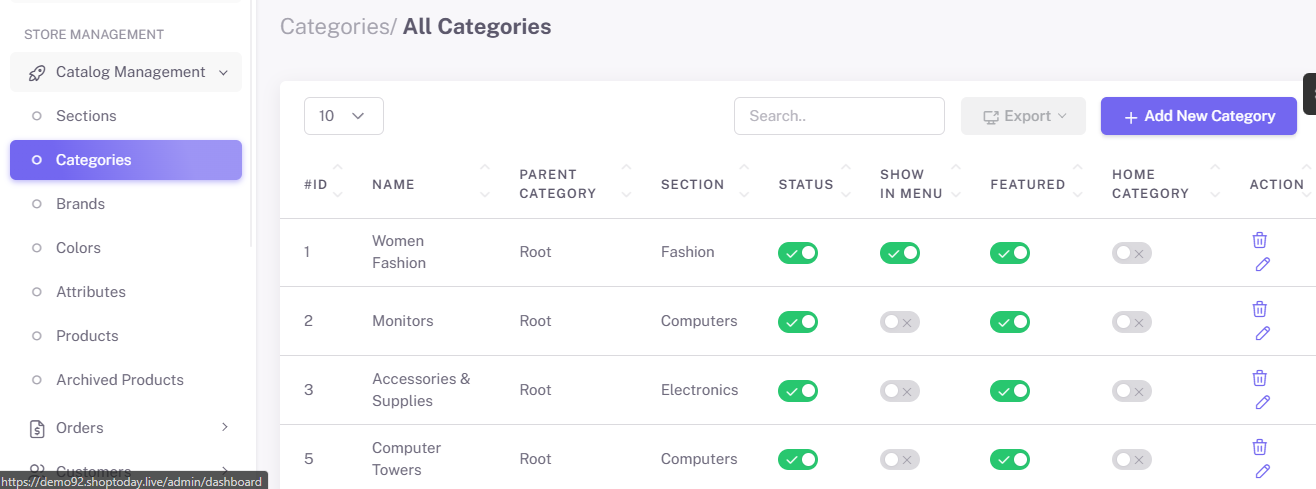
- 'Catalog Management' -> 'Categories'
-
Create categories and tags to make navigation easier.

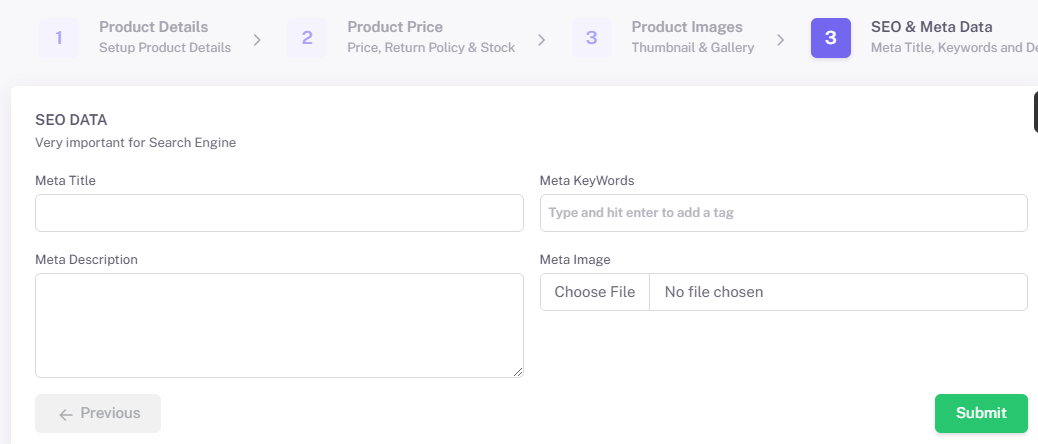
- Optimize for SEO:
-
Upon adding a product, the SEO and Meta step is important to help optimize your search engine.
-
Add meta titles and descriptions.
-
Use keywords relevant to your niche.

-
Order Processing
-
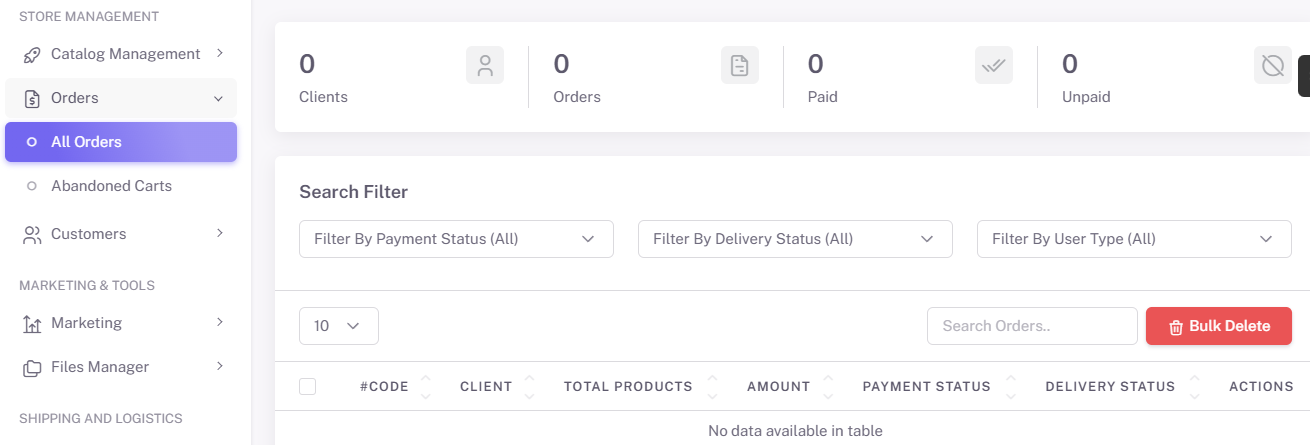
View and manage orders from the "Orders" dashboard under 'Store Management'.
-
Generate invoices and packing slips with one click.
-
Update order status (e.g., Processing, Shipped, Completed).
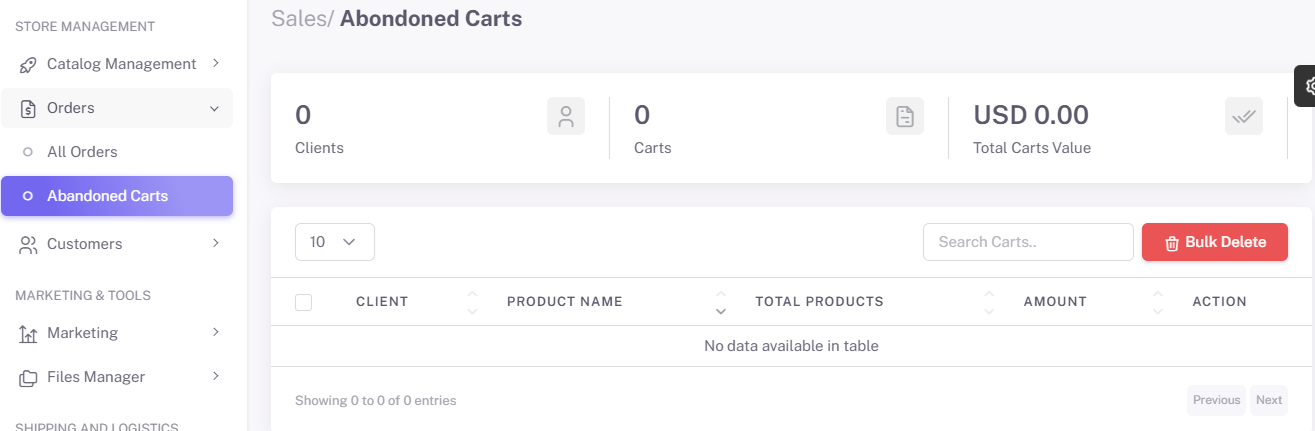
- Manage Abandoned Carts.
3. Advanced Features
Promotions
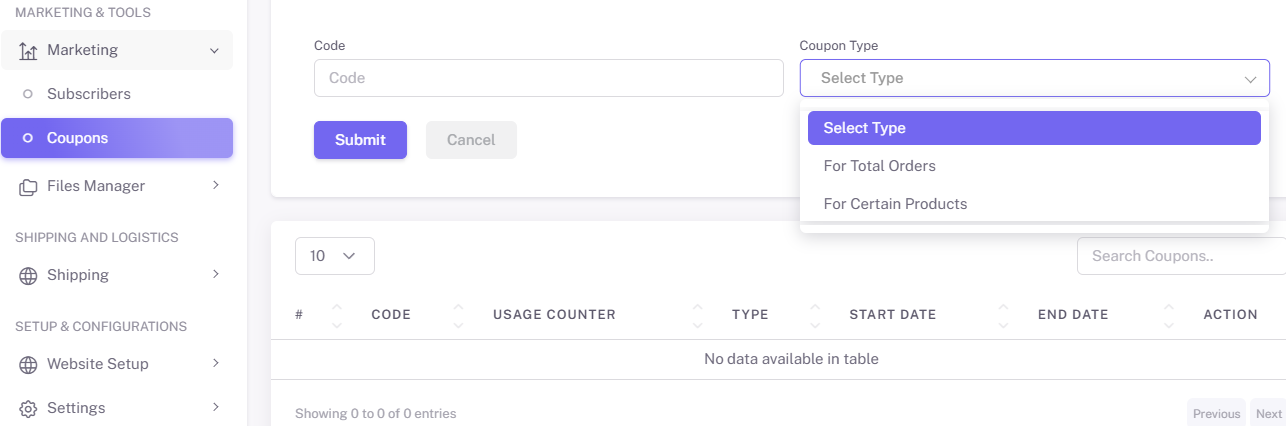
- Find 'Coupons; under 'Marketing Tools' -> 'Marketing'.
-
Create discount codes for seasonal sales or special promotions.
-
Set conditions (e.g., minimum order value, applicable categories).
- Create coupons for total or certain products.

Payment Gateway Integration
- Find 'Payment Methods' under 'Setup and Configuration' -> 'Settings'.
-
Connect your store with payment processors like Stripe, PayPal, or Square.
-
Enable multiple payment methods, including credit cards and digital wallets.


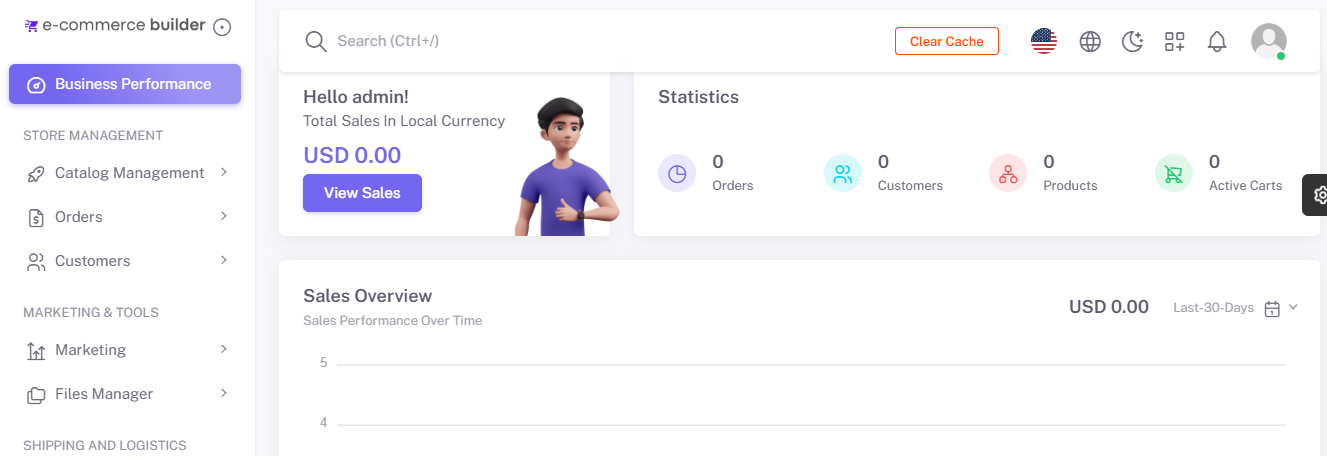
Reporting and Analytics
-
under 'Business Performance', Access detailed reports on:
-
Sales performance.
-
Earning reports.
-
Product popularity.
-
-
Use insights to refine your marketing and sales strategies.


4. Support and Troubleshooting
-
Access a dedicated support portal for technical assistance.
-
Browse the FAQ section for solutions to common issues.
-
Submit tickets for advanced troubleshooting.
With ResellPortal E-Commerce Software, you have all the tools you need to build and scale your online store. From intuitive setup and configuration to advanced analytics and branding features, ResellPortal empowers sellers to deliver exceptional shopping experiences. Explore the platform and take your e-commerce business to the next level!
Online Store Management
Welcome to ResellPortal! As a reseller, you have access to advanced tools to help your clients manage their online stores efficiently. This guide covers the essential features and processes for managing the product catalog, creating promotions, and utilizing the file manager to enhance the e-commerce experience for your clients.
1. Managing the Product Catalog
Setting Up Your Catalog
A well-organized product catalog is crucial for showcasing products effectively. Here’s how to set it up:
Pro Tip: Regularly review the catalog to keep categories and products up-to-date.
Adding and Managing Product Variations
Product variations allow you to offer multiple options for a single product, such as sizes, colors, or styles. Here’s how to manage them:
Pro Tip: Use high-quality images for each variation to enhance the customer experience.
3. Creating and Managing Coupons
Promotions are key to driving sales and engaging customers. Follow these steps to create and manage coupons:
-
Access the Coupons Section:
-
Go to "Marketing Tools" in the dashboard and select "Coupons."
-
-
Create a New Coupon:
-
Enter a unique coupon code (e.g., "SUMMER20").
-
Define discount type (percentage or flat amount).
-
Set the expiration date and usage limits (e.g., one-time use).
-
-
Assign Conditions:
-
Choose specific products, categories, or cart values where the coupon applies.
-
Example: "20% off orders over $50."
-
-
Activate and Track Coupons:
-
Activate the coupon and monitor its performance using the built-in analytics tool.
-
Pro Tip: Run seasonal campaigns with targeted coupons to attract repeat customers.
4. Using the File Manager
The file manager simplifies the process of uploading and managing media assets for your clients’ online stores. Here’s how to use it:
-
Access the File Manager:
-
Navigate to the "File Manager" in the "Store Management" section.
-
-
Upload Files:
-
Drag and drop images, videos, and documents into the file manager.
-
Organize assets into folders for easy access.
-
-
Optimize Media Files:
-
Use the built-in editor to resize or crop images before assigning them to products or banners.
-
-
Assign Media to Products:
-
From the product page, link images or videos stored in the file manager to create engaging visuals.
-
Pro Tip: Regularly audit the file manager to remove unused files and free up storage space.
5. Tips and Best Practices
-
Maintain Consistency:
-
Ensure uniform formatting for product names, descriptions, and images across the catalog.
-
-
Analyze Promotions:
-
Use coupon performance data to refine marketing strategies.
-
-
Use Quality Media:
-
High-resolution images and videos improve user engagement and conversion rates.
-
-
Stay Organized:
-
Keep categories, product variations, and media assets well-structured to enhance navigation and efficiency.
-
By mastering these features, you can provide a seamless and professional e-commerce experience for your clients. ResellPortal empowers resellers with the tools needed to manage product catalogs, run effective promotions, and streamline media management. Explore these capabilities to support your clients and grow your business!