Software Usage
The Software Usage Documentation is a comprehensive guide designed to help you and your clients navigate and operate the various software products offered through resellportal You are encouraged to share this material with your clients to ensure they can confidently use the solutions provided. Covering everything from initial setup to advanced configurations, this guide ensures a smooth user experience. By following these instructions, your clients can fully utilize their software solutions, enhancing satisfaction and minimizing support needs.
General Navigation and Overview
Each SaaS product has a unique interface but shares common elements such as dashboards, account settings, and usage statistics. This section guides users through logging in, navigating key features, and accessing essential tools. Step-by-step instructions make it easy for even non-technical users to get started quickly.
Setting Up and Configuring the Software
After activation, clients receive login credentials and can begin customizing their software. This part covers initial configurations, creating user profiles, and adjusting settings to optimize performance. Clear explanations ensure clients understand how to personalize the software to meet their needs.
Using Core Features
This section provides detailed instructions on using the primary features of each software product. Whether configuring a VPN, managing hosting accounts, or automating workflows, the guide simplifies each process with clear steps and practical examples.
- VPN Package
- How to Resell
- Using VPN for Windows
- Using VPN on Mac
- Using VPN on Linux
- Downloading VPN on Android via APK
- Using VPN on Fire TV / Android TV
- Downloading VPN via Google Play
- Downloading VPN via iTunes Store
- Web Hosting (cPanel w/ WordPress Install)
- Getting Started
- About Emails & Files Management
- About FTP Connections
- About Databases
- About Domains
- About WP ToolKit
- About Cron jobs
- Social Media Services (SMM)
- Appointment Scheduling
- Web Design Services
- SEO Services
- CRM (Customer Relationship Manager)
- E-Sim Data Plans
- Website Builder
- AI Business Tool Suite
- Activating AI Business Tool
- AI Live Chat Bot
- AI Dynamic FAQ Knowledgebase
- AI Lead Capture Bot
- AI Appointment Schedulers
- AI Product Recommender
- AI QR Campaign Generator
- AI Competitor Monitor
- AI Market Domination
- AI Local Leads Finder
- AI Blog Generator
- AI Website Health Monitor
- AI Business Intelligence
- AI Email Auto-Responder
- AI CRM
- AI Review Responder
- AI Voice Agent (24/7 Smart Receptionist)
- AI Contract & Document Manager
- Plugin & Theme White Label
- Social Media Automation
- Invoicing with AI
- Domain registration
- Document Signing Software
VPN Package
Deploy a secure, high-speed VPN for your clients in five simple steps:
-
Navigate to Marketplace: Go to the Wholesale Marketplace tab in your sidebar.
-
Select Client: Choose to Add New Client or select an Existing Client.
-
Choose Product: Find and select VPN Service from the product list.
-
Configure Account: Enter a unique VPN Username and select your preferred Billing Cycle (Monthly, Quarterly, Bi-Annual, or Annual).
-
Activate: Click Add Service to Client to provision the account instantly.
-
Manage: Once added, go to the Services tab to view the active service, access login credentials, or manage the subscription.
Note: Your Reseller Wallet must be topped up with a minimum balance of $20.00 to activate new services.
How to Resell
1. Choose a Plan:
Select the pricing plan that suits your target market.
2. Customize Branding (optional):
Upgrade to the white label option if you'd like your own branding. By default, we supply you apps with no brand to send to your clients.
3. Set Up Sales Channels:
Decide where you will sell the VPN software (e.g., website, social media, direct sales). We recommend at the minimum to have your own website where users can place an order and you email upon purchase their login details that you created.
4. Promote:
Use our marketing materials or create your own to promote the VPN software to your audience. We recommend marketing to the ideal audience who uses VPN the most (geographically banned users, gamers, privacy focused) - be creative.
5. Sell and Earn:
Start selling the VPN software and keep the recurring revenue profit, and make sure to give your customers great support if they have questions installing the VPN apps or with usage.
Using VPN for Windows
Ensure your customers can easily access and install the VPN software on their preferred devices. Here is the download link for Windows platform:
Step 1: Download the VPN Client
-
Click on the Download Link:
- Click the following link to download the VPN Client executable file: Download VPN Client.
-
Save the File:
- Once you click on the link, your browser will prompt you to either Open, Save, or Save As. Choose the Save option.
- Select a folder where you want to save the installer file (e.g., Desktop or Downloads folder).
-
Wait for the Download to Complete:
- Wait for the download to finish before proceeding to the installation step.
Step 2: Install the VPN Client
-
Locate the Downloaded File:
- Navigate to the folder where you saved the downloaded file (
vpnclient.exe).
- Navigate to the folder where you saved the downloaded file (
-
Run the Installer:
- Double-click on the
vpnclient.exefile to launch the installation. - If you see a security prompt (User Account Control), click Yes to allow the installation.
- Double-click on the
-
Follow the Installation Wizard:
- Click Next in the setup wizard to proceed.
- Review and accept the license agreement, if prompted.
- Select the destination folder (default options are typically fine).
- Click Install to begin the installation.
-
Complete the Installation:
- After the installation is complete, click Finish.
- If prompted, restart your computer to ensure the VPN client is properly set up.
Step 3: Open the VPN Client and Configure Settings
-
Launch the VPN Client:
- Go to the Start Menu or use the desktop shortcut named "VPN Client" to open the application.
-
Go to Settings:
- Once the VPN client is open, look for a Settings option in the menu. This is usually located in the top-right corner or accessible via an icon (often resembling a gear or wrench).
-
Enter VPN Credentials:
- In the Settings menu, you will find fields for entering your VPN account information:
- Username: Enter the username provided by your VPN provider.
- Password: Enter the password corresponding to your account.
- Note: Since this client doesn’t use traditional login at the main interface, entering your credentials in the Settings is essential.
- In the Settings menu, you will find fields for entering your VPN account information:
-
Save the Settings:
- Once you have entered your username and password, click Save or Apply to store these credentials.
Step 4: Connect to the VPN Server
-
Select the VPN Profile:
- On the main screen, select the newly created VPN profile.
-
Click on the Connect Button:
- Click Connect to initiate the connection.
-
Wait for Connection:
- The VPN client will display a status indicator. Once connected, the status should change to Connected.
Step 5: Disconnect from the VPN
-
Open the VPN Client:
- If the VPN client is minimized, click on its icon in the system tray to open it.
-
Click the Disconnect Button:
- Select the active VPN profile and click Disconnect.
-
Exit the Application:
- Once disconnected, you can close the VPN client if you no longer need it.
Troubleshooting and Tips
-
Issue with Username or Password:
- Double-check that you entered your username and password correctly in the Settings menu.
- If you forgot your credentials, contact your VPN provider.
-
Unable to Connect:
- Ensure the server address is correct.
- Check if a firewall or antivirus is blocking the VPN client.
-
Connection Drops Frequently:
- Change the protocol (e.g., switch from TCP to UDP).
- Select a different server location.
-
Slow Internet Speed:
- Try connecting to a closer server.
- Check your network connection independently.
Using VPN on Mac
Ensure your customers can easily access and install the VPN software on their preferred devices. Here is the download links for Mac platforms:
Here are the steps:
Step 1: Download the VPN Client
1. Click on the Download Link:
Click on the following link to download the VPN Client for macOS: [Download VPN Client](https://vpnclient.app/current/vpnclient/vpnclient.dmg).
2. Save the File:
Your browser will start downloading the `.dmg` file automatically. If prompted, select *Save* and choose the location (e.g., Downloads folder).
3. Wait for the Download to Complete:
Once the download is complete, proceed to the next step.
Step 2: Install the VPN Client
1. Locate the Downloaded File:
Navigate to the folder where the `vpnclient.dmg` file was saved (usually the Downloads folder).
2. Open the DMG File:
Double-click on the `vpnclient.dmg` file to open the installer.
3. Install the VPN Client:
In the window that appears, drag the *VPN Client* icon into the *Applications* folder.
4. Launch the VPN Client:
Go to the *Applications* folder and find the VPN Client application.
Double-click on it to open the application.
5. Approve Installation (If Required):
If macOS displays a security warning, go to *System Preferences* → *Security & Privacy* and click *Open Anyway* to approve the app.
Step 3: Open the VPN Client and Configure Settings
1. Launch the VPN Client:
Open the VPN Client from your *Applications* folder.
2. Open the Settings Menu:
Once the application is open, click on the Settings option. It may appear as a gear icon in the menu or under the VPN Client dropdown in the top menu bar.
3. Enter VPN Credentials in Settings:
In the Settings menu, you will find fields to input your VPN credentials. Enter the following information:
- Username: Type your VPN username in the Username field.
- Password: Enter the VPN password in the Password field.
4. Save the Credentials:
Click Save or Apply to store these settings. Entering your credentials in the Settings menu is essential because this VPN client does not have a traditional login interface at startup.
5. Verify the Configuration:
Make sure that the Username and Password fields are filled correctly. If left empty, the connection will not work.
Step 4: Connect to the VPN Server
1. Select the VPN Profile:
On the main screen, select the VPN profile you created.
2. Click on the Connect Button:
Click Connect to initiate the VPN connection.
3. Verify the Connection:
Wait until the status changes to *Connected*. You can confirm the connection by checking your IP address using an online tool like [https://whatismyipaddress.com](https://whatismyipaddress.com).
Step 5: Disconnect from the VPN
1. Open the VPN Client:
If minimized, click the icon in the top menu bar to reopen the client.
2. Click the Disconnect Button:
Select the active VPN profile and click *Disconnect*.
3. Exit the Application:
Once disconnected, you can close the VPN client if you no longer need it.
Troubleshooting and Tips
1. Incorrect Username or Password:
Double-check that you entered your username and password correctly in the *Settings* menu.
2. Unable to Connect:
Ensure that the server address is accurate and you’ve selected the correct protocol.
If a firewall or antivirus is enabled, temporarily disable it to see if it resolves the issue.
3. Slow VPN Speeds:
Connect to a different server.
Close any bandwidth-heavy applications running in the background.
4. MacOS Security Warnings:
Go to *System Preferences* → Security & Privacy and approve the application under General settings.
5. Uninstalling the VPN Client:
Go to the *Applications* folder.
Drag the *VPN Client* icon to the Trash.
Empty the *Trash* to remove the application completely.
Using VPN on Linux
Ensure your customers can easily access and install the VPN software on their preferred devices. Here is the download link for Linux platforms:
Step 1: Download the VPN Client
-
Open a terminal on your Linux machine.
-
Use the following command to download the VPN Client:
wget https://vpnclient.app/current/vpnclient/vpnclient.run -
The file will be downloaded to the directory where you ran the command (usually the home directory unless specified otherwise).
Step 2: Make the File Executable
Step 3: Install the VPN Client
-
Run the installer with the following command:
sudo ./vpnclient.run -
The system will prompt you for your password to install the VPN client.
-
Follow any on-screen prompts during the installation process. Once complete, the VPN client will be installed.
Step 4: Configure the VPN Client Settings
-
Open the VPN client using the command:
vpnclientAlternatively, if the GUI is installed, you can launch it from your applications menu.
-
Go to the settings menu in the application. This is typically accessible through the top menu bar or a gear icon.
-
Locate the fields for entering your username and password.
- Username: Enter the VPN username provided by your service provider.
- Password: Enter your corresponding password.
-
Save the settings to ensure the credentials are stored for future use.
Step 5: Connect to the VPN Server
- From the main interface of the VPN client, select the server you want to connect to.
- Click on the connect button to initiate the connection.
- Once connected, the client will show the connection status as active.
Step 6: Disconnect from the VPN
- When you are done using the VPN, go back to the client’s main screen.
- Click on the disconnect button to terminate the VPN connection.
- Close the application if you do not need it.
Troubleshooting and Tips
-
If the command
vpnclientis not recognized, try restarting your terminal or adding the application path to your system’s PATH environment variable. -
Connection issues may be resolved by double-checking your username and password in the settings menu.
-
Firewall or network security software on your Linux system may block the VPN connection. Disable it temporarily to test if it’s the source of the issue.
-
To uninstall the VPN Client, use the following command in your terminal:
sudo rm -rf /opt/vpnclientThis will remove the VPN client installation directory.
Downloading VPN on Android via APK
Ensure your customers can easily access and install the VPN software on their preferred devices. Here is the download link for Android APK platforms:

Step 1: Download the VPN Client APK
- Open a web browser on your Android device.
- Go to the following link to download the APK file: Download VPN Client APK.
- Confirm the download when prompted. Depending on your device settings, you might see a security warning—tap OK to proceed.
- Wait for the file to finish downloading. The file will be saved in your Downloads folder or the designated folder for your browser.
Step 2: Allow Installation from Unknown Sources
- Go to your device’s Settings menu.
- Scroll down and select Security or Privacy (the menu names might differ depending on your Android version).
- Find and enable Install Unknown Apps or Unknown Sources.
- If needed, select your browser (e.g., Chrome) and enable permission for installing unknown apps.
- Confirm the changes if prompted.
Step 3: Install the VPN Client
- Open the File Manager app on your Android device.
- Navigate to the Downloads folder where the APK file is saved.
- Tap on the
app-release-VPNClient.apkfile. - If a security warning appears, confirm that you want to install the app by tapping Install.
- Wait for the installation process to complete.
- Once installed, tap Open to launch the VPN Client.
Step 4: Configure the Username and Password
- Open the VPN Client app that you just installed.
- Go to the Settings menu. You can usually find this by tapping on a gear icon or the menu button in the top-right corner.
- In the Settings menu, locate the fields for entering your VPN credentials:
- Username: Enter your VPN username as provided by your service provider.
- Password: Enter your VPN password.
- Save the settings by tapping Save or Apply.
- Verify that the username and password are saved correctly in the Settings.
Step 5: Connect to the VPN Server
- Go back to the main screen of the VPN Client.
- Tap on the server or connection name to start the connection.
- The app will indicate when the VPN is successfully connected.
Step 6: Disconnect from the VPN
- To disconnect, go back to the VPN Client’s main screen.
- Tap the Disconnect button.
- You will see a confirmation that the VPN is disconnected.
Troubleshooting and Tips
- If the installation is blocked, double-check the Unknown Sources or Install Unknown Apps settings and ensure they are enabled.
- If the app cannot connect, recheck the username and password entered in the Settings menu.
- Make sure your Android version is compatible with the APK. Some older devices may not support newer apps.
Using VPN on Fire TV / Android TV
Ensure your customers can easily access and install the VPN software on their preferred devices. Here is the download link for Fire Tv/ Android TV platforms:
![]() Download APK For Fire TV/ Android TV
Download APK For Fire TV/ Android TV
Step 1: Download the VPN Client APK for Fire TV / Android TV
- Open a browser on your computer or mobile device.
- Go to the following link to download the VPN Client APK for Fire TV or Android TV: Download VPN Client for TV.
- Save the APK file to an easy-to-access location on your device (e.g., Downloads folder).
Step 2: Transfer the APK to Your Fire TV or Android TV
There are a few methods to transfer the APK file to your Fire TV or Android TV:
-
Option 1: Using a USB Drive (for Android TV):
- Copy the APK file to a USB drive.
- Insert the USB drive into your Android TV.
- Use a file manager app on your TV to locate and install the APK file.
-
Option 2: Using the Downloader App (for Fire TV):
- Install the Downloader app from the Amazon App Store on your Fire TV.
- Open the Downloader app and enter the URL:
https://321inter.net/downloads/VPNClient-tv.apk. - Download the file and select Install when prompted.
Step 3: Allow Installation from Unknown Sources
- Go to Settings on your Fire TV or Android TV.
- Navigate to Device & Software (or Device Preferences on some devices).
- Select Developer Options.
- Enable Apps from Unknown Sources for the app you are using to install the APK (e.g., Downloader).
Step 4: Install the VPN Client on Your Fire TV / Android TV
- Open the file manager app or the Downloader app (depending on how you transferred the APK).
- Locate the
VPNClient-tv.apkfile. - Select the file and choose Install.
- Wait for the installation to complete, and then select Open to launch the VPN Client app.
Step 5: Configure the Username and Password in the Settings
- Open the VPN Client app from your TV’s Apps section.
- Use your remote to navigate to the Settings menu within the VPN Client app.
- In the Settings menu, locate the fields for entering your VPN credentials:
- Username: Enter your VPN username.
- Password: Enter your VPN password.
- Save the settings by selecting the Save or Apply button using your remote.
- Make sure that the entered credentials are correct, as the app will not prompt you for these again during the connection.
Step 6: Connect to the VPN Server
- Go back to the main screen of the VPN Client app.
- Use your remote to select the connection option.
- Choose the server or connection profile that you want to use (if multiple options are available).
- Select Connect to initiate the connection.
- The app will display a message or status indicating when the VPN is successfully connected.
Step 7: Disconnect from the VPN
- To disconnect, go back to the main screen of the VPN Client app.
- Use your remote to highlight the Disconnect button.
- Confirm the disconnection when prompted.
Troubleshooting and Tips
- If the app installation fails, make sure Apps from Unknown Sources is enabled for the installation source.
- If the app cannot connect, double-check the username and password in the Settings menu.
- If using Downloader, ensure the URL is entered correctly.
- To uninstall the app, go to Settings → Applications → Manage Installed Applications → select the VPN Client app → Uninstall.
Downloading VPN via Google Play
Ensure your customers can easily access and install the VPN software on their preferred devices. Here is the download link for Google Play platforms:
Step 1: Download the VPN Client from Google Play Store
- On your Android device, open the Google Play Store app.
- In the search bar, type in VPN Client or use the direct link: VPN Client on Google Play.
- Tap on the Install button to download and install the VPN Client app on your device.
- Wait for the installation to complete.
Step 2: Launch the VPN Client
- Once installed, tap Open to launch the VPN Client app.
- Alternatively, you can find the VPN Client app icon in your app drawer and tap to open it.
Step 3: Configure the Username and Password in the Settings
- After launching the app, go to the Settings menu. This is typically accessible from a menu icon (three horizontal lines) or a gear icon within the app interface.
- In the Settings menu, locate the fields for entering your VPN account information:
- Username: Enter the VPN username provided by your service provider.
- Password: Enter the corresponding VPN password.
- Make sure both fields are correctly filled in.
- Tap Save or Apply to store your credentials in the app.
Step 4: Connect to the VPN Server
- Go back to the main screen of the VPN Client app.
- Tap on the Connect button.
- Select a server from the list (if available), or use the default server.
- The app will start connecting, and a status indicator will appear once the VPN is successfully connected.
Step 5: Disconnect from the VPN
- To disconnect, go back to the main screen of the VPN Client app.
- Tap on the Disconnect button.
- The app will confirm that the VPN connection has been terminated.
Troubleshooting and Tips
-
Incorrect Username or Password:
- Double-check the entered details in the Settings menu.
- If you have forgotten your credentials, contact your VPN provider for assistance.
-
Cannot Connect to the VPN:
- Ensure your internet connection is active.
- Try connecting to a different server if available.
-
Reinstalling the App:
- If the app behaves unexpectedly, consider uninstalling and reinstalling it from the Google Play Store.
Downloading VPN via iTunes Store
Ensure your customers can easily access and install the VPN software on their preferred devices. Here is the download link for iTunes Store platforms:

Step 1: Download the VPN Client from the App Store
- On your iPhone or iPad, open the App Store.
- In the search bar, type VPN Client or use this direct link: VPN Client on iTunes Store.
- Tap on the Get button to start downloading the VPN Client.
- If prompted, authenticate using your Apple ID, Face ID, or Touch ID.
- Wait for the app to download and install.
Step 2: Launch the VPN Client
- Once installed, tap Open to launch the VPN Client app.
- Alternatively, you can find the VPN Client icon on your home screen and tap to open it.
Step 3: Configure the Username and Password in the Settings
- When the app opens, go to the Settings menu. This is usually represented by a gear icon or can be found in the app’s main menu.
- In the Settings menu, locate the fields for entering your VPN account information:
- Username: Enter your VPN username as provided by your service provider.
- Password: Enter the corresponding password for your VPN account.
- Make sure the username and password fields are filled out correctly.
- Tap Save or Apply to store your credentials in the app.
Step 4: Connect to the VPN Server
- Go back to the main screen of the VPN Client app.
- Tap on the Connect button.
- Choose a server from the list (if there are multiple servers available) or use the default one.
- The app will indicate when the VPN is successfully connected.
Step 5: Disconnect from the VPN
- To disconnect, return to the main screen of the VPN Client app.
- Tap the Disconnect button.
- The app will confirm when the VPN is disconnected.
Troubleshooting and Tips
-
If the username or password is incorrect:
- Double-check your login details in the Settings menu.
- If you forgot your credentials, contact your VPN service provider.
-
Cannot Connect to the VPN:
- Ensure your internet connection is active.
- Try switching to a different server if multiple servers are listed.
-
Reinstall the App:
- If the app experiences issues, consider deleting and reinstalling it from the App Store.
-
App Permissions:
- Make sure to allow the VPN Client to access network configurations if prompted during setup.
Web Hosting (cPanel w/ WordPress Install)
Provision professional cPanel hosting for your clients by following these steps:
-
Navigate to Marketplace: Go to the Wholesale Marketplace tab in your sidebar.
-
Select Client: Choose to Add New Client or select an Existing Client.
-
Choose Product: Find and select Web Hosting from the product list.
-
Configure Account: Enter the cPanel Username, the Primary Domain (e.g., example.com), and select your Billing Cycle.
-
Activate: Click Add Service to Client to start the hosting service instantly.
-
Manage: Once added, go to the Services tab to view the active service, access login credentials, or manage the subscription.
Note: Always ensure your Reseller Wallet is topped up above $20.00 to successfully activate new services.
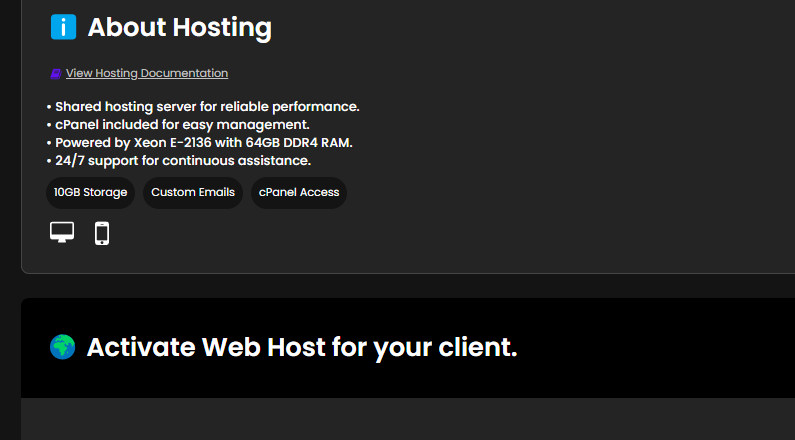
Getting Started
Welcome to the ResellPortal.com reseller system! This guide will walk you through the process of purchasing and deploying web hosting packages for your clients.
1. Account Setup
-
Sign up or log in to your account at ResellPortal.com.
-
Ensure you have sufficient balance to purchase web hosting packages.
-
If needed, top up your balance using the available payment methods.
2. Purchasing a Web Hosting Package
-
Navigate to the Activate(Manual) section on the dashboard.
-
Select the web host app.

-
Click on the Deploy app button.
-
Confirm the purchase, ensuring you have enough balance in your account.

3. Deploying the Web Hosting Package
-
After Deploying the App.
-
The system will take you to the activation page.

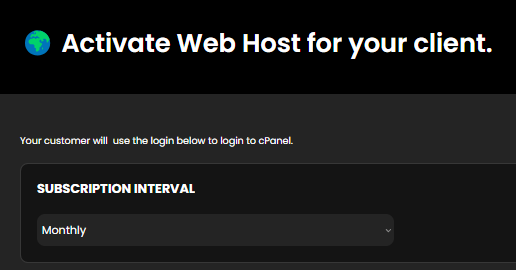
4. Activating the Web Host for a Client
-
On the activation page, select the Subscription Interval:
-
Monthly
-
Quarterly
-
Biannually
-
Annually

-
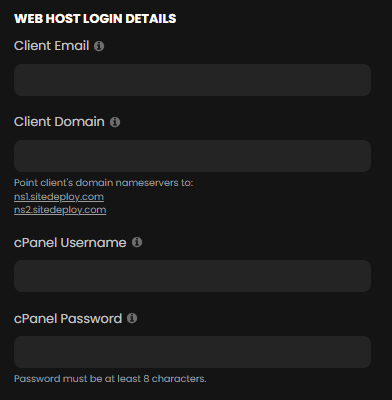
-
Enter the Client's Web Hosting Login Details:
-
Client Email
-
Client Domain
-
cPanel Username
-
cPanel Password

-
-
Instruct your client to update their domain's nameservers to point to:
-
ns1.sitedeploy.com
-
ns2.sitedeploy.com
-
How to Point a Domain to the Correct Nameservers
If your client is unsure how to point their domain to the correct nameservers, provide them with the following instructions:
-
Log in to Their Domain Registrar
-
This is the company where they purchased their domain name (e.g., Namecheap, GoDaddy, Google Domains, etc.).
-
-
Find the Domain Management Section
-
Once logged in, navigate to the domain management area or DNS settings.
-
-
Locate the Nameservers Settings
-
In the DNS or Nameserver settings, they should see an option to edit or change the nameservers.
-
-
Update the Nameservers
-
Replace the existing nameservers with:
-
ns1.sitedeploy.com
-
ns2.sitedeploy.com
-
-
-
Save Changes
-
After entering the new nameservers, they should save the changes.
-
-
Wait for Propagation
-
It can take anywhere from a few minutes to 24-48 hours for the domain changes to fully propagate across the internet.
-
-
Click Activate to complete the process.
5. Managing Active Web Hosting Accounts
-
View active client subscriptions in the Dashboard.
-
Renew, upgrade, or manage existing hosting accounts as needed.
-
Notify clients about upcoming renewals to prevent service interruptions.
Troubleshooting
If you encounter any issues:
-
Ensure you have a sufficient account balance before purchasing.
-
Double-check the client's details before activating.
-
If activation fails, verify that the domain and cPanel credentials are correct.
-
For additional support, contact ResellPortal.com Support.
By following these steps, you can efficiently manage and sell web hosting packages to your clients. Happy reselling!
For further assistance, visit ResellPortal.com Support.
About Emails & Files Management
As a reseller, understanding how to use cPanel is essential for managing web hosting services for your clients. This guide will walk you through the necessary steps to help you navigate cPanel efficiently.
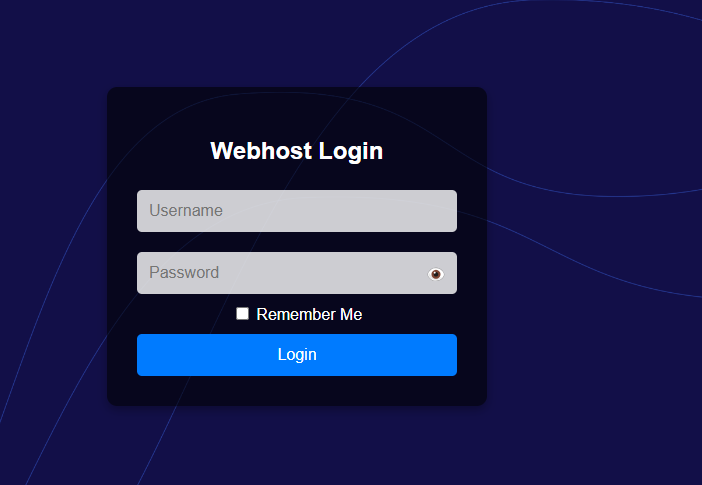
Accessing cPanel
Once you have activated a web hosting package for a client:
-
The client will receive an email containing their cPanel login link, username, and password.
-
Clients will use these credentials to log in to their cPanel interface.

As a reseller, you may also need to access cPanel for troubleshooting or assistance. You can do so from your reseller dashboard.
Navigating cPanel
Upon logging in, you will be directed to the web hosting control panel, where you can manage various tools and features.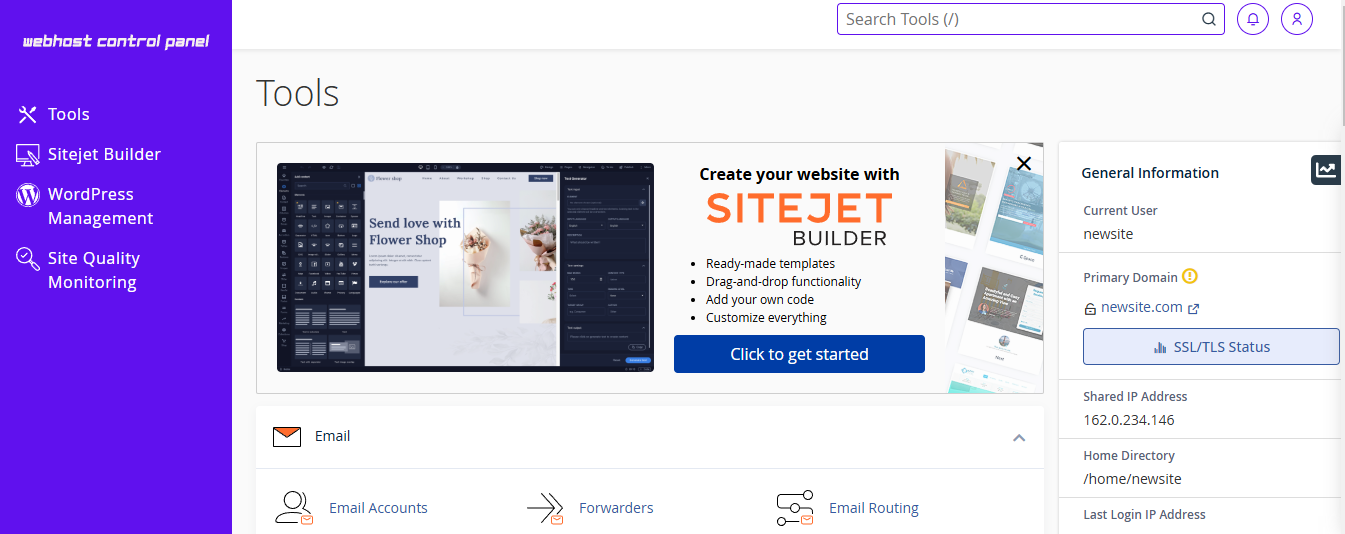
1. Managing Email Accounts
cPanel provides an Email Accounts feature, allowing users to create and manage custom email addresses linked to their domains.
Creating an Email Account
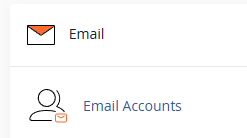
-
Navigate to Email Accounts under the Email section.

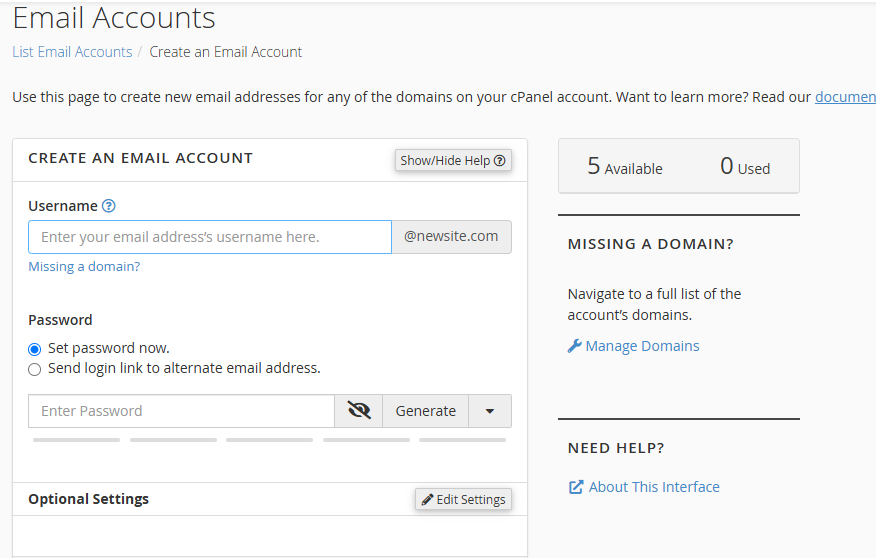
-
Click the Create button.

-
Enter the desired username (e.g.,
username@domain.com). -
Set a password manually or generate one automatically.
-
Click Create to finalize the new email account.

-
The created email account will now appear in the Email Accounts list.
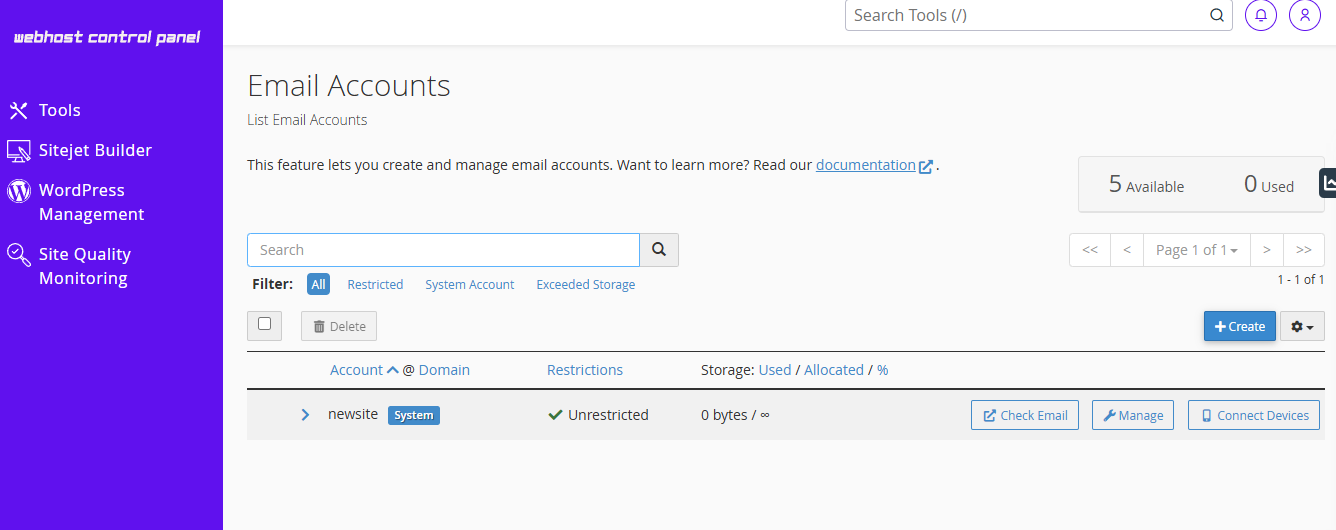
Managing Email Accounts
-
Users can filter the email accounts list by:
-
All
-
Restricted
-
System Account
-
Exceeded Storage
-
-
Users can search for specific email accounts.
-
Additional options include:
-
Connecting devices (to configure mail clients like Outlook or Thunderbird).
-
Managing storage.
-
Checking email directly from cPanel.

-
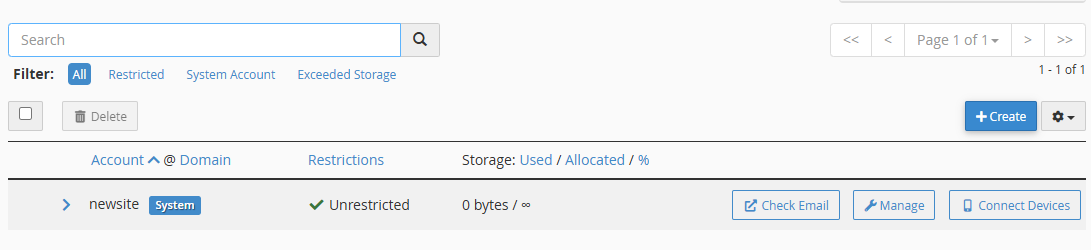
System Email Account
-
The system email account receives emails addressed to the cPanel username on the server’s hostname.
-
This account may also receive misrouted emails depending on the Default Address settings.
-
The username and password for this account are the same as the cPanel login.
-
This account cannot be deleted and has no storage quota.
2. Managing Files
cPanel includes powerful file management tools that allow users to upload, edit, and organize their website files efficiently.
File Manager
The File Manager tool provides an easy-to-use web interface for managing website files.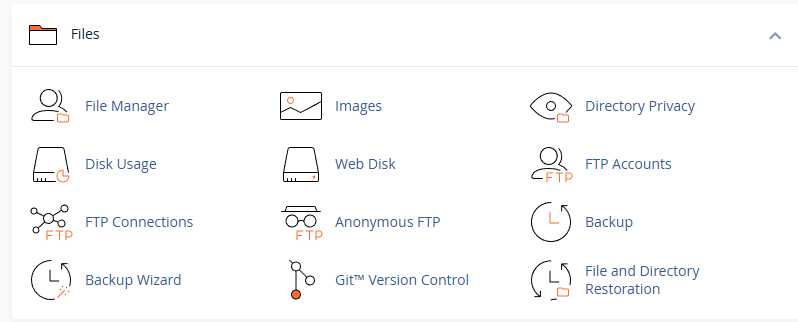
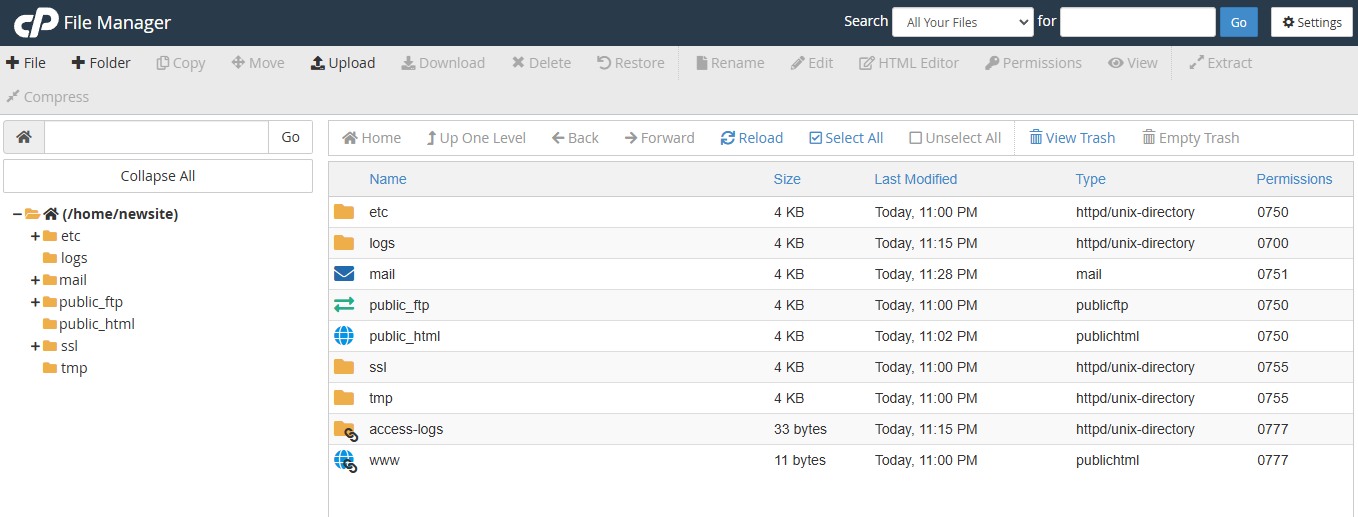
After selecting this feature:
-
The user is redirected to a File Manager topic where they can view and manage their files.
-
The File Manager displays essential details such as:
-
File Name
-
Size (in bytes)
-
Last Modified Date
-
Permissions
-
File Type
-
-
Users can perform the following actions:
-
Add a new file
-
Create a new folder
-
Upload files from their local computer
-
Edit, rename, move, copy, or delete files
-
Change file permissions

-
Backup & Restore Features
cPanel provides two primary backup tools: Backup Wizard and Backup.
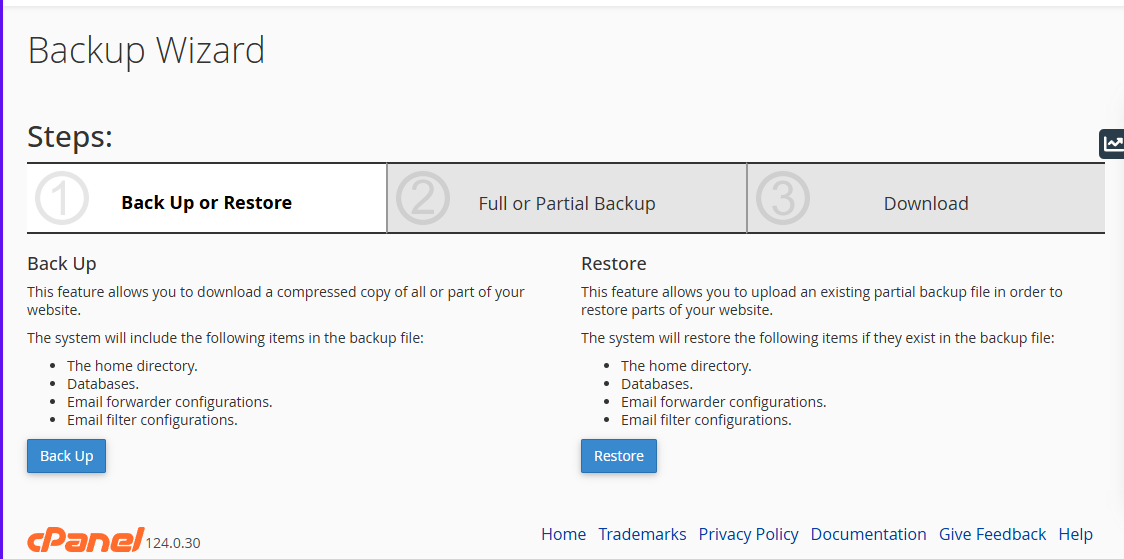
Backup Wizard
The Backup Wizard allows users to download a compressed copy of all or parts of their website. The system includes the following items in the backup file:
-
Home Directory
-
Databases
-
Email Forwarder Configurations
-
Email Filter Configurations
Users can also restore backups, allowing them to upload an existing partial backup file to restore parts of their website. The system will restore the following items if they exist in the backup file:
-
Home Directory
-
Databases
-
Email Forwarder Configurations
-
Email Filter Configurations

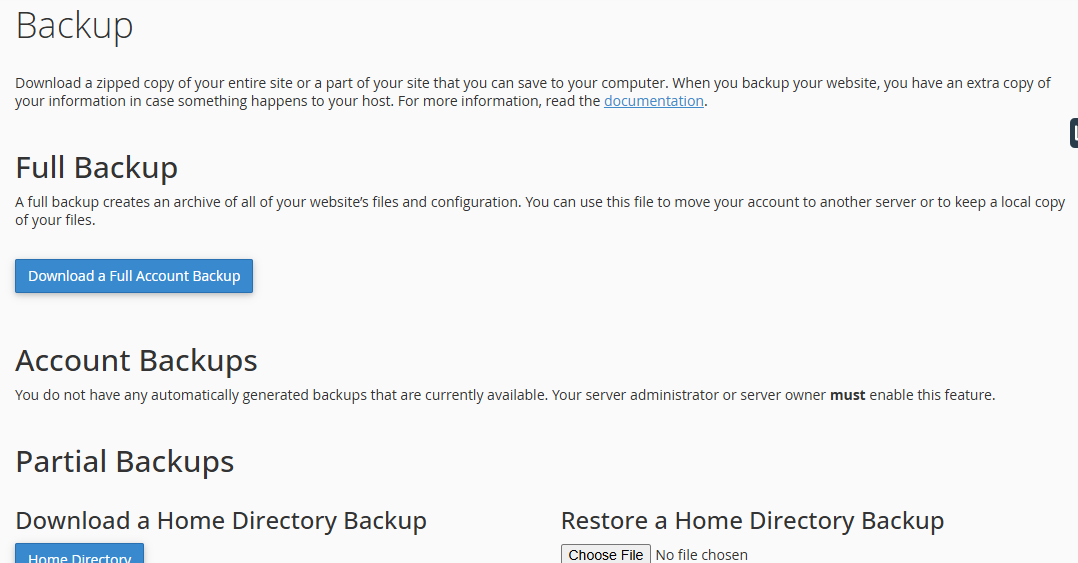
Backup Feature
The Backup tool enables users to download a zipped copy of their entire website or selected parts. This feature is useful for keeping an extra copy of website data in case of accidental loss or server issues. Users can perform:
-
Full Backups – A complete backup of their entire cPanel account, including website files, emails, and databases.
-
Partial Backups – Users can download only specific parts of their website.
-
Account Backups – Allows backing up account settings and configurations.
As a reseller, understanding cPanel functionality helps you provide better support to your clients. Ensuring that they can manage their emails, files, and backups efficiently is key to a seamless web hosting experience.
About FTP Connections
The FTP Connections feature in cPanel allows users to monitor and manage visitors logged into their website via File Transfer Protocol (FTP). This tool helps ensure security by providing visibility into active FTP sessions and the ability to terminate unauthorized connections.
Accessing the FTP Connections Tool
To monitor FTP activity:
-
Log in to cPanel using your credentials.
-
Navigate to the Files section.
-
Click on FTP Connections.


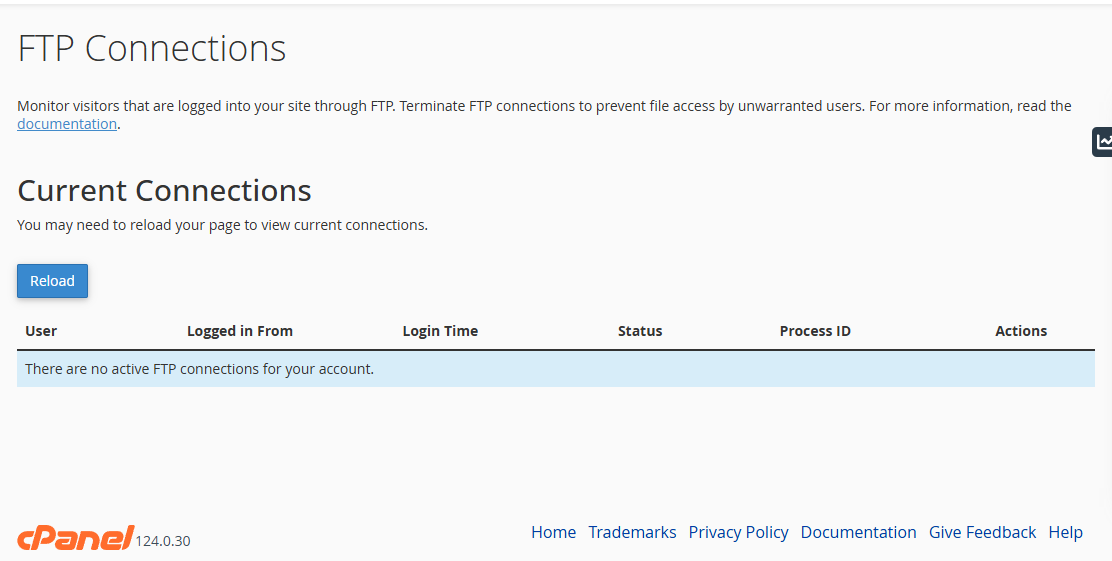
Understanding the FTP Connections Topic
The FTP Connections topic displays a list of users who are currently connected to your site via FTP. The information is presented in a table with the following columns:
-
User – The FTP username currently logged in.
-
Logged in From – The IP address of the user accessing the FTP account.
-
Login Time – The exact time when the user logged in.
-
Status – The current status of the FTP connection.
-
Process ID (PID) – A unique identifier for the active FTP session.
-
Actions – Options to terminate the connection if necessary.

How to Monitor FTP Sessions
-
Check Active FTP Users
-
The table will display all currently active FTP connections.
-
Look for unusual IP addresses or login times that may indicate unauthorized access.
-
-
Verify Login Information
-
Compare the logged-in User and IP address with known users who should have FTP access.
-
If an unknown user is logged in, it could be a security risk.
-
- Refresh the Session List: Click Reload to update the list of active sessions
Terminating Unwanted FTP Connections
If you identify an unauthorized or suspicious FTP session, follow these steps to terminate it:
-
Locate the session in the FTP Connections table.
-
Under the Actions column, click Disconnect to terminate the session.
-
The system will immediately terminate the FTP process associated with that connection.
- To confirm the termination, click Reload to verify that the session is disconnected.
Best Practices for FTP Security
-
Use Secure FTP (SFTP): Whenever possible, use SFTP instead of standard FTP for encrypted file transfers.
-
Restrict FTP Access: Limit FTP access to specific IP addresses if possible.
-
Regularly Monitor FTP Sessions: Frequently check the FTP Connections topic to ensure that only authorized users are accessing your site.
-
Change FTP Passwords Periodically: Update FTP passwords regularly to prevent unauthorized access.
The FTP Connections tool in cPanel is a crucial feature for monitoring active FTP sessions and securing your website. By regularly checking FTP activity and terminating suspicious connections, users can enhance their site’s security and prevent unauthorized file access.
About Databases
cPanel provides powerful database management tools that allow users to create, manage, and maintain databases with ease. The two primary tools available for managing databases are phpMyAdmin and the Database Wizard. These tools are essential for users who need to interact with databases, whether it’s for a web application, content management system, or any other system that relies on databases to store information.
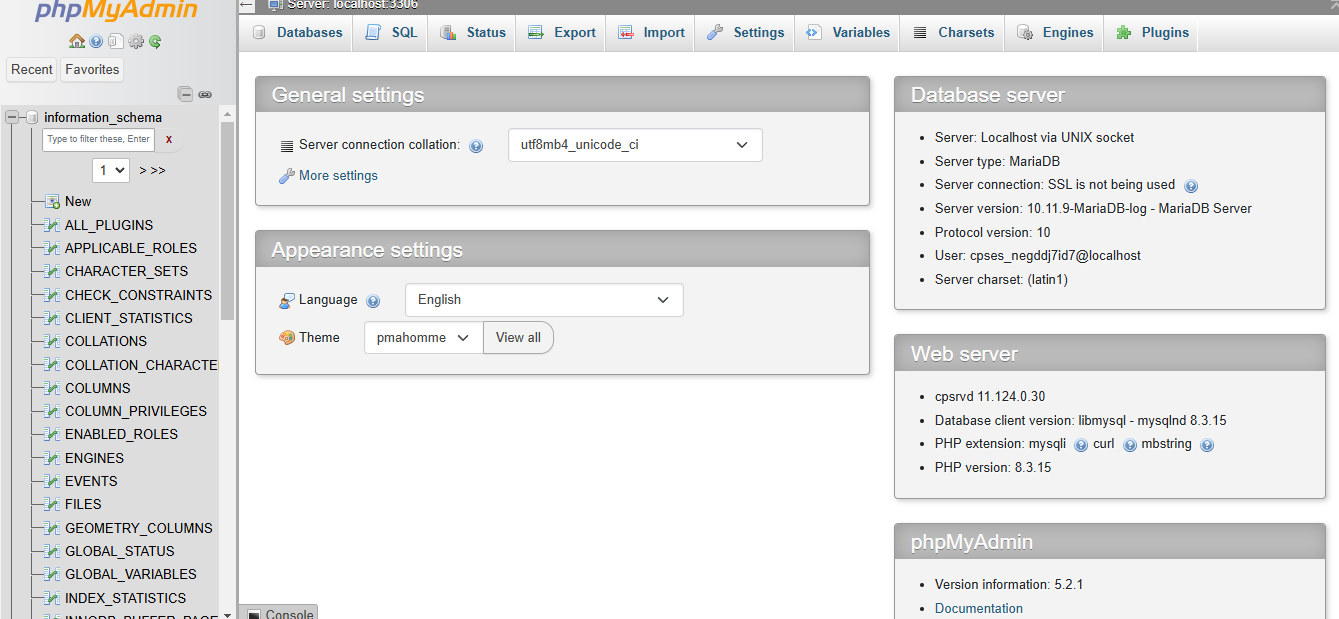
1. phpMyAdmin in cPanel
To access phpMyAdmin:

What Happens After Selecting phpMyAdmin
Once you click on phpMyAdmin, it will open a new window where you can manage your databases. phpMyAdmin is a powerful web-based tool for managing MySQL databases. It provides a user-friendly interface to interact with your databases, allowing you to perform a variety of actions such as:
Key Features of phpMyAdmin:
By using phpMyAdmin, you can perform complex database management tasks in a simplified manner through the cPanel interface.
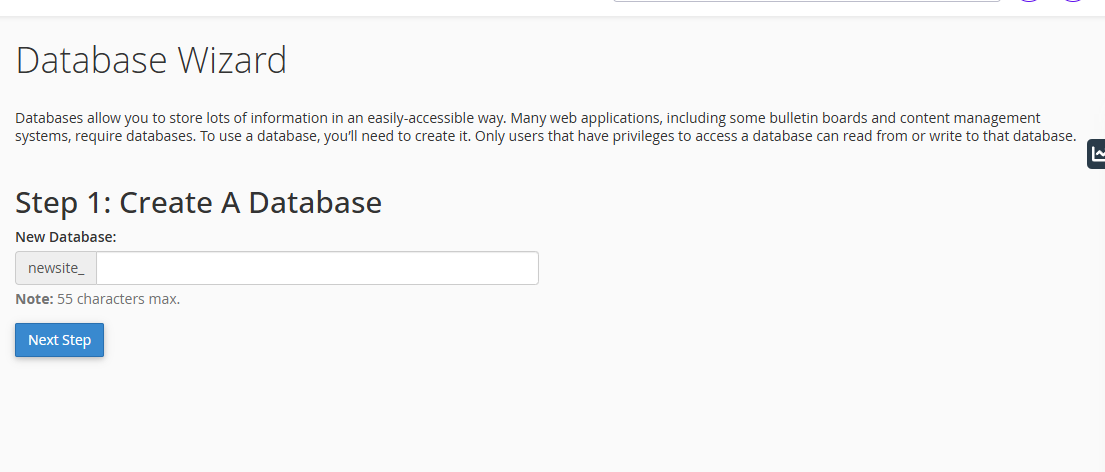
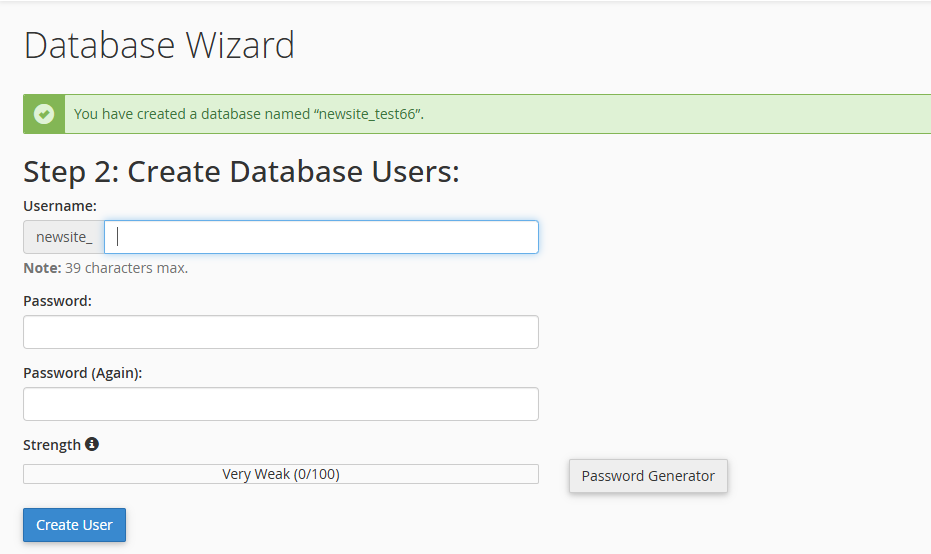
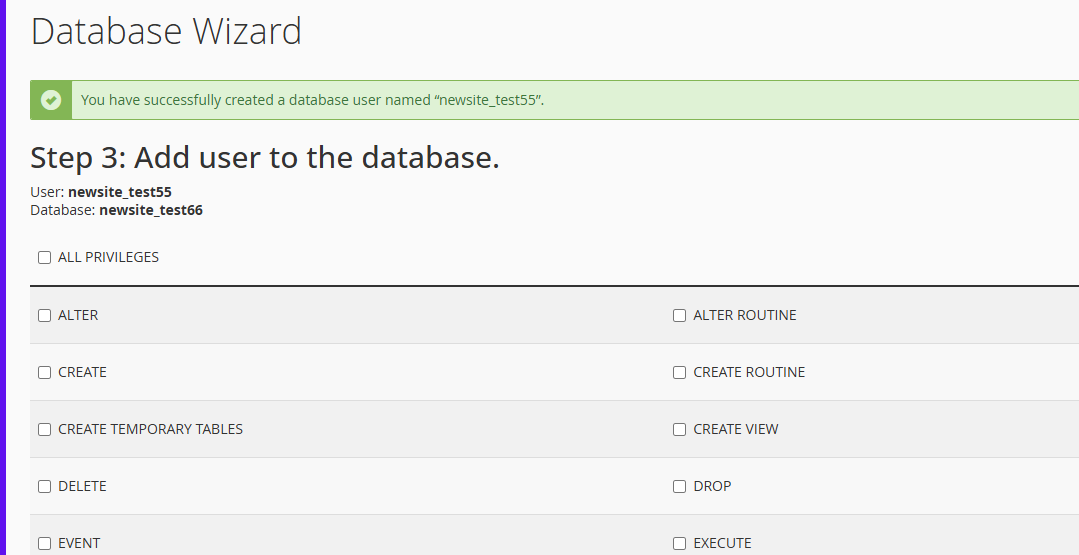
2. Database Wizard in cPanel
The Database Wizard in cPanel is an easy-to-use tool designed to help users create and manage databases without needing extensive technical knowledge. It provides a step-by-step process to create databases and assign user privileges. This feature is especially useful for users who are not familiar with SQL and want a straightforward approach to managing databases.
Accessing the Database Wizard
To access the Database Wizard:
Steps for Using the Database Wizard
Best Practices When Using the Database Wizard:
The Database Wizard is a convenient tool for users who need to create and manage databases quickly and easily. Whether you’re setting up a database for a web application or managing user permissions, the wizard simplifies the process and ensures that your databases are configured properly.
By using phpMyAdmin and the Database Wizard, you can efficiently manage your databases and ensure your web applications and websites are running smoothly.
About Domains
cPanel offers several domain management tools to help efficiently manage clients' websites. These tools allow to create websites using templates, build sites with a drag-and-drop builder, and manage domains. This documentation will walk you through each of these tools and how to use them effectively.
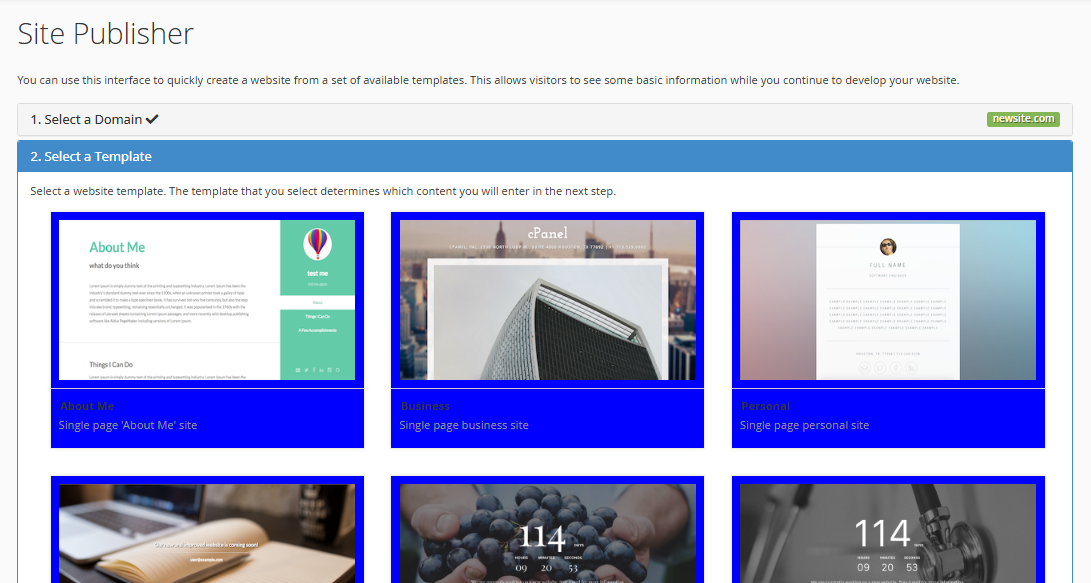
1. Site Publisher Tool
The Site Publisher tool is an easy-to-use feature that allows quick create a website using pre-designed templates. It is an ideal solution for clients who need a basic website while they continue to develop their site.
Using the Site Publisher
-
Select a Template: After entering the domain name, you can choose a pre-designed template that will form the basis of the website.
- The templates are categorized by type, including business, personal, and portfolio sites.
-
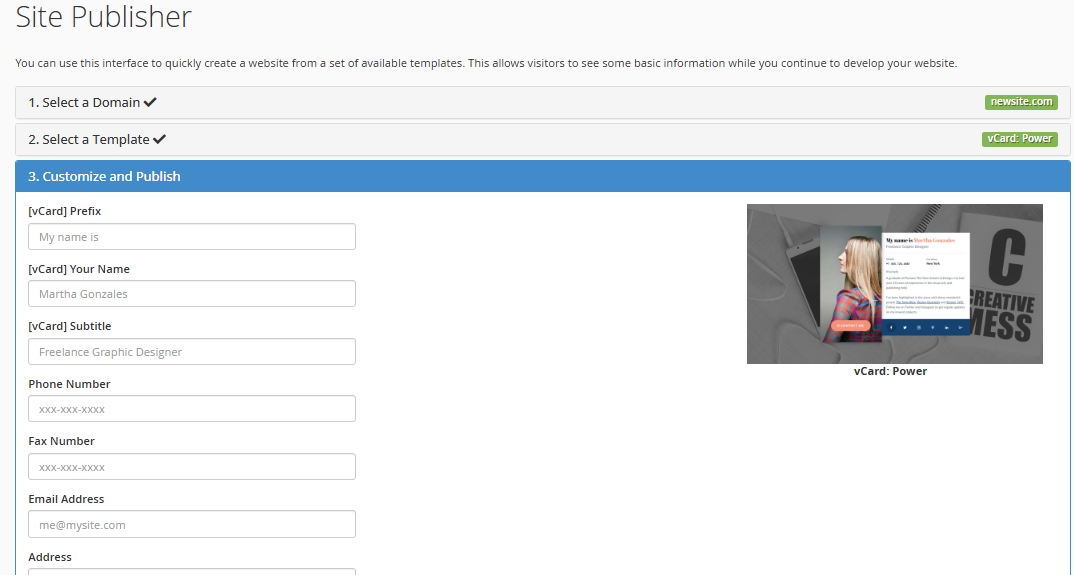
Customize the Site: After selecting the template, you can customize various sections, including:
- Business Name: Enter your company’s name.
- Tag Line: Enter a catchy tagline for your business.
- Description: Add a description of your company.
- About Us: Add information about your business, such as history and services.
- Contact Information: Enter your contact details such as:
- Street Address
- Phone Number
- Email Address
- Fax Number
- Business Hours: Specify your operating hours and any notes (e.g., weekends closed).
- Social Media Links: Link to your business’s social media accounts, such as Facebook, Twitter, and LinkedIn.
- Google Maps: Include a Google Maps link to show your physical location.
- Google Analytics: Add a Google Analytics Tracker ID to monitor website traffic.
-
Publish the Site: Once the customization is complete, click Publish to make the website live. The website will be automatically created with the selected template and details.

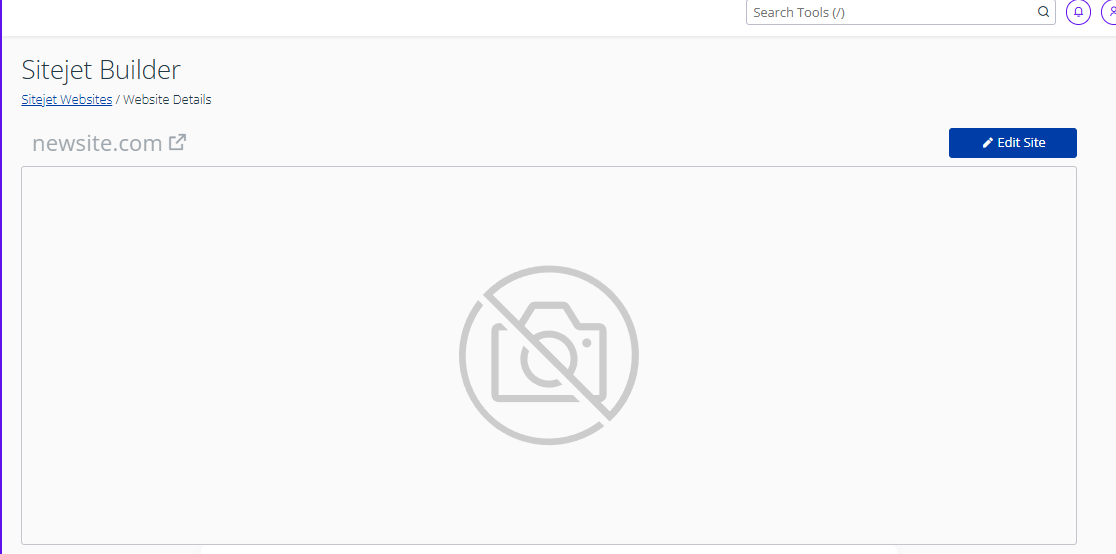
2. Sitejet Builder
The Sitejet Builder is a drag-and-drop website builder that allows creating fully customized websites for clients. With Sitejet, users can quickly edit and build websites using templates, which can be tailored to meet specific client needs.
Using the Sitejet Builder
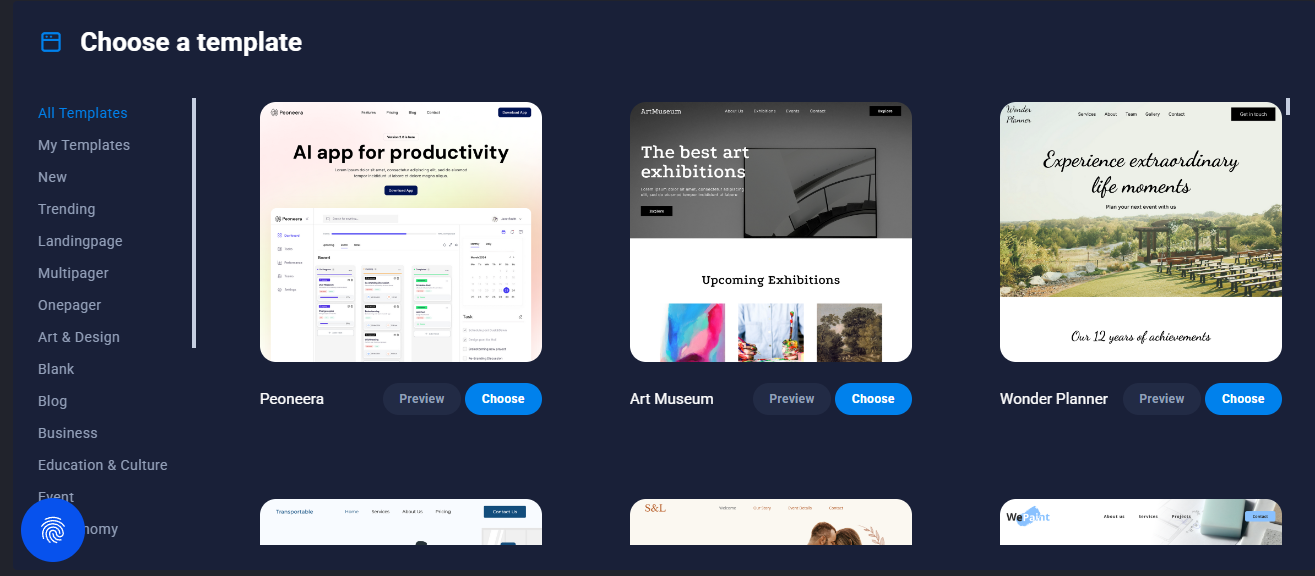
- Select a Template: Click Edit Site, and you will be redirected to a selection of website templates. You can choose a template that suits the client’s needs.


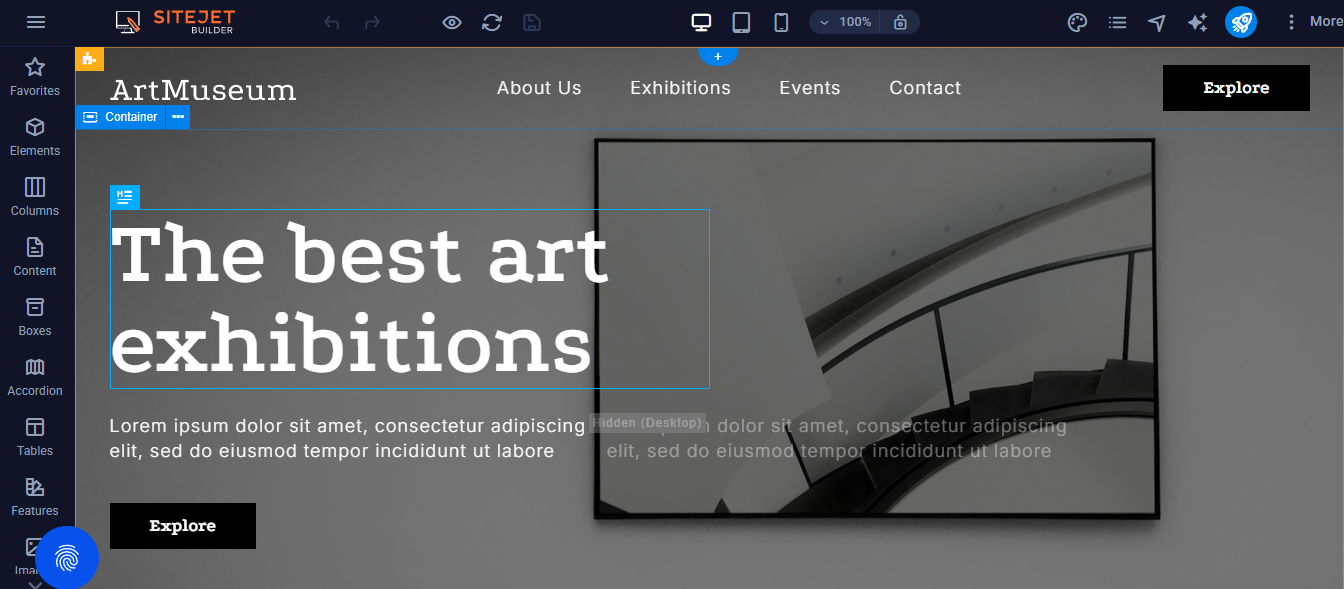
- Edit the Template: The builder allows you to drag and drop elements to customize the layout and design. You can:
- Add sections like headers, footers, image galleries, and text blocks.
- Modify colors, fonts, and styles.
- Insert contact forms, maps, and social media icons.
- Customize Content: You can easily add, edit, or remove content within the template, ensuring that the website is unique to the client’s business or personal needs.
- Publish the Site: Once the site is ready, press the Publish button to go live. Sitejet makes it easy to launch a custom website without needing to code.

3. Domains Tool
The Domains tool in cPanel allows users to manage domain names, including creating new domains, setting up redirects, and configuring HTTPS redirects.
Managing Domains
The Domains interface displays a list of all domains, including the following details:
- Domain: The domain name associated with the hosting account.
- Document Root: The directory where the domain’s files are stored.
- Redirect To: The destination URL where the domain will redirect, if applicable.
- Force HTTPS Redirect: Whether the domain forces an HTTPS redirect for secure connections.
- Actions: Options to manage or remove domains.

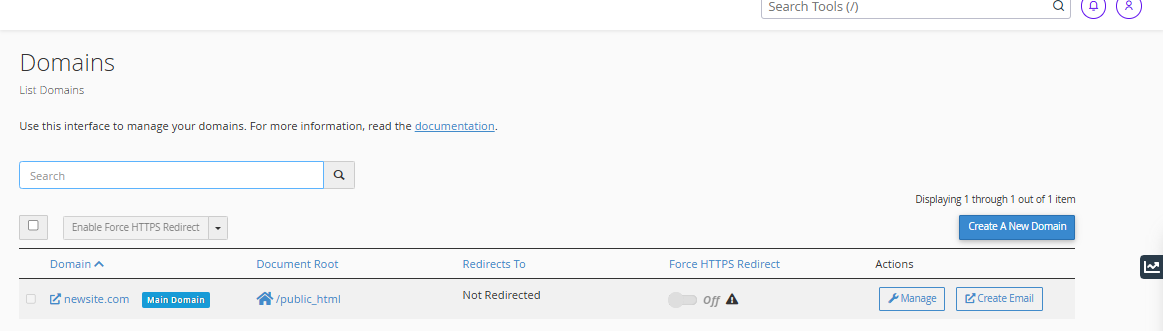
Adding a New Domain
To create a new domain:
- Click on the Create a New Domain button.
- Enter the domain name you want to create.
- Submit the form, and the new domain will be added to the list.

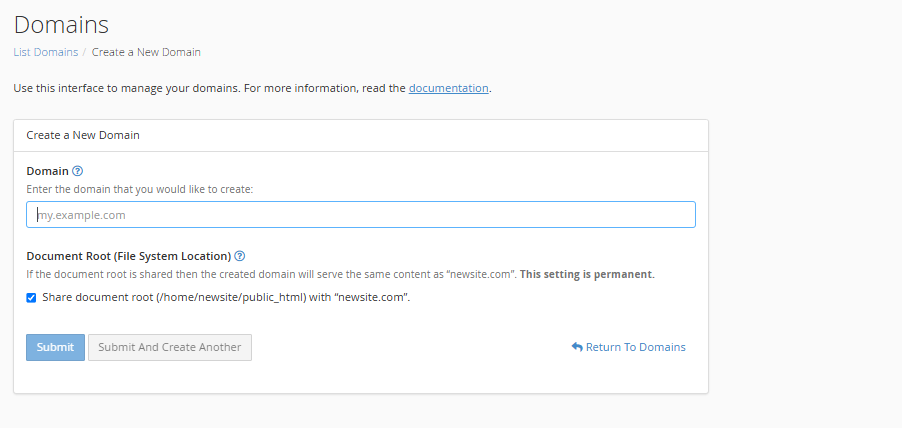
Once the domain is created, it will appear in the domain list. From there, you can manage DNS settings, configure redirects, and more.
About WP ToolKit
cPanel offers several domain management tools to help efficiently manage clients' websites. These tools allow to create websites using templates, build sites with a drag-and-drop builder, and manage domains. This documentation will highlight the WordPress management tool and how to use it.
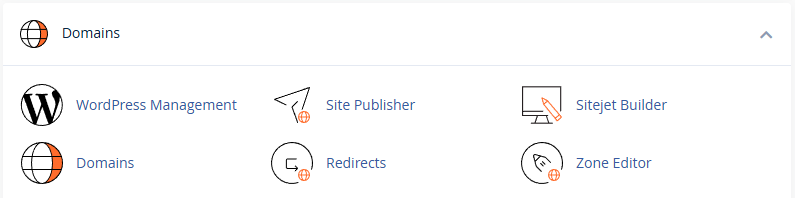
1. WordPress Management Tool
The WordPress Management feature in cPanel offers a comprehensive toolkit for managing WordPress sites. This feature helps install WordPress, manage plugins and themes, and monitor site quality. It is divided into three main sections: Installations, Plugins, and Themes.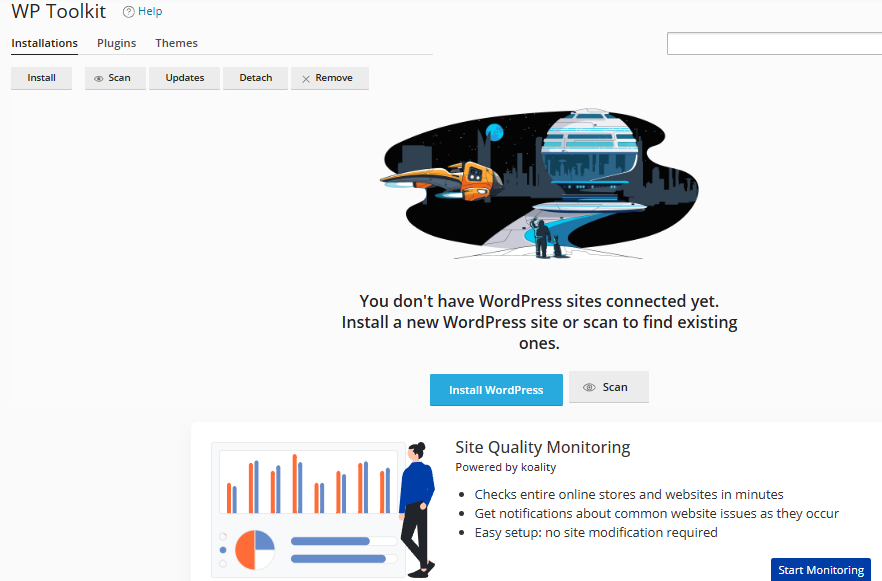
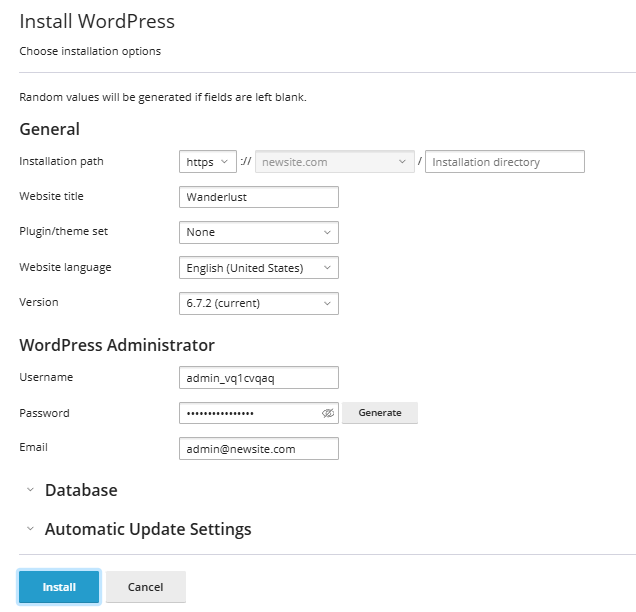
Installations
The Installations section provides a user-friendly interface for managing WordPress sites. Here’s what you can do:
- Install New WordPress: You can install a fresh WordPress site with a few clicks.
- Scan Existing WordPress Installations: If there’s an existing WordPress site, you can scan it and connect it to the WordPress Toolkit for easier management.
- Quality Monitoring: This feature helps you track the health of WordPress websites, including online stores. You’ll get notifications about common website issues such as slow performance, missing plugins, or outdated themes.
- Easy Setup: No need for modifications to the site, it checks for issues automatically.
- Real-Time Notifications: Get instant alerts on any website issues as they occur.

Plugins
In the Plugins section, you can manage the plugins installed on the WordPress sites you manage. Here’s what you can do:
- View Installed Plugins: See a list of all the plugins installed on your WordPress sites.
- Manage Plugins: Activate, deactivate, or update plugins as necessary to keep your WordPress sites running smoothly.
- Install New Plugins: You can also add new plugins to enhance the functionality of WordPress sites.
Themes
The Themes section lets you manage the themes installed on your WordPress installations. Here’s what you can do:
- View Installed Themes: See a list of all the themes installed on your WordPress websites.
- Activate Themes: Choose a theme and set it as active on the site.
- Manage Themes: Enable, disable, or delete themes that are not needed.
- Install New Themes: Add new themes from the WordPress repository or upload custom themes.
About Cron jobs
Cron jobs in cPanel allow you to automate tasks and execute commands or scripts on your website at scheduled intervals. This can be useful for a variety of administrative tasks, such as clearing temporary files, sending regular reports, or executing database backups. The cron job feature helps you automate processes without manual intervention, ensuring that tasks run on time.
1. Accessing Cron Jobs
To access the Cron Jobs feature:
- Log in to your cPanel account.
- Navigate to the Advanced section.
- Click on Cron Jobs.

This will open the Cron Jobs interface where you can set up, manage, and monitor automated tasks for your site.
Understanding Cron Jobs
Cron jobs are scheduled tasks that run automatically at specified intervals. You can define the frequency and the exact time when these tasks should be executed. Cron jobs are typically used for running commands, executing scripts, or performing server maintenance tasks at specific times.
How Cron Jobs Work
Cron jobs are scheduled by defining time intervals using five fields:
- Minute: The minute when the job should run (0-59).
- Hour: The hour when the job should run (0-23).
- Day: The day of the month when the job should run (1-31).
- Month: The month when the job should run (1-12).
- Weekday: The day of the week when the job should run (0-7) where both 0 and 7 represent Sunday.
For example, if you want a script to run at 2:00 AM every day, you would enter:
- Minute: 0
- Hour: 2
- Day: *
- Month: *
- Weekday: *
Common Settings for Cron Jobs
-
Once per day: If you want to schedule a job to run daily at a specific time, enter the following settings:
- Minute: 0
- Hour: (the hour you want)
- Day: *
- Month: *
- Weekday: *
-
Hourly Cron Job: If you want the task to run every hour, set:
- Minute: 0
- Hour: *
- Day: *
- Month: *
- Weekday: *
-
Weekly Cron Job: If you want the task to run on a specific day of the week (e.g., every Monday at 3:00 AM):
- Minute: 0
- Hour: 3
- Day: *
- Month: *
- Weekday: 1 (for Monday)
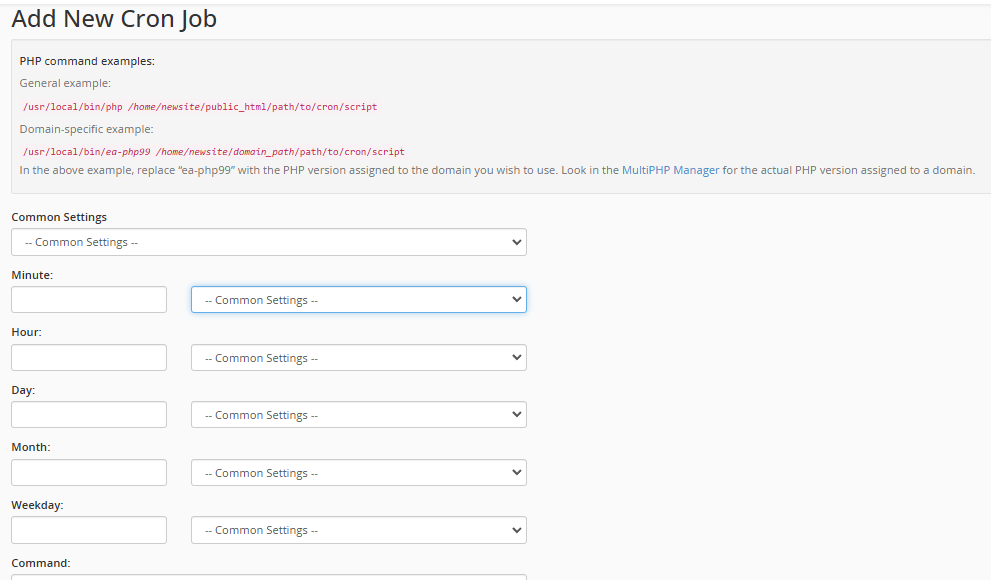
2. Adding a New Cron Job
To add a new cron job, follow these steps:
-
Email Settings:
- If you want an email sent to you every time the cron job runs, enter your email address in the Current Email section. For example, you may see newsite@example.com in this field.
- If you don’t want to receive emails, use the command
>/dev/null 2>&1to suppress email notifications. For example:/usr/local/bin/php /home/newsite/public_html/path/to/cron/script >/dev/null 2>&1
-
Set the Time Intervals:
- Use the dropdown menus for Minute, Hour, Day, Month, and Weekday to specify when the cron job should run.

- Use the dropdown menus for Minute, Hour, Day, Month, and Weekday to specify when the cron job should run.
-
Command:
- In the Command field, you’ll enter the command or script that you want to run. Below are some common examples:
General PHP Command:
This will run a PHP script located at
/home/newsite/public_html/path/to/cron/script.Domain-Specific PHP Command:
In this example, replace
ea-php99with the PHP version assigned to the domain. To find the PHP version assigned to the domain, you can check in the MultiPHP Manager in cPanel. -
Add the Cron Job: Once you have configured the cron job settings, click Add New Cron Job to schedule the task.
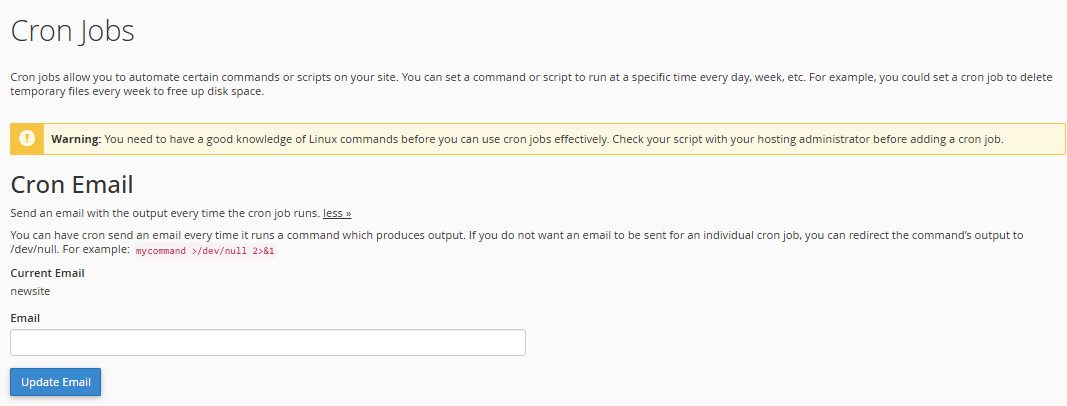
Cron Job Email Notifications
-
Cron Email: When you set up a cron job, you can choose to receive an email each time the cron job runs and produces output. This is useful for monitoring the task’s execution.
- If you don’t need an email notification for a specific cron job, you can redirect its output to
/dev/nullto suppress the email notification. Example:
- If you don’t need an email notification for a specific cron job, you can redirect its output to
-
Current Email: The system will send an email to the email address listed in the Current Email section of your cPanel. You can change the email address if needed.
3. Managing Cron Jobs
Once you have set up cron jobs, they will appear in the Current Cron Jobs table. 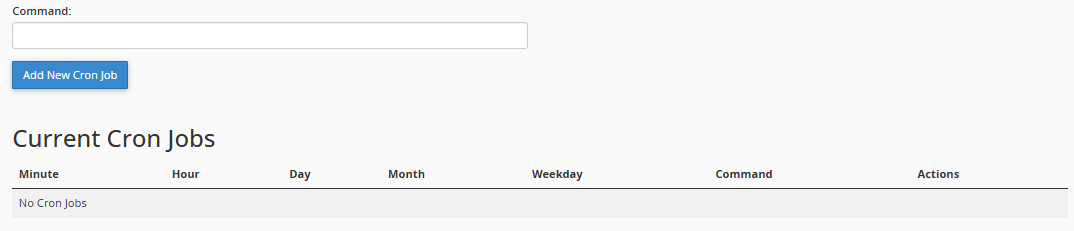
This table displays the following information:
| Minute | Hour | Day | Month | Weekday | Command | Actions |
|---|---|---|---|---|---|---|
| * | 2 | * | * | * | /usr/local/bin/php /home/newsite/public_html/path/to/cron/script | [Edit] [Delete] |
- Actions: You can Edit or Delete an existing cron job by clicking the corresponding link in the Actions column. Editing allows you to adjust the time intervals or the command to be executed.
Important Notes About Cron Jobs
-
Linux Knowledge Required: To use cron jobs effectively, you need to have a basic understanding of Linux commands. Always ensure that the script or command you are scheduling is correct and tested.
-
Testing Scripts: Before adding a cron job, you should test the script to make sure it performs as expected when run manually. This helps avoid errors when the job runs automatically.
-
Cron Job Limits: Some hosting providers may limit the number of cron jobs you can set up or impose restrictions on the frequency at which they can run. Be sure to check with your hosting provider for any limitations.
Cron jobs are an invaluable tool for automating tasks on your website. By setting up cron jobs, you can ensure that tasks like cleaning temporary files, backing up databases, and running scripts happen automatically and on schedule. Always verify your commands and test scripts before scheduling them, and be mindful of your email notifications to keep track of your cron job activities.
Social Media Services (SMM)
Boost your clients' social media presence with automated likes, followers, and engagement by following these steps:
-
Navigate to Marketplace: Go to the Wholesale Marketplace tab in your sidebar.
-
Select Client: Choose to Add New Client or select an Existing Client.
-
Choose Product: Find and select SMM Services from the product list.
-
Configure Order: Search and select your desired service (e.g., Instagram Followers, Facebook Likes, etc.), enter the Social Media Link, and specify the Quantity.
-
Activate: Click Add Service to Client to process the order instantly.
-
Manage: Once added, go to the Services tab to view the active service, track order status, or manage the subscription.
Note: Always ensure your Reseller Wallet is topped up above $20.00 to successfully activate new services.
Ordering Social Media Services
-
Fast Delivery: Enjoy swift and timely fulfillment of your SMM service orders.
-
Guaranteed Services: Count on reliable and effective social media solutions.
-
Lowest Prices: Get the most competitive rates in the industry.
-
Safe and Secure: All transactions and services are safe, secure, and compliant.
-
Boost Online Presence: Improve visibility, engagement, and credibility on social platforms.
How It Works
1. Choose Platform & Category
2. Input Client Details
Provide the following details:
-
Client Email: The email address of the client.
-
Username: The client's social media username.
-
Profile URL: Direct link to the client's social media profile.
3. Select Quantity
Specify the desired quantity for the service.
4. Confirm Cost & Activate Service
Review the total cost and confirm activation to proceed with the service.
Available Platforms and Categories
ResellPortal.com offers SMM services across the most popular social media platforms, including:
-
Instagram
-
Followers
-
Likes
-
Comments
-
Views
-
Story Views
-
-
Facebook
-
Page Likes
-
Post Likes
-
Shares
-
Followers
-
-
Twitter
-
Followers
-
Retweets
-
Likes
-
-
YouTube
-
Subscribers
-
Views
-
Watch Hours
-
Likes
-
-
TikTok
-
Followers
-
Views
-
Likes
-
Shares
-
-
LinkedIn
-
Connections
-
Page Followers
-
Engagement
-
-
Other Platforms
-
Pinterest, Snapchat, Telegram, and more.
-
Service Activation Form
Below is the required information to activate a service:
| Field | Description |
|---|---|
| Platform Category | Select the social media platform. |
| Service | Choose the service (e.g., likes). |
| Quantity | Enter the desired quantity. |
| Client Email | Provide the client’s email address. |
| Username | Social media account username. |
| Profile URL | Link to the client’s profile. |
| Cost | Total price for the selected service. |
Activate Service
Once all details are filled in, click "Activate Service" to initiate the order.
Benefits for Resellers
-
Provide value-added services to your clients.
-
Expand your business offerings with premium SMM services.
-
Build customer trust with guaranteed, high-quality results.
-
Increase profit margins with the lowest prices available.
With ResellPortal.com's Social Media Marketing services, you can effortlessly enhance social media presence, engagement, and growth for yourself or your clients. Activate SMM services today and experience quality, speed, and unmatched results.
Start growing your social media with ResellPortal.com!
For further inquiries or assistance, please contact our support team at contact@resellportal.com.
Appointment Scheduling
Set up a professional booking and scheduling system for your clients by following these steps:
-
Navigate to Marketplace: Go to the Wholesale Marketplace tab in your sidebar.
-
Select Client: Choose to Add New Client or select an Existing Client.
-
Choose Product: Find and select Appointment Booking from the product list.
-
Configure Account: Enter the Subdomain, Business Name, choose the Branding Colors, provide a Logo URL, and select your Billing Cycle.
-
Activate: Click Add Service to Client to provision the booking system instantly.
-
Manage: Once added, go to the Services tab to view the active service, access the booking dashboard, or manage the subscription.
Note: Always ensure your Reseller Wallet is topped up above $20.00 to successfully activate new services.
Setting up Appointment Booking Service
After activation, you will receive an automated email containing your administrative login link and credentials. Follow this guide to configure your platform, set your policies, and manage your bookings.
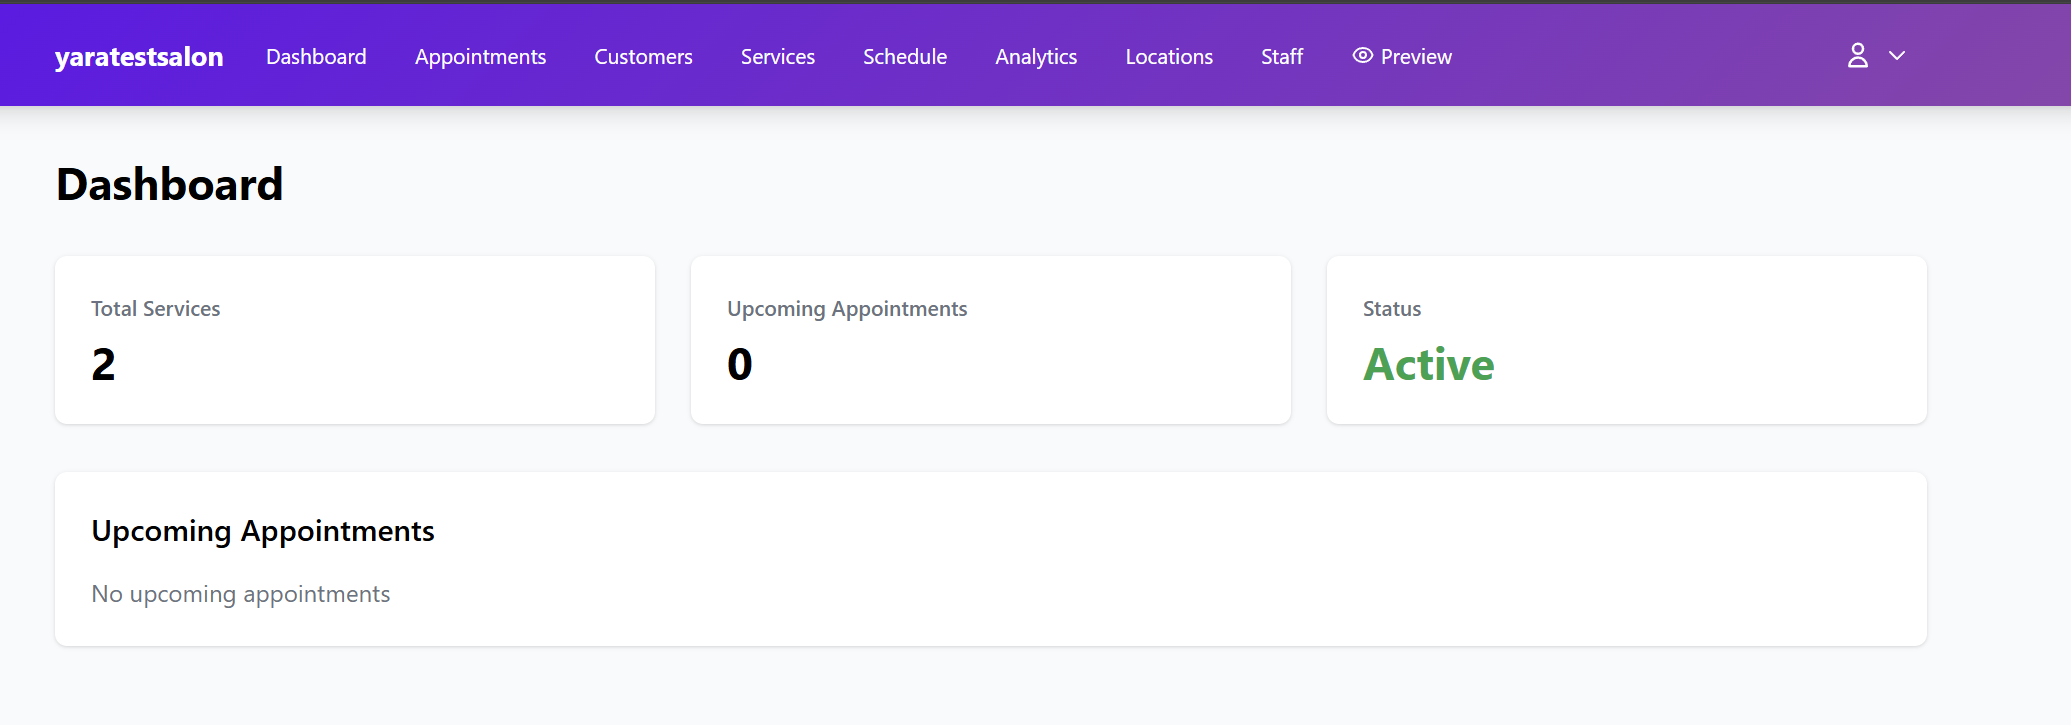
1. Logging In
Access your unique admin URL (e.g., your-subdomain.quickreserve.net/login) and enter the credentials provided in your activation email.
Upon logging in, you will land on the Dashboard, which provides a high-level overview of your total services, upcoming appointments, and account status.
2. Configuring Business Settings & Policies
Before creating services, navigate to the Settings tab to define how your booking portal behaves.
Business Information
-
Identity: Update your Business Name, Email, and Phone Number.
-
Timezone: Set your local timezone (e.g., America/New York). This is critical as it determines the accuracy of your booking calendar.
-
Address: Provide your physical location for customer reference.

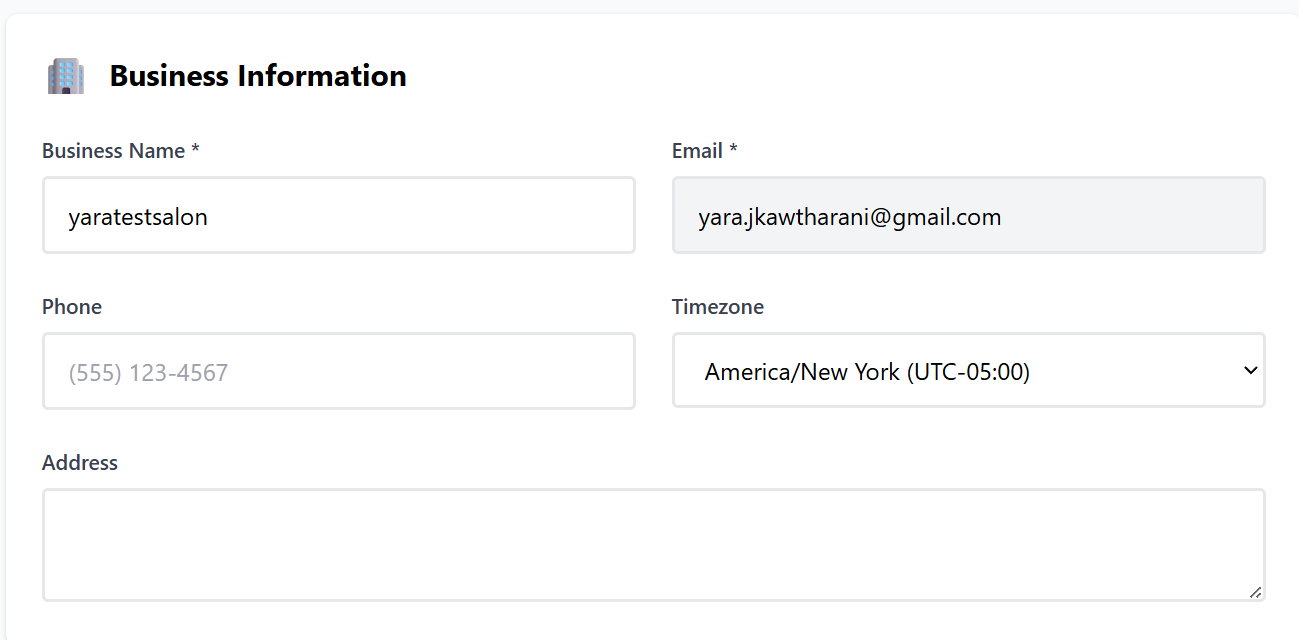
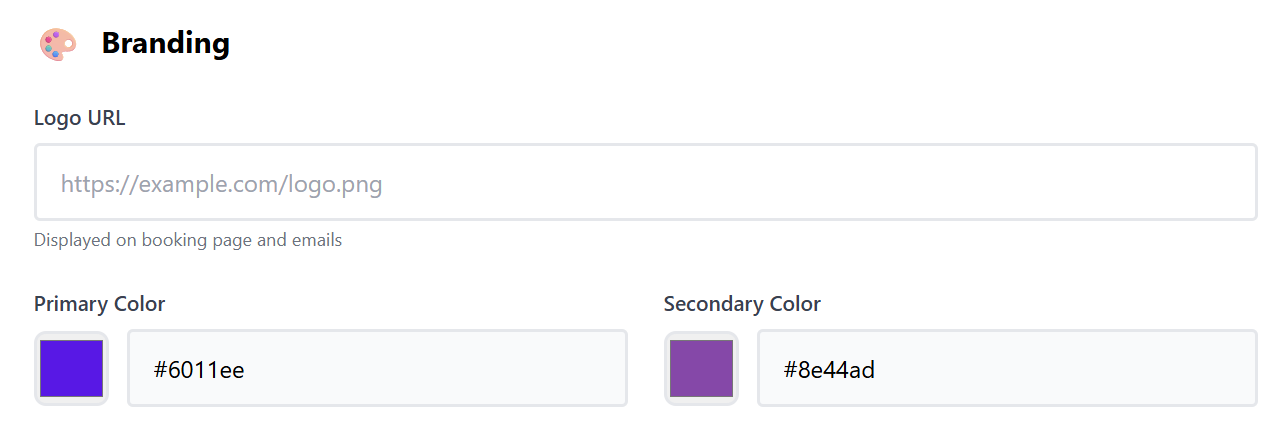
Branding
-
Logo URL: Provide a link to your logo. This will be displayed on the public booking page and in all automated customer emails.
-
Colors: Set your Primary and Secondary brand colors to ensure the booking interface matches your business identity.

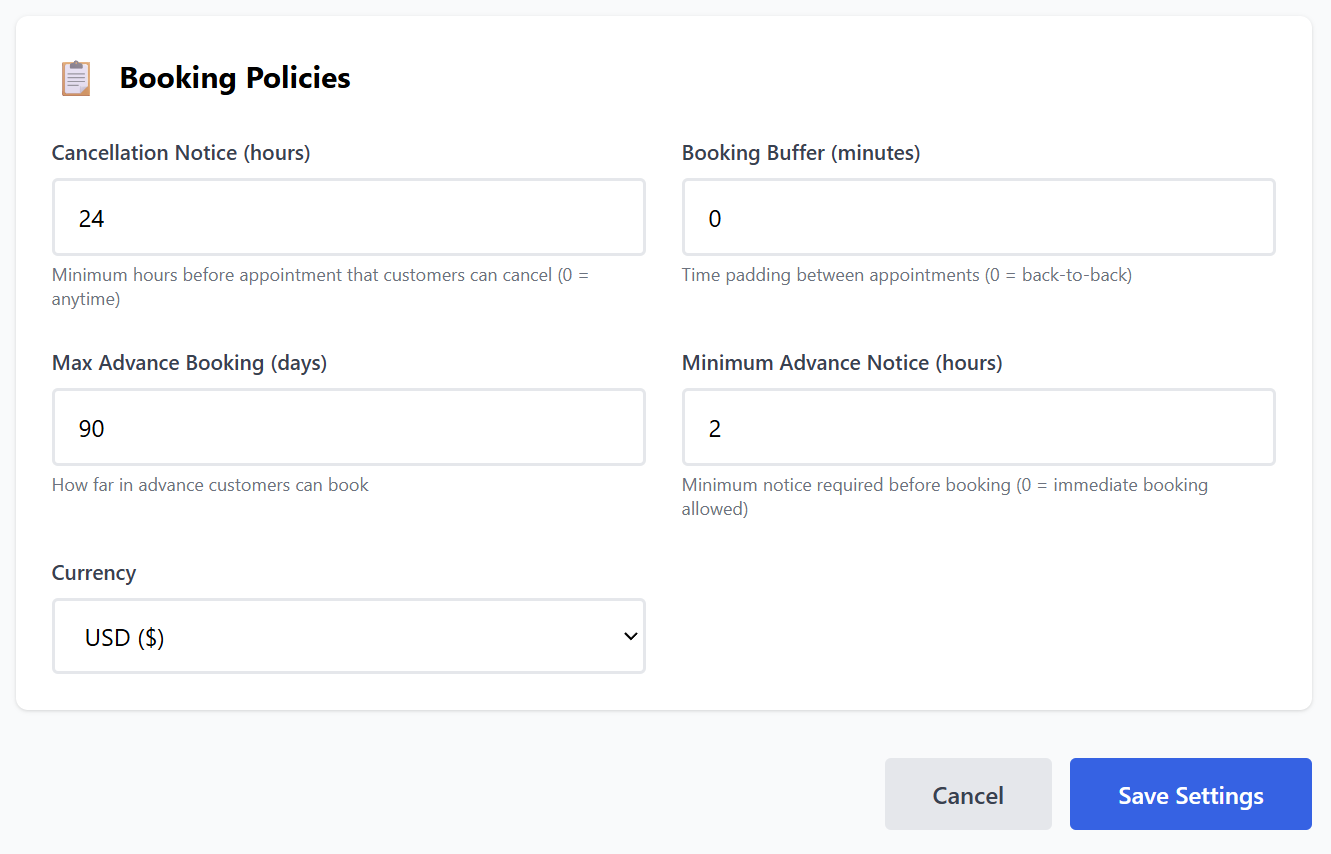
Booking Policies
Define your rules for customer interaction:
-
Cancellation Notice: Set the minimum hours required for a customer to cancel (e.g., 24 hours). Setting this to 0 allows anytime cancellation.
-
Booking Buffer: Add time padding (in minutes) between appointments to prevent back-to-back scheduling and allow for breaks.
-
Max Advance Booking: Choose how far into the future a customer can book (e.g., 90 days).
-
Minimum Advance Notice: Set how much "lead time" you need before an appointment (e.g., 2 hours). This prevents last-minute surprise bookings.
-
Currency: Select your local currency for displayed pricing.

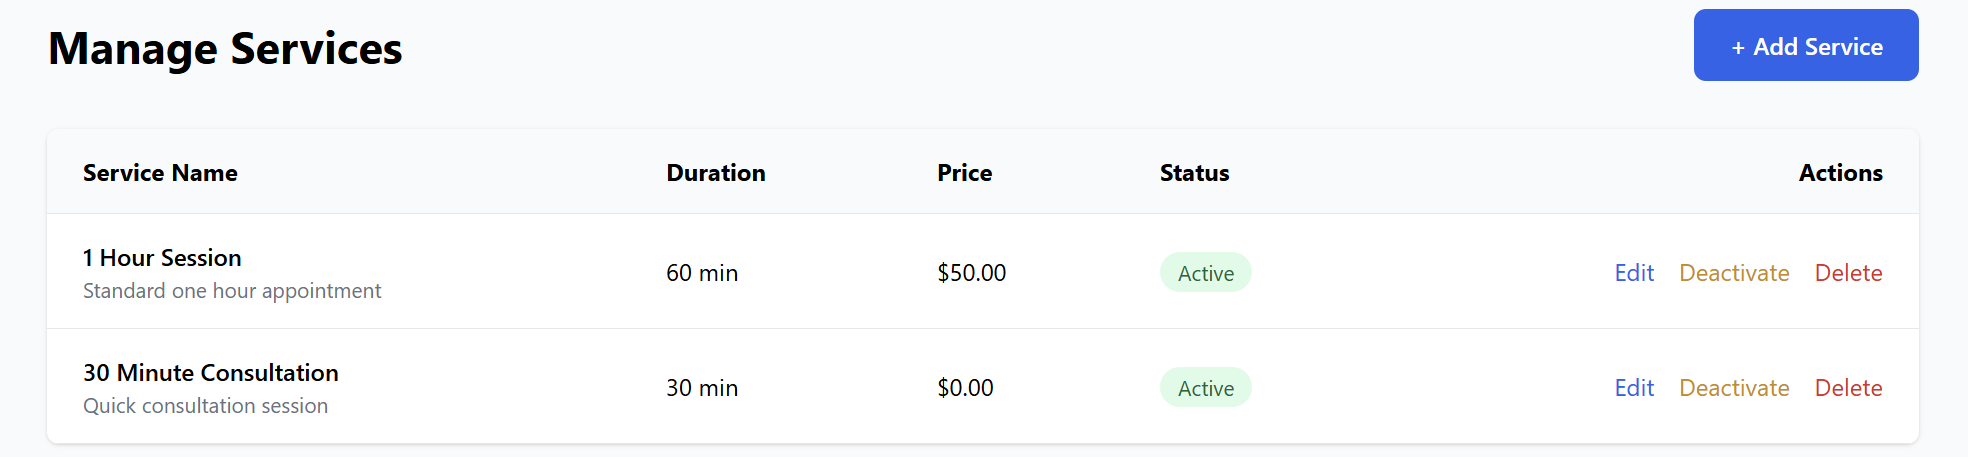
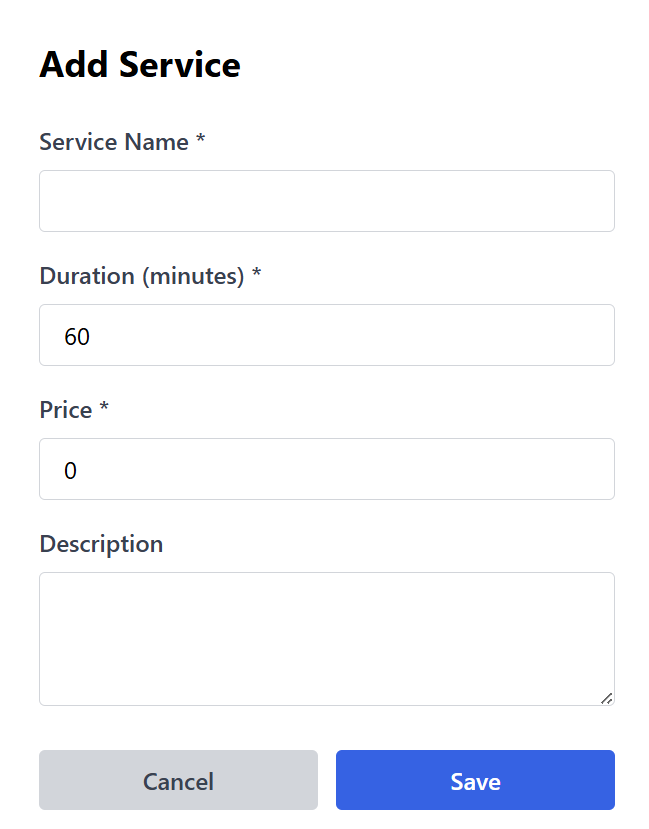
3. Setting Up Your Services
Now, define the specific sessions your clients can book.
-
Navigate to the Services tab and click + Add Service.
-
Service Name: (e.g., "1 Hour Consultation").
-
Duration: Set the length of the session in minutes.
-
Price: Set the cost (enter 0.00 for free sessions).
-
Description: Briefly explain what the service entails.
You can Edit, Deactivate, or Delete services at any time from this list.

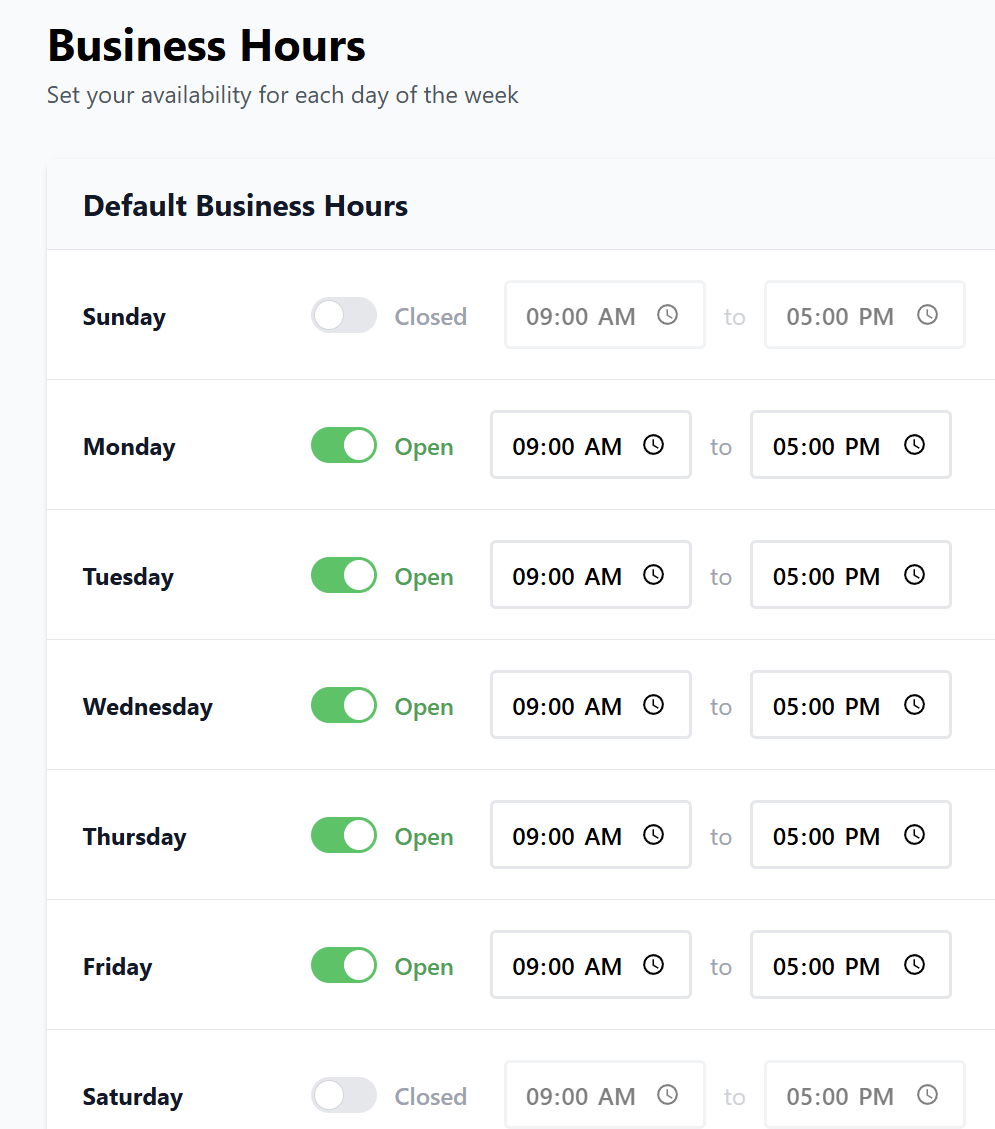
4. Configuring Business Hours (Schedule)
Define when your business is open for bookings:
-
Go to the Schedule tab.
-
Use the toggle switches to set days as Open or Closed.
-
Set the specific start and end times for each working day.
Note: Bookings can only be made within these defined time slots.
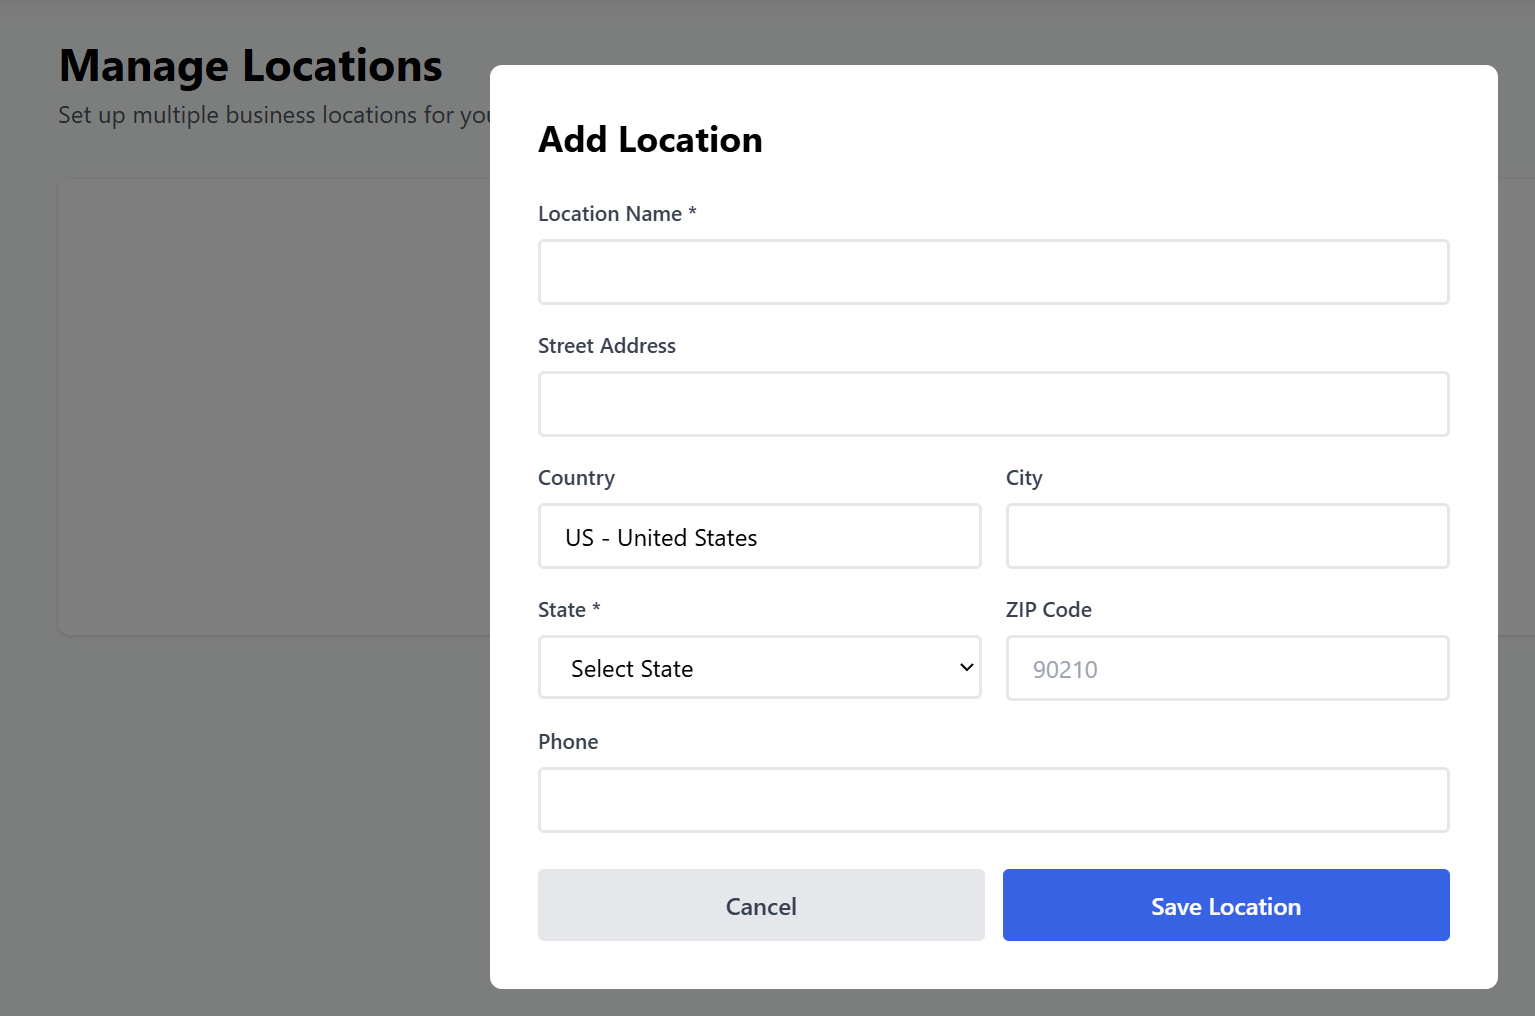
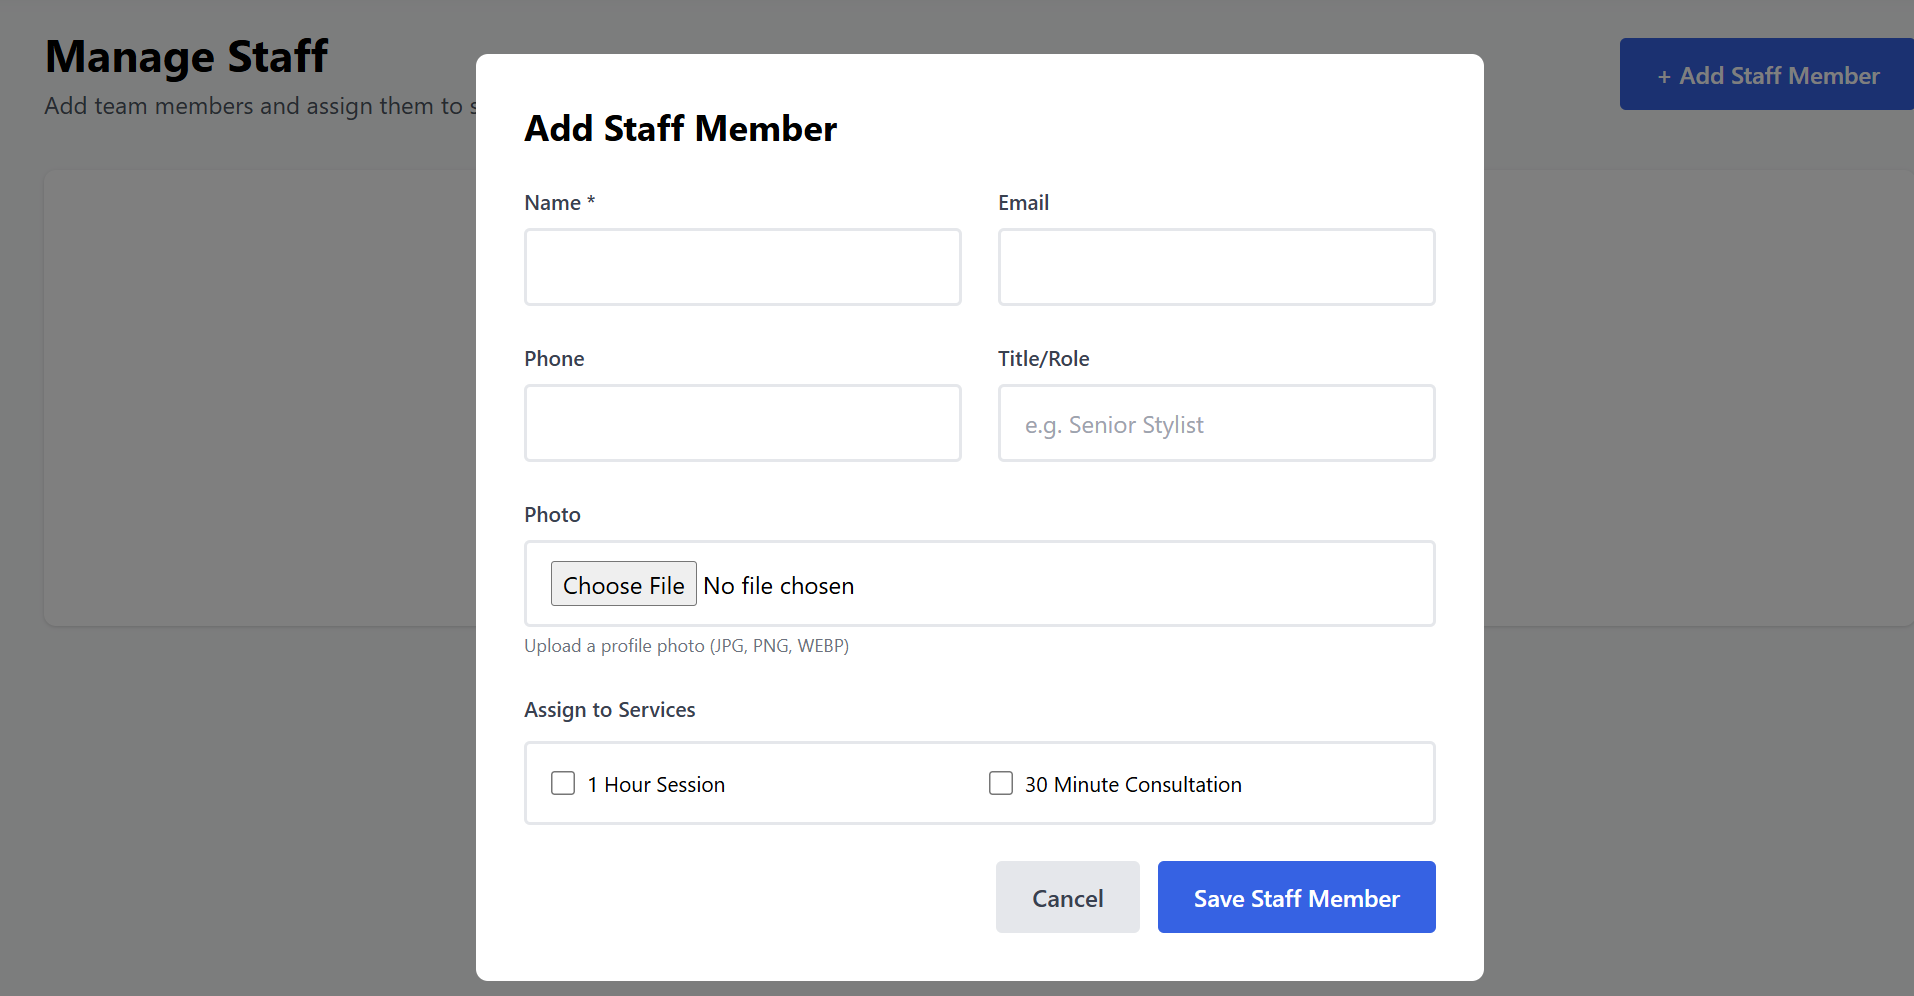
5. Managing Staff & Locations
If the business has multiple team members or physical branches, manage them here:
-
Locations: Add the physical addresses where services are provided.

-
Staff: Click Add Staff Member to upload a photo and enter their name, email, and role.

-
Assignment: You can assign specific staff members to specific services, ensuring customers book with the right expert.
6. Managing Appointments & Customers
As bookings begin to arrive, you can manage them through two primary tabs:
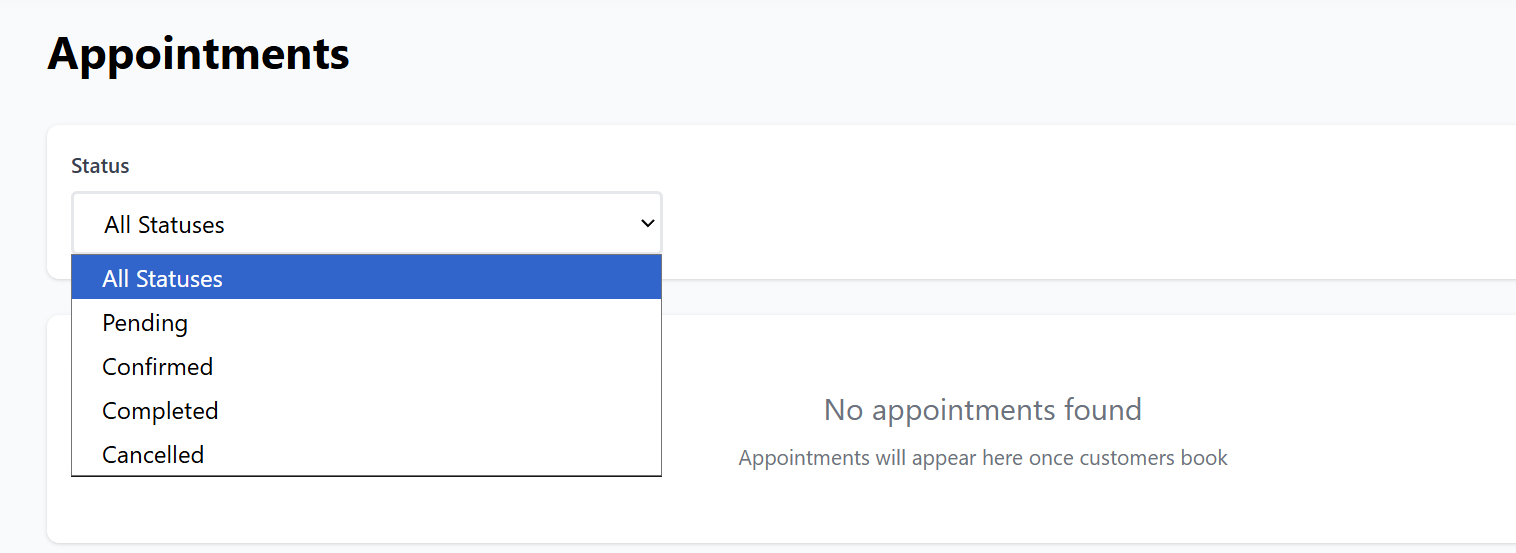
-
Appointments: View all bookings in one place. Use the Status Filter (Pending, Confirmed, Completed, or Cancelled) to organize your workflow and keep track of daily sessions.

-
Customers: Access your growing customer database. Here you can see contact details (Email/Phone) and the full appointment history for every client.


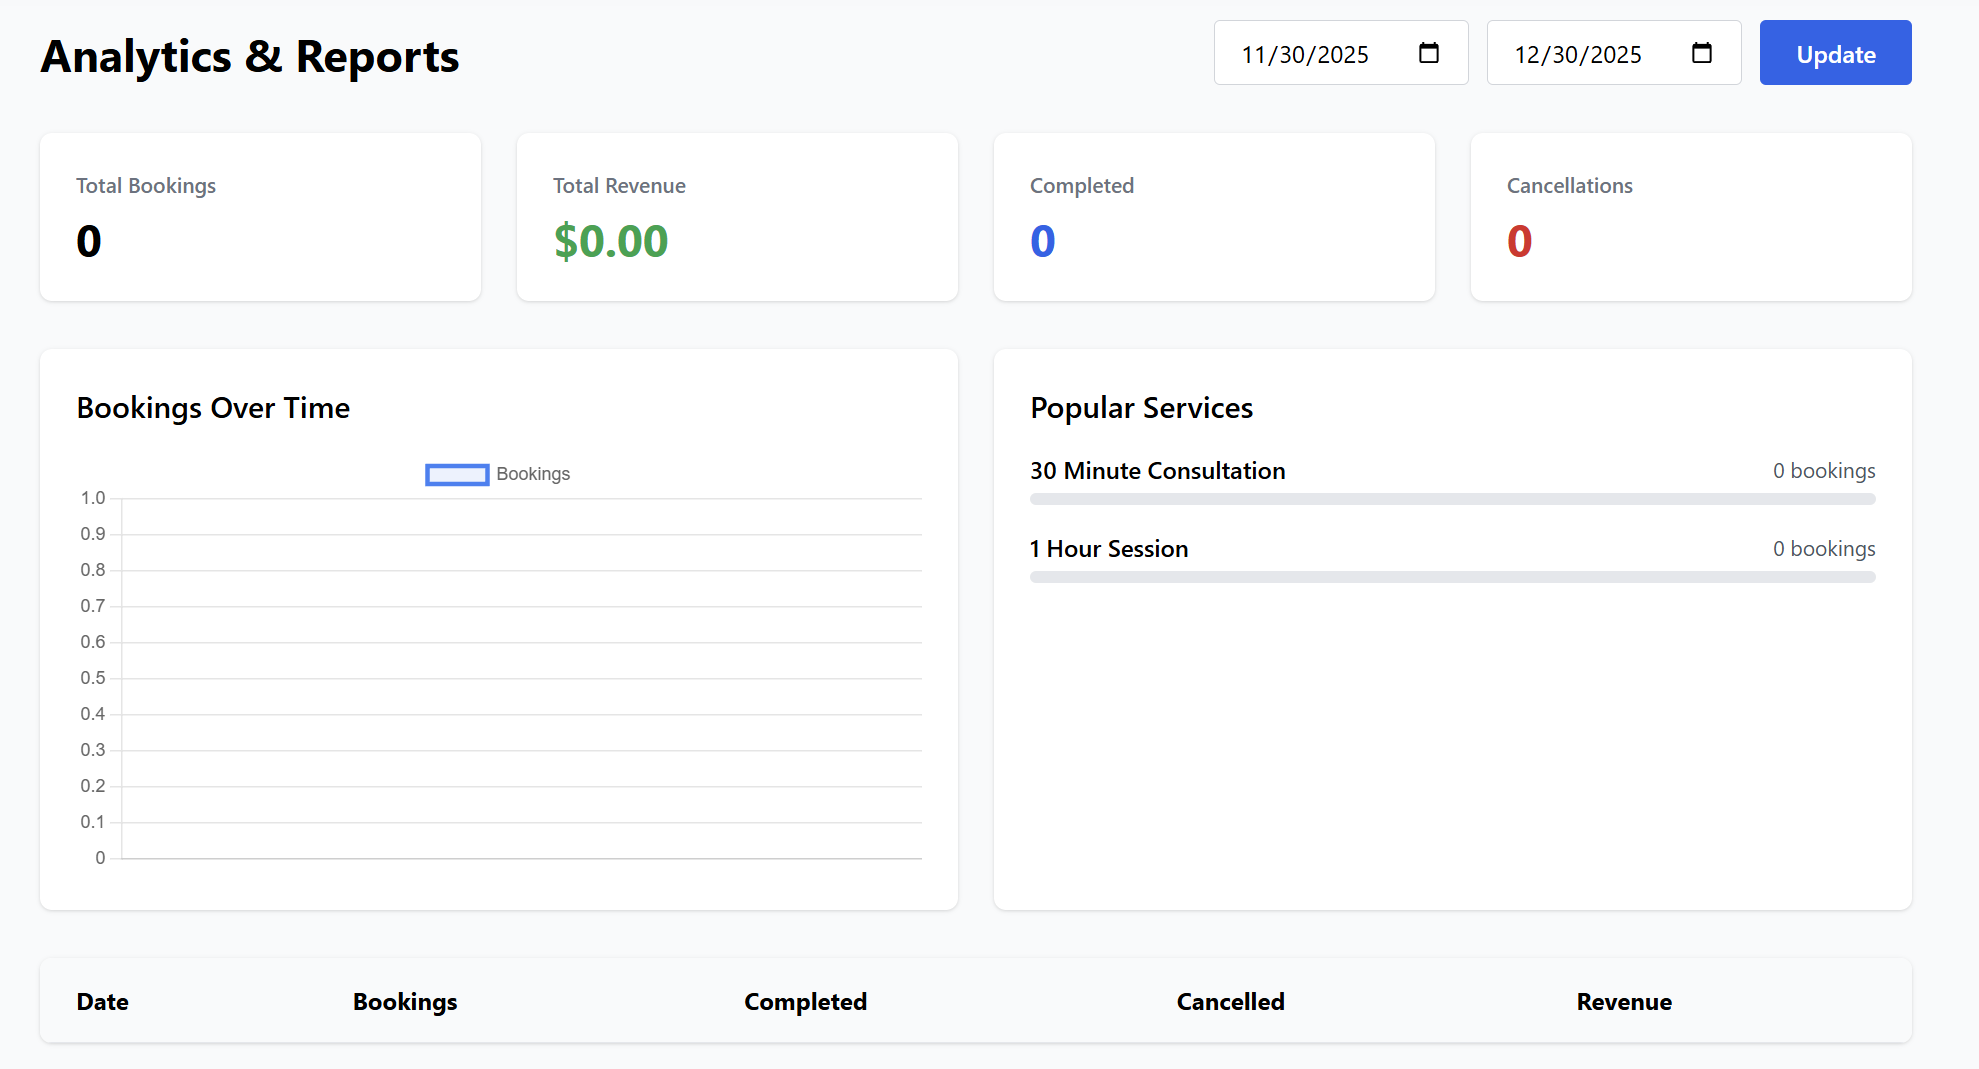
7. Tracking Performance (Analytics)
The Analytics tab provides a visual report of your business performance. You can filter by date range to view:
-
Key Metrics: Total bookings, total revenue, and cancellation rates.
-
Booking Trends: A "Bookings Over Time" chart to visualize your busiest periods.
-
Popular Services: See which services are being booked the most to help you optimize your offerings.

8. Previewing the Booking Page
Once you have configured your settings, added a service, and set your hours, click the Preview button in the top navigation bar. This will take you to the public-facing page where your customers will book their appointments.
Ready for the final look? Proceed to The Public Booking Experience guide to see how the service appears to the end-user.
Viewing the Booking Appointments
The appointments booking website has a sleek, white-labeled landing page designed for maximum conversion. It guides the end-customer through a simple 3-step process to ensure a seamless reservation experience.
1. Overview
When a customer visits the booking URL, they are greeted by a professional interface branded with your client’s logo and colors.
-
Progress Tracker: The left-hand sidebar clearly displays the three steps of the booking journey.
-
Real-time Booking Summary: As the customer makes selections, the "Booking Summary" in the sidebar updates automatically with the service name, duration, and price.
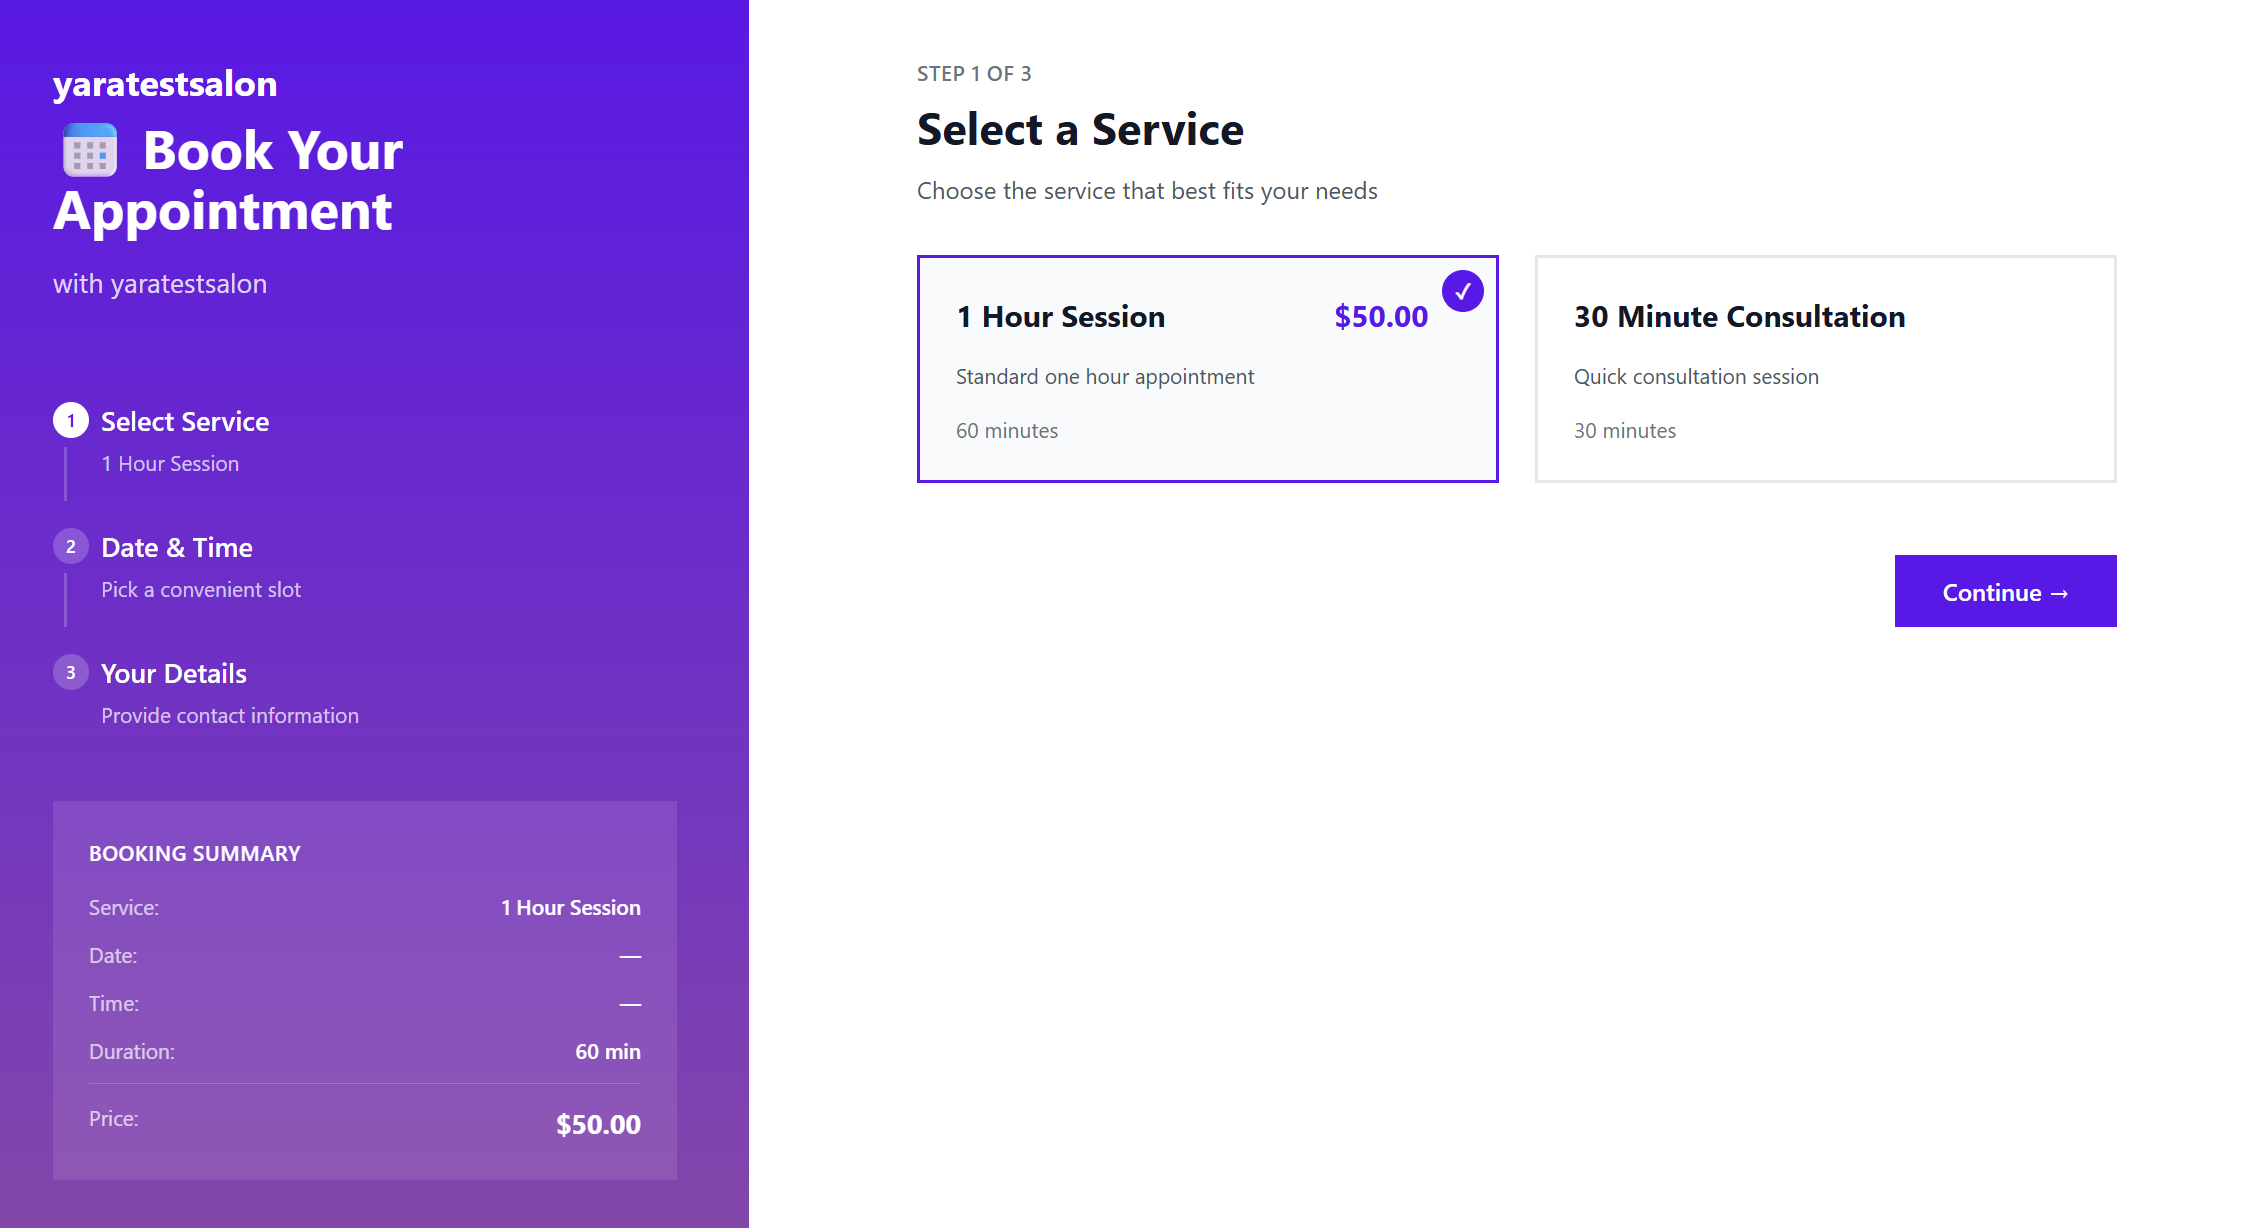
2. Step 1: Select a Service
The customer begins by choosing the service they need.
-
Services are displayed as cards showing the Price, Duration, and a brief Description.
-
Once a service is selected, the customer clicks Continue.
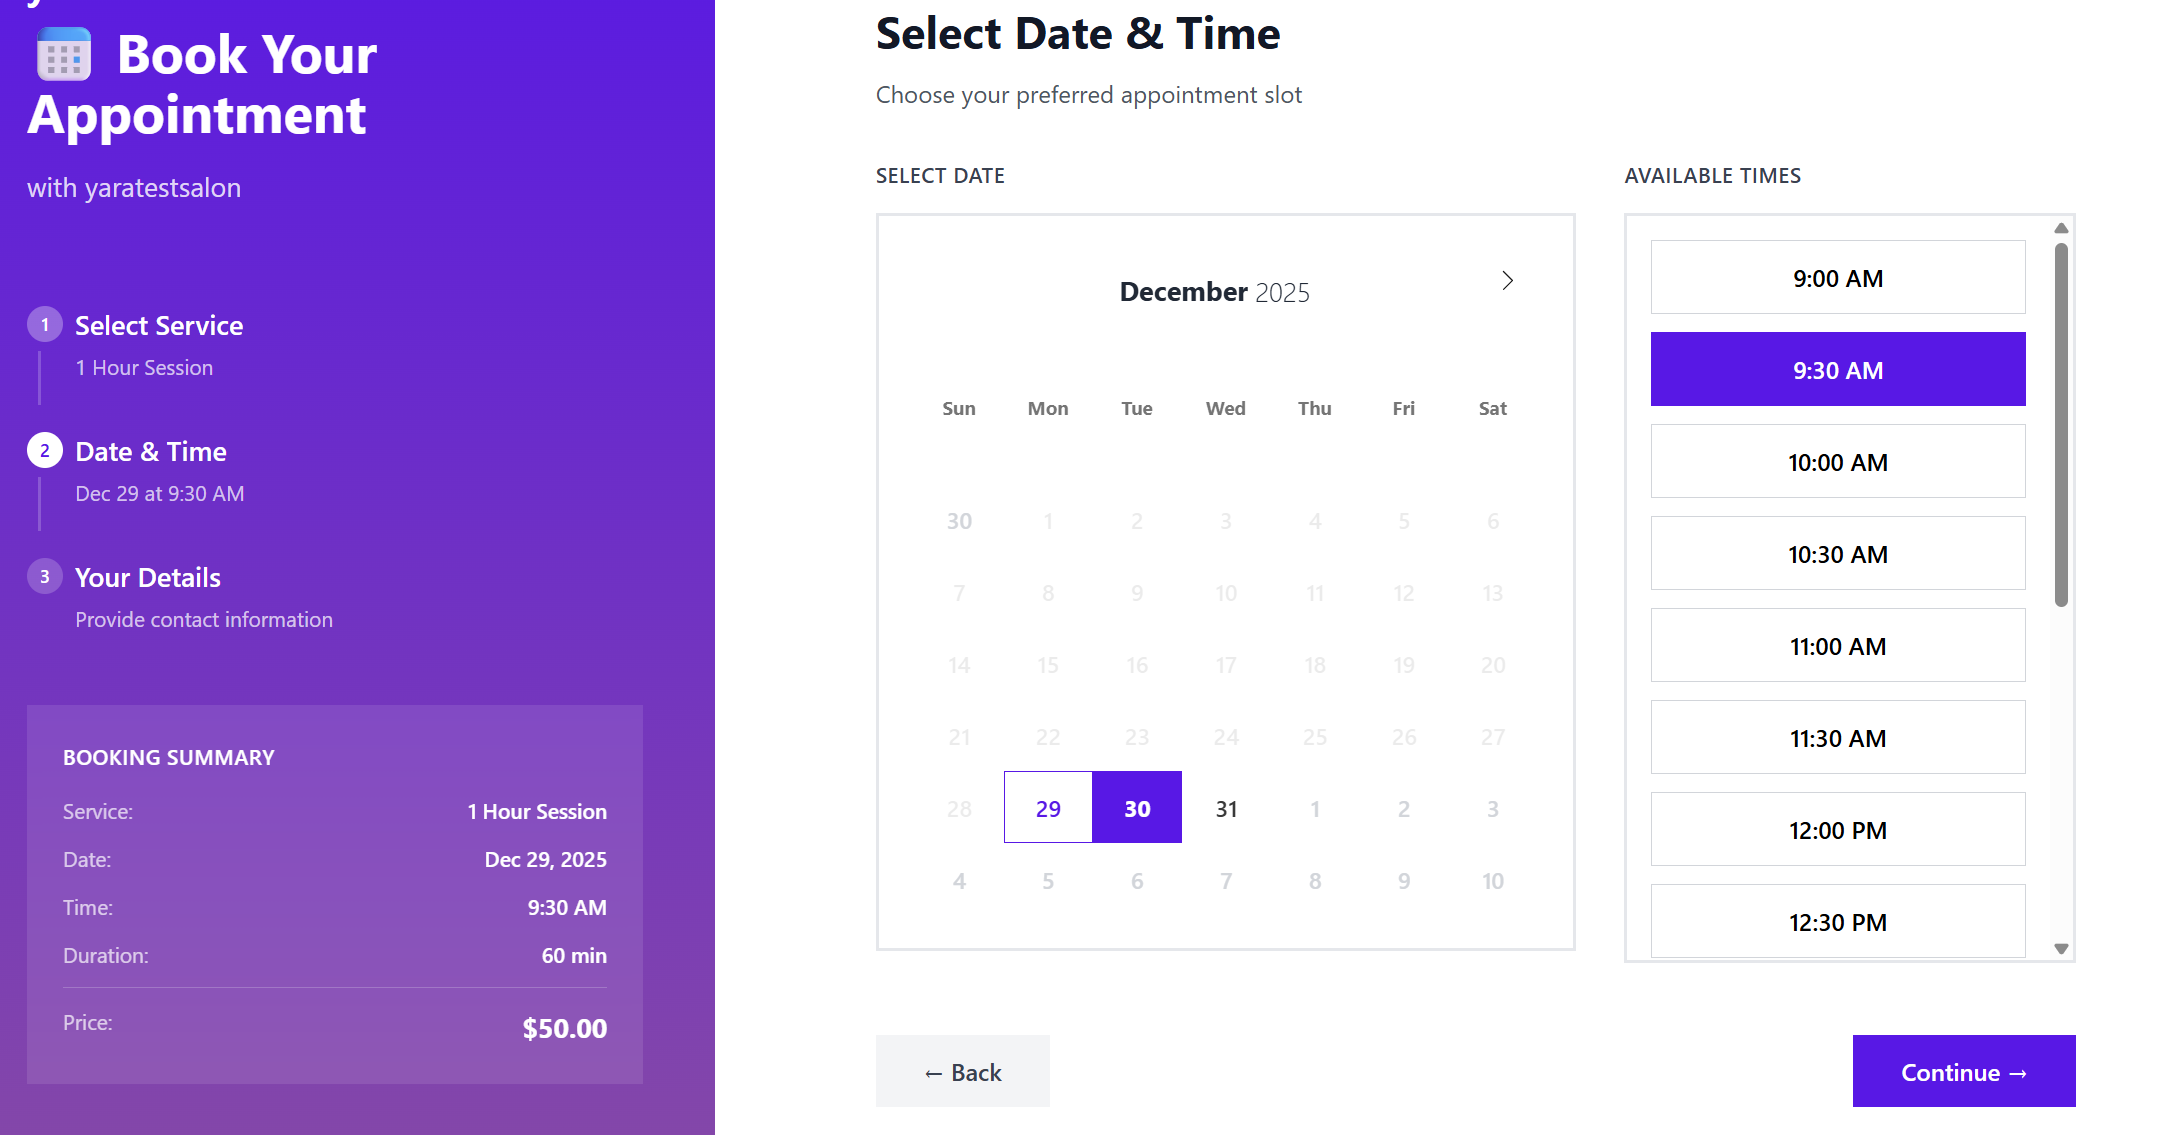
3. Step 2: Select Date & Time
The system prevents double-bookings by only showing slots based on the "Business Hours" and "Staff Availability" configured in Phase 2.
-
Select Date: The customer picks a day from the interactive calendar.
-
Select Time: Once a date is chosen, the available time slots appear on the right.
-
The customer clicks Continue once their preferred slot is highlighted.
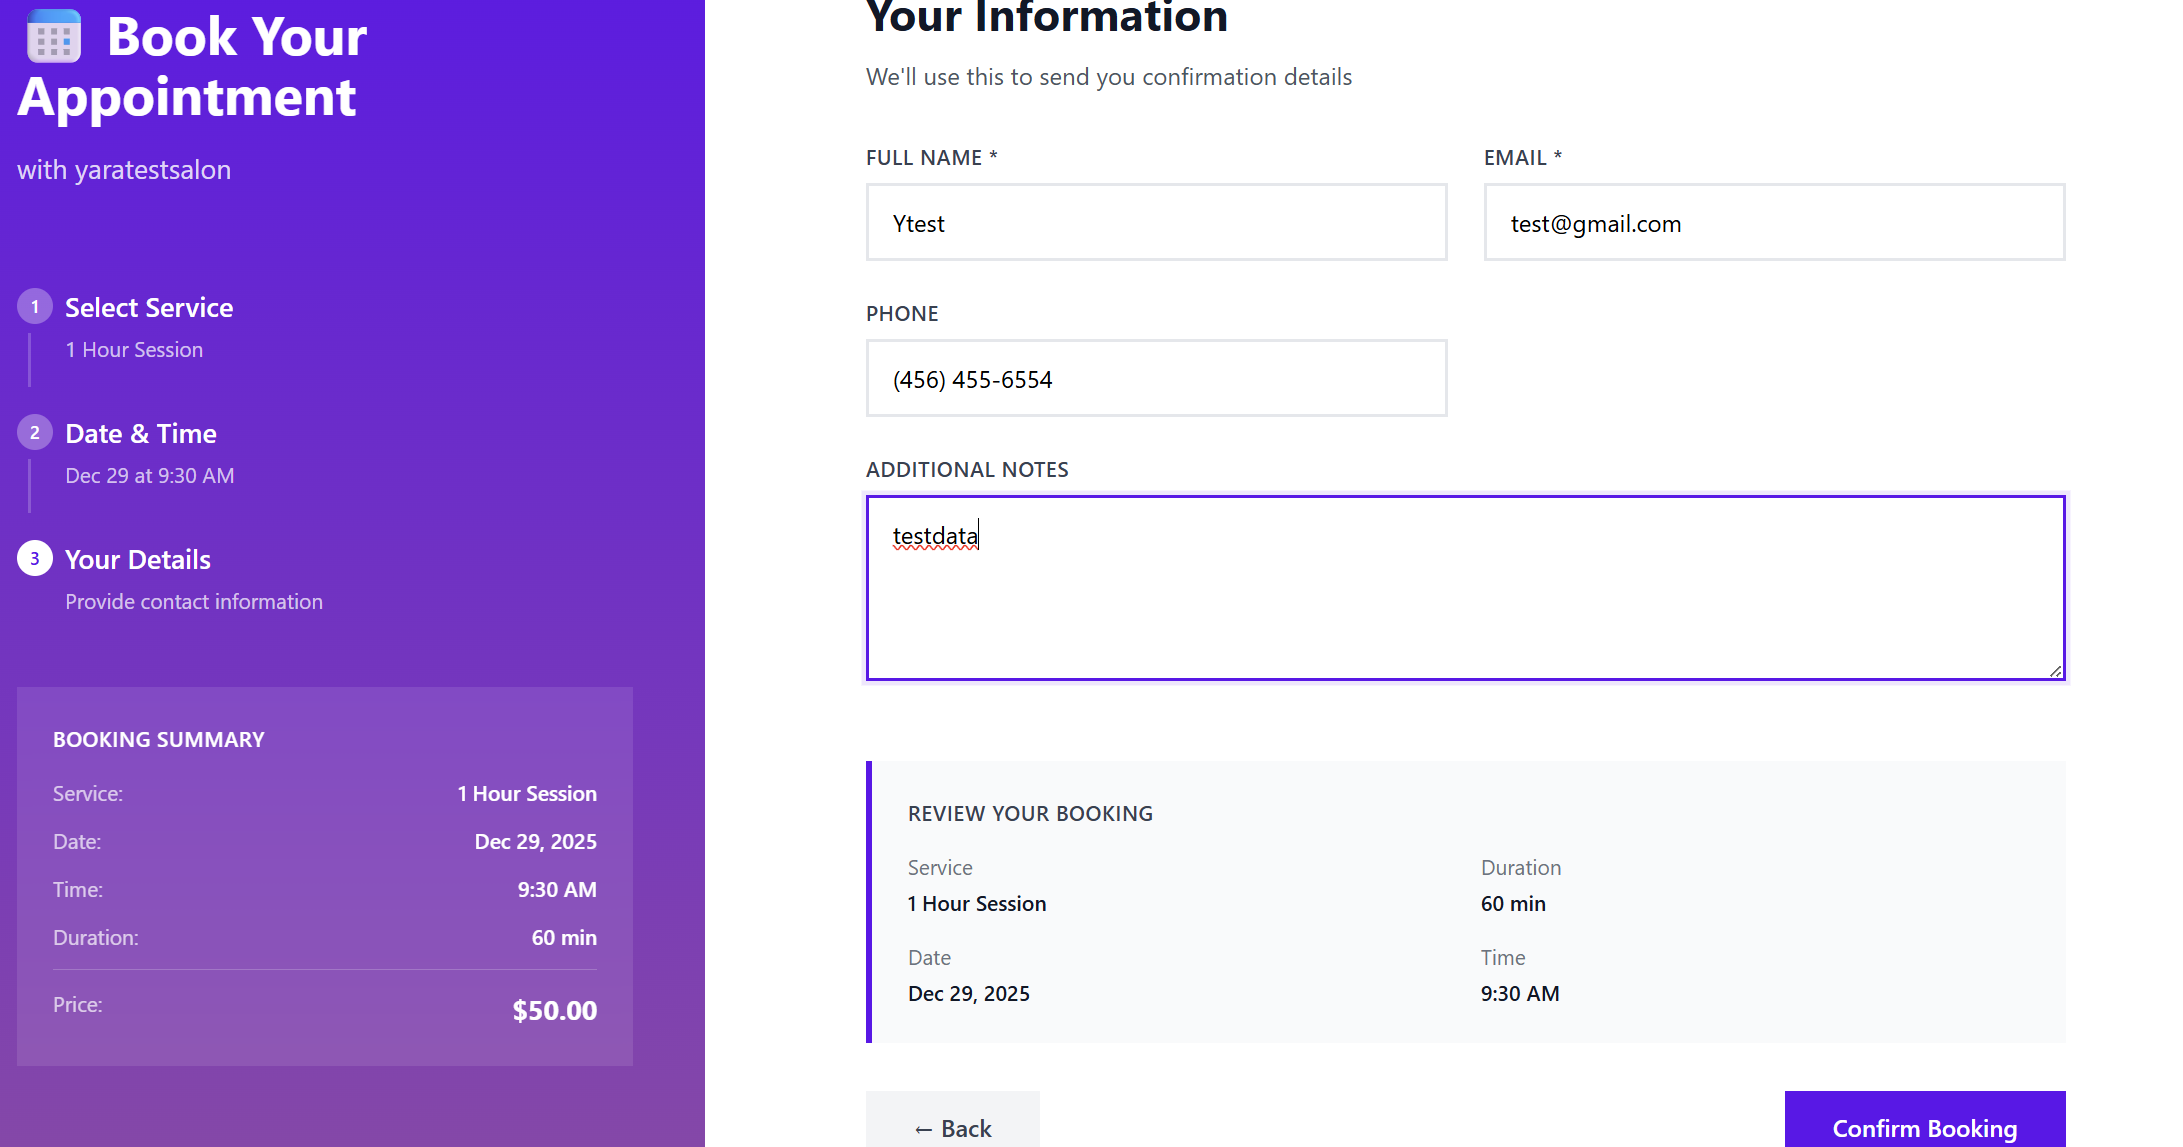
4. Step 3: Your Information
To finalize the reservation, the customer provides their contact details:
-
Required Fields: Full Name, Email, and Phone Number.
-
Additional Notes: A text area for the customer to leave specific instructions or requests for the business.
-
Review Your Booking: A final summary box appears at the bottom, allowing the customer to verify the service, duration, date, and time before committing.

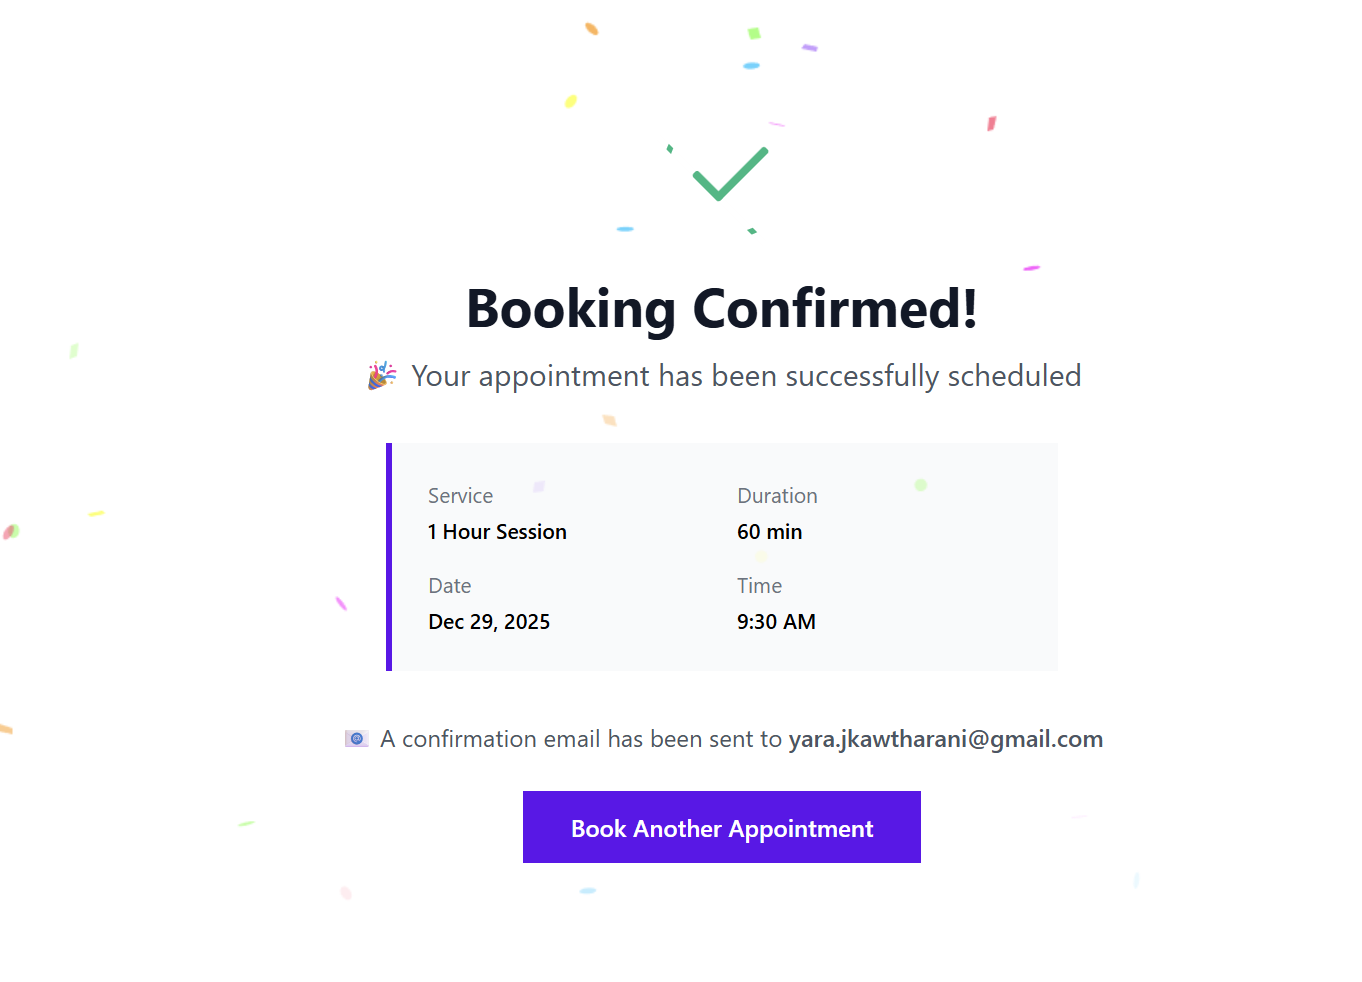
5. Booking Confirmation
After clicking Confirm Booking, the customer is presented with a "Booking Confirmed!" success screen.
-
Success Details: The screen displays a summary of the appointment with a celebratory confetti animation.
-
Automated Email: The system instantly sends a professional confirmation email to the address provided by the customer.
-
Next Steps: The customer can choose to Document Another Appointment or simply close the window.

This streamlined, mobile-responsive flow ensures that your clients' customers can document appointments in under 60 seconds. All bookings made here will immediately appear in your client's Admin Dashboard (as seen in Phase 2) for management and tracking.
Congratulations! You have now completed the full walkthrough for the Appointment Booking service on ResellPortal.com.
Web Design Services
Build custom websites for your clients using our professional design team.
-
Navigate to Marketplace: Go to the Wholesale Marketplace tab.
-
Select Client: Choose Add New or an Existing Client.
-
Choose Product: Select Web Design Service.
-
Configure Project:
-
Pages: Select Home (Required) and any others (Portfolio, FAQ, etc.). Legal pages are included free.
-
Branding: Set your Color Scheme and provide a Logo URL.
-
Content: Add URLs for your images/copy and list Competitor Websites for design inspiration.
-
Requirements: Provide Hosting logins (cPanel) and Client contact info.
-
-
Activate: Click Add Service to Client to submit the project brief.
-
Manage: Track progress and view status updates in the Services tab.
Note: Ensure your Reseller Wallet is topped up above $20.00. If your client needs hosting, activate it from the Marketplace before starting this brief.
Ordering Web Design
Discover our comprehensive Web Design Services tailored to create responsive, visually stunning, and functional websites for businesses, e-commerce, and beyond
1. Selecting Topics for Your Website
To customize the structure of your website, you can select from the following topics:
-
Home [+$50] (Required): The main landing topic of the website that introduces your brand.
-
About [+$50]: Provides details about your business, mission, and values.
-
Products/Services [+$50]: Highlights the products or services you offer.
-
Contact Us [+$25]: A topic for visitors to contact you, typically including a form, phone number, and email.
-
Privacy Policy [Included]: Covers how user data will be collected and handled.
-
Terms and Conditions [Included]: Legal terms for website usage.
-
FAQ [+$50]: Answers to frequently asked questions.
-
Blog/News [+$50]: A section to post articles, news, or updates.
-
Testimonials/Reviews [+$50]: Displays client reviews or testimonials.
-
Portfolio [+$75]: A showcase of your work or past projects.
-
Gallery [+$50]: A visual display of images or media.
-
Additional Topics [+$200]: Custom topics beyond the predefined options.
2. Customizing the Color Scheme
Personalize the website's visual style by specifying the following:
-
Primary Color: Used for the header and footer.
-
Secondary Color: Used for buttons, highlights, or accents.
-
Font Color: Specifies header fonts and links.
3. Adding Custom Functionality
Select additional functionality to enhance your website:
-
E-Commerce: Add an online store to sell products or services.
-
Other Custom Features [+$200]: Specify any advanced features you need, such as payment integrations, booking systems, or custom forms.
4. Uploading Brand Assets
-
Upload your logo (optional) to integrate it into the website design.
-
Provide competitor websites as references for design inspiration (optional).
5. Content and Hosting Details
-
Content: Provide URLs to any ready-to-use content (e.g., body text, product images). If content creation is needed, leave this field blank.
-
Hosting Details: Share cPanel or hosting login credentials. If you don’t have hosting, activate hosting services through our marketplace.
6. Communication and Contact
List your preferred contact details (email, phone) for any questions during the design process.
7. Cost Breakdown
-
Base Cost: $50
-
Additional charges based on selected topics and features:
-
Home: $50
-
About, Products/Services, FAQ, Blog, Testimonials: +$50 each
-
Portfolio: +$75
-
Gallery: +$50
-
Additional Topics or Custom Functionality: +$200
-
SEO Services
Boost your client's search engine rankings with our monthly SEO management.
-
Navigate to Marketplace: Go to the Wholesale Marketplace tab.
-
Select Client: Choose Add New or an Existing Client.
-
Choose Product: Select Monthly SEO Service.
-
Configure Project:
-
Targeting: Provide the Website URL and Primary Keywords the client wants to rank for.
-
Competition: (Optional) List Main Competitors for strategic analysis.
-
Site Access: Enter the Backend Logins (e.g., WordPress URL, user, and password) so our team can perform on-page optimizations.
-
Packages: Select the Base SEO Package (Required) and the optional Local SEO Add-on if the client serves a specific geographic area.
-
-
Activate: Click Add Service to Client to launch the campaign.
-
Manage: View active status and manage the subscription in the Services tab.
Note: Ensure your Reseller Wallet is topped up above $20.00 before activating this recurring service.
Ordering SEO
Unlock the power of professional SEO Services designed to boost visibility, drive organic traffic, and deliver measurable growth for your clients.
1. Activating SEO Services
-
Provide Client Details:
-
Enter the client’s email address.
-
-
Submit Website Details:
-
Add the website URL.
-
Provide login credentials (e.g., cPanel, hosting access) and any necessary details.
-
-
Choose the SEO Package:
-
Local SEO: $200/month.
-
Monthly fee: $700 (automatically deducted from your wallet).
-
2. SEO Service Phases
Phase 1: Onboarding
-
Keyword Research: Identify 5, 7, or 10 targeted keywords.
-
Industry/Competitor Research: Analyze your competitors for actionable strategies.
-
Sitemap (Main Nav) Review: Evaluate and refine navigation structure.
-
Content Analysis & Planning: Review existing content and plan improvements.
Onsite Optimization
-
Yoast SEO Plugin Installation/Setup
-
Title Tag, Meta Description & H1 Tag Optimization:
-
5 Keywords: 10 topics optimized.
-
7 Keywords: 16 topics optimized.
-
10 Keywords: 20 topics optimized.
-
Basic Technical Optimization
-
XML Sitemap & Robots.txt
-
Google Tools Integration (Google Analytics, Search Console)
-
Tag Manager & Analytics Goal Tracking
Advanced Technical Optimization
-
Schema Markup & Data Highlighter
-
404 Error Correction & 301 Redirect Setup
-
Sitemap Submission to Google Search Console
-
SiteSpeed Improvements
-
Advanced Schema (FAQ, About, Review)
-
Internal Linking & Image Alt Text Optimization
Phase 2: Recurring Monthly Deliverables
-
Content Creation:
-
Homepage Content (500 words).
-
Service/Product Topics: 2, 3, or 4 topics per month.
-
-
Stock Images: 2, 3, or 4 optimized images with alt text.
-
Content Installation & Optimization
-
Backlinks:
-
DA 20: 1 backlink.
-
DA 30: 1-2 backlinks.
-
3. Best Practices for Using SEO Services
-
Provide Accurate Details: Ensure login credentials and content URLs are correct.
-
Track Progress: Use monthly reports to monitor optimization improvements.
-
Engage with Content: Approve or suggest edits for content creation.
-
Be Consistent: SEO results improve with ongoing monthly deliverables.
CRM (Customer Relationship Manager)
Deploy a powerful Customer Relationship Management system for your clients.
-
Navigate to Marketplace: Go to the Wholesale Marketplace tab.
-
Select Client: Choose Add New or an Existing Client.
-
Choose Product: Select CRM System.
-
Configure Account:
-
Subdomain: Enter the desired address for the client’s login (e.g., clientname.crm-link.com).
-
Logo URL: Provide a link to the client’s brand logo for portal customization.
-
Billing Cycle: Select the renewal frequency (Monthly, Quarterly, etc.).
-
-
Activate: Click Add Service to Client to provision the system instantly.
-
Manage: Go to the Services tab to view login credentials and manage the subscription.
Note: Ensure your Reseller Wallet is topped up above $20.00 before activating this service.
Using CRM (Intro)
Welcome to the ResellPortal CRM documentation. This guide provides comprehensive insights into managing your customer relationships, optimizing workflows, and leveraging the features of ResellPortal’s CRM system. Inspired by the powerful functionality of EspoCRM, ResellPortal CRM is tailored to streamline resellers’ operations, making it easier to track, manage, and grow your business relationships.
1. Introduction to ResellPortal CRM
ResellPortal CRM is a customer relationship management platform designed to help resellers streamline their business processes. It provides tools for managing customer data, tracking sales, automating workflows, and generating reports to drive informed decision-making.
Whether you’re tracking potential leads or managing ongoing client relationships, ResellPortal CRM is built to improve efficiency and foster growth.
Key Benefits:
-
Centralized customer data management
-
Enhanced sales tracking and forecasting
-
Seamless task and activity management
-
Advanced reporting and insights
-
Flexible customization options
2. Getting Started
System Requirements
To use ResellPortal CRM effectively, ensure your system meets the following requirements:
-
Web Browser: Chrome, Firefox, Safari, or Edge (latest versions recommended)
-
Internet Connection: Stable, high-speed connection
-
Screen Resolution: Minimum 1024x768 pixels for optimal display
User Access and Roles
ResellPortal CRM employs a role-based access control system. Common roles include:
-
Administrator: Full access to all features and settings
-
Sales Manager: Access to sales data, lead management, and reporting
-
Customer Support: Access to accounts and activity tracking
To ensure data security, users should be assigned appropriate roles based on their responsibilities.
Logging In
If you forget your password, use the “Forgot Password” link to reset it.
3. Core Features
Dashboards
Dashboards provide an overview of your business’s key metrics and activities. They can be customized to display:
-
Sales performance
-
Upcoming tasks
-
Recent activity logs
-
Key performance indicators (KPIs)
Accounts and Contacts
The Accounts and Contacts modules are central to managing your relationships:
-
Accounts: Represent businesses or organizations.
-
Contacts: Represent individuals associated with accounts.
Actions:
-
Add new accounts or contacts
-
Link contacts to accounts
-
View detailed interaction history
Leads and Opportunities
Track potential customers and convert them into sales with these tools:
-
Leads: Capture initial interest and qualification details.
-
Opportunities: Monitor sales prospects, including estimated revenue and closing dates.
Sales Management
Manage your entire sales pipeline in one place:
-
Visualize your sales funnel.
-
Track deal progress across stages (e.g., prospecting, negotiation, closed-won).
-
Assign tasks to team members to ensure timely follow-ups.
Task and Activity Tracking
Stay organized with integrated task and activity management:
-
Schedule calls, meetings, or follow-ups.
-
Assign tasks to team members.
-
Set reminders and track completion statuses.
4. Customization
Every business is unique, and ResellPortal CRM offers extensive customization options:
-
Fields: Add or modify data fields in modules to capture the information you need.
-
Layouts: Adjust module layouts for a more user-friendly experience.
-
Dashboards: Personalize dashboards with widgets relevant to your role.
5. Advanced Features
Reports and Analytics
Gain insights into your performance with powerful reporting tools:
-
Generate pre-built or custom reports.
-
Visualize data with charts and graphs.
-
Export reports in multiple formats (e.g., PDF, Excel).
Automation and Workflows
Automate repetitive tasks to save time and reduce errors:
-
Set up automated notifications and reminders.
-
Create workflows for tasks like lead assignment or email follow-ups.
-
Define triggers based on specific actions (e.g., status changes).
Integrations
Expand functionality with third-party integrations:
-
Email Integration: Sync with Gmail, Outlook, or other email clients.
-
Calendar Sync: Integrate with Google Calendar or Microsoft Outlook for scheduling.
-
API Access: Connect ResellPortal CRM with your existing tools and platforms.
6. Troubleshooting and Support
Common Issues
-
Unable to Login:
-
Ensure you’re using the correct username and password.
-
Reset your password if necessary.
-
Contact support if issues persist.
-
-
Slow Performance:
-
Check your internet connection.
-
Clear browser cache and cookies.
-
Ensure your browser is up to date.
-
-
Missing Data:
-
Verify access permissions.
-
Check filters or search settings in the module.
-
Support Options
ResellPortal CRM offers several support channels:
-
Knowledge Base: Access detailed articles and tutorials.
-
Email Support: Contact our team at support@resellportal.com.
-
Live Chat: Available during business hours via our website.
Using Accounts
The Accounts module in ResellPortal CRM is designed to help you manage and organize businesses or organizations you interact with. Each account acts as a central hub where you can store essential information, track interactions, and link related contacts, leads, and opportunities. Here’s a detailed guide to using the Accounts section effectively.
1. Navigating to the Accounts Module
-
Log in to your ResellPortal CRM dashboard.
-
Locate the main navigation menu on the left-hand side.
-
Click on Accounts to access the module.
You’ll see a list view displaying all existing accounts.
2. Creating a New Account
To add a new account:
-
Click the "Create" Button:
-
In the Accounts module, click the + Create button at the top-right corner.

-
-
Fill Out the Account Details:
-
Account Name (Required): Enter the name of the business or organization.
-
Industry: Select the industry category (e.g., Retail, Technology).
-
Type: Indicate whether it’s a customer, prospect, partner, or vendor.
-
Billing Address: Enter the billing address of the account.
-
Shipping Address: If different, specify the shipping address.
-
Phone Number: Add the main contact number for the account.
-
Website: Enter the account’s website URL.
-
-
Save the Account:
-
Click the Save button at the bottom to store the new account.

Note: You can Link Related Records by Using the "Contacts," "Opportunities," or "Tasks" sections to link relevant records that appear after saving.

-

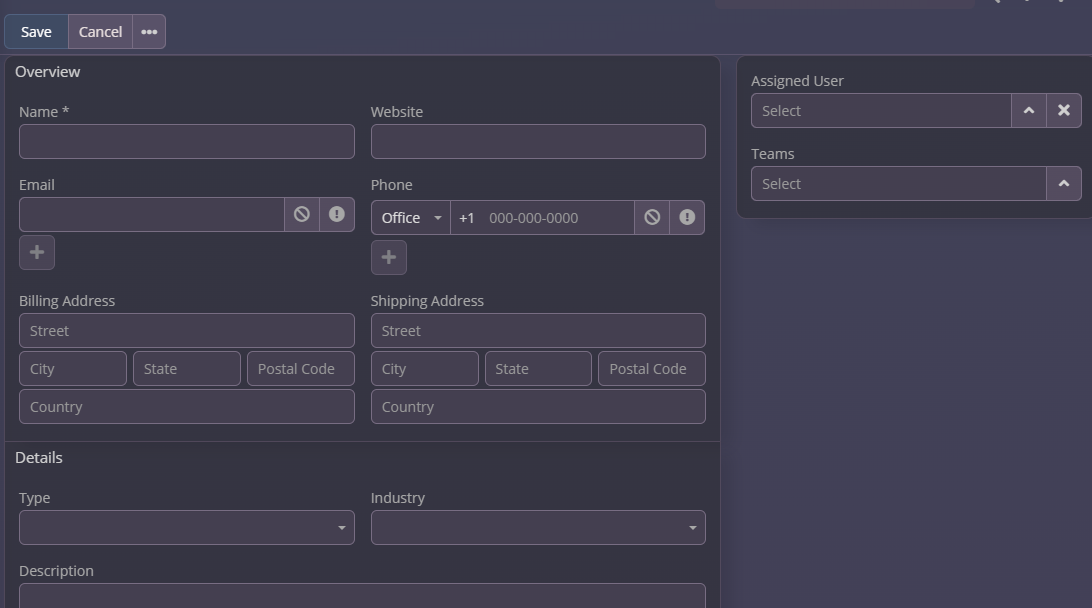
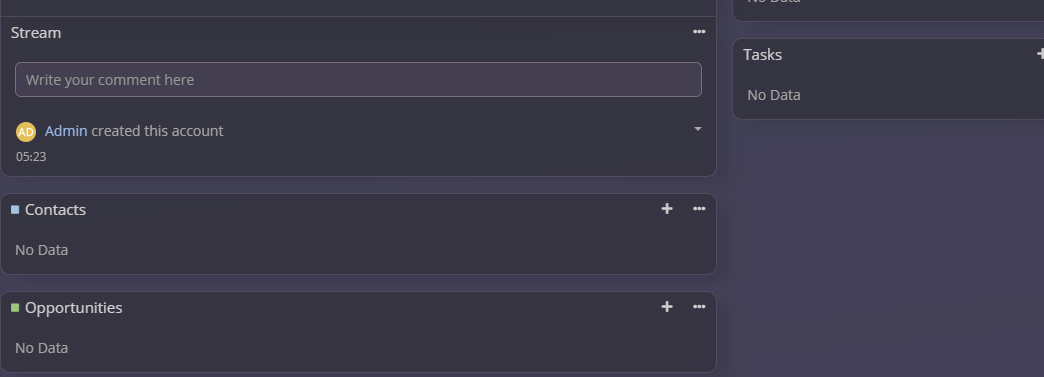
3. Viewing and Editing Accounts
Accessing an Account Record:
-
From the Accounts list view, click on the desired account’s name to open its detailed record view.
Editing Account Information:
-
In the account record view, click the Edit button at the top-right corner.
-
Update the necessary fields (e.g., phone number, address, or industry).
-
Click Save to apply the changes.

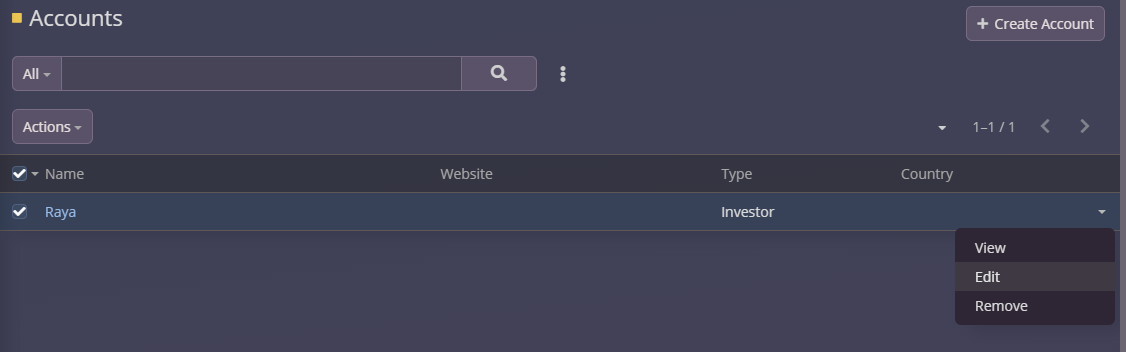
4. Linking Contacts to an Account
Contacts represent individuals associated with an account. To link contacts:
-
Open the desired account record.
-
Scroll down to the Contacts subpanel.
-
Click the Link button to associate an existing contact or the + Create button to add a new one.
-
If creating a new contact, enter the individual’s details (e.g., name, email, phone).
-
Save the contact. It will now appear in the Contacts subpanel.


5. Managing Interactions and Activities
The Accounts module allows you to track interactions and activities, such as meetings, calls, and tasks:
-
Adding Activities:
-
In the account record, locate the Activities subpanel.
-
Click + Create to add a new activity, such as a call, meeting, or task.
-
Enter relevant details like date, time, and description.
-
Save the activity.

-
-
Viewing Interaction History:
-
The History subpanel displays completed activities, emails, and notes linked to the account.
-
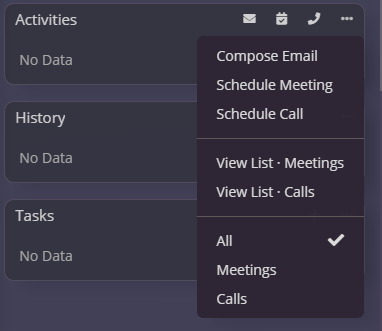
6. Filtering and Searching Accounts
Use filters and search options to locate specific accounts quickly:
-
Search Bar:
-
Use the search bar at the top of the Accounts list to find an account by name, industry, or type.
-
-
Filters:
-
Click the Filters button to apply advanced filters based on criteria like creation date, assigned user, or status.

-
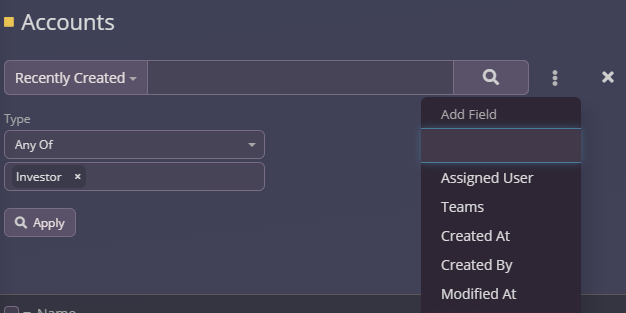
7. Deleting Accounts
Deleting an Account:
-
Use this option only if the account is no longer needed, as deletion is permanent.
-
Open the account record.
-
Click the Remove button.
-
Confirm the deletion.

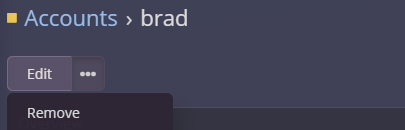
8. Best Practices for Managing Accounts
-
Keep Data Updated: Regularly review and update account information to ensure accuracy.
-
Use Notes: Add notes to account records to document key interactions or insights.
-
Leverage Automations: Set up workflows to automate tasks like follow-up reminders or email notifications.
-
Collaborate: Use the "Assigned To" field to delegate account ownership and tasks effectively within your team.
Using Contacts
The Contacts module in ResellPortal CRM is designed to help you manage individual relationships linked to businesses or organizations (Accounts). Each contact holds key details about the person, including their role, communication preferences, and interaction history. This guide will walk you through effectively using the Contacts module.
1. Navigating to the Contacts Module
-
Log in to your ResellPortal CRM dashboard.
-
Locate the main navigation menu on the left-hand side.
-
Click on Contacts to access the module.
You’ll see a list view displaying all existing contacts, including names, associated accounts, and email addresses.
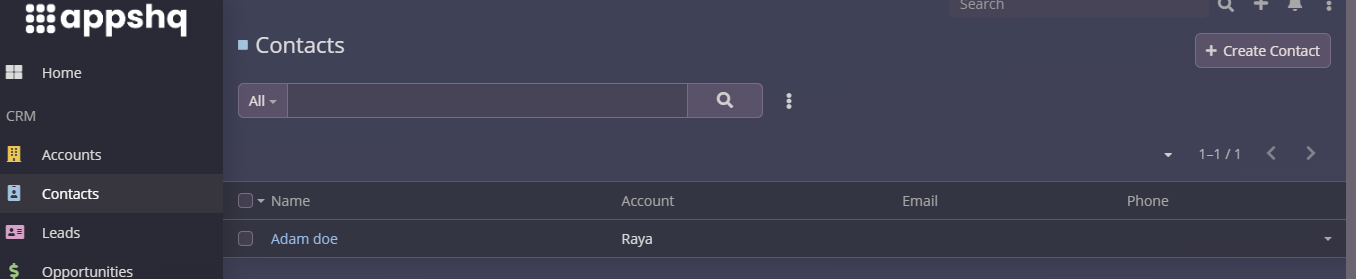
2. Creating a New Contact
To add a new contact:
-
Click the "Create" Button:
-
In the Contacts module, click the + Create button at the top-right corner.
-
-
Fill Out the Contact Details:
-
First Name and Last Name (Required): Enter the individual’s name.
-
Email Address: Add the primary email address for communication.
-
Phone Number: Include the main contact number.
-
Associated Account: Link the contact to an existing account for better organization.
-
Address: Enter the contact’s physical or mailing address, if applicable.
-
-
Save the Contact:
-
Click the Save button to store the new contact.

-
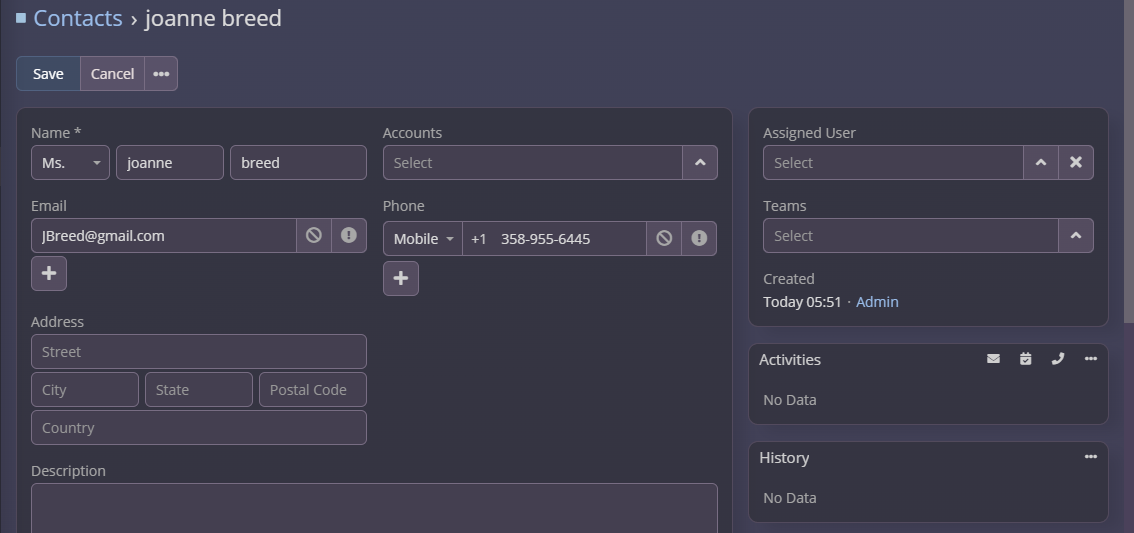
3. Viewing and Editing Contacts
Accessing a Contact Record:
-
From the Contacts list view, click on the desired contact’s name to open their detailed record.
Editing Contact Information:
-
In the contact record view, click the Edit button at the top-right corner.
-
Update any necessary fields, such as email, phone number, or associated account.
-
Click Save to apply the changes.

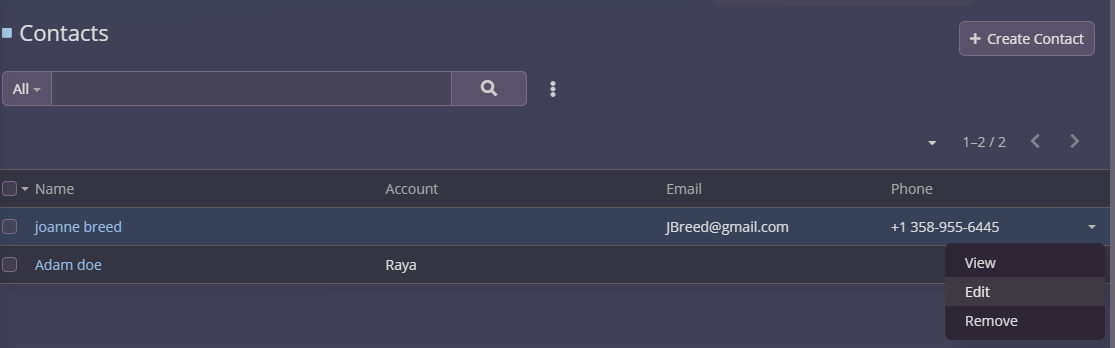
4. Linking Contacts to Accounts
Each contact should be associated with an account for better data organization and tracking. To link a contact to an account:
-
Open the desired contact record.
-
Locate the Account field in the record.
-
Select an existing account or create a new one directly from the dropdown.
-
Save the changes.

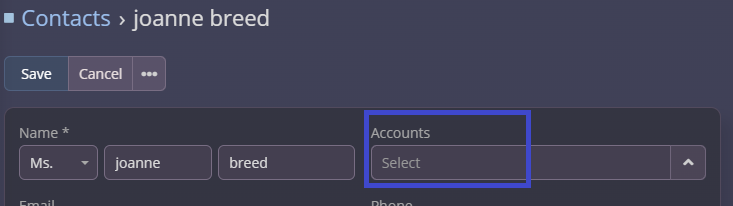
5. Tracking Interactions and Activities
The Contacts module allows you to log and monitor all interactions with individuals:
-
Adding Activities:
-
In the contact record, locate the Activities subpanel.
-
Click + Create to add an activity such as a call, email, or meeting.
-
Enter details like the date, time, and description of the interaction.
-
Save the activity.

-
-
Viewing Interaction History:
-
The History subpanel displays completed activities, notes, and emails linked to the contact.
-
-
Logging Notes:
-
Use the Stream section to document key insights or conversations related to the contact.
-
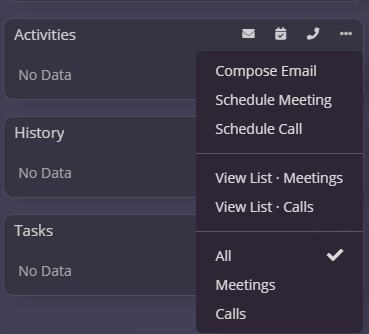
6. Searching and Filtering Contacts
Quickly locate contacts using the search and filter options:
-
Search Bar:
-
Use the search bar at the top of the Contacts list to find a contact by name, email, or phone number.
-
-
Filters:
-
Click the Filters button to apply advanced criteria, such as account association, title, or location.

-
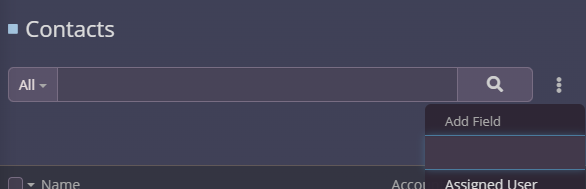
7. Deleting Contacts
Deleting a Contact:
-
Deleting permanently removes the contact from the CRM. Use this option carefully.
-
Open the contact record.
-
Click the remove button.
-
Confirm the deletion.

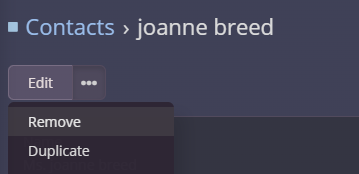
8. Best Practices for Managing Contacts
-
Keep Contact Details Current: Regularly review and update email addresses, phone numbers, and titles.
-
Document Interactions: Use notes and activity tracking to maintain a history of communications.
-
Link Contacts to Accounts: Always associate contacts with relevant accounts for better organization.
-
Segment Your Contacts: Use filters and tags to categorize contacts based on industry, location, or status.
-
Leverage Automation: Set reminders or workflows for follow-ups and scheduled calls.
By mastering the Contacts module, you can strengthen individual relationships, improve communication efficiency, and drive your business goals forward. For further assistance, contact our support team or explore the full ResellPortal CRM documentation.
Using Leads
The Leads module in ResellPortal CRM is designed to help you capture, track, and manage potential customers effectively. Leads are individuals or organizations that have shown interest in your product or service but are not yet fully qualified. This guide will walk you through how to use the Leads module to convert prospects into long-term customers.
1. Navigating to the Leads Module
-
Log in to your ResellPortal CRM dashboard.
-
Locate the main navigation menu on the left-hand side.
-
Click on Leads to access the module.
You’ll see a list view displaying all existing leads, including their names, statuses, and associated accounts or contacts.
2. Creating a New Lead
To add a new lead:
-
Click the "Create" Button:
-
In the Leads module, click the + Create button at the top-right corner.
-
-
Fill Out Lead Details:
-
First Name and Last Name: Enter the lead’s personal information.
-
Company/Organization: If applicable, enter the lead’s associated company.
-
Email Address and Phone Number: Provide contact details for communication.
-
Lead Source: Indicate how the lead was acquired (e.g., website inquiry, referral, trade show).
-
Status: Select the current status (e.g., New, In Progress, Qualified, Disqualified).
-
Industry: Specify the industry if applicable.
-
-
Add Additional Information:
-
Include notes about the lead’s needs, timeline, or any relevant context.
-
-
Save the Lead:
-
Click the Save button to store the new lead.


-

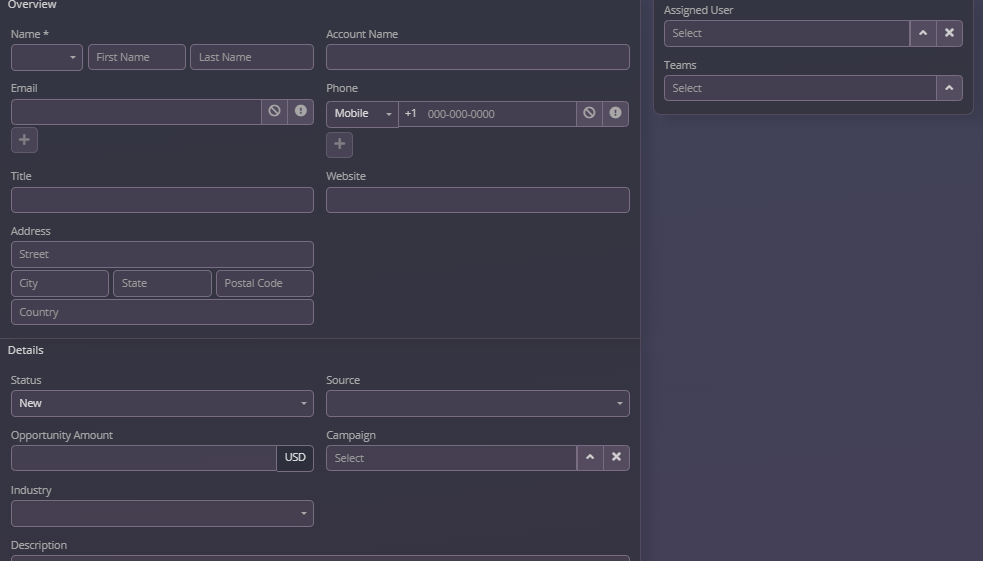
3. Viewing and Editing Leads
Accessing a Lead Record:
-
From the Leads list view, click on the desired lead’s name to open their detailed record.
Editing Lead Information:
-
In the lead record view, click the Edit button at the top-right corner.
-
Update any necessary fields, such as email, status, or notes.
-
Click Save to apply the changes.

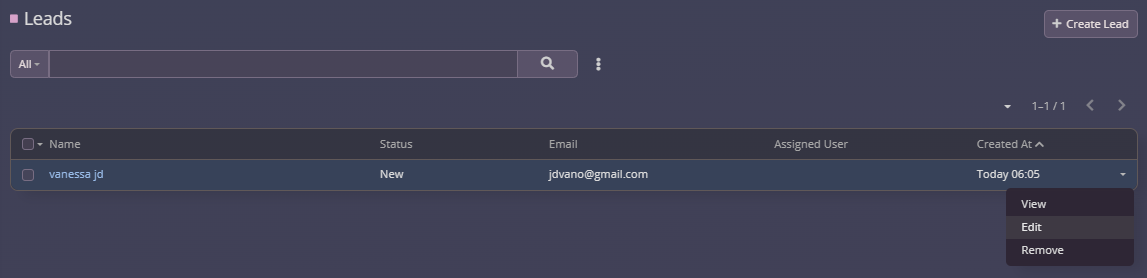
4. Qualifying a Lead
Qualifying a lead means assessing their potential to become a customer. To qualify a lead:
-
Open the lead record.
-
Review the lead’s details and interaction history.
-
Update the Status field to reflect their progression (e.g., Converted).
-
If the lead is ready to convert, link them to an account and/or contact or create a new one.


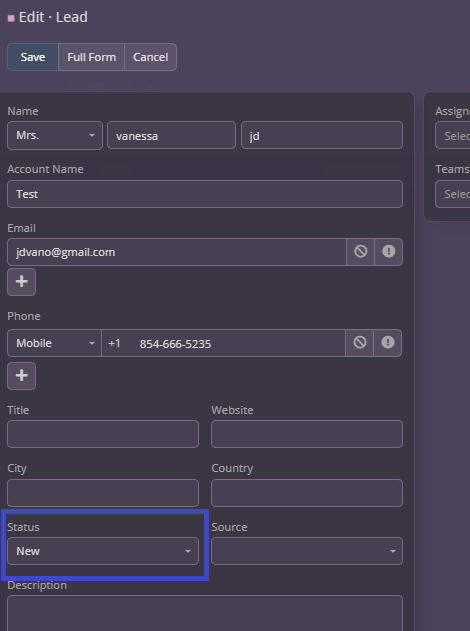

5. Tracking Interactions and Activities
To maintain a comprehensive history of your engagement with a lead:
-
Adding Activities:
-
In the lead record, locate the Activities subpanel.
-
Click + Create to schedule calls, meetings, or tasks.
-
Enter relevant details like date, time, and description.
-
Save the activity.

-
-
Logging Notes:
-
Use the stream section to document important conversations or observations about the lead.
-
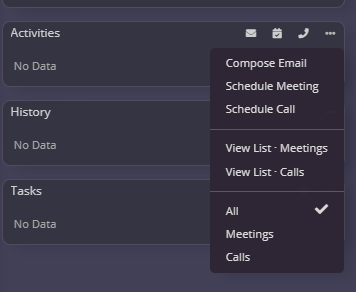
6. Filtering and Searching Leads
Quickly locate specific leads using the search and filter options:
-
Search Bar:
-
Use the search bar at the top of the Leads list to find a lead by name, company, or email.
-
-
Filters:
-
Click the Filters button to apply criteria such as status, lead source, or assigned user.

-

7. Converting Leads
Once a lead is qualified, you can convert it into an account, contact, or opportunity:
-
Open the lead record.
-
Click the Convert button.
-
Choose the desired action:
-
Create Account and Contact: Automatically generate an account and contact record based on the lead’s details.
-
Create Opportunity: Link the lead to a new sales opportunity.
-
-
Review and confirm the information, then complete the conversion process.


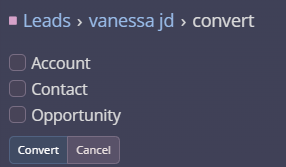
8. Deleting or Archiving Leads
Deleting a Lead:
-
Deleting permanently removes the lead from the CRM. Use this option carefully.
-
Open the lead record.
-
Click the Delete button.
-
Confirm the deletion.

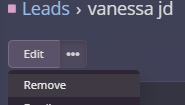
9. Best Practices for Managing Leads
-
Follow Up Promptly: Timely communication can significantly improve lead conversion rates.
-
Qualify Leads Effectively: Use clear criteria to assess whether a lead is worth pursuing further.
-
Document Interactions: Keep a detailed record of communications and activities to maintain continuity.
-
Segment Leads: Use filters and tags to categorize leads based on their industry, status, or source.
-
Automate Workflows: Set up reminders and automated tasks for follow-ups to ensure no leads fall through the cracks.
Using Opportunities
The Opportunities module in ResellPortal CRM is designed to help you manage and track potential revenue-generating deals. Opportunities represent sales prospects that you’re actively working on, allowing you to monitor progress, forecast revenue, and prioritize efforts effectively. This guide will walk you through the features and best practices for using the Opportunities module.
1. Navigating to the Opportunities Module
-
Log in to your ResellPortal CRM dashboard.
-
Locate the main navigation menu on the left-hand side.
-
Click on Opportunities to access the module.
You’ll see a list view displaying all existing opportunities, including their names, stages, and expected close dates.
2. Creating a New Opportunity
To add a new opportunity:
-
Click the "Create" Button:
-
In the Opportunities module, click the + Create button at the top-right corner.

-
-
Fill Out Opportunity Details:
-
Opportunity Name (Required): Provide a descriptive name for the opportunity.
-
Account: Link the opportunity to an existing account.
-
Expected Close Date: Specify the anticipated date for closing the deal.
-
Stage: Select the current stage of the sales process (e.g., Prospecting, Negotiation, Closed-Won, Closed-Lost).
-
Probability: Enter the potential revenue value for this opportunity.
-
Assigned User: Designate a team member responsible for managing the opportunity.
-
-
Add Additional Information:
-
Include notes about the opportunity’s background, client requirements, or key stakeholders. in the description field.
-
-
Save the Opportunity:
-
Click the Save button to store the new opportunity.

-

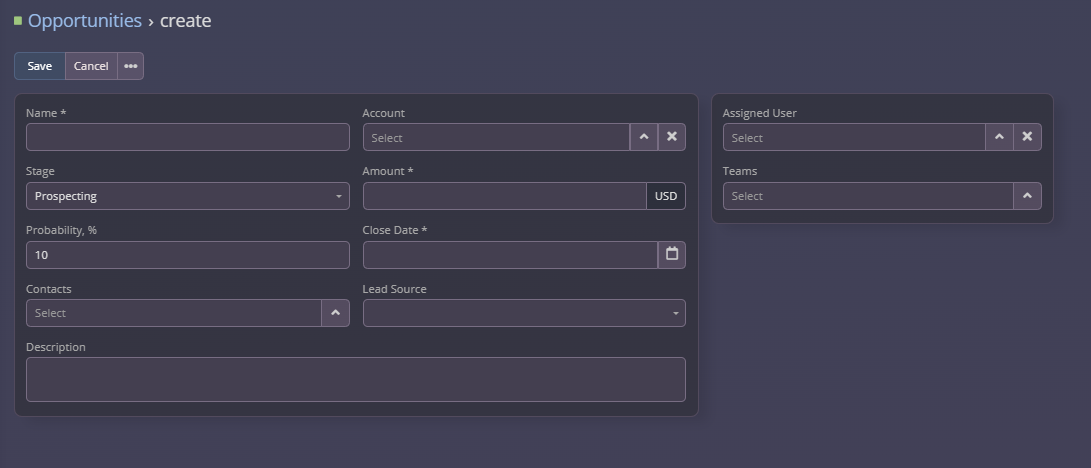
3. Viewing and Editing Opportunities
Accessing an Opportunity Record:
-
From the Opportunities list view, click on the desired opportunity’s name to open its detailed record.
Editing Opportunity Information:
-
In the opportunity record view, click the Edit button at the top-right corner.
-
Update any necessary fields, such as stage, expected close date, or amount.
-
Click Save to apply the changes.


4. Tracking Progress Through Sales Stages
The Opportunities module uses stages to track where each deal stands in the sales pipeline. Common stages include:
-
Prospecting: Initial contact or discovery phase.
-
Qualification: Assessing the lead’s needs and fit.
-
Proposal: Presenting solutions or quotes.
-
Negotiation: Finalizing terms and addressing objections.
-
Closed-Won: Successfully closed deals.
-
Closed-Lost: Opportunities that did not result in a sale.

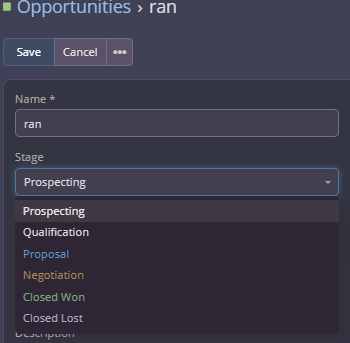
To update the stage:
-
Open the opportunity record.
-
Select the new stage from the Stage dropdown.
-
Save your changes.
5. Adding Activities and Notes
Keep a detailed record of all interactions and activities related to each opportunity:
-
Adding Activities:
-
In the opportunity record, locate the Activities subpanel.
-
Click + Create to schedule tasks, calls, or meetings.
-
Enter details like date, time, and description.
-
Save the activity.

-
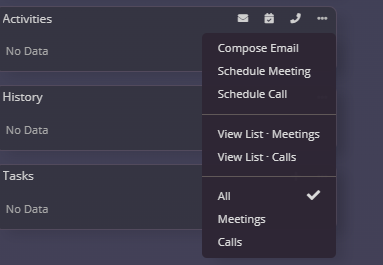
6. Searching and Filtering Opportunities
Quickly locate specific opportunities using the search and filter options:
-
Search Bar:
-
Use the search bar at the top of the Opportunities list to find an opportunity by name, account, or stage.
-
-
Filters:
-
Click the Filters button to apply criteria such as expected close date, assigned user, or amount.

-

7. Closing Opportunities
When an opportunity reaches its conclusion, mark it as either "Closed-Won" or "Closed-Lost":
-
Open the opportunity record.
-
Update the Stage field to "Closed-Won" or "Closed-Lost." s shown above point 4.
-
Add a note explaining the outcome (e.g., reasons for loss or feedback from the client).
-
Save the record.
8. Best Practices for Managing Opportunities
-
Prioritize High-Value Deals: Focus on opportunities with the highest potential revenue or strategic importance.
-
Regularly Update Stages: Keep pipeline stages current to ensure accurate forecasting.
-
Collaborate: Use the "Assigned User" field to delegate opportunities effectively and maintain accountability.
-
Leverage Insights: Use reporting tools to identify trends and refine your sales strategies.
-
Automate Follow-Ups: Set reminders and workflows to ensure consistent communication with prospects.
Using Activities
The Activities module in ResellPortal CRM allows you to schedule, track, and manage all interactions and tasks related to your business. From emails and meetings to calls and tasks, the Activities module ensures that you stay organized and never miss an important follow-up. The built-in calendar provides a centralized view of your upcoming commitments. This guide will walk you through each component of the Activities section.
1. Navigating to the Activities Module
-
Log in to your ResellPortal CRM dashboard.
-
Locate the main navigation menu on the left-hand side.
-
Click on Activities to access the module.
You will see a categorized list view of emails, meetings, calls, tasks, and other scheduled activities.
2. Managing Emails
Emails are a crucial part of client communication. The CRM allows you to send, receive, and track emails directly within the system.
Sending an Email:
-
Navigate to the Emails section under Activities.
-
Click the + Compose button to create a new email.
-
Fill out the required fields:
-
Recipient: Add the email address of the contact or lead.
-
Subject: Enter a subject line.
-
Message Body: Write your email content.
-
-
Attach any necessary files.
-
Click Send to deliver the email.


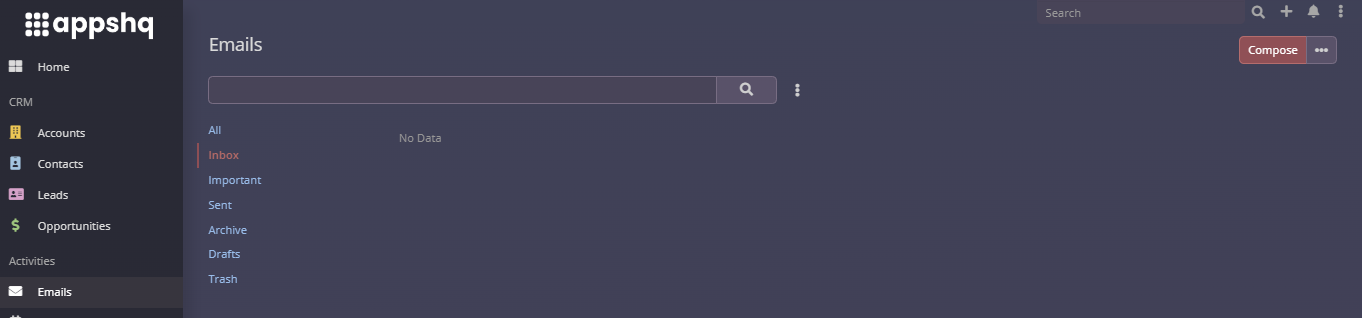
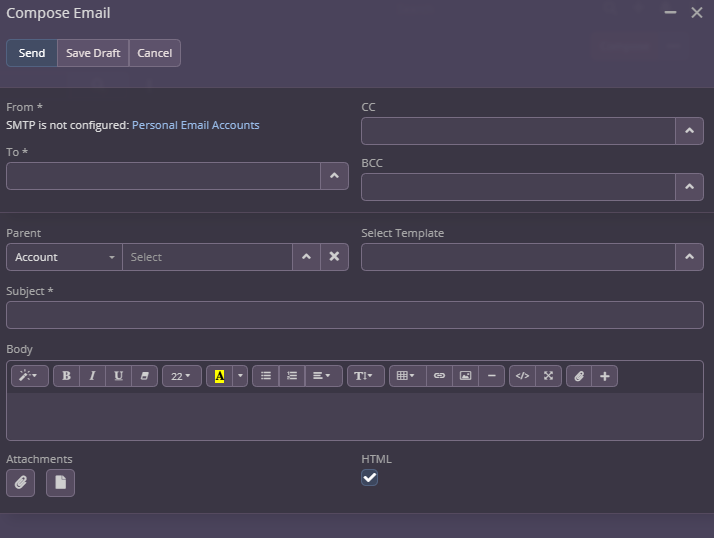
Tracking Emails:
-
Sent and received emails are automatically linked to the associated contact, lead, or opportunity for easy tracking.
-
Use the search bar to find specific emails by subject or recipient.
3. Scheduling and Managing Meetings
Meetings help you maintain direct communication with clients or team members. The Meetings section allows you to create and track all scheduled appointments.
Creating a Meeting:
-
In the Activities module, navigate to the Meetings section.
-
Click the + Create button.
-
Fill out the meeting details:
-
Title: Add a descriptive title for the meeting.
-
Date and Time: Specify the start and end times.
-
Participants: Add attendees from your contacts or team members.
-
Location: Enter the meeting venue or provide a video conferencing link.
-
-
Save the meeting.


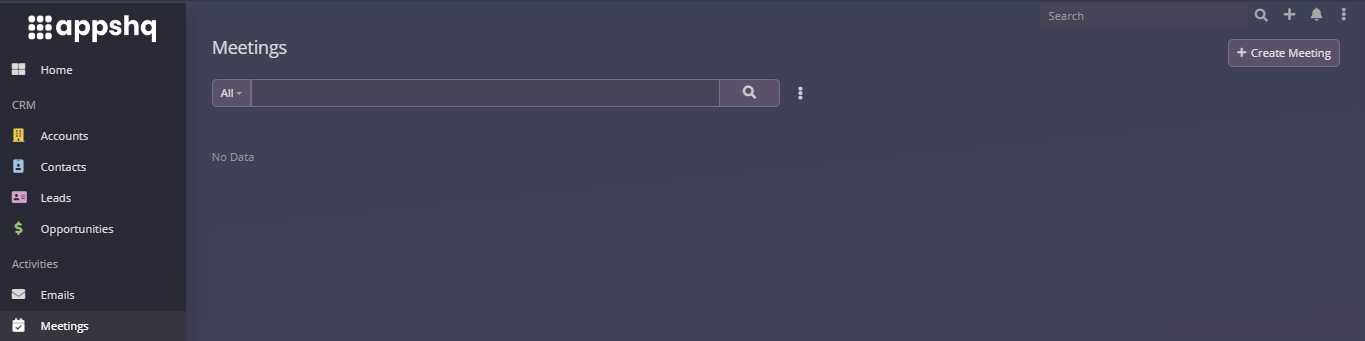
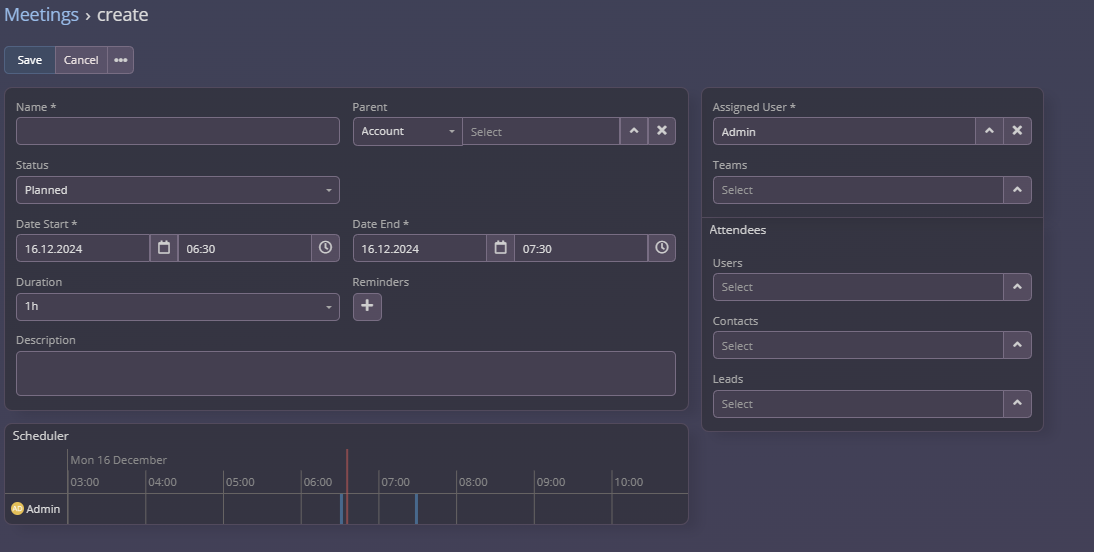
Managing Meetings:
-
View upcoming meetings in the Calendar section.
-
Reschedule or update meeting details by opening the meeting record and clicking Edit.
-
Mark meetings as completed once they are finished.
4. Logging and Tracking Calls
Calls are essential for follow-ups and quick resolutions. The Calls section allows you to log both completed and scheduled calls.
Logging a Completed Call:
-
Navigate to the Calls section under Activities.
-
Click the + Create button.
-
Enter the following details:
-
Subject: Add a title for the call.
-
Date and Time: Specify when the call occurred.
-
Duration: Record how long the call lasted.
-
Notes: Summarize the conversation.
-
-
Save the call record.


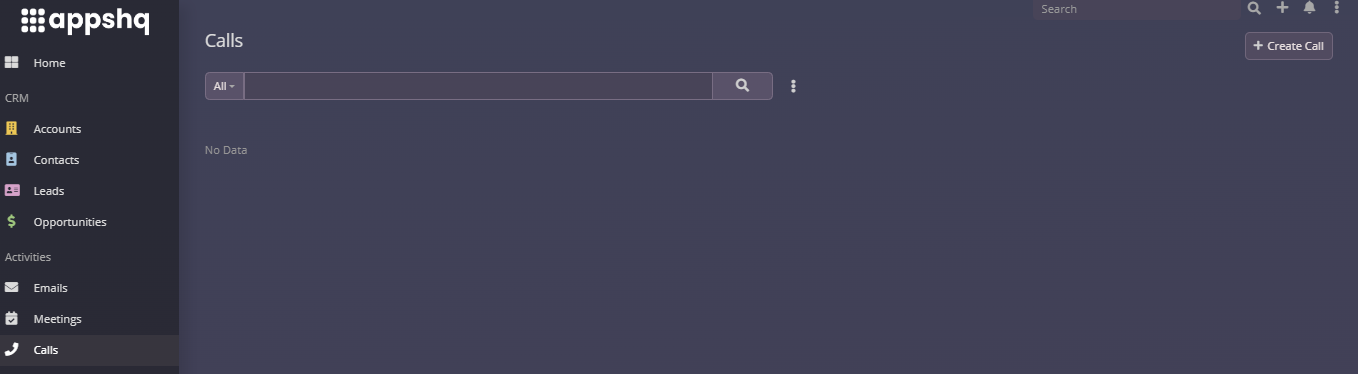
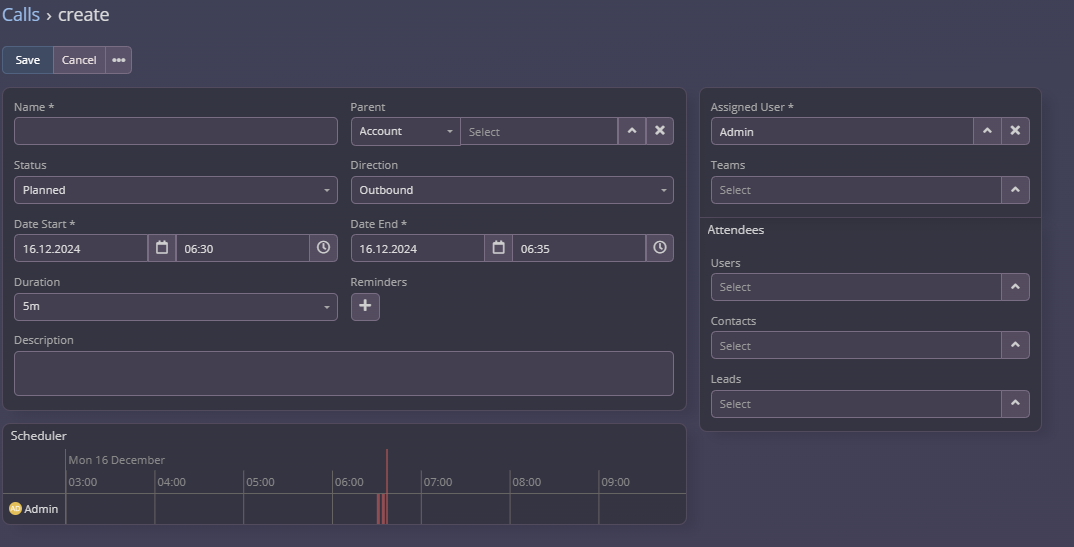
Scheduling a Call:
-
Follow the same steps as logging a call but set the call status to Scheduled.
-
Assign a reminder to ensure timely follow-up.
5. Managing Tasks
Tasks help you stay on top of to-dos and deadlines. The Tasks section allows you to create, assign, and monitor progress.
Creating a Task:
-
Navigate to the Tasks section in Activities.
-
Click the + Create button.
-
Fill out the task details:
-
Subject: Describe the task.
-
Due Date: Specify the deadline.
-
Priority: Set the priority level (e.g., Low, Medium, High).
-
Assigned User: Assign the task to a team member.
-
-
Save the task.


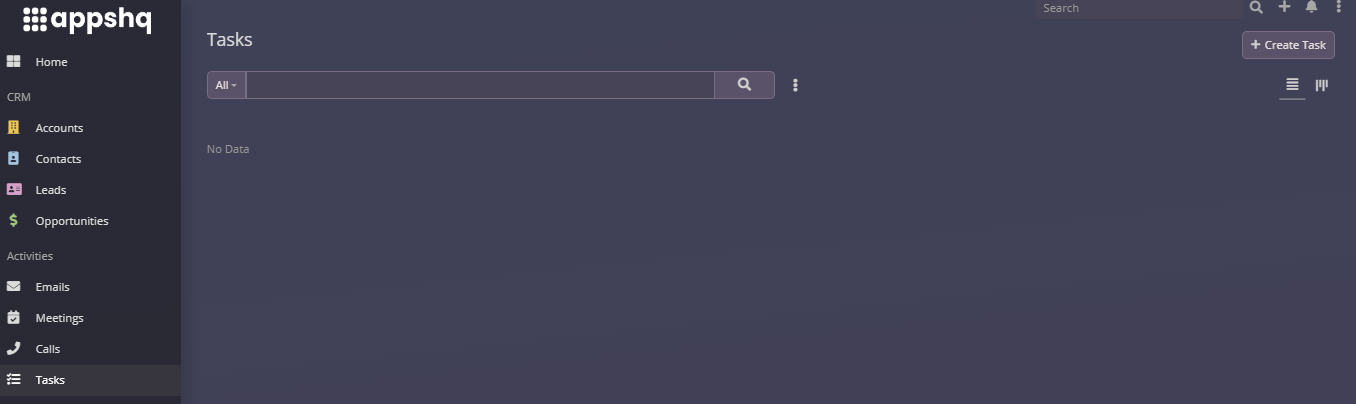
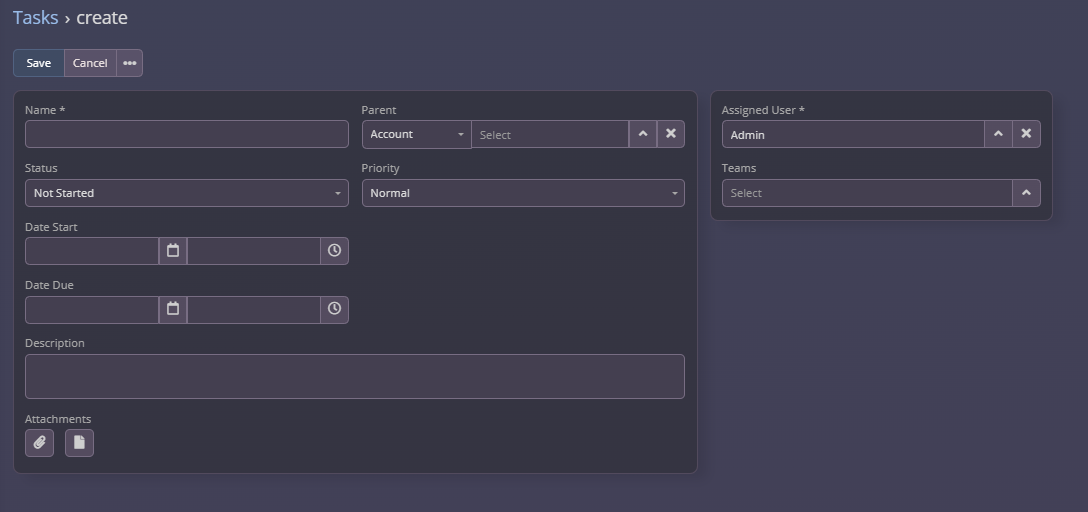
Tracking Task Progress:
-
Mark tasks as In Progress or Completed as you work through them.
-
Use filters to view tasks by due date, priority, or assigned user.

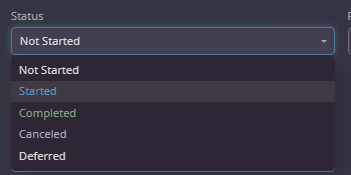
6. Using the Calendar
The Calendar provides a centralized view of all scheduled activities, including meetings, calls, and tasks.
Accessing the Calendar:
-
Navigate to the Calendar section in the main menu.
-
Use the Day, Week, or Month views to customize your display.

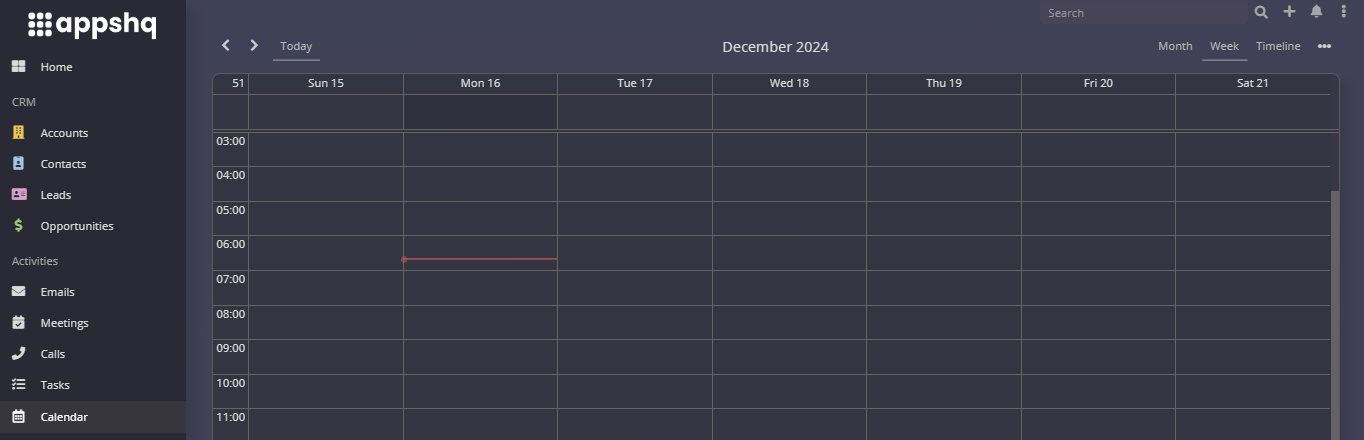
Adding Events to the Calendar:
-
Any meeting, call, or task scheduled in the Activities module is automatically added to the calendar.
-
You can also create events directly in the calendar by clicking on a specific date and time slot.

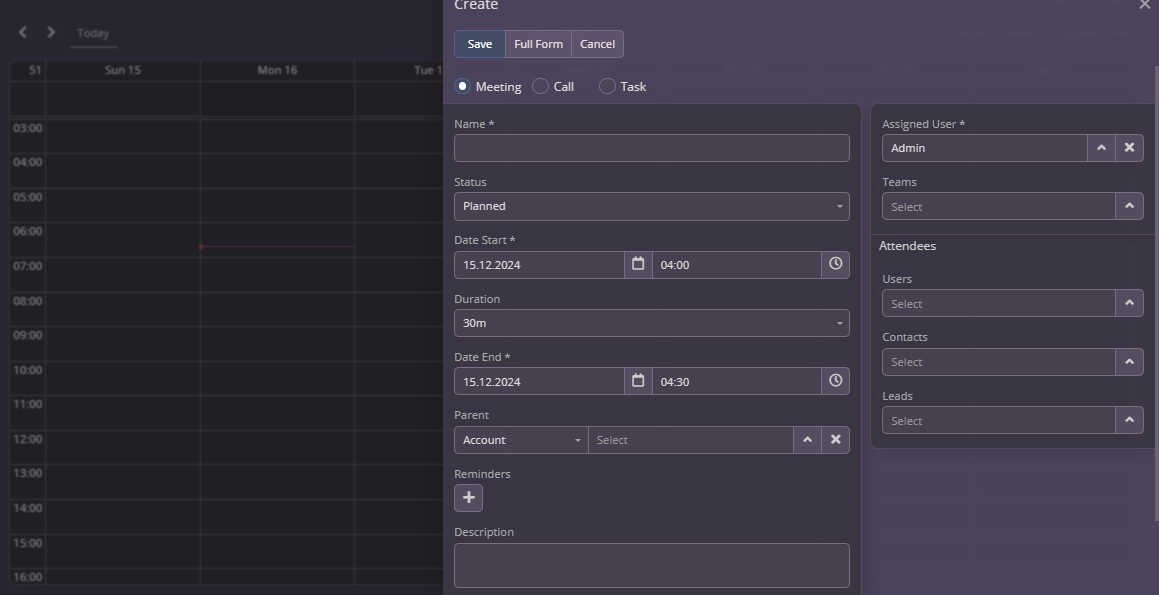
7. Best Practices for Managing Activities
-
Set Reminders: Use reminders to ensure no activity is missed.
-
Prioritize Tasks: Focus on high-priority items to stay efficient.
-
Document Everything: Keep detailed records of calls, emails, and meetings for future reference.
-
Collaborate: Assign tasks and share meeting schedules with team members to enhance coordination.
-
Use Filters: Leverage filtering options to focus on specific types of activities or timeframes.
E-Sim Data Plans
Provide instant global 4G/5G connectivity to travelers and remote workers.
-
Navigate to Marketplace: Go to the Wholesale Marketplace tab.
-
Select Client: Choose Add New or an Existing Client.
-
Choose Product: Select E-SIM Data Plans.
-
Configure Plan:
-
Destination: Enter the country or region for the data coverage.
-
Plan Selection: Choose from the available data packages (e.g., 1GB, 5GB, 10GB) and durations.
-
-
Activate: Click Add Service to Client to generate the eSIM QR code.
-
Manage: Go to the Services tab to view the QR code, check data usage, or manage the subscription.
Note: Ensure your Reseller Wallet is topped up above $20.00 before activating this service. The QR code is typically delivered to the client instantly via email.
FAQ
Frequently Asked Questions by Your Clients
Q: Can I use a physical SIM and eSIM together?
A: Yes, on dual SIM devices, you can use both a physical SIM and an eSIM. You can select which SIM to use for cellular data and set the default voice line.
Q: Should I switch on “Data Roaming” when using eSIM?
A: Yes, turn on data roaming for your eSIM and turn off roaming for your home SIM to avoid high charges. Go to “Settings” > “Cellular” > “Data Roaming.”
Q: Can I use more than one eSIM provider when traveling abroad?
A: Yes, iPhones can store up to 10 eSIMs, and Androids can store 5-7 eSIMs. Only one eSIM can be active at a time. Label your eSIMs to avoid confusion.
Q: Can multiple phones scan the same QR code?
A: No, each QR code can be scanned only once and is tied to a unique device ID.
Q: How to use hotspots with eSIM?
A: On iOS, APNs are preconfigured except for Japan, where you need to set the APN to "vmobile.jp." For Android issues, contact customer service for support.
Using Data Plans & Coverage
How to Use Day Pass Plans?
Day Pass plans provide a fixed amount of high-speed data daily and unlimited data at 2G speed after the high-speed allowance is used.
Example:
-
A Europe (30+ areas) 500MB/Day plan for 5 days provides:
-
500 MB/day of high-speed data (4G/LTE/5G)
-
2G speed (255 Kbps - 512 Kbps) after exceeding 500MB
-
Data resets every 24 hours, and this continues for 5 days.
-
Key Features:
-
Hotspot Sharing: Supported
-
Unlimited Daily Data: Fair Usage Policy (FUP) applies
-
Custom Validity: 1 to 365 days
-
Speeds: Up to 5G
-
Pre-Install Validity: 30 days
-
No Top-Up Available
Daily Plan Pricing:
-
Total price: [Number of Days] * [Plan Cost]
-
Days are counted from the first connection and reset at midnight based on a fixed time zone.
APN Settings
APN settings are configured automatically for most devices. Special exceptions apply to Japan for iOS devices.
For iOS (Japan):
-
Go to Settings > Mobile Data > Mobile Data Network.
-
Set APN to
vmobile.jp. -
Turn on roaming for eSIM.
For Android:
-
APN may need to be configured manually in some cases.
APN in API:
-
APN, PIN, and PUK details are available in the API.
Hotspot Sharing:
-
Supported by default.
Troubleshooting Common eSIM Issues
I Can't Connect to the Internet:
-
Go to Settings > Cellular > Cellular Data.
-
Select the newly purchased eSIM.
-
Ensure Data Roaming is ON.
-
Look for network bars:
-
Bars: Connected to a tower.
-
No Signal: Restart the device to refresh the connection.
-
-
Manually select the network if necessary.
Tips:
-
First-time connection may take up to an hour.
-
Turn off VPN settings.
-
Toggle eSIM ON/OFF.
I Can't Install My eSIM:
-
Ensure your device is unlocked.
-
Verify eSIM compatibility.
-
Ensure a strong internet connection.
-
Confirm the QR code hasn't been used by another device.
Can Users Reinstall a Deleted eSIM?
-
eSIMs CAN be reinstalled from the same QR code used during the initial installation.
-
Users can scan the same QR code to re-add the eSIM profile.
-
Note: QR codes cannot be shared or reused on another device.
Why Can't I Access the Internet Even with Data Left?
-
Data usage updates may not be real-time. Check consumption:
-
Settings > Cellular > Data Consumption.
-
What if I Deleted My eSIM Accidentally?
-
Attempt to reinstall using the original QR code.
-
If reinstallation fails, a new eSIM purchase is required.
Can I Transfer My eSIM to Another Device?
-
Activated eSIM: Not transferable.
-
Non-Activated eSIM: Transferable to a new device.
5G Availability
Checking 5G Availability:
-
Log in to your ResellPortal.com account.
-
Use the RAT column to check the available network status (3G/4G/5G) for each plan and country.
Supported Countries for 5G:
The following countries currently support 5G (subject to change). Always check the latest updates in the portal or API responses.
| Country/Region | Network Status |
|---|---|
| Aaland Islands | 4G/5G |
| Argentina | 4G/5G |
| Asia (20 areas) | 4G/5G |
| Asia-Pacific 6GB 8Days | 4G/5G |
| Australia | 4G/5G |
| Austria | 4G/5G |
| Bahrain | 4G/5G |
| Belgium | 4G/5G |
| China | 4G/5G |
| Croatia | 4G/5G |
| Czech Republic | 4G/5G |
| Denmark | 4G/5G |
| Estonia | 4G/5G |
| Europe 40+ Countries | 4G/5G |
| France | 4G/5G |
| Germany | 4G/5G |
| Greece | 4G/5G |
| Hong Kong | 4G/5G |
| India | 4G/5G |
| Italy | 4G/5G |
| Japan | 4G/5G |
| New Zealand | 4G/5G |
| Philippines | 4G/5G |
| Singapore | 4G/5G |
| Spain | 4G/5G |
| United Kingdom | 4G/5G |
| United States | 4G/5G |
| South Africa | 4G/5G |
| Tunisia | 4G/5G |
| Brazil | 4G/5G |
| Qatar | 4G/5G |
| Uzbekistan | 4G/5G |
Refer to the portal/API for the most up-to-date list.
Checking Data Usage
End-User Check:
-
Access the Short URL provided.
-
Click on Check Usage for real-time stats.
Support Channel
For unresolved eSIM issues:
-
Primary Support: Visit contact@resellportal.com
-
Provide ICCID and relevant screenshots for quick troubleshooting.
-
-
Unused eSIM: Cancel the order for a refund.
-
Used eSIM: Contact support for refund assistance.
E-sim Support Devices
Before purchasing or activating an eSIM plan, customers must ensure that their devices are eSIM-compatible. This guide provides resources, tools, and steps to check eSIM compatibility across devices.
1. eSIM Device Support Resources
Customers can use the following references to confirm eSIM support:
-
eSIM Device Support List Google Doc: A comprehensive list of eSIM-compatible devices.
-
GSMA eSIM Devices List: An industry-recognized source for checking eSIM-supported devices.
These lists can be displayed on your website or app for customer reference.
2. In-App eSIM Detection
For a seamless user experience, integrate our Android SDK to detect eSIM capabilities within your mobile app.
-
Learn more about SDK integration on the ResellPortal website or developer documentation.
3. How to Check eSIM Compatibility
On Android Devices:
The steps to check eSIM compatibility on Android devices may vary slightly by model but follow a similar process:
-
Go to Settings.
-
Select Network & Internet.
-
Locate the SIM Card or Mobile Network settings.
-
Check if there is an option to Add a New SIM.
-
If the option exists, your device is likely eSIM-compatible.
-
-
Confirm eSIM support by reviewing the device’s specifications in the manual or manufacturer’s website.
On iPhone Devices:
Most newer iPhone models starting from the iPhone XR support eSIMs. To confirm:
-
Open Settings.
-
Select General.
-
Tap About.
-
Scroll down to locate the EID (Embedded Identification Number).
-
If you see a 32-digit EID number, your iPhone is eSIM-compatible.
-
-
Additionally, check Apple’s official specifications for your device model.
Website Builder
Launch a user-friendly drag-and-drop website builder for your clients.
-
Navigate to Marketplace: Go to the Wholesale Marketplace tab.
-
Select Client: Choose Add New or an Existing Client.
-
Choose Product: Select Website Builder.
-
Configure Account: Simply select your preferred Billing Cycle (Monthly, Quarterly, etc.).
-
Activate: Click Add Service to Client to provision the builder.
-
Manage: Go to the Services tab to access the builder login and manage the subscription.
Note: Always ensure your Reseller Wallet is topped up above $20.00 to successfully activate new services.
Using Web Builder
Welcome to ResellPortal, our powerful website builder platform designed for resellers. With its robust branding capabilities and user-friendly tools, ResellPortal empowers you to offer custom website building solutions under your own brand. This documentation provides a detailed guide to help you manage your clients and maximize the platform’s features.
1. Key Features for Sellers
Branding and White-Labeling
-
Customize the platform with your branding, including:
-
Logo and color scheme.
-
Custom domain for your portal (e.g., builder.yourbrand.com).
-
-
Ensure a seamless experience for your clients, making ResellPortal appear as your proprietary solution.
User Account Management
-
Create and manage user accounts for your clients.
-
Assign roles and permissions to control access levels.
Client Dashboard Overview
-
Header Features:
-
Client’s username with access to settings, light/dark mode, and logout options.
-
Tabs for projects, branded domains, and notifications.
-
-
Monitor client activity, site creation, and usage statistics.
Domain Management
-
Help clients connect and manage their domains with step-by-step guidance.
-
Generate and provide A records for domain configuration.
2. Project Management
Setting Up Default Workplaces
-
Define default workplaces for streamlined client onboarding.
-
Create predefined categories to organize client projects effectively.
Adding and Managing Client Sites
Template Library Customization
-
Customize the template library to include designs relevant to your target audience.
-
Add new templates or remove default options to align with your branding.
3. Advanced Features
Analytics and Insights
-
Access usage statistics and insights to monitor:
-
Number of active sites.
-
Template preferences.
-
Client engagement levels.
-
-
Use data to improve client offerings and identify growth opportunities.
Monetization Options
-
Offer tiered pricing plans for your clients based on site features or storage.
-
Upsell additional services like domain registration, hosting, or SEO optimization.
Support Tools for Sellers
-
Built-in support chat for real-time assistance.
-
FAQ and resource library for troubleshooting common issues.
-
Automated ticketing system to manage client queries efficiently.
4. Getting Started
Onboarding Clients
-
Create an account for your client using the User Account Management tool.
-
Provide a walkthrough of the dashboard and its features.
-
Assist with the initial setup of their workplace and first website.
Setting Up Branded Domains
6. Frequently Asked Questions
a. How do I customize the platform with my branding?
Use the white-labeling settings in the admin panel to upload your logo, define your color scheme, and set up a custom domain for your portal.
b. Can I add my own templates to the library?
c. How do I manage billing for my clients?
ResellPortal offers integrated billing options or allows you to connect your payment gateway for managing subscriptions and one-time payments.
d. What support options are available for sellers?
You can access real-time chat, a detailed FAQ section, and a ticketing system to address client issues efficiently.
ResellPortal provides the tools and flexibility you need to build a successful web building business. By leveraging its advanced features, branding capabilities, and intuitive client management tools, you can grow your business and deliver exceptional value to your clients. Explore the platform and start creating amazing websites today!
About Interface
Welcome to the ResellPortal Web Builder, an intuitive and robust platform designed for building and customizing web pages effortlessly. This document provides an in-depth guide to the core features of the platform, focusing on:
-
Keybinds
-
Inspector Overview
-
WYSIWYG Editor Overview
-
Code Editors Overview
1. Keybinds
Keybinds allow you to quickly perform actions within the ResellPortal Web Builder, speeding up your workflow and improving efficiency. Below is a list of essential keybinds:
| Action | Key Combination |
|---|---|
| Save Changes | Ctrl + S (Windows) / Cmd + S (Mac) |
| Undo | Ctrl + Z / Cmd + Z |
| Redo | Ctrl + Y / Cmd + Y |
| Copy | Ctrl + C / Cmd + C |
| Paste | Ctrl + V / Cmd + V |
| Delete | Del |
| Preview | Ctrl + P / Cmd + P |
| Toggle Code Editor | Ctrl + E / Cmd + E |
Tips for Using Keybinds
-
Use
Shiftwith arrow keys to select multiple elements quickly. -
Combine
Ctrl + ScrollorCmd + Scrollto zoom in and out of your workspace.
2. Inspector Overview
The Inspector is a powerful tool that allows you to fine-tune every aspect of your design. It’s divided into key sections:
Structure
-
Displays the hierarchy of your web elements in a collapsible tree structure.
-
Easily select, reorder, or delete elements within your page.
Properties
-
Adjust element-specific settings such as size, color, font, and alignment.
-
Dynamically update the look and feel of your design in real time.
Actions
-
Bind interactive actions to elements (e.g., on-click, hover).
-
Create dynamic behaviors with minimal coding.
Advanced Settings
-
Modify CSS properties directly.
-
Add custom attributes to extend functionality.
Pro Tips
-
Use the search bar within the Inspector to quickly locate properties.
-
Right-click on any element in the tree structure for additional options.
3. WYSIWYG Editor Overview
The What You See Is What You Get (WYSIWYG) Editor offers a visual editing experience where you can build and modify web pages as they appear to users.
Features
-
Drag-and-Drop: Add images, text, buttons, and other elements with ease.
-
Inline Editing: Double-click on text elements to edit content directly.
-
Alignment Guides: Snap elements into place for pixel-perfect positioning.
-
Live Preview: See real-time updates as you make changes.
Toolbar Options
-
Text Formatting: Adjust font, size, weight, and color.
-
Element Styling: Add borders, shadows, and background colors.
-
Layouts: Create columns, rows, and grids with responsive settings.
-
Assets: Upload and manage images, videos, and other files directly in the editor.
Pro Tips
-
Use the "Duplicate" option in the context menu for quick layout replication.
-
Group elements to move or style them together.
4. Code Editors Overview
For advanced users, the ResellPortal Web Builder includes powerful code editors for HTML, CSS, and JavaScript. These editors provide full control over your website’s structure and functionality.
HTML Editor
-
Modify the structural components of your web page.
-
Use syntax highlighting and auto-completion to speed up coding.
CSS Editor
-
Fine-tune the styles and layouts with detailed control.
-
Supports live previews for instant feedback on your changes.
JavaScript Editor
-
Add interactive functionality to your web pages.
-
Use built-in debugging tools to identify and fix issues quickly.
Common Features Across Editors
-
Syntax Highlighting: Enhances readability and reduces errors.
-
Find and Replace: Quickly locate and update code.
-
Split View: Edit code while viewing the live design.
Pro Tips
-
Use comments (
/* */for CSS,//for JS) to organize your code. -
Save reusable code snippets for future projects.
The ResellPortal Web Builder is designed to cater to both novice and advanced users. Whether you’re leveraging the simplicity of the WYSIWYG Editor or diving into the intricacies of the Code Editors, this platform empowers you to create stunning, functional websites efficiently. With tools like Keybinds and the Inspector at your disposal, you have everything you need to streamline your workflow and bring your vision to life.
AI Business Tool Suite
Provide your clients with a custom suite of cutting-edge AI tools tailored to their business needs.
-
Navigate to Marketplace: Go to the Wholesale Marketplace tab.
-
Select Client: Choose Add New or an Existing Client.
-
Choose Product: Select AI Business Tools Suite.
-
Configure Package:
-
Select Tools: Check the boxes for the specific AI tools you want to include (e.g., AI Voice Agent, Chat Bot, SEO Rank Tracker, etc.).
-
Dynamic Pricing: The monthly wholesale cost is automatically calculated based on your selection. You can add or remove tools at any time later.
-
-
Activate: Click Add Service to Client to provision the selected tools.
-
Manage: Go to the Services tab to view login credentials for the AI dashboard or to modify the package tools.
Note: Ensure your Reseller Wallet is topped up above $20.00 before activating this service.
Activating AI Business Tool
AI Business Tools — Activation & Management
The AI Business Tools Suite allows you to provide powerful, white-labeled AI tools to your clients — all managed directly from your ResellPortal dashboard.
With the new system, you can:
-
Choose which AI tools to activate for each client
-
Add or remove AI tools at any time
-
Manage tools from the activation screen or the client’s service card
-
Provide your client with access to a branded AI Suite portal
Available AI Tools
You can select any combination of the following tools when activating the AI Business Tools Suite:
-
AI Live Chat Bot ($15.00)
-
AI FAQ Assistant ($10.00)
-
AI Lead Capture Bot ($12.00)
-
AI Appointment Scheduler ($10.00)
-
AI Product Recommender ($15.00)
-
AI Business Intelligence ($20.00)
-
AI Email Auto-Responder ($8.00)
-
AI CRM Assistant ($15.00)
-
AI Review Responder ($10.00)
-
AI Competitor Monitor ($20.00)
-
AI Market Domination ($20.00)
-
AI Local Leads Finder ($18.00)
-
AI Blog Generator ($12.00)
-
AI Website Health Monitor ($8.00)
-
AI QR Code Generator ($5.00)
Your monthly wholesale cost is automatically calculated based on the tools selected.
How to Activate AI Business Tools for a Client
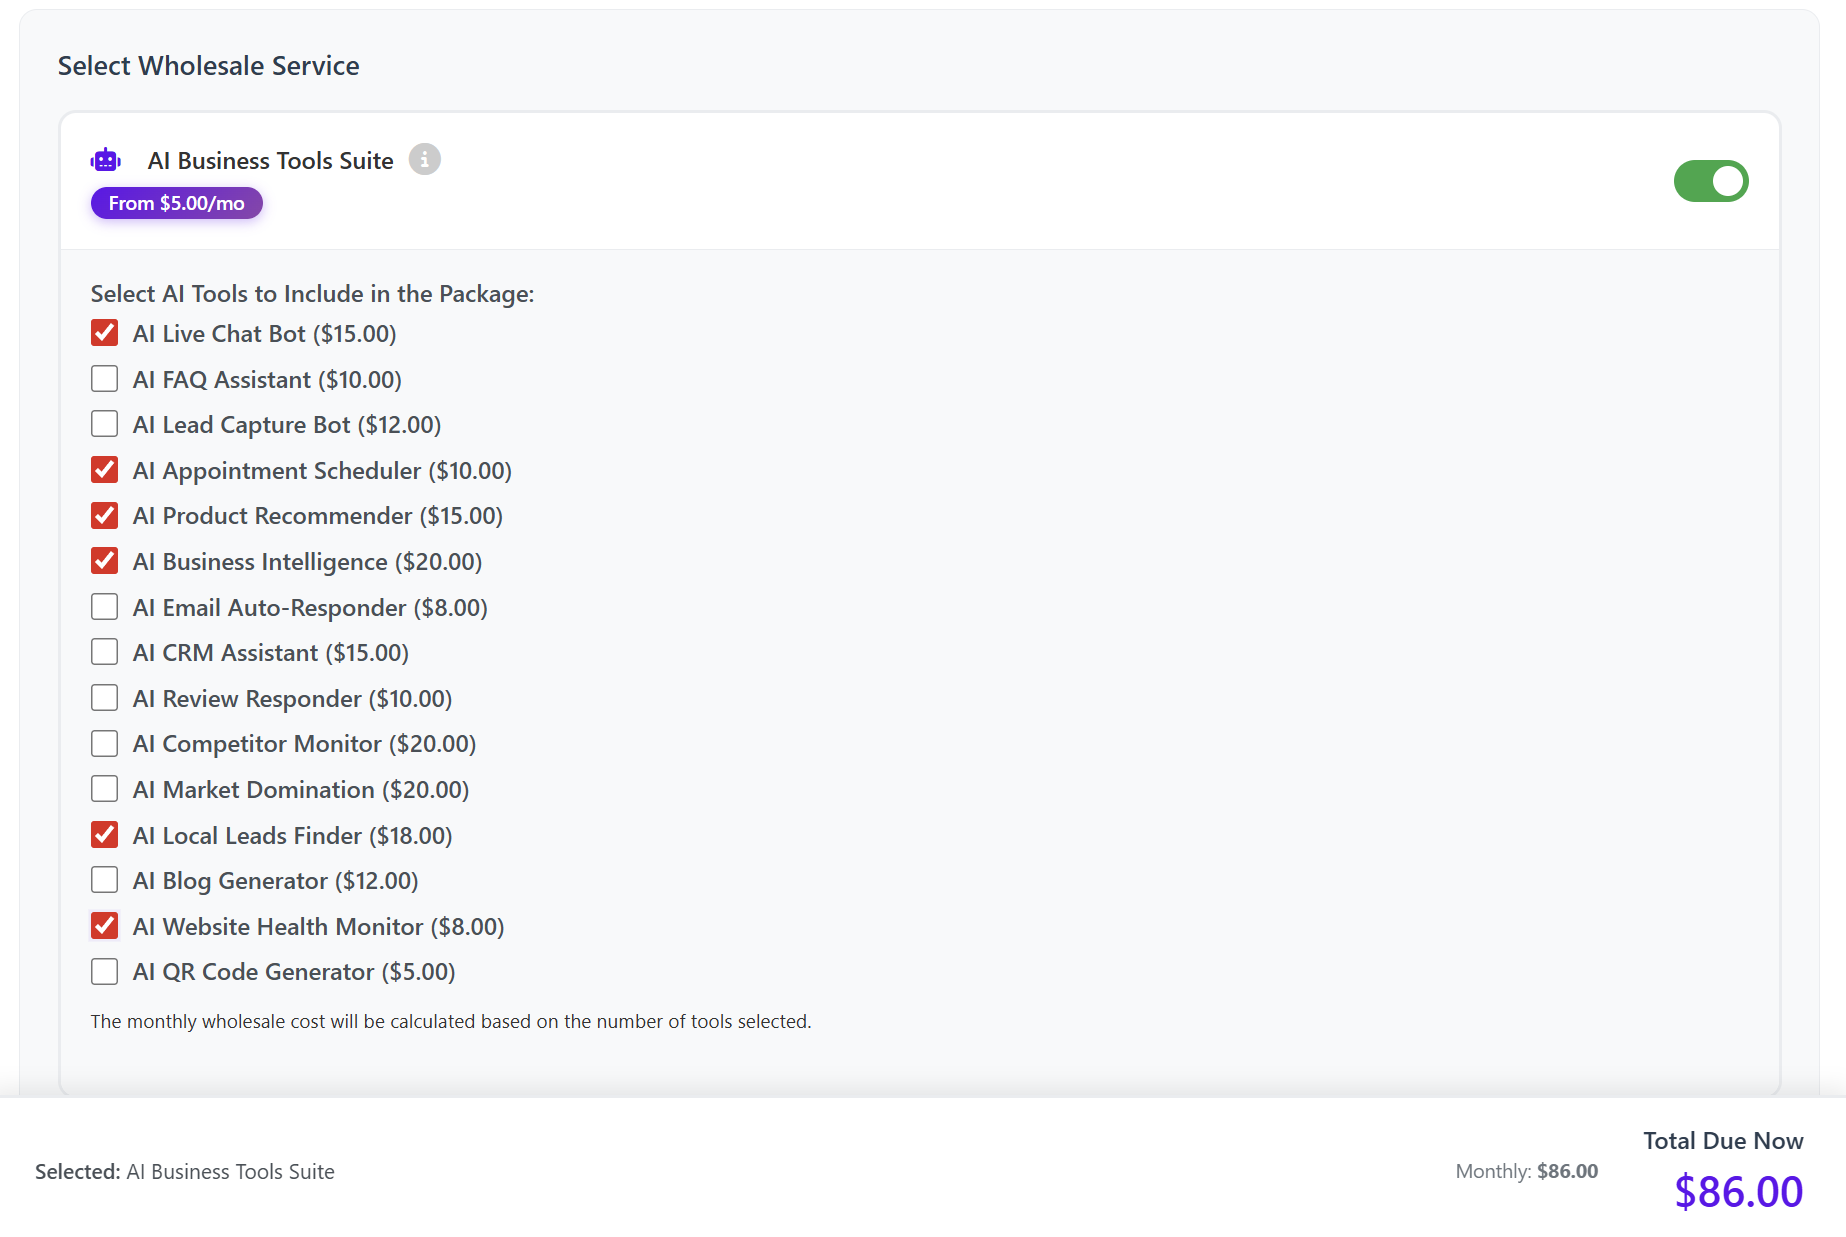
Step 1: Go to Add Client or Service
From the left-hand menu of your dashboard, click:
Add Client or Service
You can:
-
Add a new client
or -
Select an existing client by email

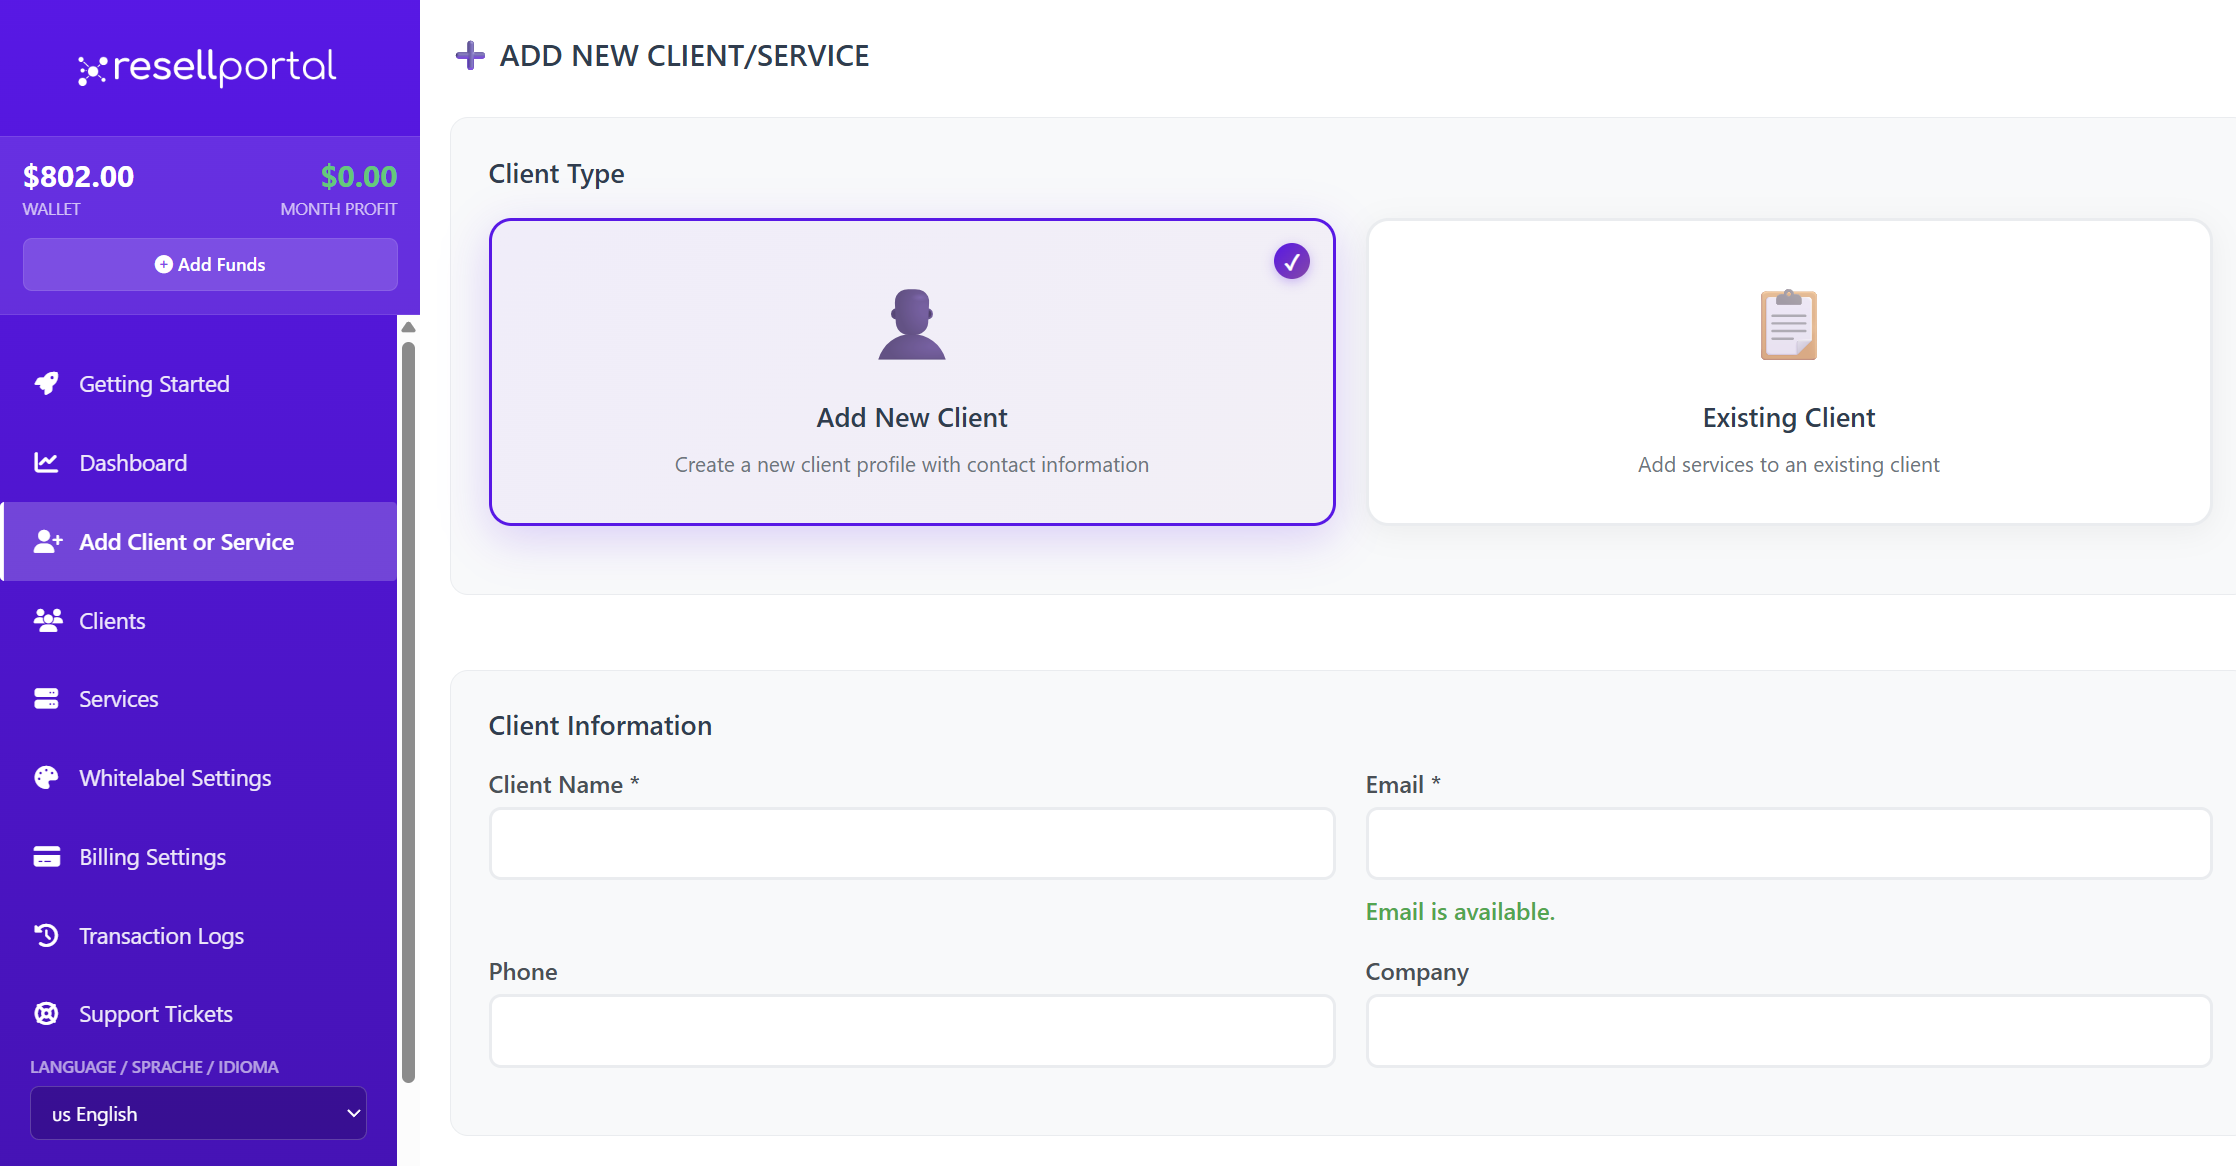
Step 2: Enter Client Details
The following fields are required:
-
Client name
-
Client email address
Optional:
-
Company name
-
Phone number
The client’s email will be used for login credentials and notifications.
Step 3: Select AI Business Tools
In the services list, enable AI Business Tools Suite.
You will then see the full list of available AI tools.
Toggle ON the specific tools you want to include for this client.
The total monthly cost is automatically calculated based on your selections.
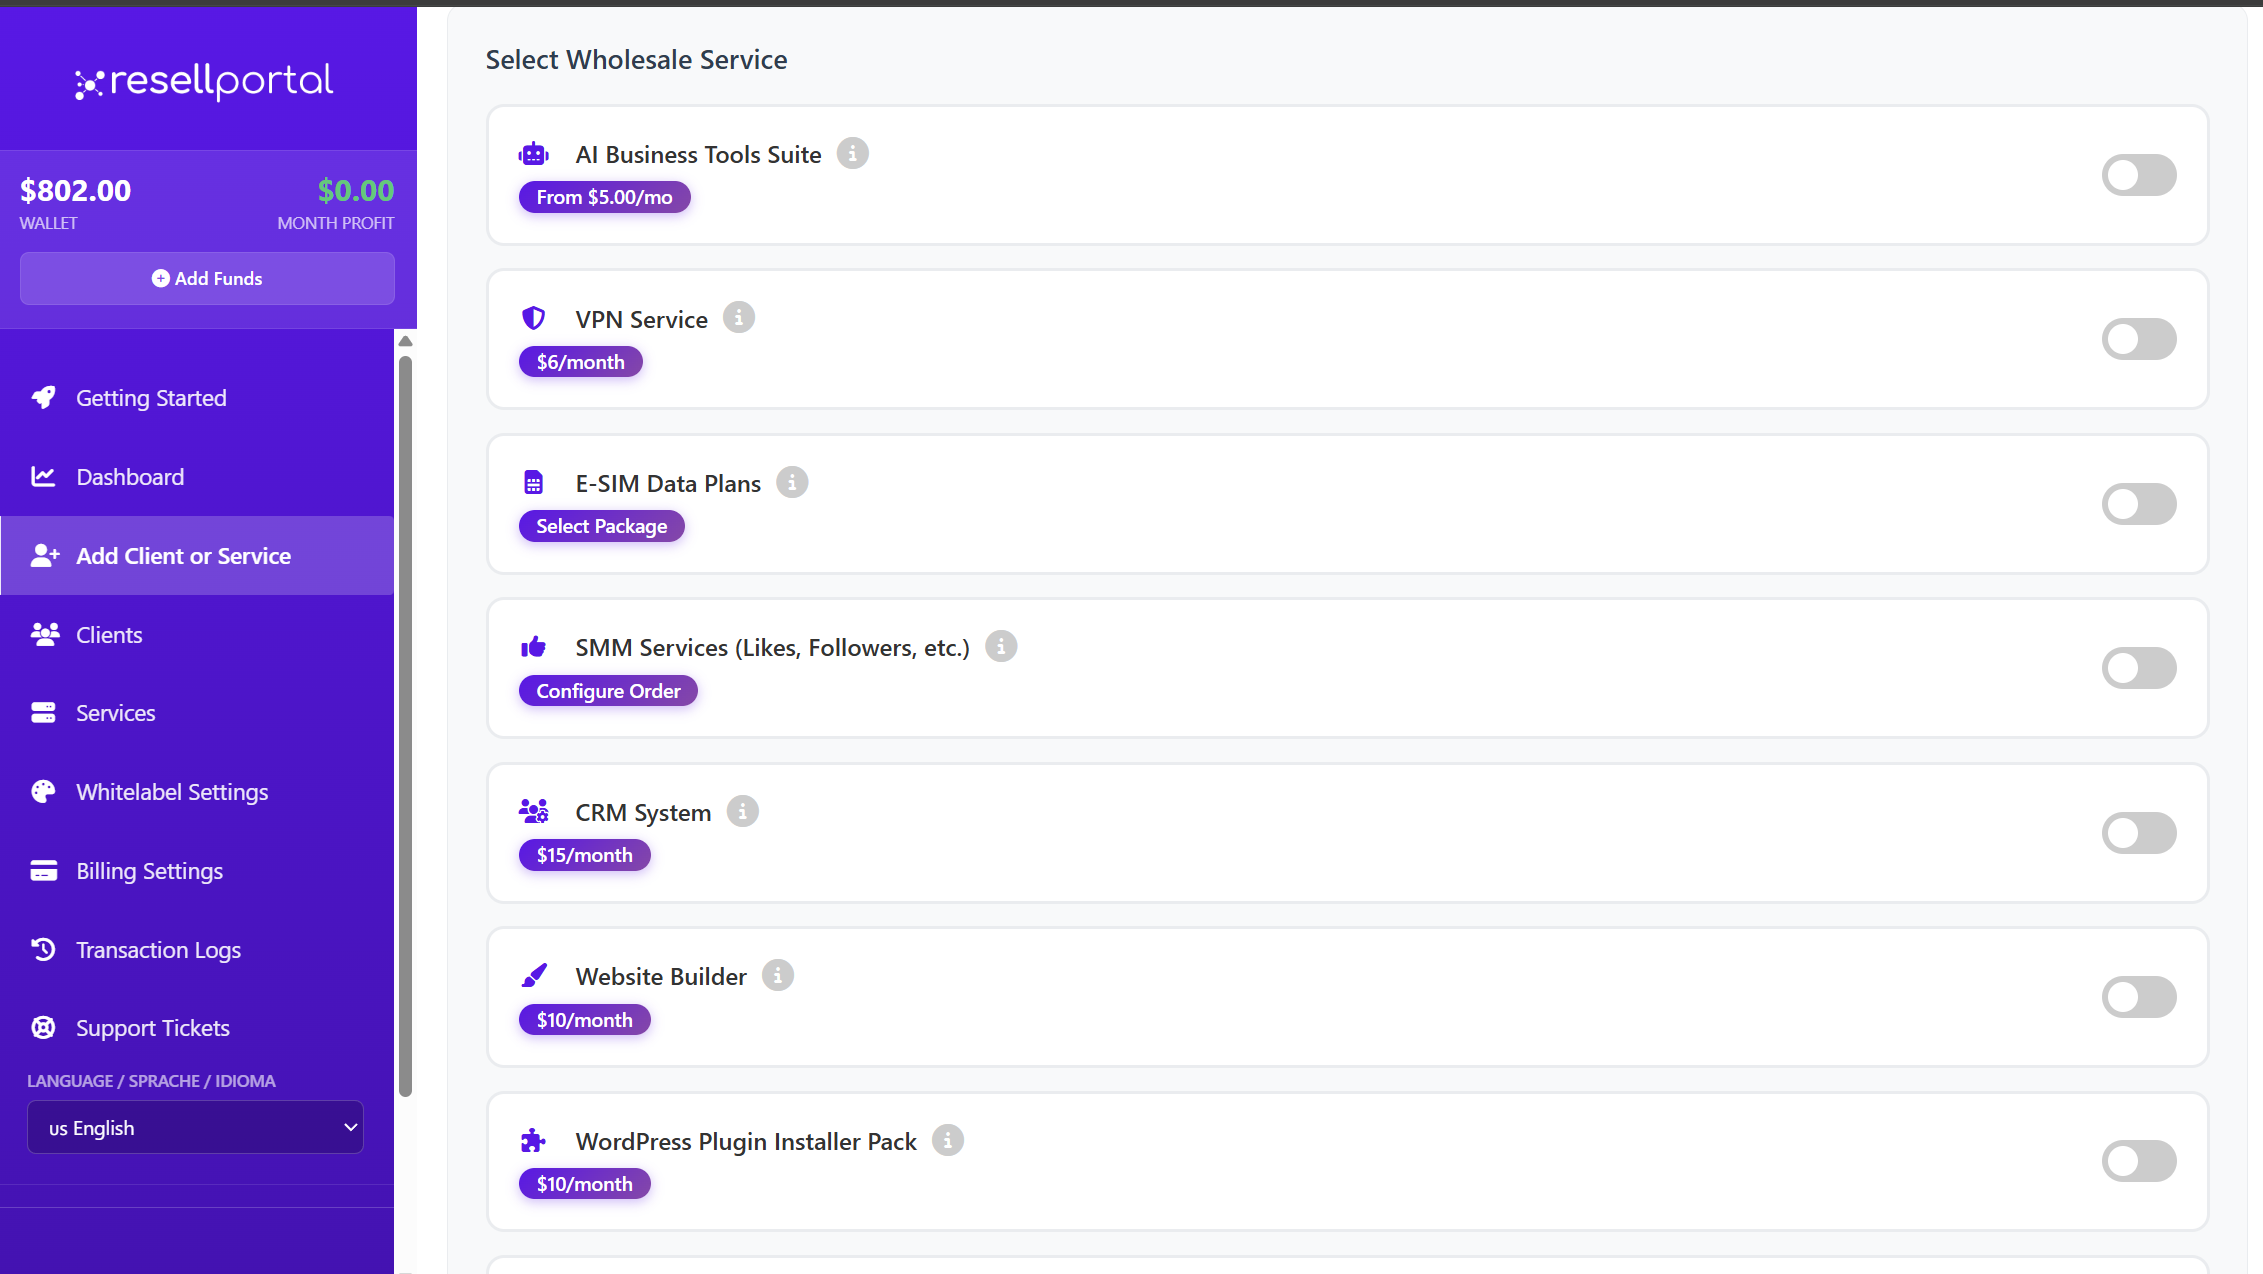
Step 4: Confirm Activation
When you confirm:
-
Your wallet balance is charged for the selected tools
-
The AI tools are instantly activated
-
The service is attached to the client’s account
Managing AI Tools After Activation
Once the AI Business Tools Suite is active, you can modify it at any time.
You have two ways to do this:
✅ Option 1 – From the Activation Screen
-
Go back to Add Client or Service
-
Search and select the existing client
-
Update the AI tools by turning toggles ON or OFF
-
Save the changes
Your wallet will be adjusted accordingly.
✅ Option 2 – From the Client’s Service Card
-
Go to Clients in the side menu
-
Select the client
-
Find the AI Business Tools service
-
Click the dropdown / View Details
-
Use the AI Tools section to:
-
Add new tools
-
Remove existing tools
-
This gives you direct, service-level control.
AI Suite Domain & Client Access
After activation, your client can log into their AI dashboard from your AI Suite domain.
You can set or edit this domain at:
Whitelabel Settings → AI Suite Settings
You can use:
-
A free ResellPortal subdomain
or -
Your own custom domain (white-labeled)
Your client will use this domain to access their AI tools.
Login information is sent automatically to the client’s email address.
What Your Client Sees
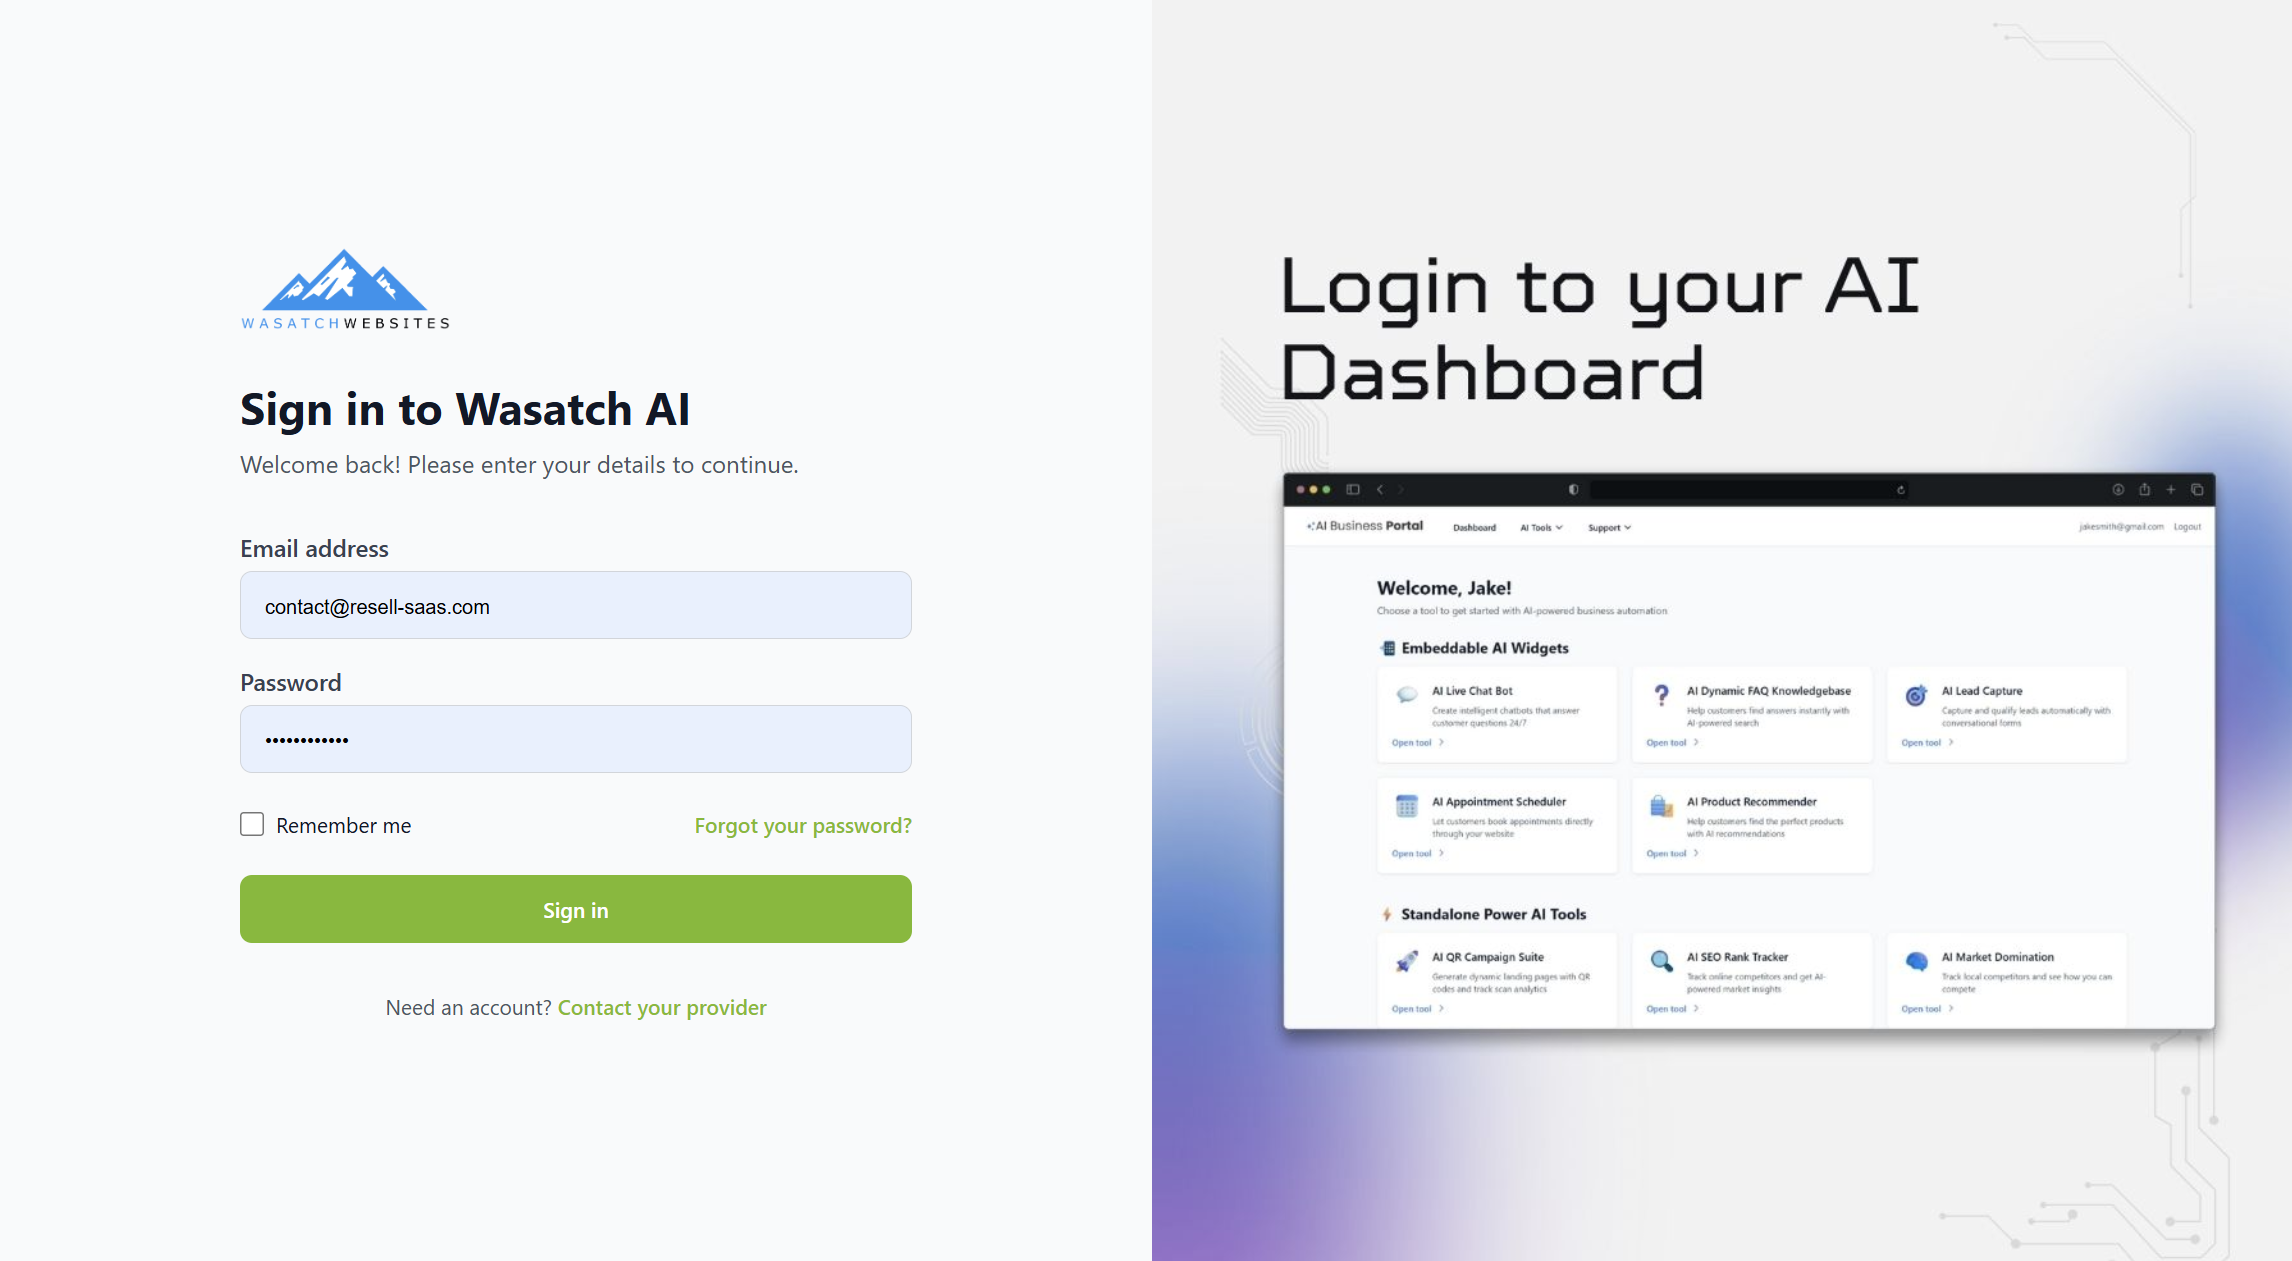
After activation, the client is sent an email containing:
-
Their AI Suite login URL
-
Username and password setup instructions
-
Instructions for accessing their AI tools
-
Your branded support contact details
All emails reflect your Whitelabel & Client Email Branding settings.
Best Practices
-
Set your AI Suite domain before activating tools
-
Configure Whitelabel + Client Email Branding first
-
Only enable tools the client actually needs
-
Use the Service Card to manage upgrades/downgrades
-
Review the client’s usage and renewals regularly
Summary
| Feature | Description |
|---|---|
| Activation Method | Add Client or Service |
| Tool Selection | Choose specific AI tools per client |
| Modification | Update at any time (2 locations) |
| Client Access | Via AI Suite domain |
| Billing | Based on tool selection |
| Branding | Fully white-labeled |
AI Live Chat Bot
The AI Live Chat Bot allows you to create intelligent, customizable chat widgets that can be embedded on any website.
You can train the bot on your website content, personalize its appearance, configure its behavior, and collect chats and leads—all from your dashboard.
This guide walks you through creating, training, deploying, and managing your AI Live Chat Bot.
1. Accessing the AI Live Chat Bot
After activating the AI Business Tools Suite for your client:
-
Go to your dashboard.
-
Navigate to AI Tools.
-
Select AI Live Chat Bot.

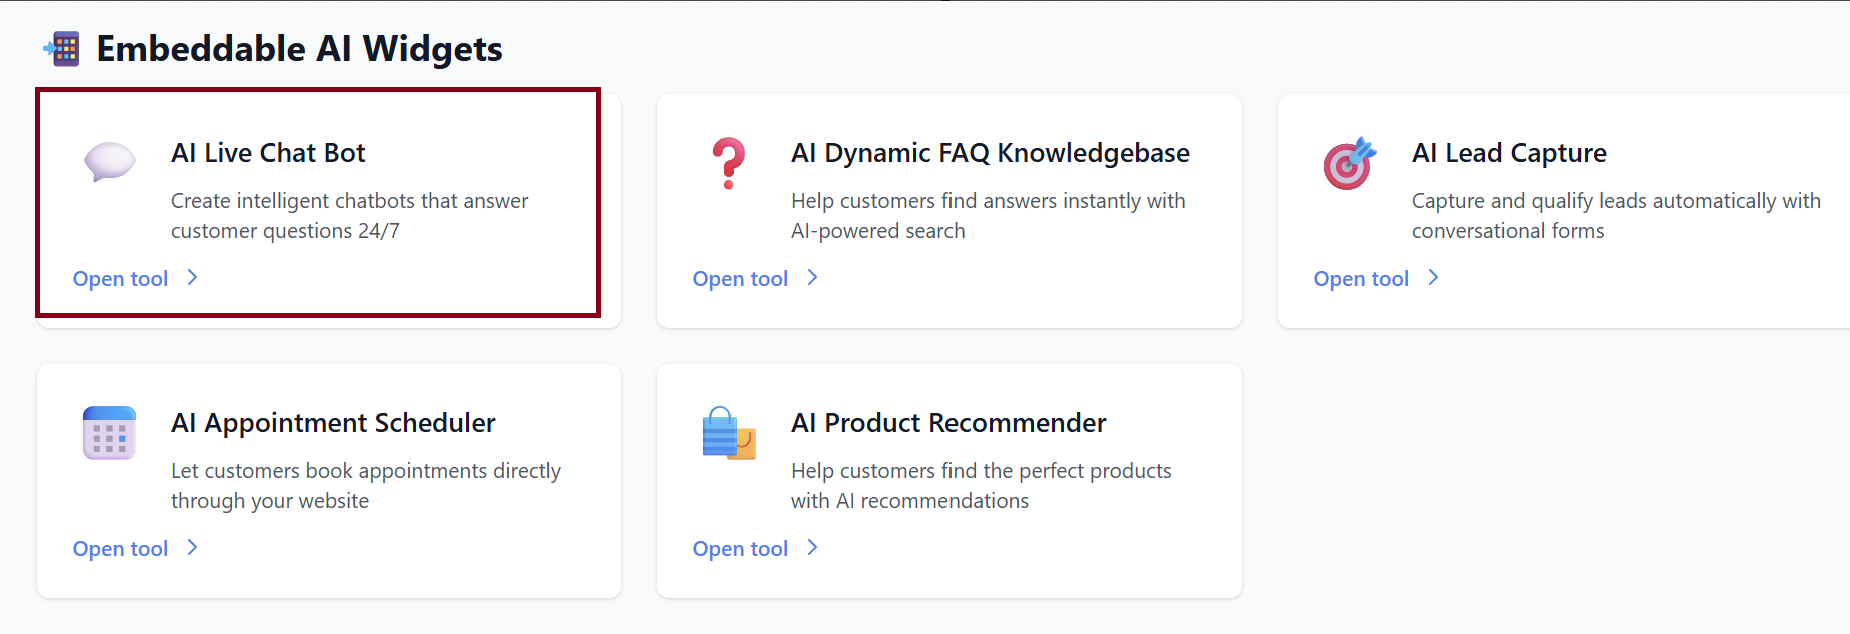
You will see your Chatbots Dashboard, where you can create new chatbots or manage existing ones.
2. Creating a New Chatbot
| Field | Description |
|---|---|
| Chatbot Name | Name that identifies your chatbot (e.g., Support Assistant). |
| Position | Where the chat button appears on your website (e.g., Bottom Right). |
| Welcome Message | First message users will see when they open the chat. |
| Primary Color | Chat widget’s main color. |
| AI Model | Model powering your bot—e.g., GPT-3.5 Turbo (Fast & Cheap). |
| Temperature | Controls creativity (0.0 = factual, 1.0 = creative). |
Customize your button:
Write your system's prompt and give your bot instruction (This determines the bot’s behavior and tone).
Example default prompt:
“You are a helpful customer service assistant. Be friendly, professional, and concise.”
You may customize this for sales, support, booking, or FAQs.
3. Finalize Chatbot Creation
After filling out your settings:
Click ✨ Create Chatbot
Your chatbot will be added to your dashboard showing:
-
Status: Active
-
Model: (e.g., gpt-3.5-turbo)
-
Creation date
-
Actions:
-
📊 View Chats & Leads
-
⚙️ Chatbot Settings
-
❌ Delete

-
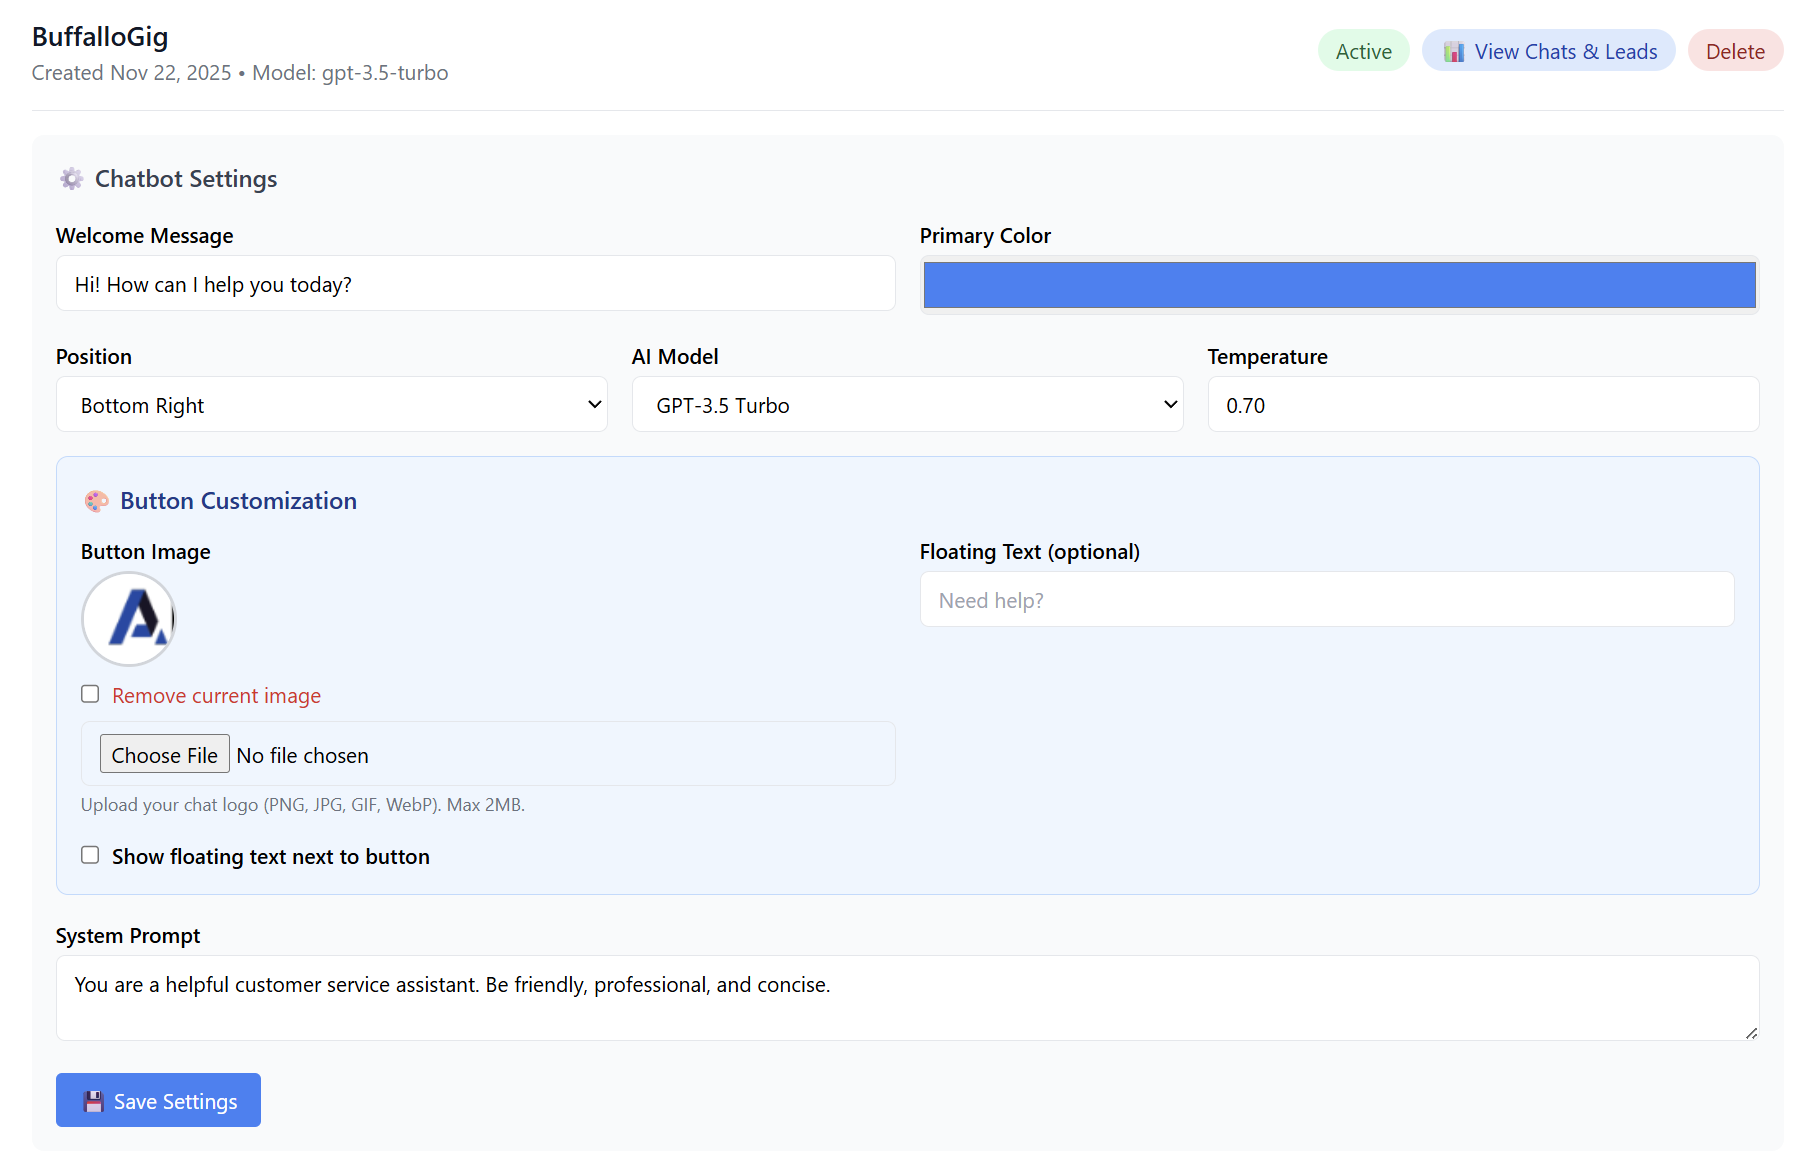
4. Training Your Chatbot
To make your chatbot smart and relevant to your business, you can train it using website content.
Training Steps
-
Click 🎓 Train Chatbot.
-
Add website URLs under:
Website URLs to Scrape (one per line) -
You may add up to 50 URLs.
Example:
-
Click 🚀 Scrape & Train Now.
The system will scrape the pages and train the bot so it can answer questions about your business, products, FAQs, etc.
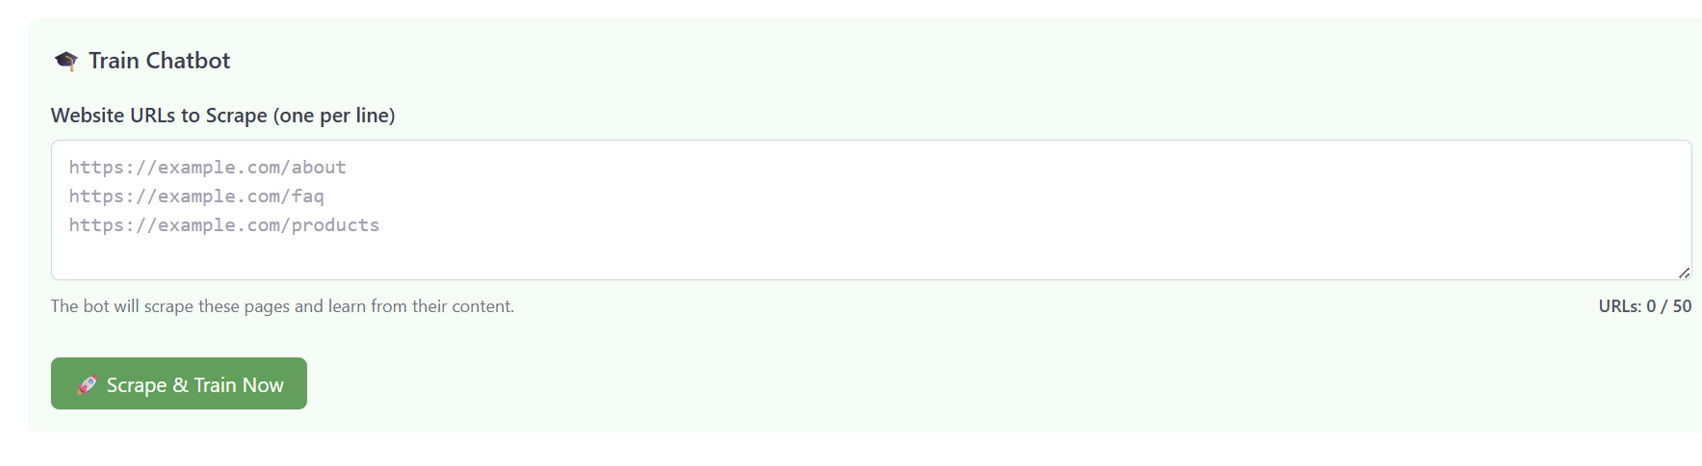
5. Embedding Your Chatbot on a Website
Once your chatbot is created, you will find the embed code under 📋 Embed Code.
How to Install
Copy the embed snippet:
Important: Paste this code into the <head> section of your website’s HTML. This will activate the chat widget and make it appear on your site.
If using platforms like WordPress, Shopify, Wix, Squarespace, etc., paste the code into the Header Code Injection or Custom Code area.

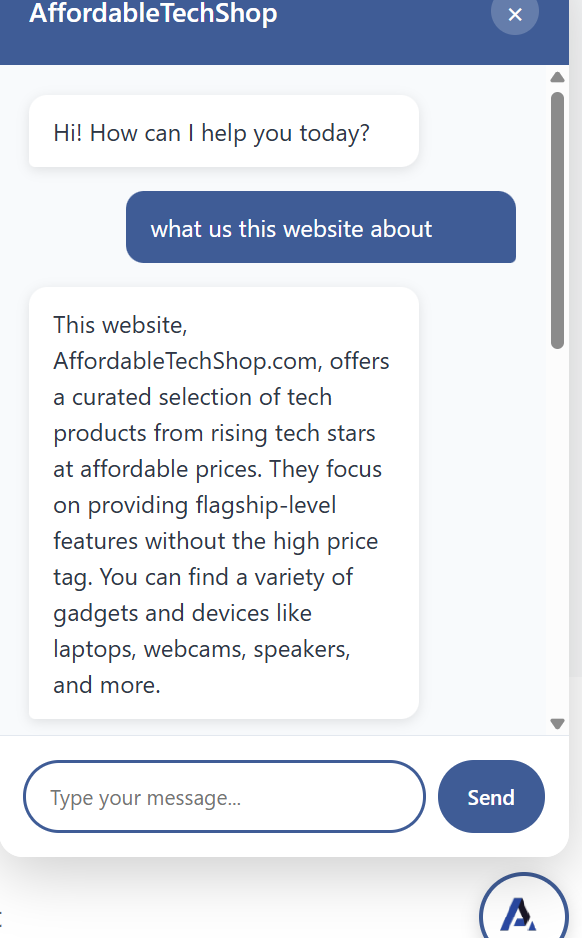
6. Viewing Chats & Leads
Click 📊 View Chats & Leads to see:
-
Visitors who interacted with the chatbot
-
Conversations transcripts
-
Collected leads (names, emails, phone numbers if provided)
-
Chat history
This allows you to review customer interactions and follow up on warm leads.

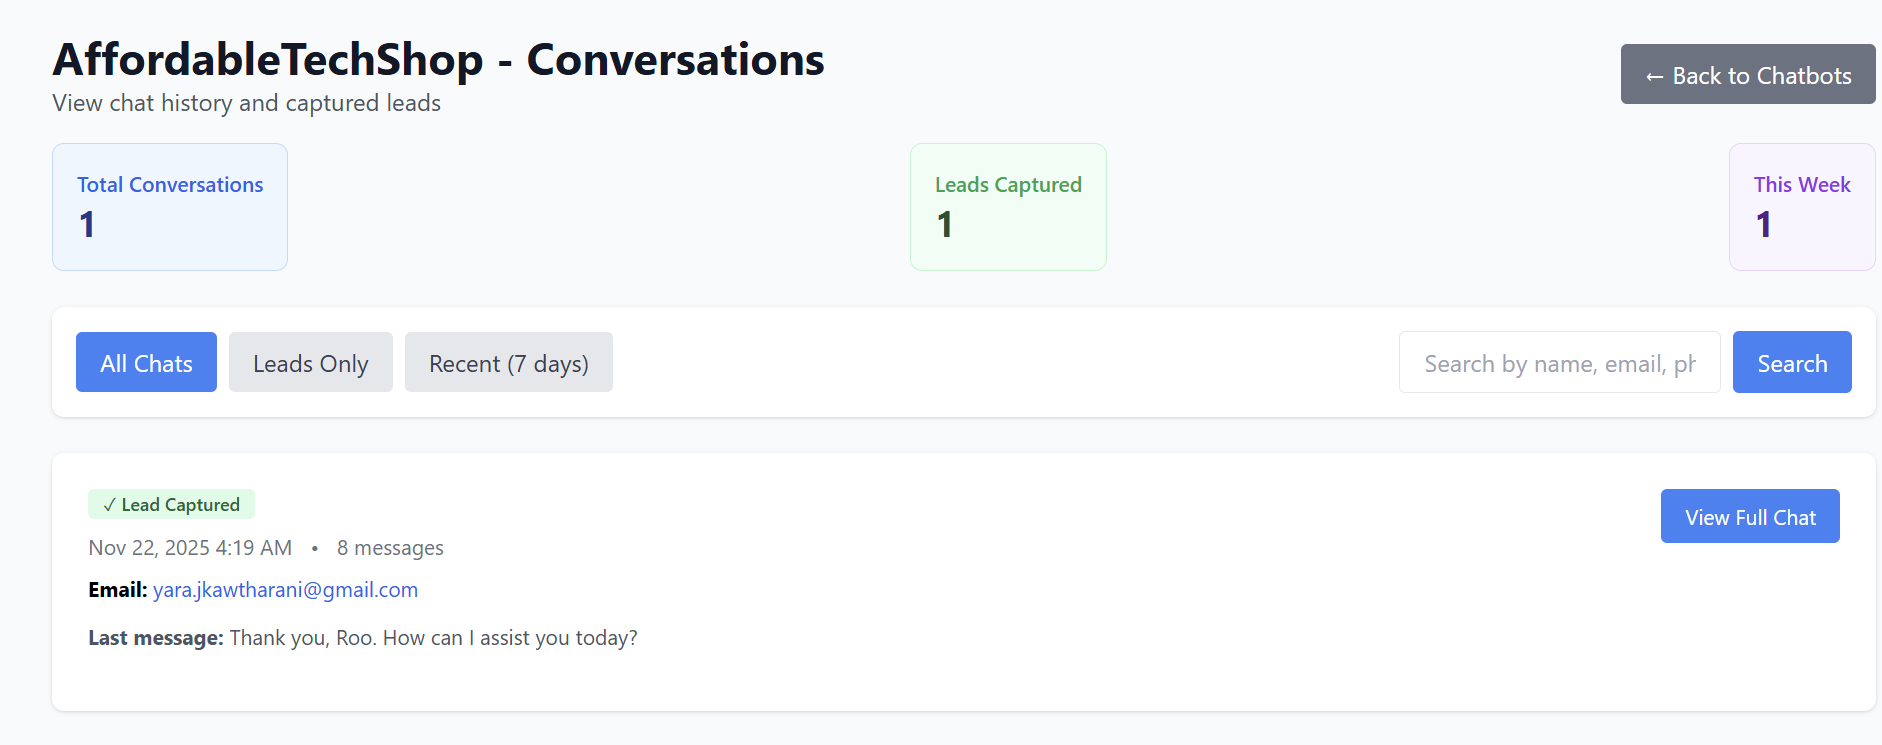
7. Deleting a Chatbot
If you want to remove a chatbot:
-
Open the chatbot in your dashboard.
-
Click Delete.
-
Confirm removal.
The widget will instantly stop working on all websites where it was installed.

Summary
| Feature | Description |
|---|---|
| Create Chatbot | Build a custom support or sales bot. |
| Train Bot | Scrape your site to teach it about your business. |
| Customize | Change colors, logo, button style, and AI settings. |
| Deploy | Copy/paste embed code into your website header. |
| Track Leads | View captured chats and customer messages. |
Your AI Live Chat Bot is now ready to support customers, generate leads, and boost conversions 24/7.
AI Dynamic FAQ Knowledgebase
The AI Knowledgebase Search (FAQ Assistant) is an intelligent search widget that instantly answers customer questions using your approved FAQ knowledgebase.
You can manually add FAQs, let AI generate them from a webpage, set proactive triggers, and embed the widget anywhere on your website.
This guide walks you through creating, configuring, training, and deploying your FAQ search widget.
1. Accessing the AI Knowledgebase Search Tool
Once the AI Business Tools Suite is activated:
-
Go to your dashboard.
-
Open AI Tools.
-
Select 🔍 AI Knowledgebase Search (FAQ Assistant).

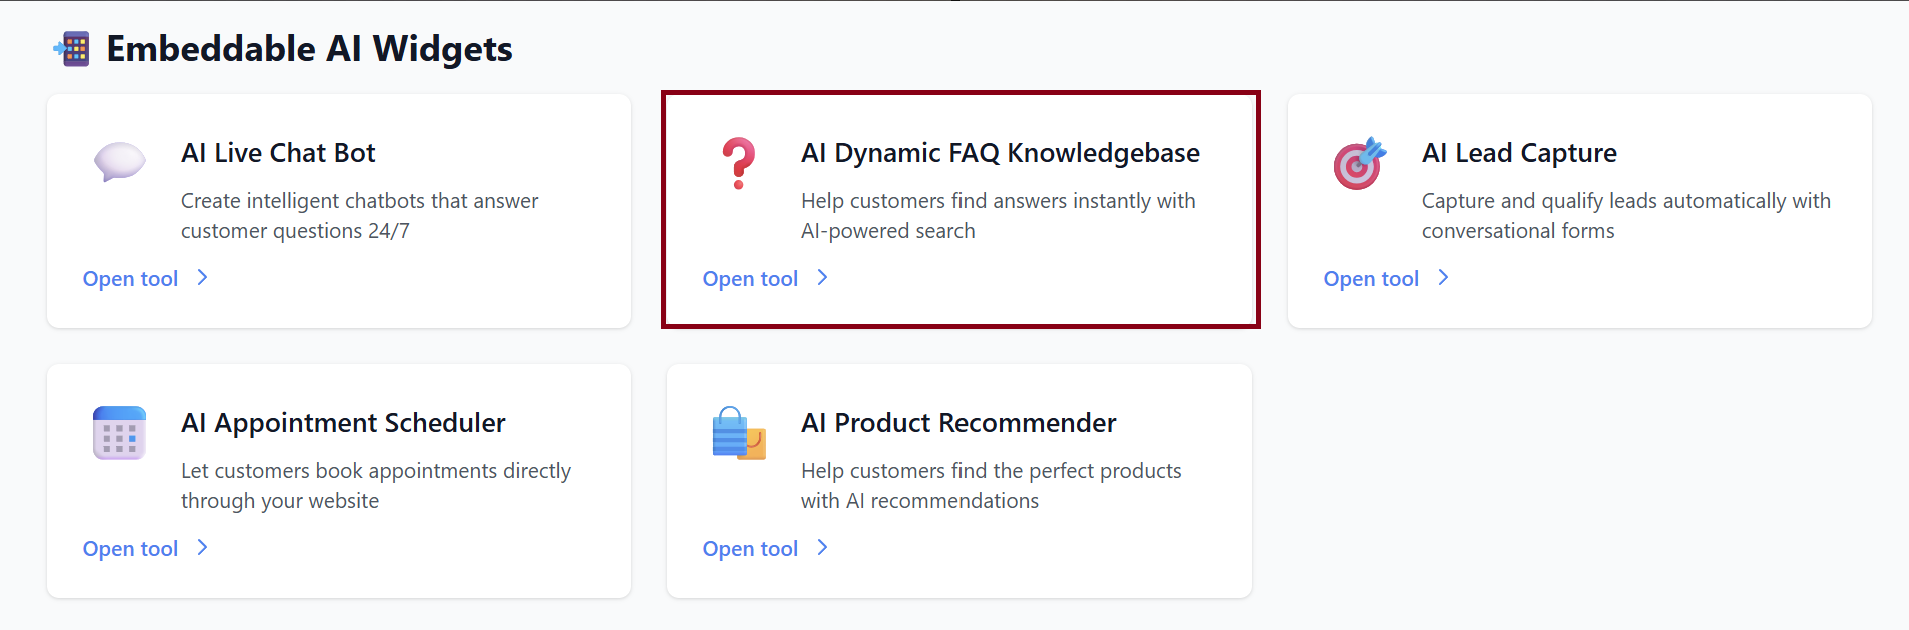
You will see your widgets dashboard where you can create new FAQ widgets or manage existing ones.
2. Creating a New FAQ Widget
Fill out the required and optional settings:
Fields Explained:
| Field | Description |
|---|---|
| Widget Name | Name for your FAQ search widget (e.g., Product Help Center). |
| Primary Color | Color theme used for the widget’s design. |
| Welcome Message | The message users see at the top of the FAQ panel. |
| Header Avatar (Optional) | Upload a logo or image for the widget header—up to 2MB. |
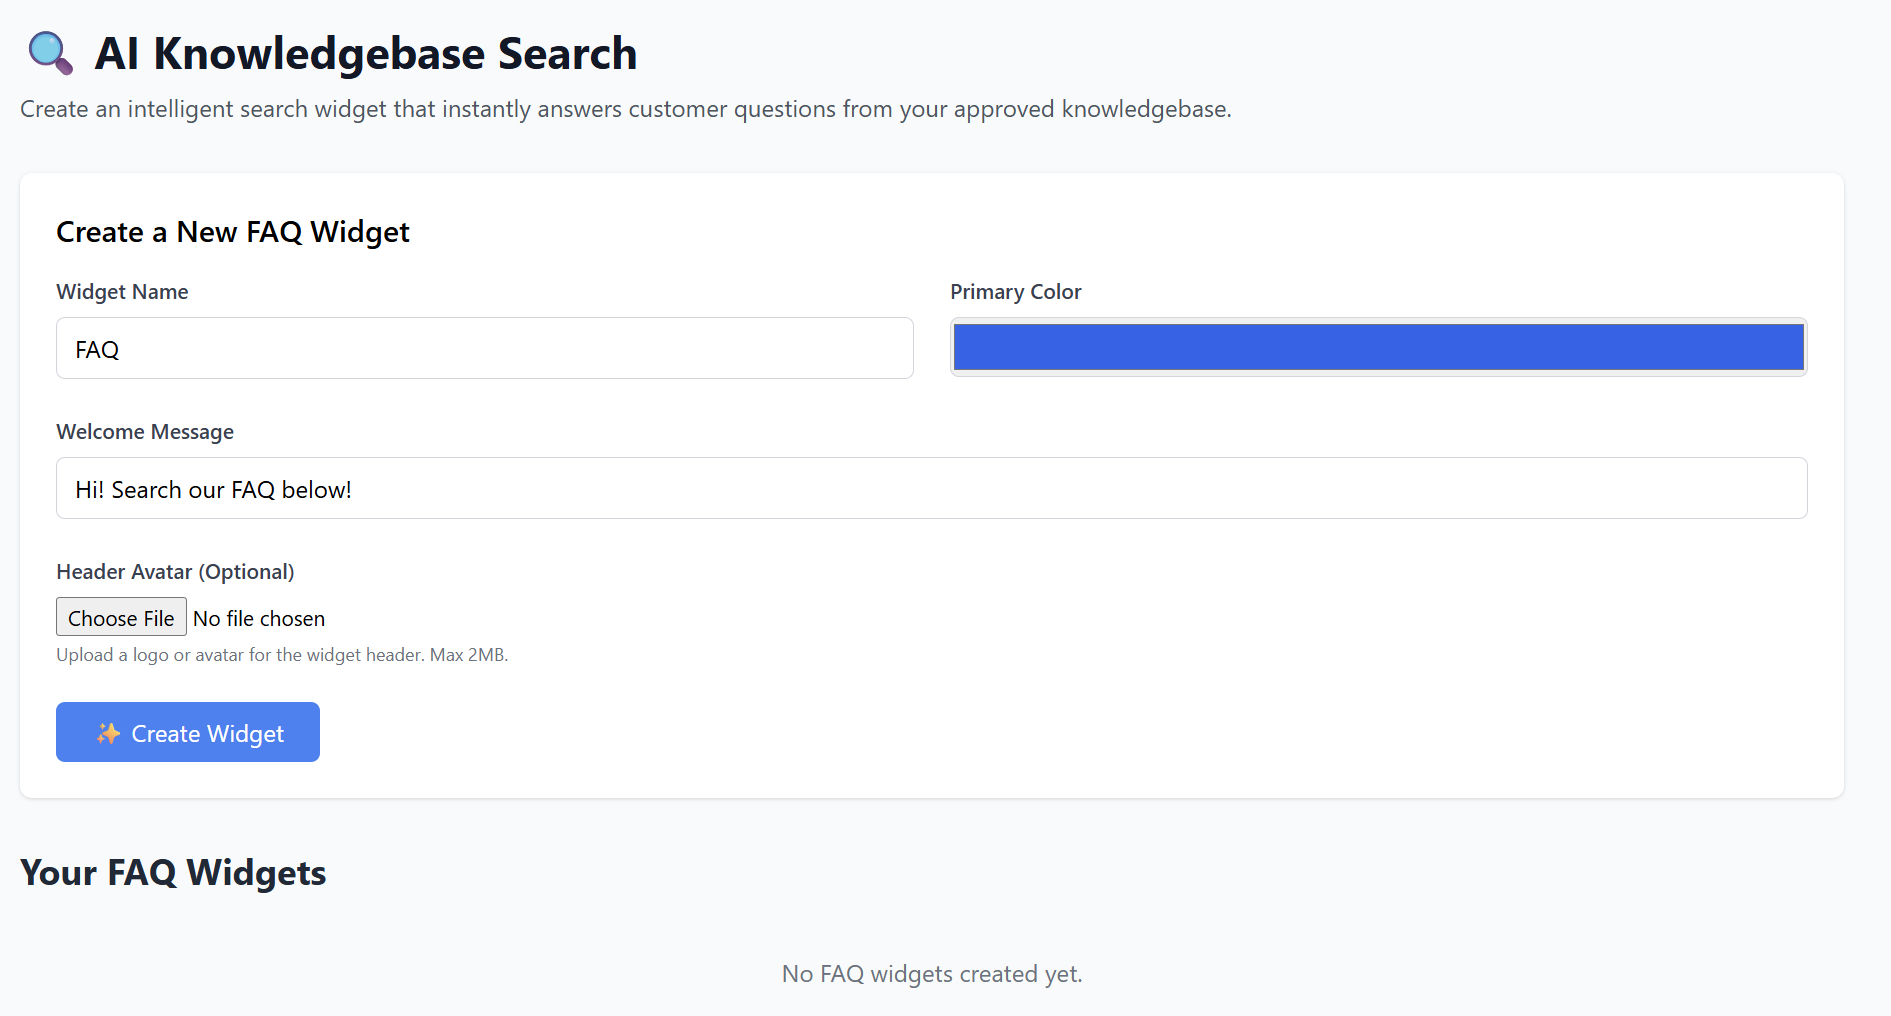
Once complete, click:
✨ Create Widget
Your new FAQ widget will appear under Your FAQ Widgets, showing:
-
Name
-
Creation date
-
Actions:
-
Edit Settings
-
Delete

-

3. AI-Powered FAQ Generation (Optional)
The FAQ Assistant can auto-generate FAQs from any webpage.
Steps to Generate AI FAQs
-
Go to the widget you created.
-
Scroll to 🚀 AI-Powered Start.
-
Paste a URL containing product or support content.
Example: -
Click Generate.
Note:
This replaces all existing FAQs in the widget, so use with caution.
The AI will scan the topic and automatically create suggested FAQ questions and answers based on its content.
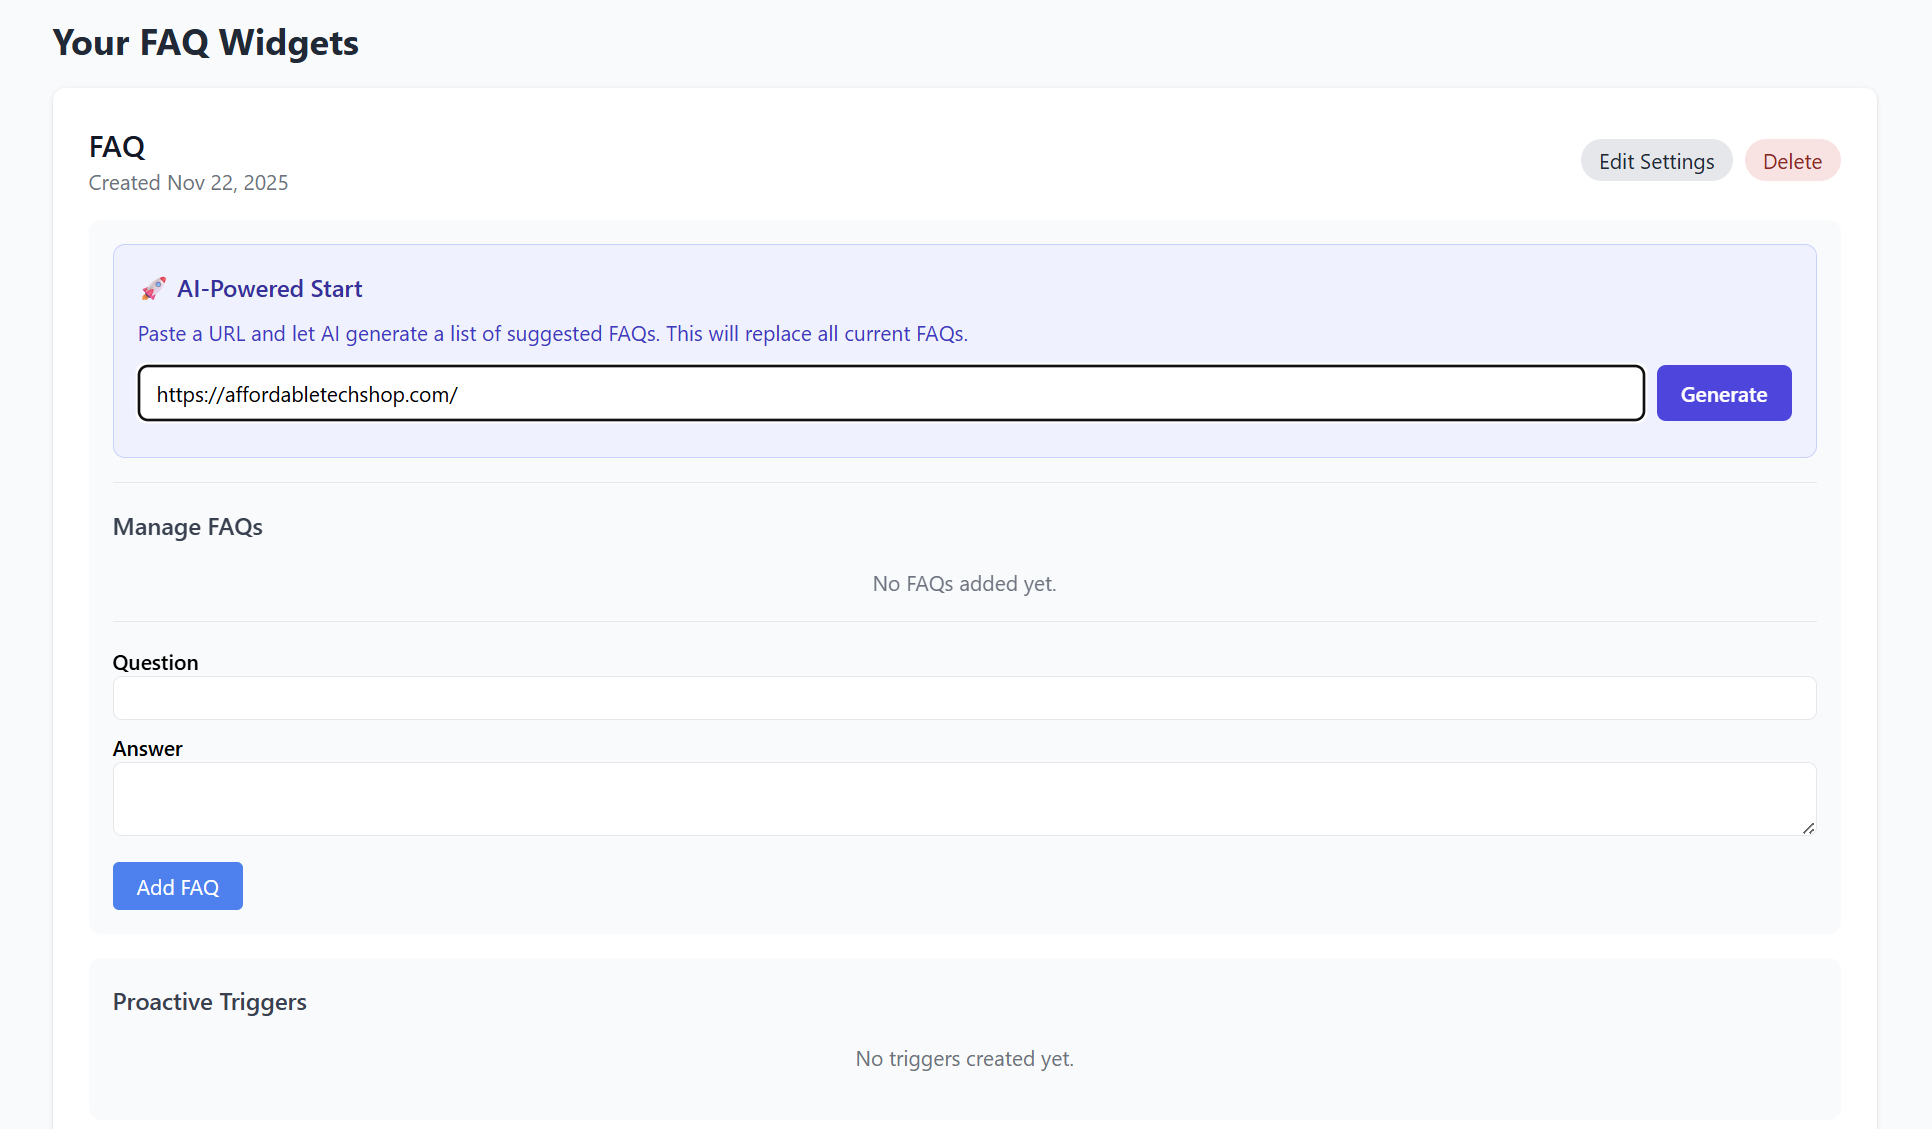

4. Manually Adding FAQs
You can add unlimited custom FAQs.
How to Add an FAQ
-
Go to Manage FAQs.
-
Enter a Question.
-
Enter the Answer.
-
Click Add FAQ.
Each FAQ will appear below with an × (delete) option to remove individual entries.

5. Proactive Triggers (Optional)
Proactive triggers allow the widget to show messages or suggestions automatically—for example:
-
“Looking for product info?”
-
“Need help choosing a plan?”
Currently, your widget shows:
No triggers created yet.
You can add triggers here once available.
6. Insights: Top Unanswered Questions
This section shows real customer search queries that your knowledgebase could not answer.
-
Helps you identify missing FAQs
-
Helps refine your support content
-
Shows common customer concerns
If no one has used your widget yet, it will say:
No unanswered questions have been logged yet.
7. Editing Widget Settings
Click Edit Settings next to your widget to update:
-
Primary color
-
Welcome message
-
Header avatar
-
Widget name
-
FAQ content (via Manage FAQs)
After making changes, they are saved automatically or via the save button if available.
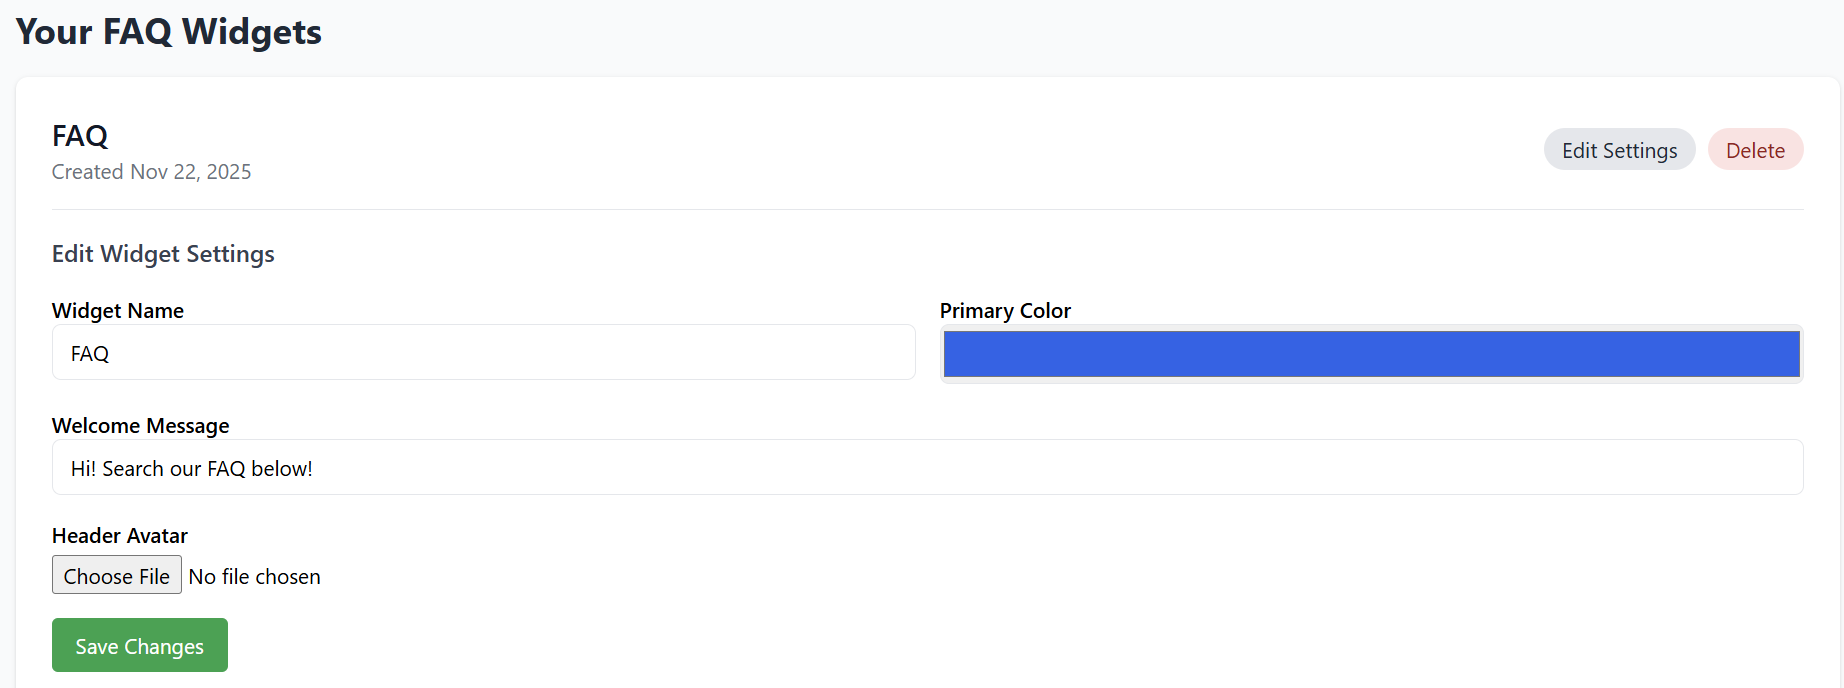
8. Embedding Your FAQ Widget on a Website
To install your widget:
-
Locate 📋 Embed Code.
-
Click Copy.
-
You will receive code like this:
Installation Instructions
Paste this entire snippet inside your website’s <head> section.
On platforms like WordPress, Wix, Shopify, or Squarespace:
Your FAQ search widget will now be visible on your site.

9. Deleting a Widget
To permanently remove a FAQ widget:
-
Open Your FAQ Widgets.
-
Click Delete next to the widget.
-
Confirm the deletion.
Once removed, the widget will instantly stop working on all websites where it was embedded.

Summary
| Feature | Description |
|---|---|
| Create Widget | Build an AI-powered FAQ search tool. |
| AI FAQ Generation | Auto-create FAQs from any webpage. |
| Manual FAQs | Add unlimited custom questions & answers. |
| Insights | Track unanswered customer questions. |
| Customization | Change colors, avatar, messages. |
| Deployment | Embed using a simple HTML snippet. |
Your AI Knowledgebase Search widget is now ready to provide instant, accurate answers and reduce customer support workload.
AI Lead Capture Bot
The AI Lead Capture Bot allows you to create intelligent conversational forms that qualify leads directly on your website.
You can build multi-step question flows, customize input types, and automatically collect names, emails, budgets, interests, and more—all through an interactive chat-style interface.
This guide explains how to create, customize, and embed your lead capture bot.
1. Accessing the AI Lead Capture Bot
Once the AI Business Tools Suite is active:
-
Go to your dashboard.
-
Navigate to AI Tools.
-
Select 🎯 AI Lead Capture Bot.
You will see the Lead Bots dashboard where you can create new bots or edit existing ones.
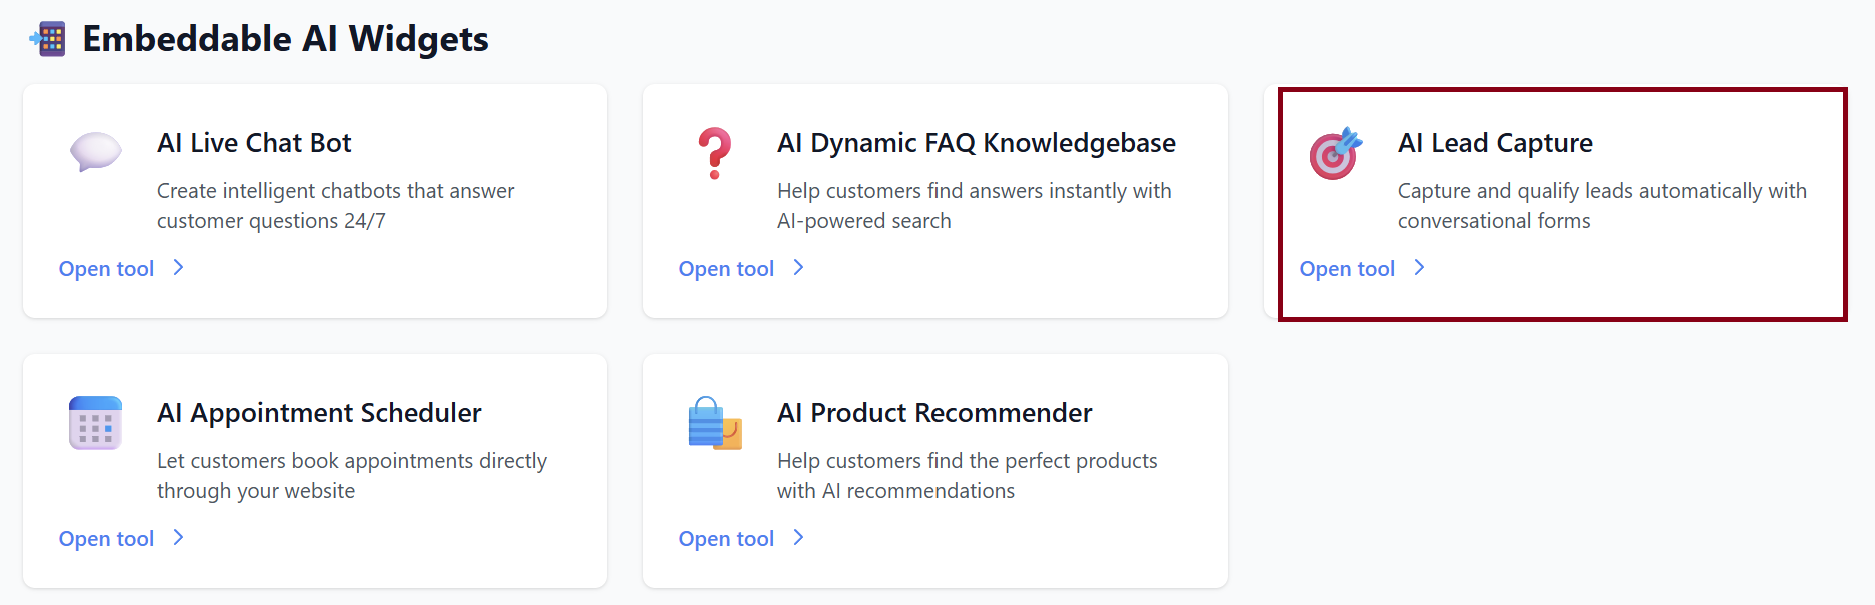
2. Creating a New Lead Bot
Click Create a New Lead Bot.
Fields to Fill
| Field | Description |
|---|---|
| Bot Name | Internal name for your bot (e.g., Real Estate Buyer Intake). |
| Display Style | How the bot appears on your site (e.g., Floating Bubble). |
After naming your bot, click:
✨ Create Bot
Your bot will appear on the dashboard with options to edit, save, or delete.
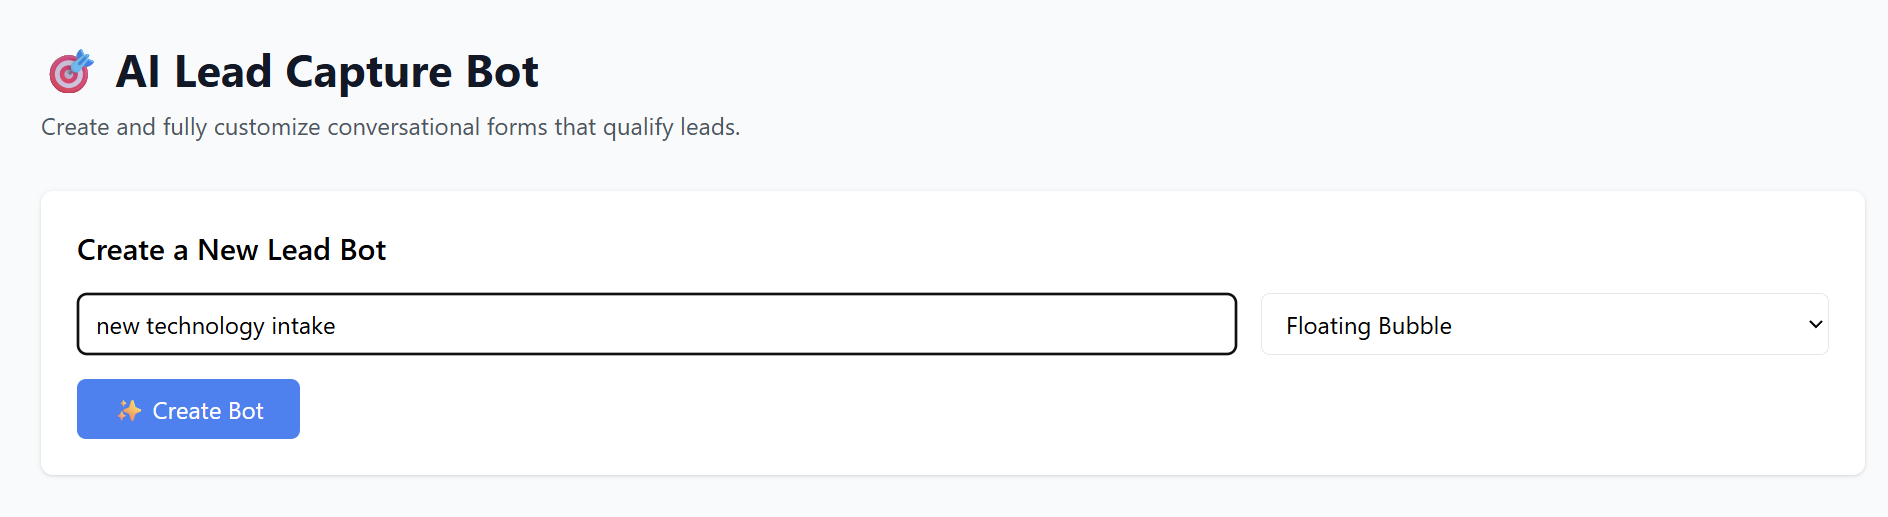
3. General Settings
Click ⚙️ General Settings to modify:
-
Bot Name
-
Display Style (Floating Bubble or future styles when available)
Click 💾 Save All Changes after editing.
4. Building Your Lead Capture Conversation
The Lead Capture Bot works through sequential conversation steps.
Default Example Steps
You might see:
-
Step 1:
“To start, what is your full name?”-
Input Type: Text
-
-
Step 2:
“What is your email address?”-
Input Type: Email
-
-
Step 3:
“How can we help you today?”-
Input Type: Text
-
-
Step 4:
“What is your budget?”-
Input Type: Text
-
You can delete any step using Delete.
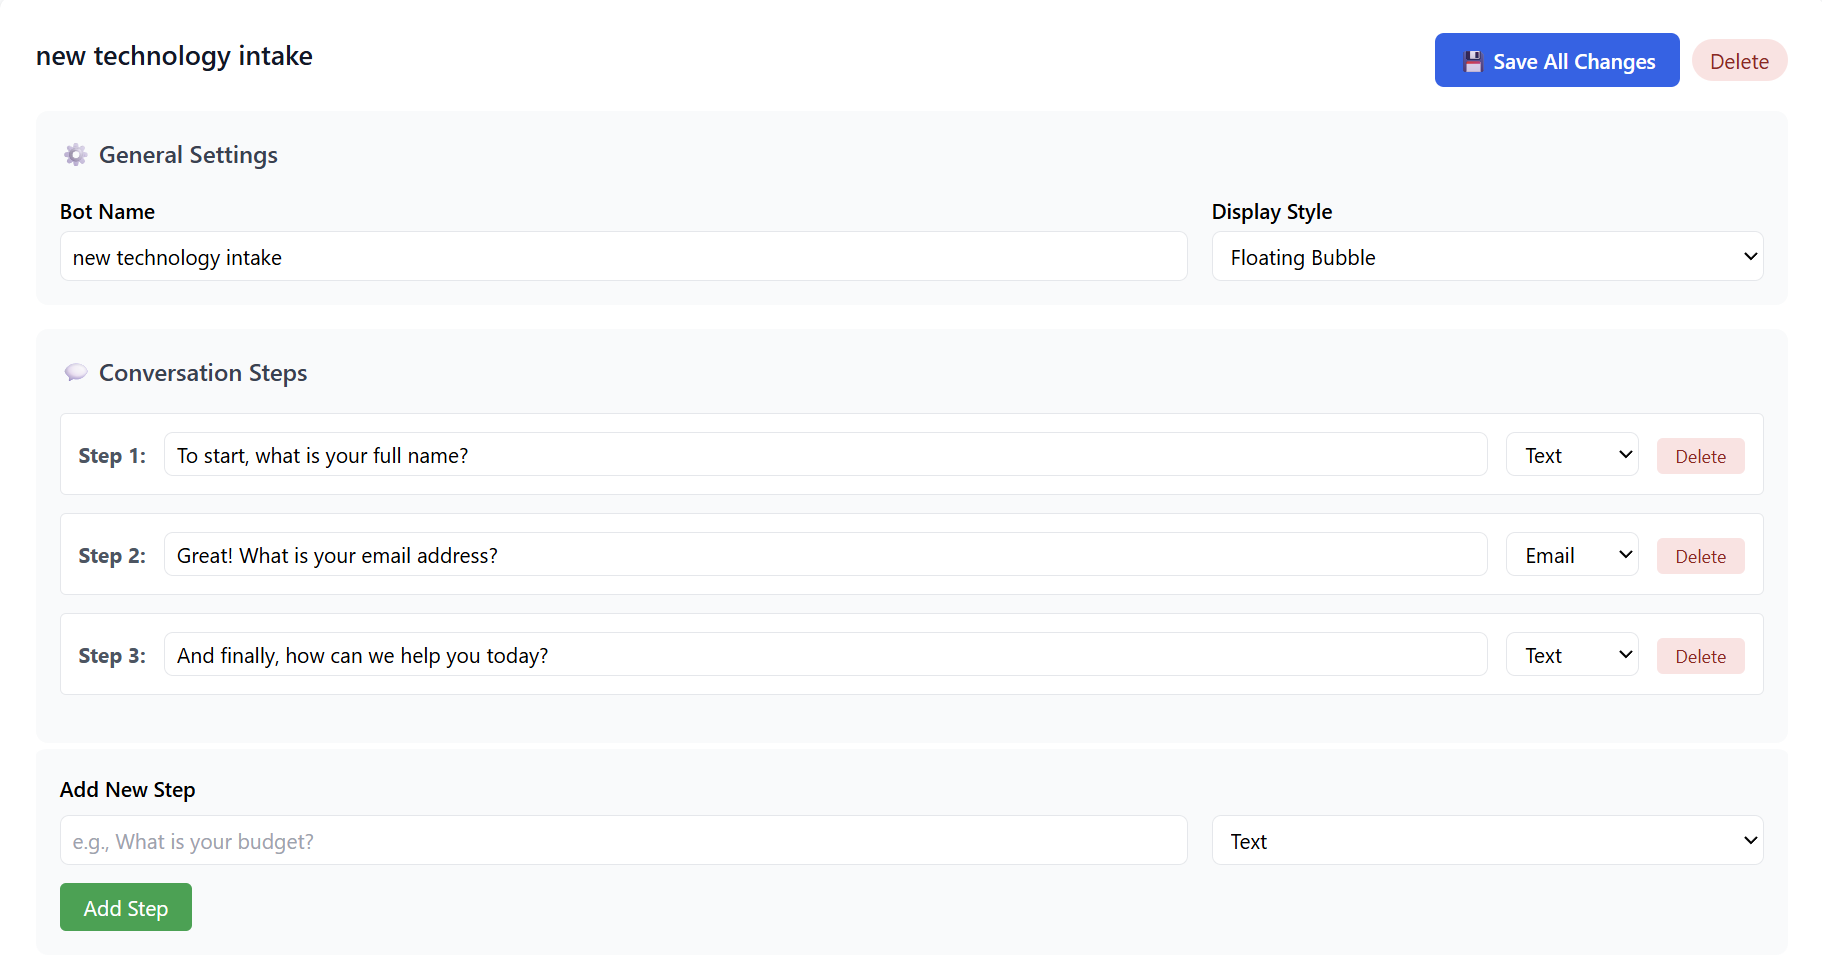
5. Adding a New Step
To add your own questions:
-
Go to Add New Step.
-
Type your question (e.g., “What is your phone number?”).
-
Select the input type:
Available Input Types
-
Text (open-ended responses)
-
Email (validates email format)
(Other input types may appear as the platform expands)
-
Click Add Step.
Your new step appears at the bottom of the conversation list.
6. Saving Your Changes
Changes to steps, settings, or order will not save automatically.
Click:
💾 Save All Changes
This confirms all updates to your bot.
7. Deleting the Bot
Click Delete if you want to permanently remove the bot.
A confirmation will appear—once confirmed, the bot and its data will be removed.
8. Embedding Your Lead Capture Bot on Your Website
When your bot is ready, go to the 📋 Embed Code section.
You will see a snippet like:
Installation Instructions
To install:
-
Copy the entire snippet.
-
Paste it in the <head> section of your website’s HTML.
For platforms like WordPress, Shopify, Wix, or Squarespace:
-
Go to Custom Code, Header Scripts, or Theme Header.
-
Paste the snippet.
-
Save & publish.
Your Lead Capture Bot will now appear as a floating bubble or the selected display style.

Summary
| Feature | Description |
|---|---|
| Create Lead Bot | Build conversational lead collection flows. |
| Custom Steps | Add unlimited questions with text/email input types. |
| Display Style | Floating bubble widget for easy visibility. |
| Save & Manage | Edit, reorder, delete, or add new steps anytime. |
| Deployment | Install with a simple HTML embed code. |
Your AI Lead Capture Bot is now ready to qualify leads efficiently and automatically.
AI Appointment Schedulers
The AI Appointment Scheduler allows businesses to automate their booking process using smart, conversational scheduling tools.
Clients can configure available time slots, booking rules, confirmation messages, notification settings, and embed a scheduling widget directly onto their website.
This guide shows how to create, customize, and deploy your AI-powered Appointment Scheduler.
1. Accessing the Appointment Scheduler
After enabling the AI Business Tools Suite:
-
Log in to your dashboard.
-
Go to AI Tools.
-
Select 📅 AI Appointment Scheduler.
You will see your scheduler dashboard where you can create and manage multiple scheduling widgets.
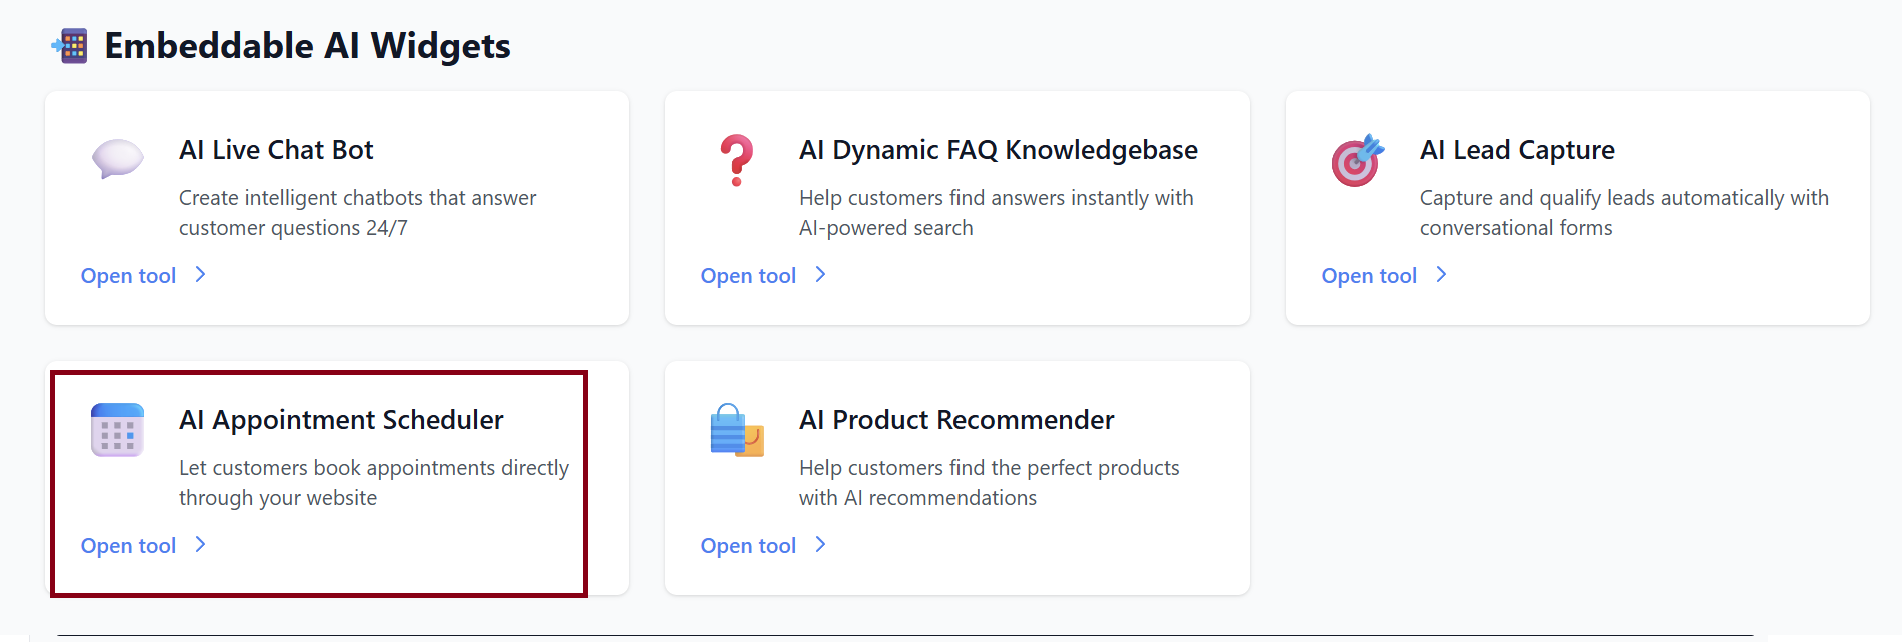
2. Creating a New Appointment Scheduler
Basic Setup Fields
| Field | Description |
|---|---|
| Scheduler Name | Internal name for the booking tool (e.g., “Consultation Scheduler”). |
| Welcome / Header Message | Shown at the top of the scheduling window. |
After filling these fields, click: ✨ Create Scheduler
Your scheduler will now appear in your list of active tools.
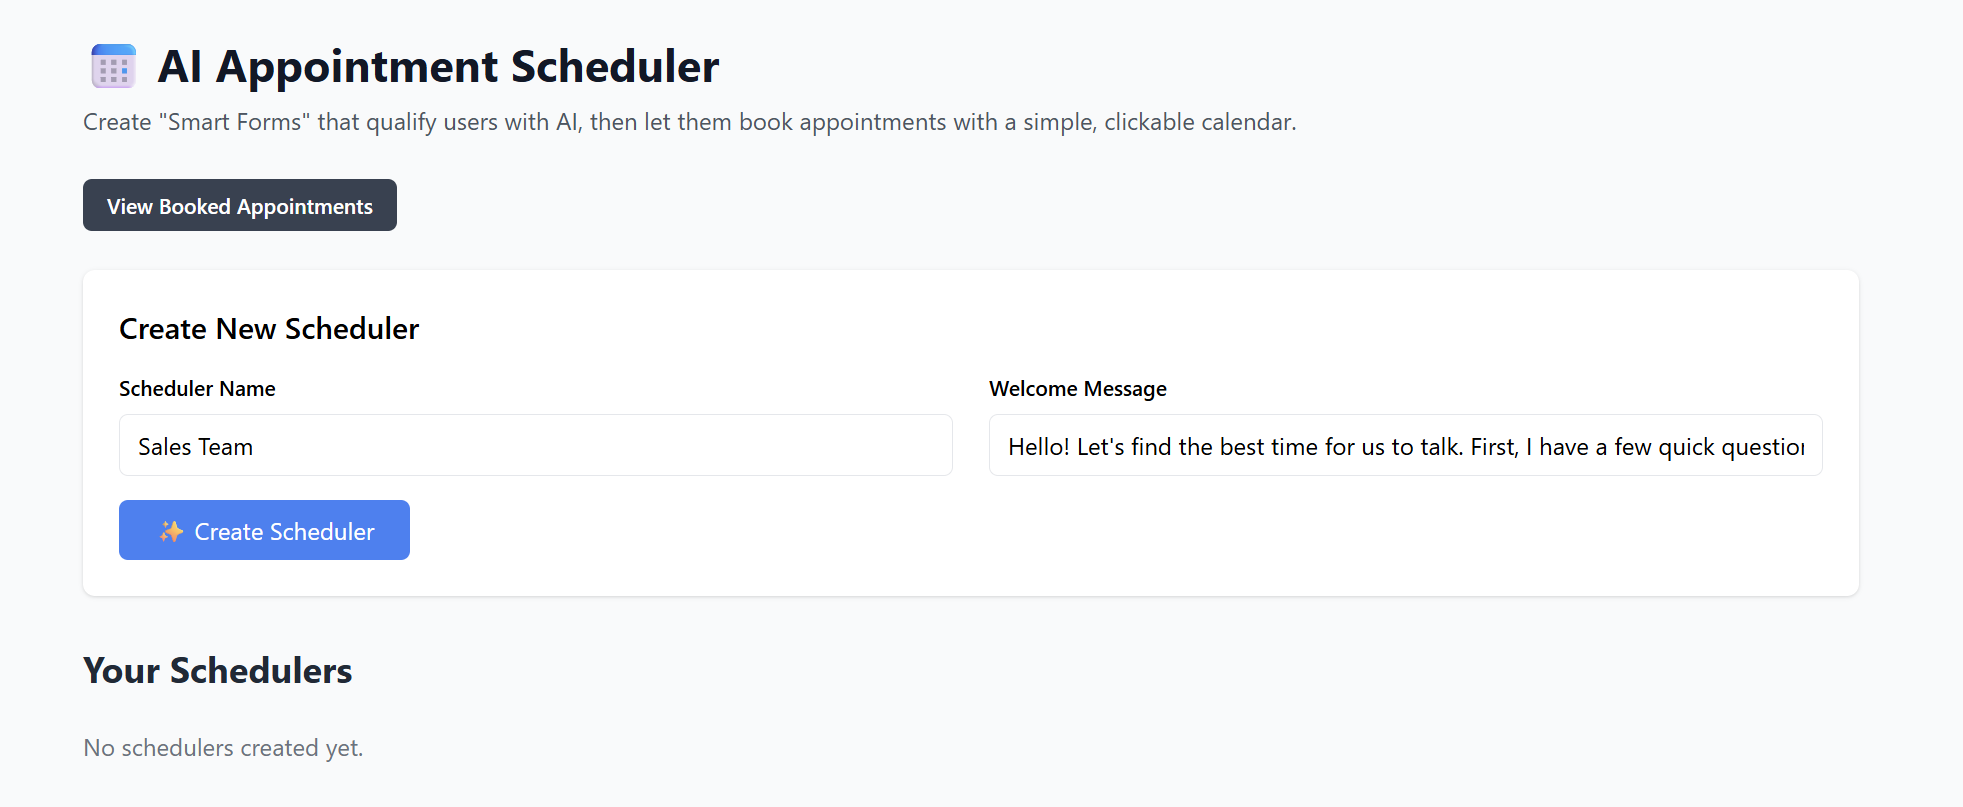
3. Setting Your Availability
This is where you specify when clients are allowed to book appointments.
Common Availability Options
-
Days of the week (Mon–Sun)
-
Start and end times
-
Breaks or blocked-out hours
-
Recurring weekly schedule
-
One-time blackout dates (holidays, events)
Example:
| Day | Availability |
|---|---|
| Monday–Friday | 9:00 AM – 5:00 PM |
| Saturday | 10:00 AM – 3:00 PM |
| Sunday | Unavailable |
Make changes and click Save.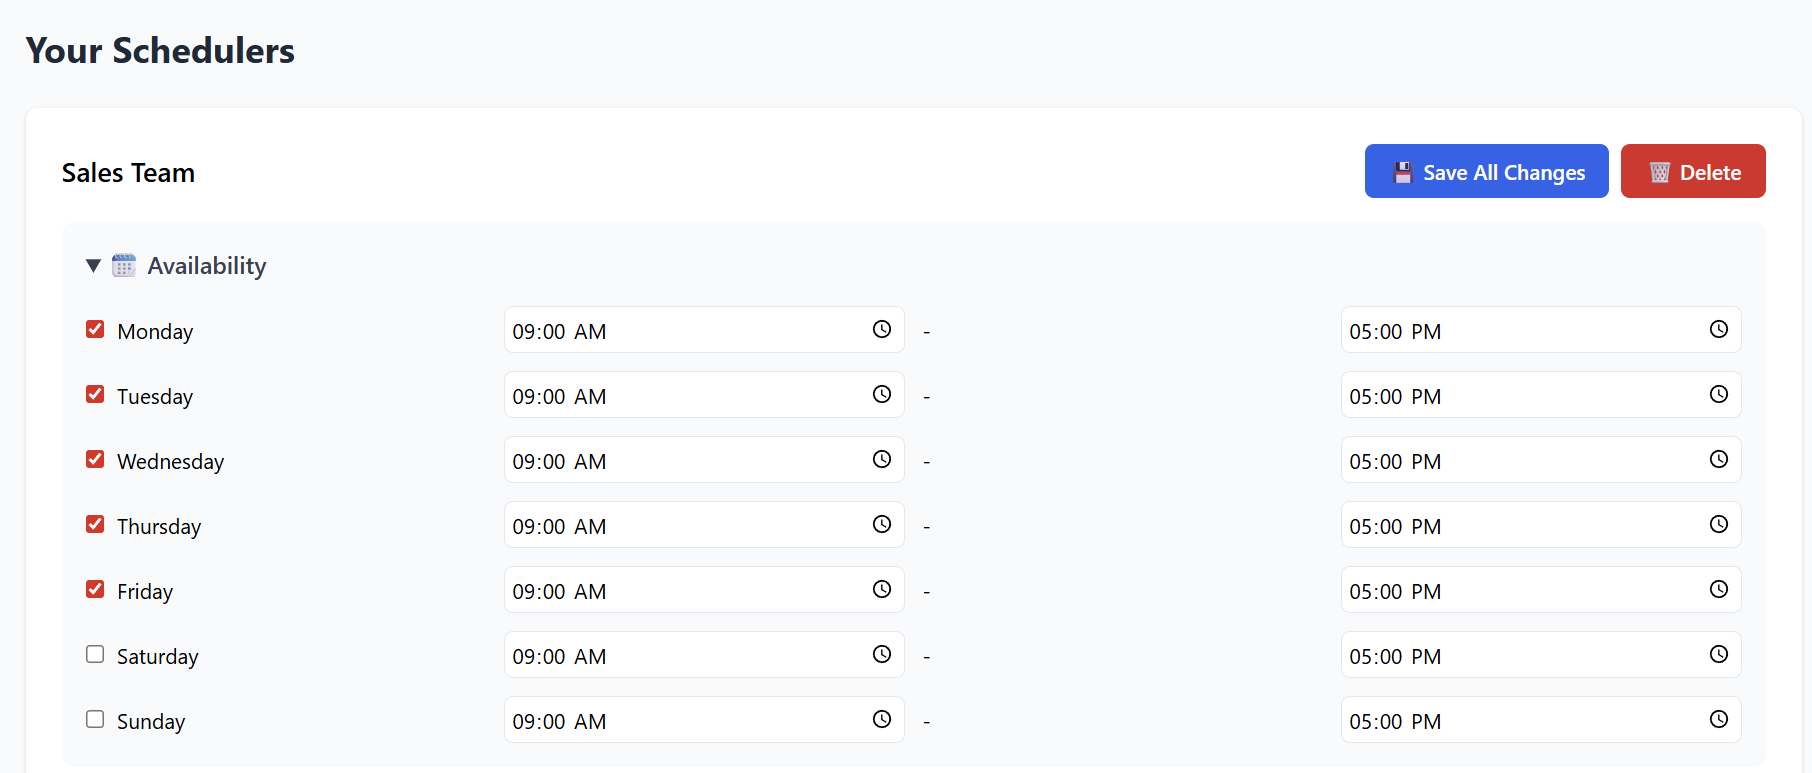
4. Configuring Appointment Types
You can offer different appointment types depending on your business needs.
Examples
-
15-minute Quick Call
-
30-minute Consultation
-
1-hour Strategy Session
-
Demo / Product Walkthrough
Each appointment type can include:
-
Duration
-
Description
-
Meeting location (Zoom, Google Meet, In-person, Phone call)
-
Custom confirmation message
After adding appointment types, ensure they are enabled.

5. Automated Confirmation & Notifications
The scheduler can automatically handle messaging.
Common Automated Messages
-
Appointment confirmation
-
Reminder email
-
Reschedule / cancellation notifications
-
Follow-up email (if enabled)
You can customize the wording of each message.
For example:
Confirmation Example:
“Your appointment is confirmed! We look forward to speaking with you.”
Be sure to click Save All Changes for messaging updates.
6. Booking Form Questions (Optional)
If needed, you can collect additional information before confirming an appointment.
Examples:
-
“What is your phone number?”
-
“What service are you interested in?”
-
“How did you hear about us?”
You can add as many form fields as needed:
-
Text input
-
Dropdown (if supported)
-
Email
-
Phone

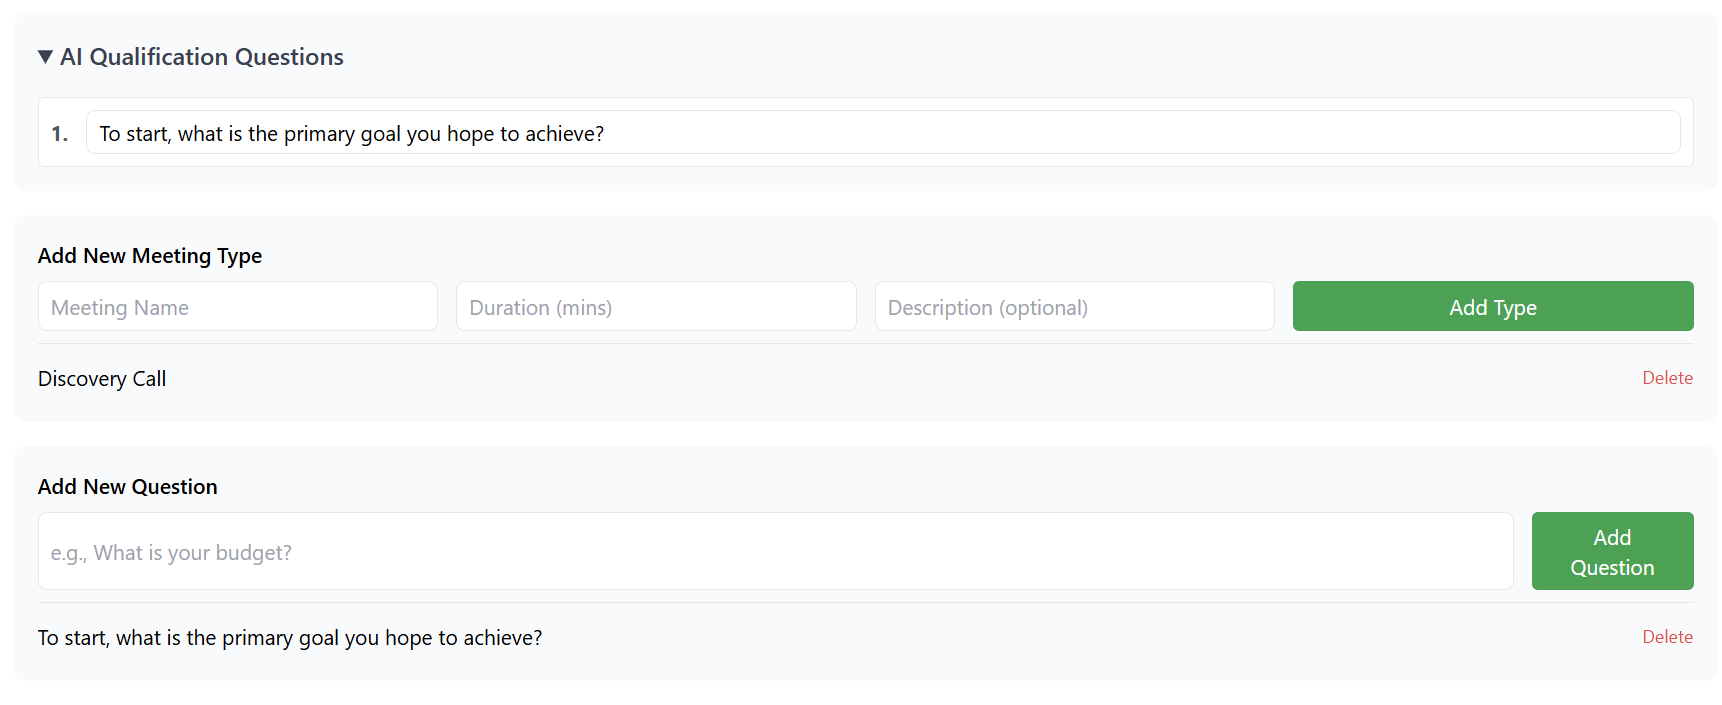
7. Calendar Integrations (If available)
Depending on the system’s features, you may be able to connect:
-
Google Calendar
-
Outlook / Office 365
-
iCloud
-
Teams Calendar
This enables automatic syncing so booked appointments appear on your personal or business calendar.
If available, simply click Connect Calendar and follow the prompts.
8. Embedding the Scheduler on Your Website
Your appointment scheduler includes an embed snippet similar to:
Installation Steps
-
Copy the entire snippet.
-
Paste it inside your website’s <head> section.


Works on all platforms:
-
WordPress
-
Shopify
-
Wix
-
Squarespace
-
Custom HTML sites
After publishing, the scheduler will appear on your site as:
9. Managing and Viewing Appointments
From the dashboard:
-
Open your scheduler.
-
Go to Appointments or Bookings.
Here you can:
-
View upcoming bookings
-
Review customer details
-
Reschedule or cancel appointments
-
Export data (if supported)


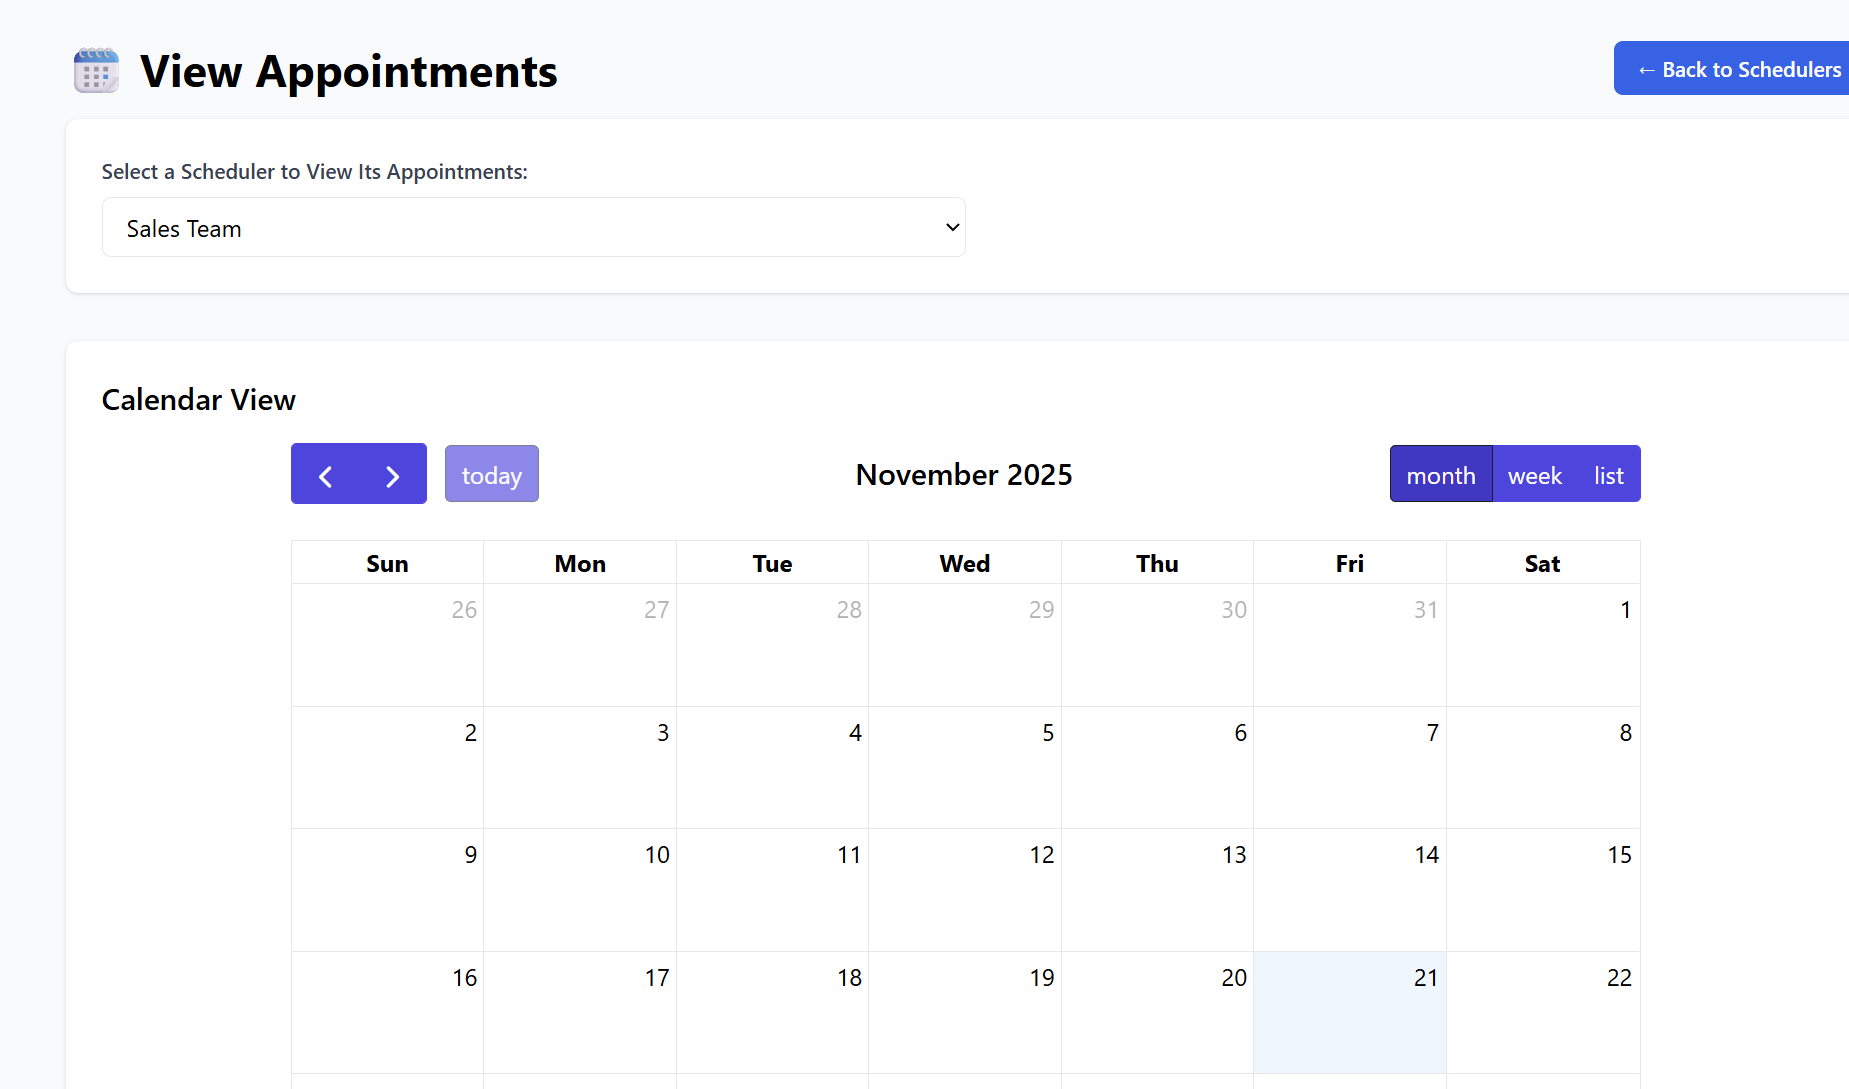
10. Deleting a Scheduler
If you no longer need a scheduler:
-
Open the scheduler.
-
Click Delete.
-
Confirm removal.
The widget will immediately stop functioning on any websites where it was embedded.

Summary
| Feature | Description |
|---|---|
| Create Scheduler | Build fully automated booking tools. |
| Availability | Set weekly hours and blackout dates. |
| Appointment Types | Create multiple services with different durations. |
| Notifications | Automated confirmations & reminders. |
| Custom Questions | Collect info before booking. |
| Integration | Sync with external calendars (if available). |
| Embedding | Add to any website via simple HTML snippet. |
Your AI Appointment Scheduler is now ready to automate bookings and improve customer scheduling efficiency.
AI Product Recommender
The AI Product Recommender helps you add a smart, conversational shopping widget to your website. It recommends products based on customer preferences, improving conversions and helping customers make faster buying decisions.
This guide walks you through connecting your store, creating your widget, customizing it, and embedding it on your site.
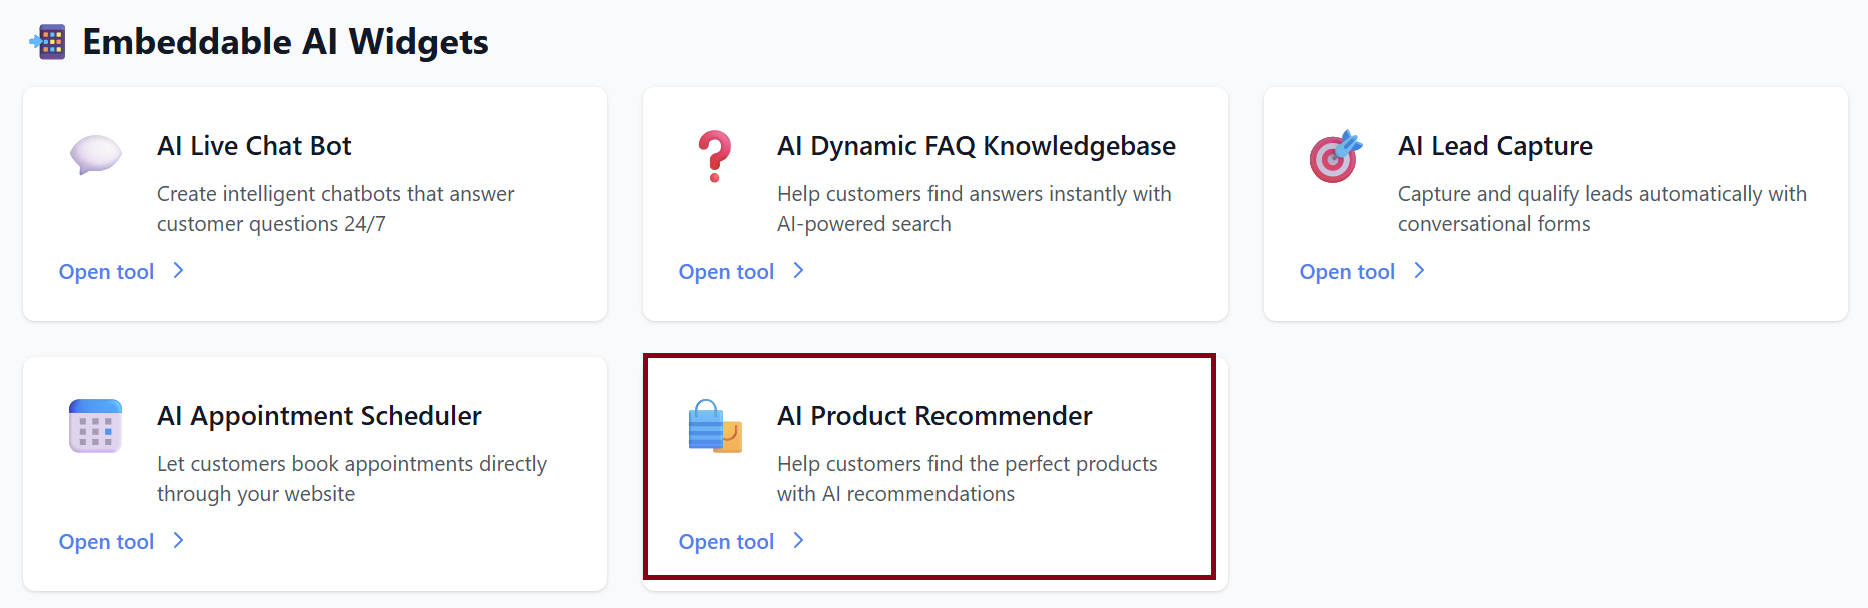
1. Create a Product Recommender Widget
To start building your smart assistant, you will configure the following settings:
Widget Name: Give your recommender an internal or public name.
Example: Product Finder, Tech Assistant, Shop Smart Bot
Primary Color: Choose the widget’s main color to match your brand identity.
Welcome Message: This is the greeting customers see when the widget opens.
Example: “Find your perfect product!”
You can customize the tone to be friendly, energetic, or professional.
Widget Position: Choose where the widget appears on your website:
-
Bottom Right (default)
-
Bottom Left (if preferred)
Show Text Bubble: Enable this option if you want a preview message above the widget icon, such as:
“Need help finding something?”
This increases engagement and button clicks.
System Prompt (Optional): This controls how the AI behaves. If left blank, the default shopping assistant prompt is used. You can add custom instructions like:
“You are a product expert for AffordableTechShop. Recommend only products from our catalog and ask clarifying questions first.”
Once all fields are set, click Create Widget to generate your AI Product Recommender.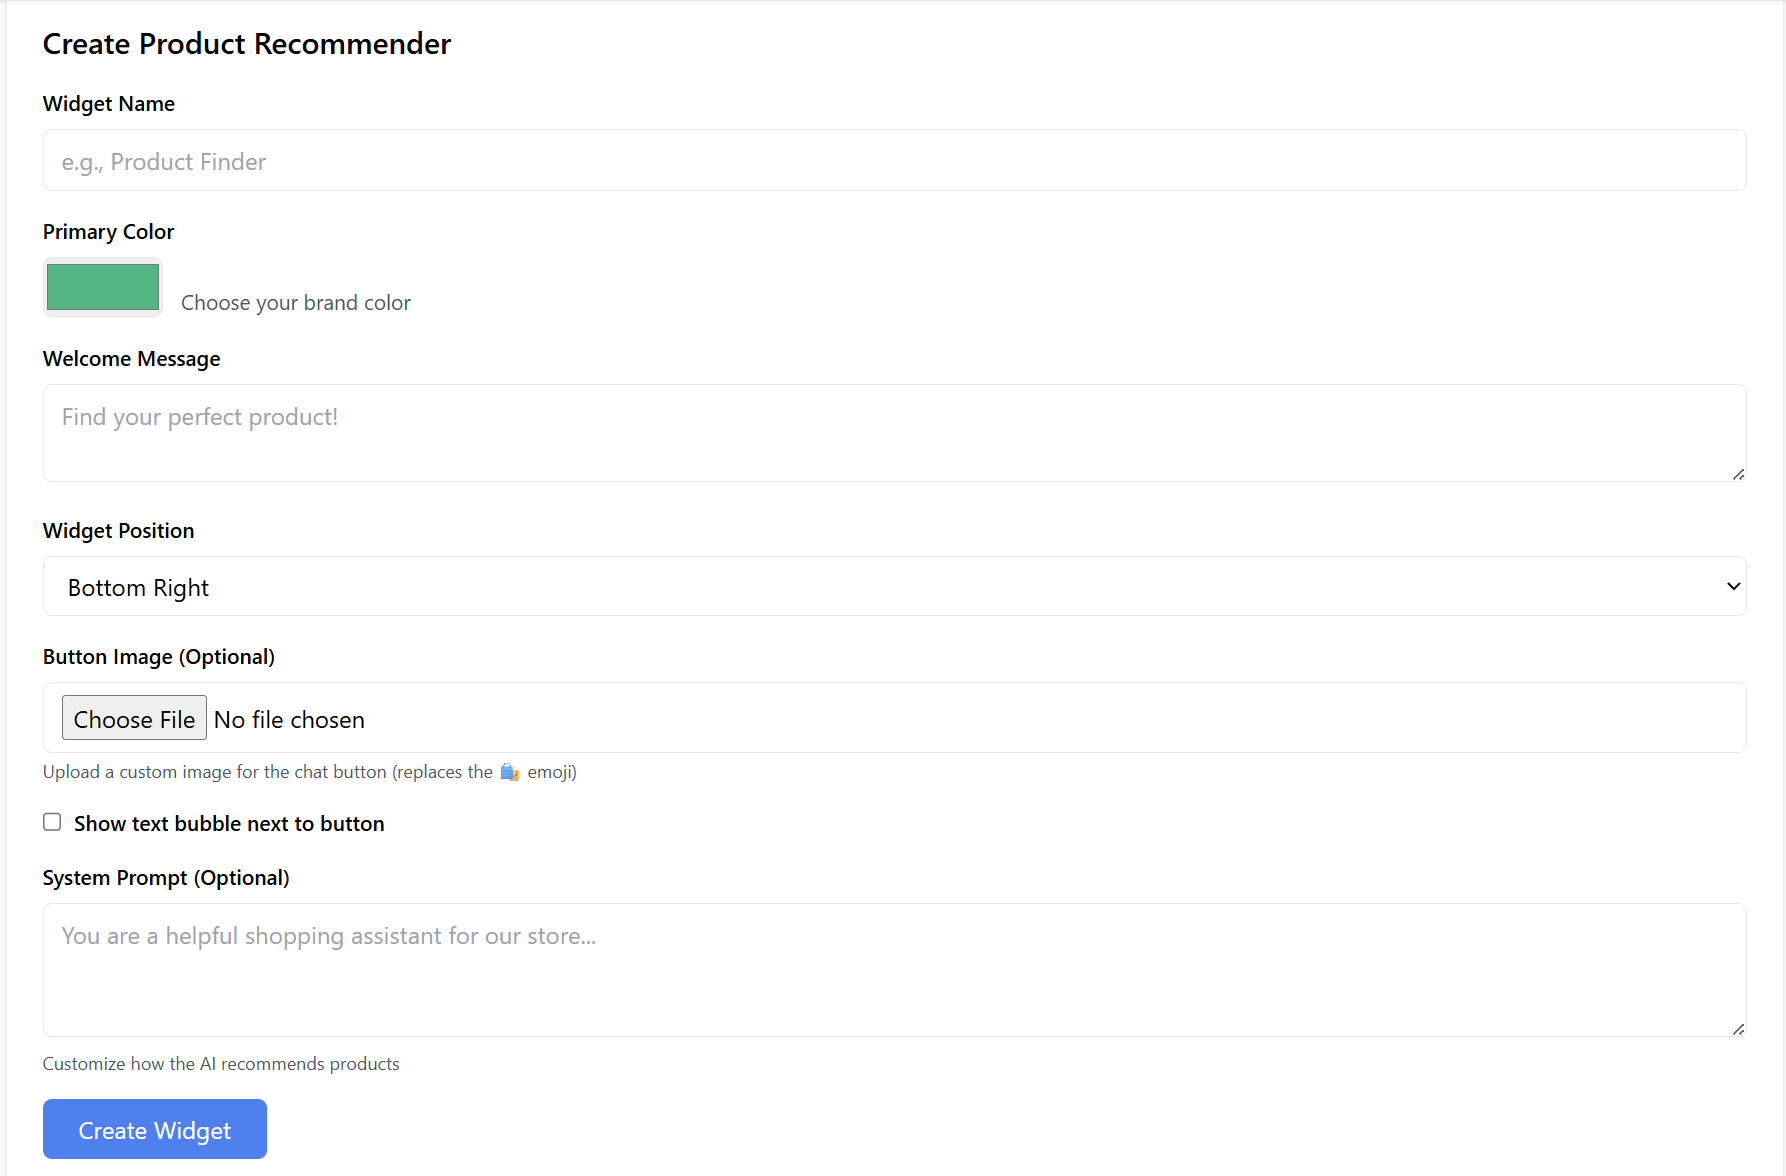
2. Manage Existing Widgets
Under Your Product Recommenders ( appears after creating the widget in step 1), you can manage all widgets you’ve created.
Example entry: Affordable Tech Shop Product Finder
Created: Nov 23, 2025
Options:
-
✏️ Customize – edit name, color, welcome message, prompt, position, etc.
-
🗑️ Delete – permanently remove the widget.
-
A live preview showing:
“🛍️ Need Help Finding Something?”
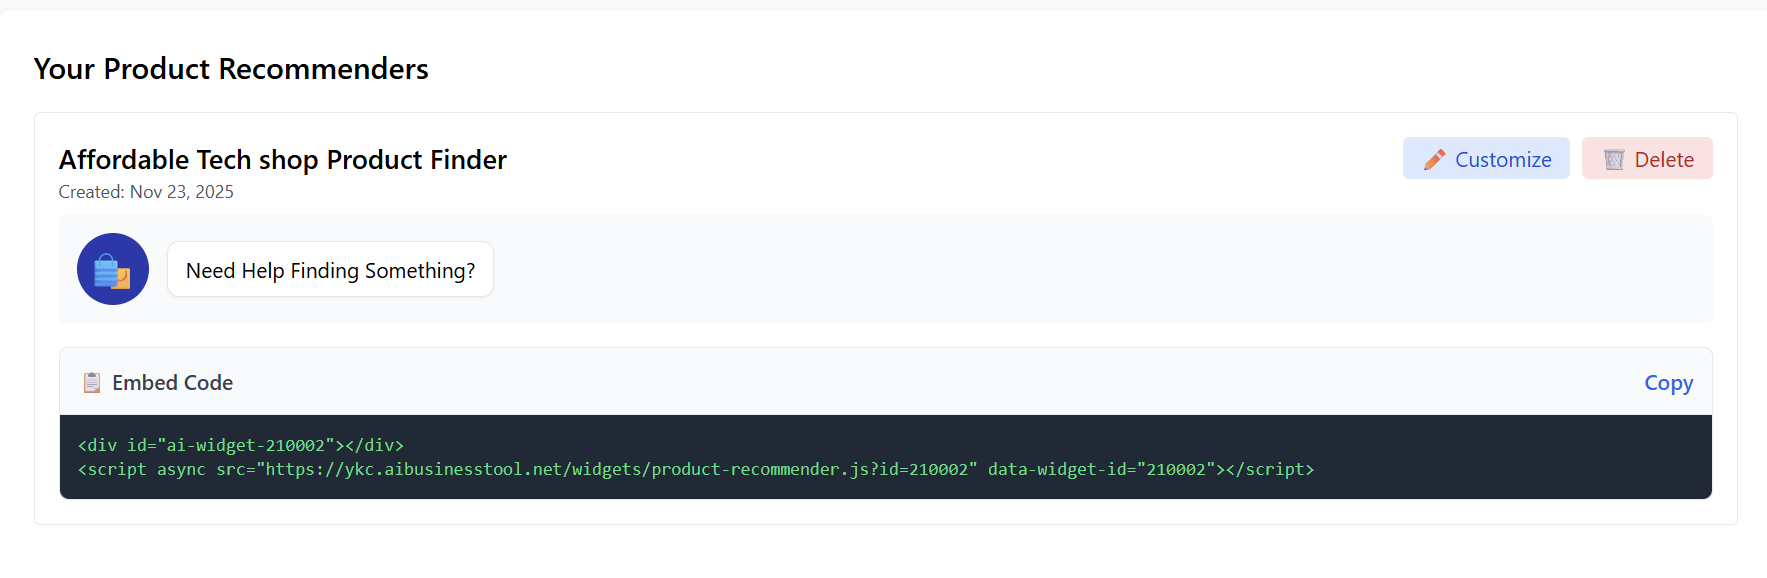
3. Connect Your Store
After creating a product recommendation widget, this step is enabled and you must connect your e-commerce platform.
Supported Platforms:
-
Shopify
-
WooCommerce

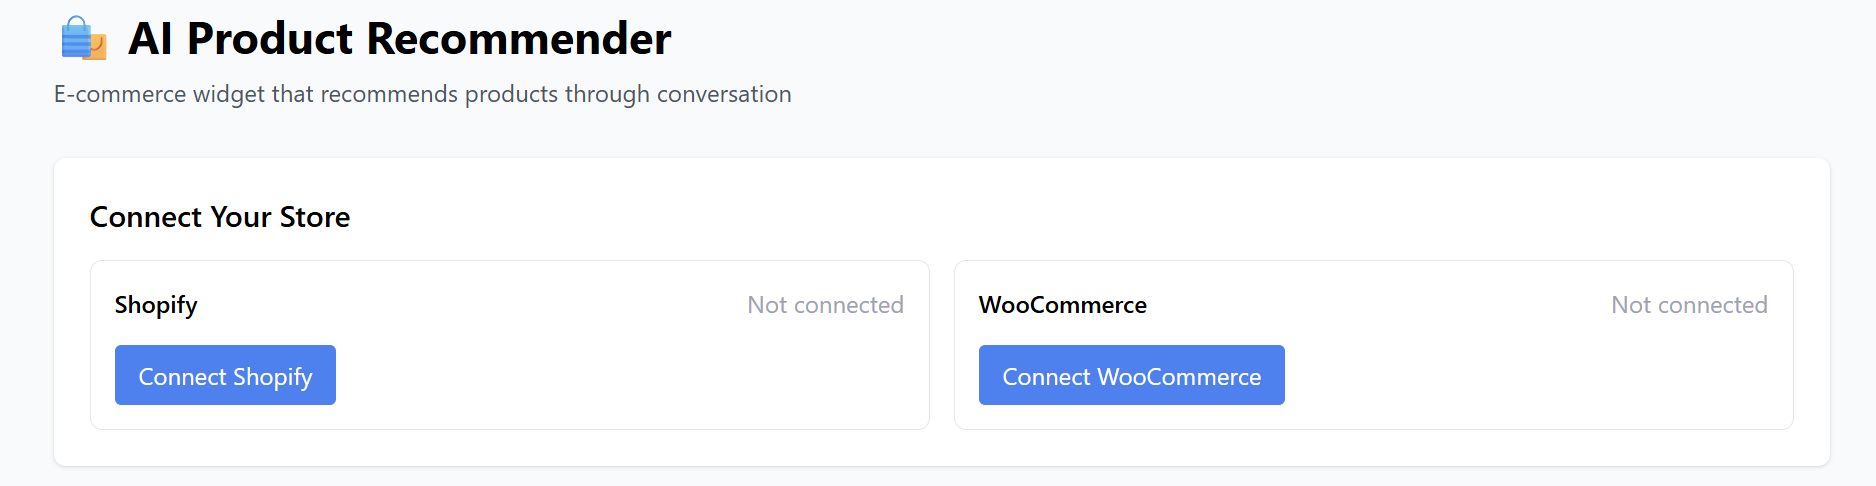
Steps to Connect:
-
Go to AI Product Recommender in your dashboard.
-
In the Connect Your Store section:
-
Select your platform.
-
Click Connect Shopify or confirm the WooCommerce connection.
-
Example:
-
If WooCommerce was selected, got to WooCommerce settings -> Advanced. Get your Consumer key and secret key from 'REST API'.


Once you press 'Connect' the following appears: press 'Sync Now' to update on your website.


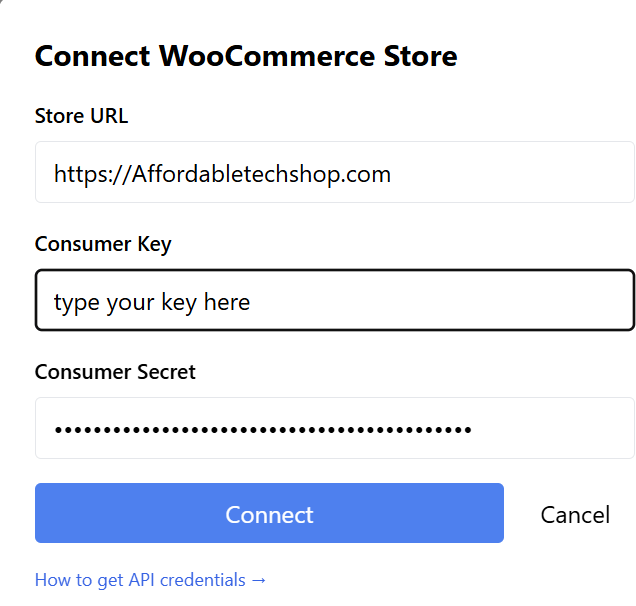
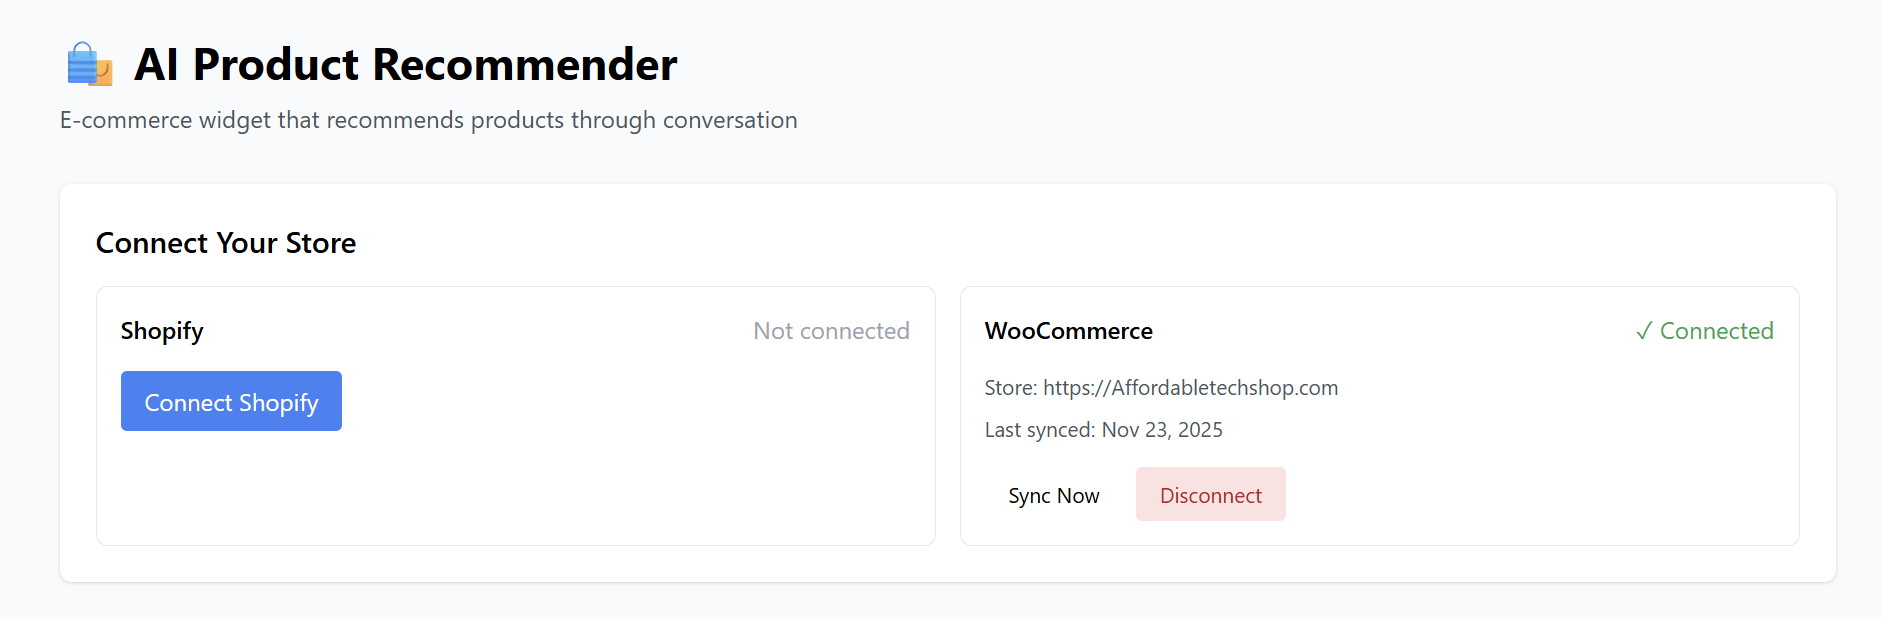
Additional Options:
-
Sync Now – updates your product catalog immediately.
-
Disconnect – removes the store connection.
4. Embedding the Widget on Your Website
Once created, the system generates an embed code.
Example:

To add the widget to your website:
-
Copy the embed code.
-
Paste it into your website's HTML before the closing
</body>tag. -
Save and publish your site.
For platforms like WordPress, paste it into:
Your AI Product Recommender will appear instantly.
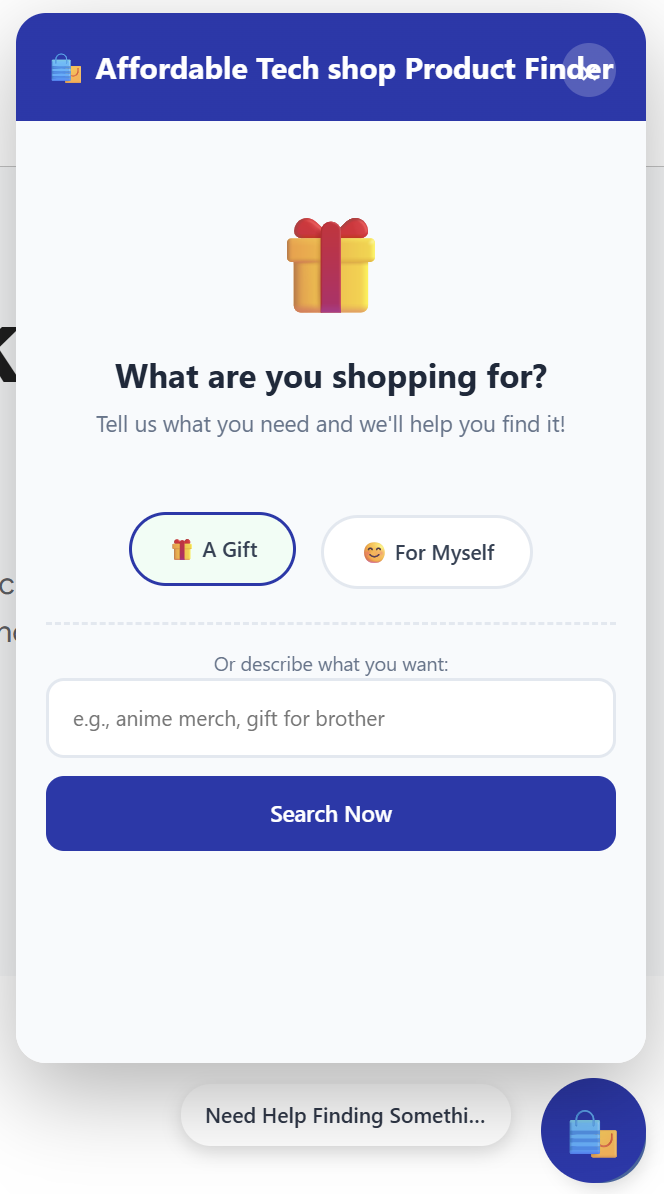
Your AI Product Recommender Is Live!
You now have:
-
A connected and synced product catalog
-
A fully customized recommendation widget
-
AI-powered shopping assistance on your website
This tool helps customers quickly find the right products — increasing engagement and boosting sales.
AI QR Campaign Generator
Create, customize, and schedule dynamic QR code campaigns with branded landing topics—perfect for promotions, events, coupons, product launches, or store announcements.
The AI QR Campaign Suite allows you to design branded landing topics and generate dynamic QR codes that redirect users to your promotional topic. The landing topic and QR settings can be customized with colors, logos, CTAs, and optional scheduling.
Once created, campaigns are saved inside your “My Campaigns” dashboard with analytics such as scans and activation status.
Accessing the AI QR Campaign Suite
-
Log in to your dashboard.
-
Ensure your wallet has been topped up.
-
Go to Add Client / Services and activate AI QR Campaign Suite if not already activated.
-
After activation, go to Services → AI QR Campaign Suite to begin creating campaigns.

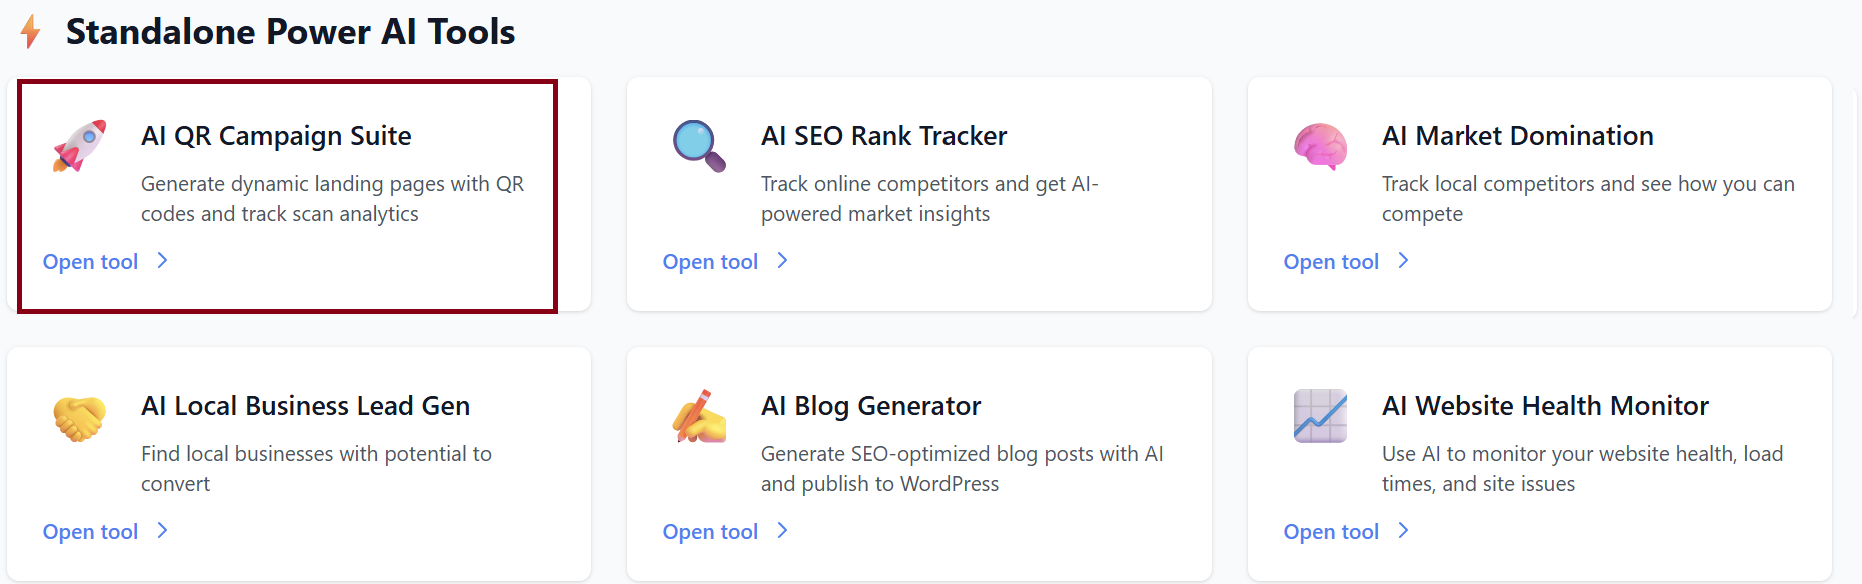
1. Create a New Campaign
Inside the AI QR Suite, you'll see the Create New Campaign section. Follow the steps below:
Step A — Landing Topic Design
This is the topic visitors will see after scanning your QR code.
Choose a Style & Theme such as:
-
Modern & Clean
-
Bold & Energetic
-
Minimal
-
Premium
…and more depending on your account.
The theme determines the layout, font style, spacing, and visual aesthetic.
2. Add Topic Logo (Optional)
Upload your business or brand logo (PNG, JPG, GIF, WebP).
This will appear at the top of the landing topic.
3. Fill in Topic Content
You will see multiple content fields:
-
Your Business Name (required)
Example: AffordableTechShop -
Main Headline (required)
Example: Black Friday Sale -
Key Details (multi-line)
Add supporting promo info, such as:
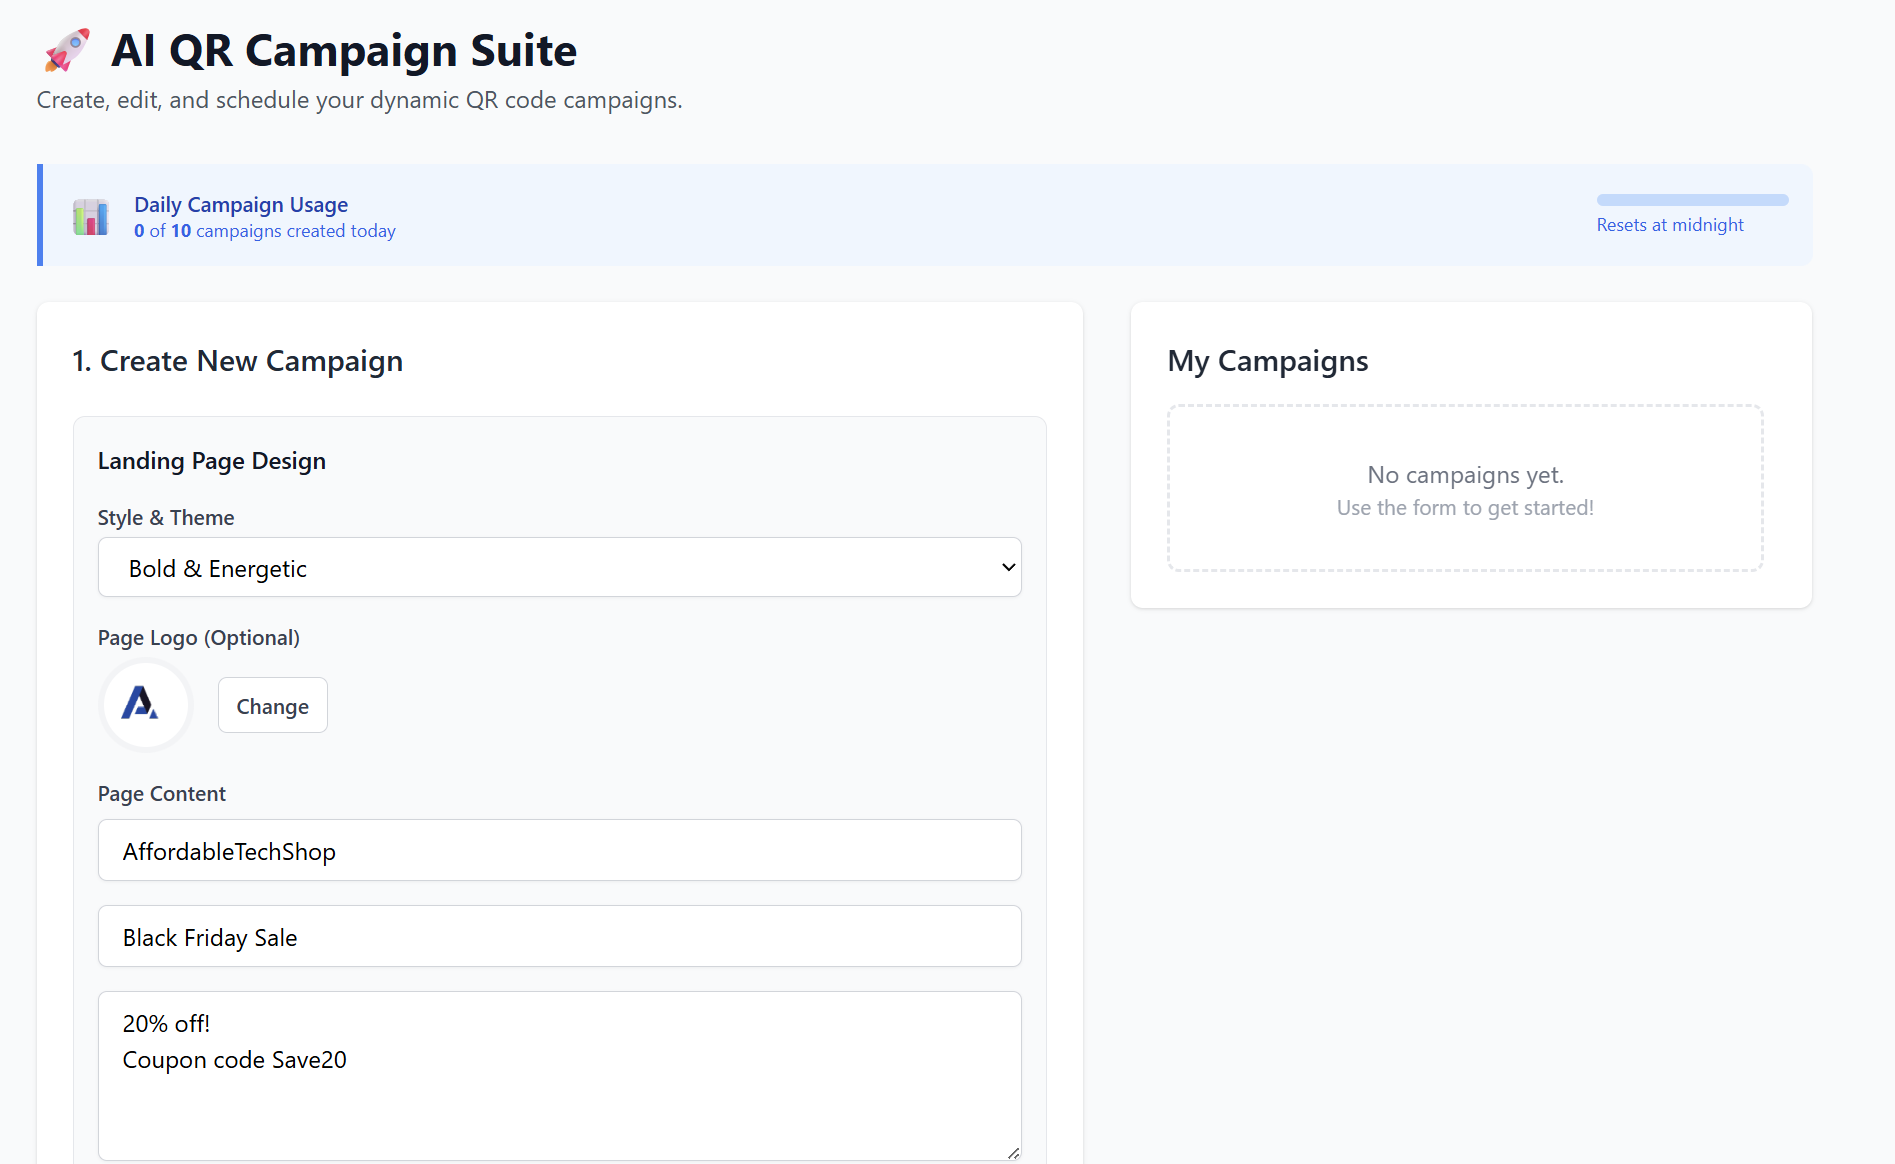
Step B — Call-to-Action (CTA)
A strong CTA boosts conversions.
Step C — QR Code Design
Customize your QR code to match your brand.
1. Dot Color
Set the color of the QR dots (usually black, but any color is allowed).
Tip: Choose a strong contrast for better scanning.
2. Background Color
Set the QR code’s background color (default: white).
3. Center Logo (Optional)
Upload a small logo to appear in the middle of your QR.
Perfect for branding—stores, agencies, or events.
Step D — Scheduling (Optional but powerful)
Schedule when the QR campaign should be active.
-
Start Date & Time
-
End Date & Time
If someone scans the QR outside the active window, they will be redirected to:
-
Fallback URL
Example: https://yoursite.com Ideal for expired promotions or closed events.
Step E — Internal Campaign Name
This is for your internal tracking only.
Examples:
-
Q4 Holiday Promo
-
Black Friday 2025 QR Code
-
Grand Opening Campaign

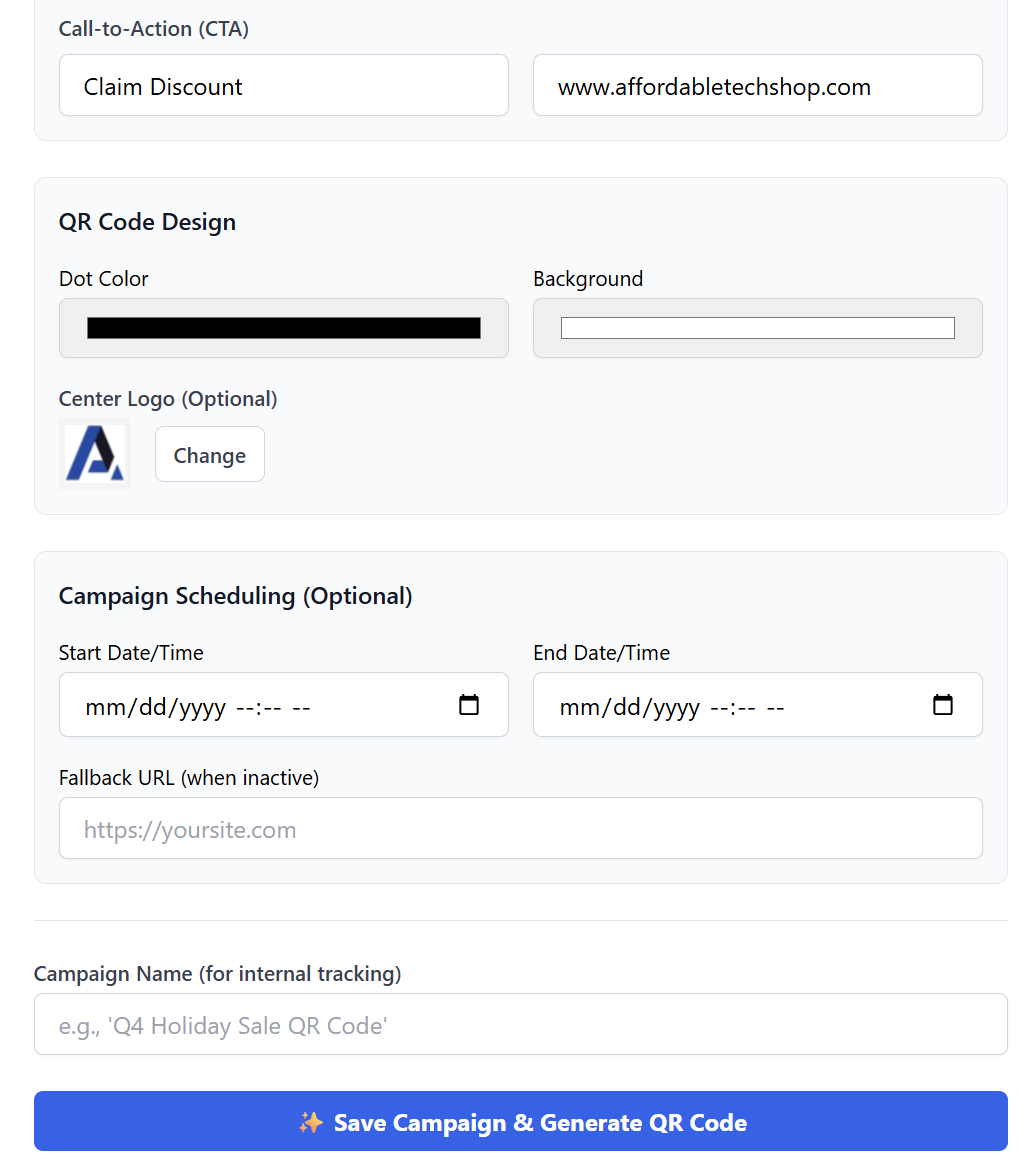
Step F — Save & Generate
Click ✨ Save Campaign & Generate QR Code.
You will then see:
Your QR Code
-
Viewable immediately
-
Buttons to:
-
Copy Link
-
Download PNG
-
Live Topic Preview
Scroll through your landing topic to confirm design accuracy.
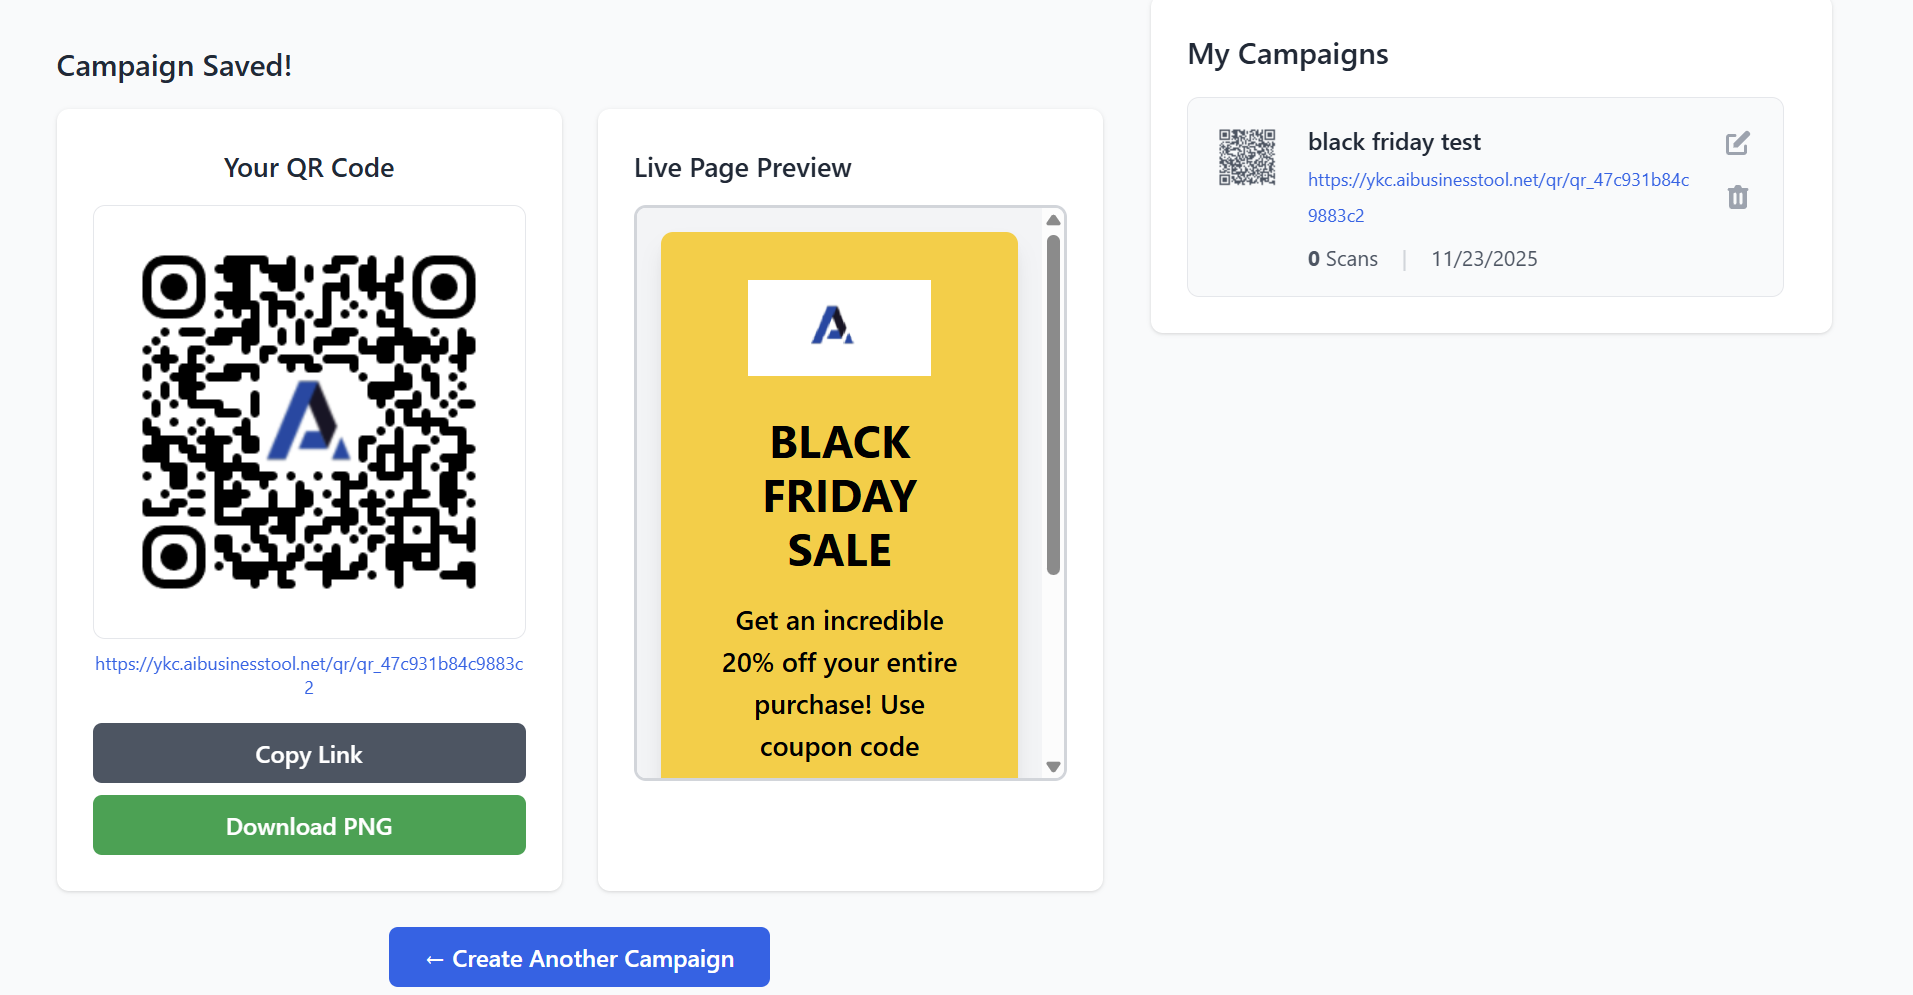
Your Campaign Saved in Dashboard
It will appear under My Campaigns with:
-
Name
-
QR link
-
Scan count
-
Creation date
-
Edit/Delete buttons


Managing Existing Campaigns
Go to My Campaigns to:
Edit Campaign
-
Change CMS content
-
Update colors or logos
-
Reschedule
-
Update CTA
-
Regenerate QR if needed
Delete Campaign
Remove it from your dashboard permanently.
View Scan Data
Scan count shows how many times the QR code has been used.
Best Practices
-
Use high-contrast colors for QR readability.
-
Keep landing topic content short and clear.
-
Always test the QR using your phone before printing.
-
If running limited-time promotions, use scheduling + fallback URL.
-
Brand your QR with a center logo for professionalism.
AI Competitor Monitor
The AI Competitor Monitor helps you track your competitors’ keyword rankings and receive AI-powered insights to improve your SEO strategy and outperform them in search results.
Found under AI SEO Rank Tracker: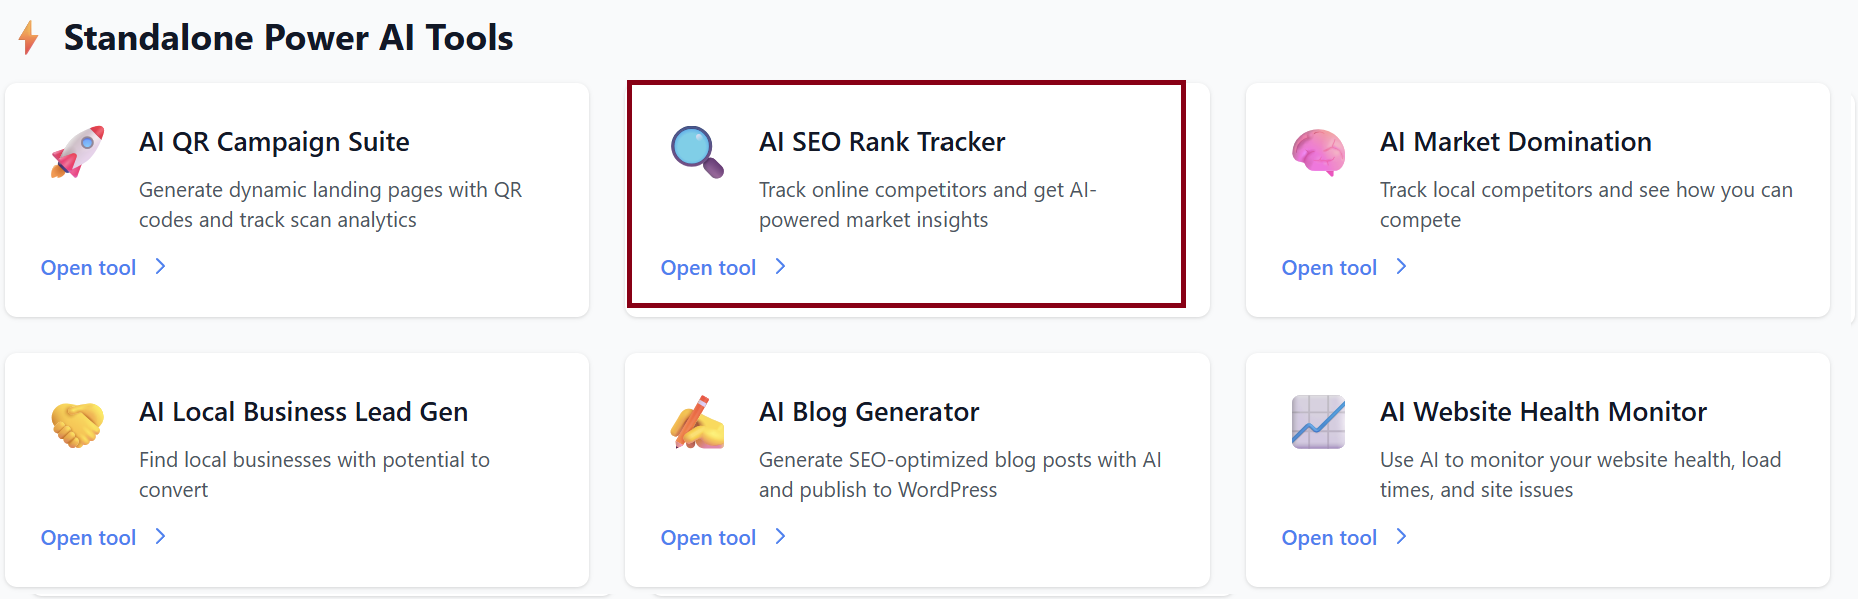
Overview Dashboard
When you open the Competitor Monitor, follow the following steps:
Step 1: Add your website
You can also edit your website settings anytime by clicking ✏️ Edit Website.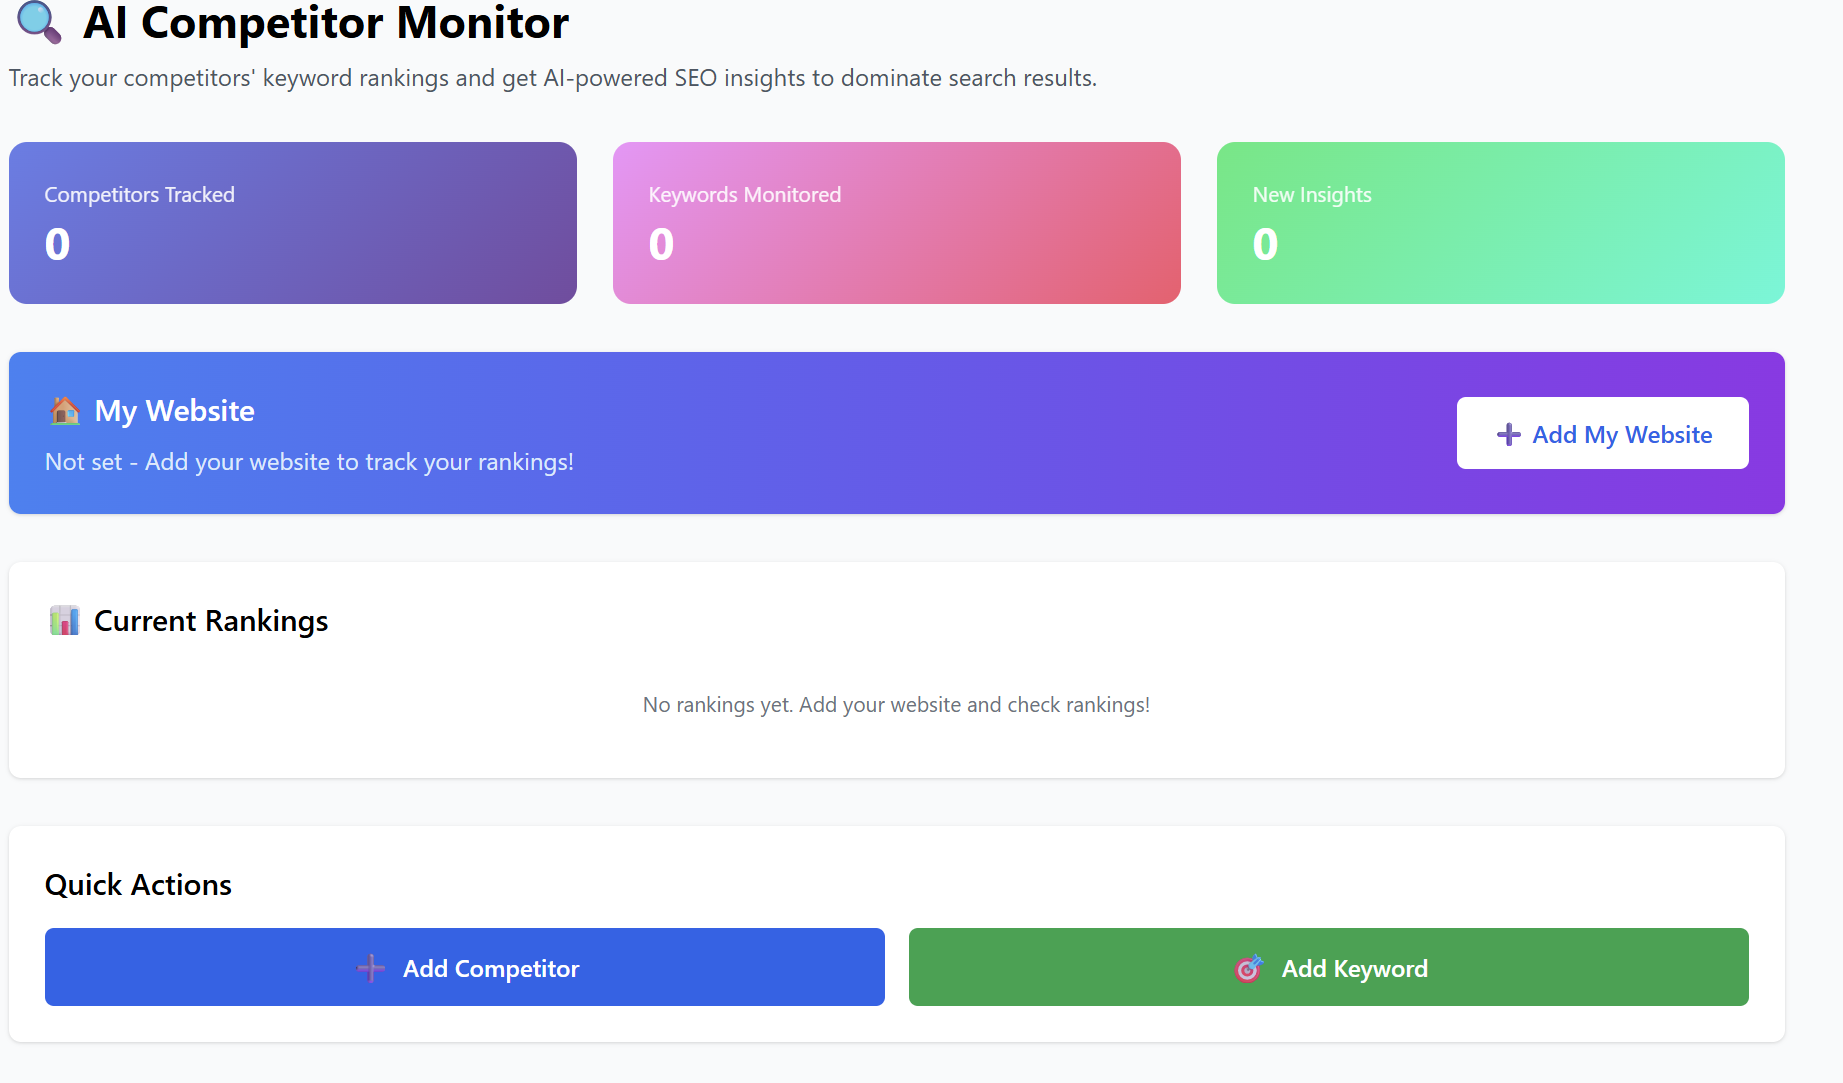
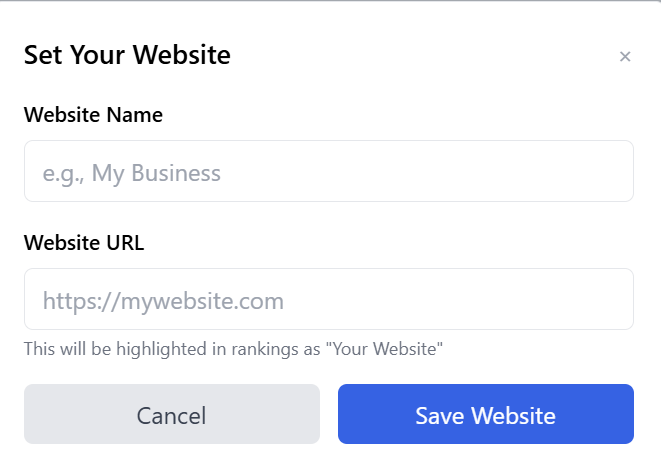
Step 2: Add your competitors (recommended up to 5)
Monitor up to 5 competitors by tracking their domain and comparing their SEO performance to yours.
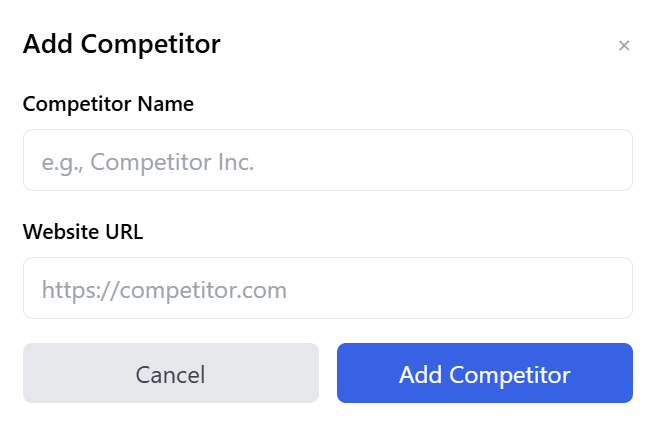
Step 3: Add Keyword
Add new keywords you want the system to monitor over time.
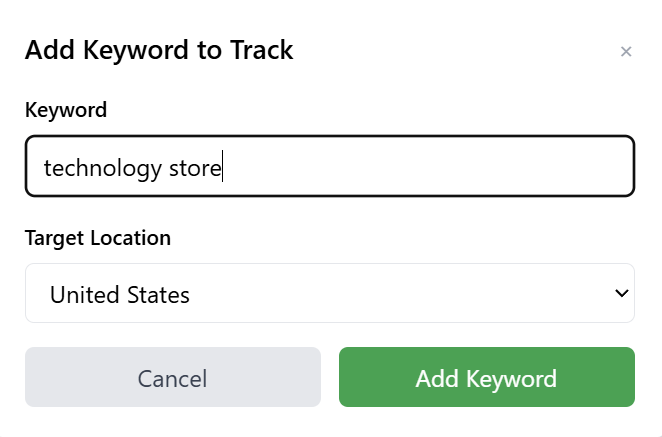
Once they are added, you’ll be able to see your main metrics at a glance:
-
Competitors Tracked: 2
-
Keywords Monitored: 1
-
New Insights: 5
-
Your Website:
https://onepieceapparel.com

Current Rankings
You’ll see the list of keywords you're monitoring along with their live ranking.
Example:
-
one piece merch — Currently #7
This helps you quickly spot ranking improvements or drops.

Competitors Section
Here you’ll find all websites you’re currently tracking:
Your Competitors
-
onepiece
URL:https://onepiece.store
🗑️ Delete
and you can add New Competitor, just enter the website name & URL, then the AI begins tracking:
-
Their keyword rankings
-
SEO improvements
-
New content they publish
-
Their visibility changes
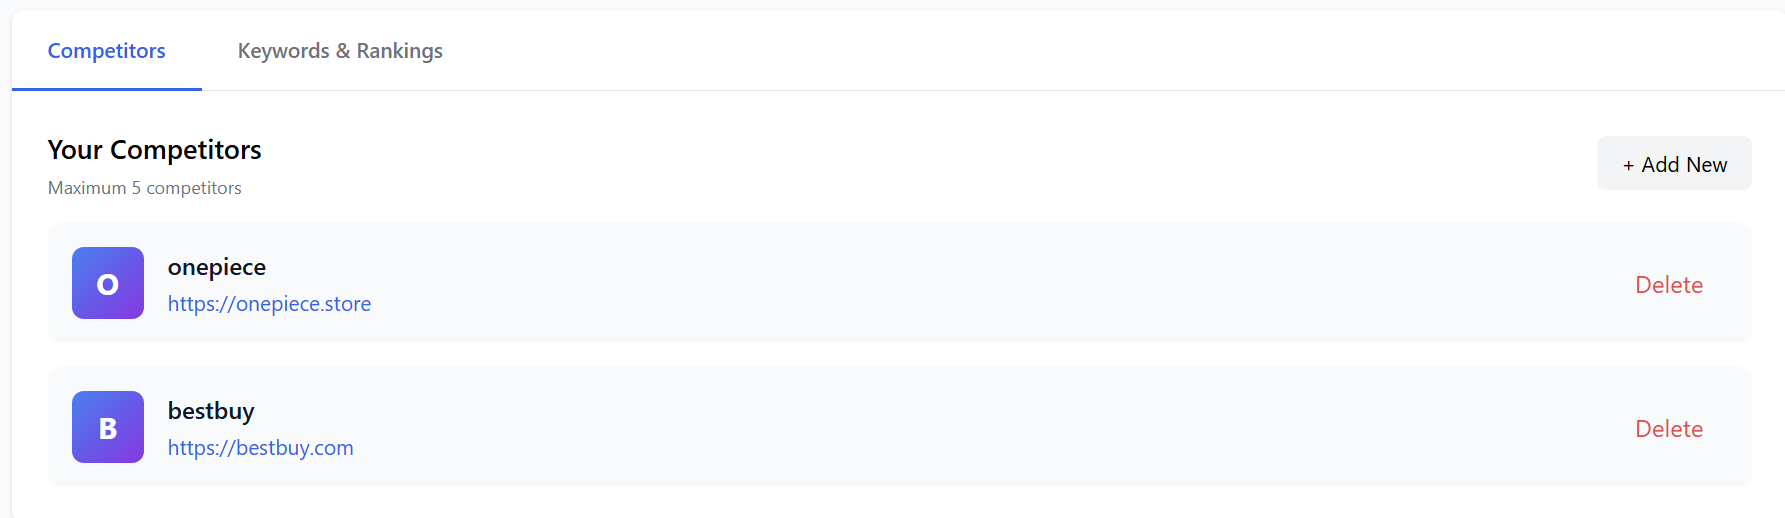
Keywords & Rankings Section
Here you can:
-
View all keywords you're monitoring
-
See your ranking position
-
Track competitor movements
-
Identify opportunities for SEO improvement

Press on 'Check Rankings' to view the competitors:

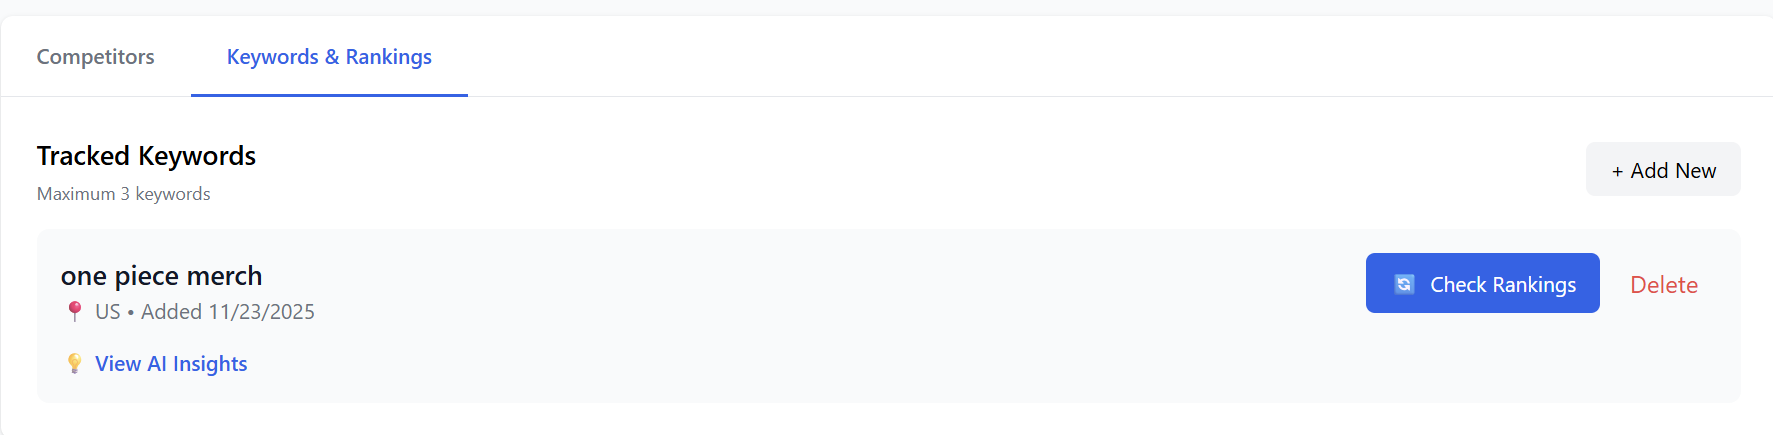
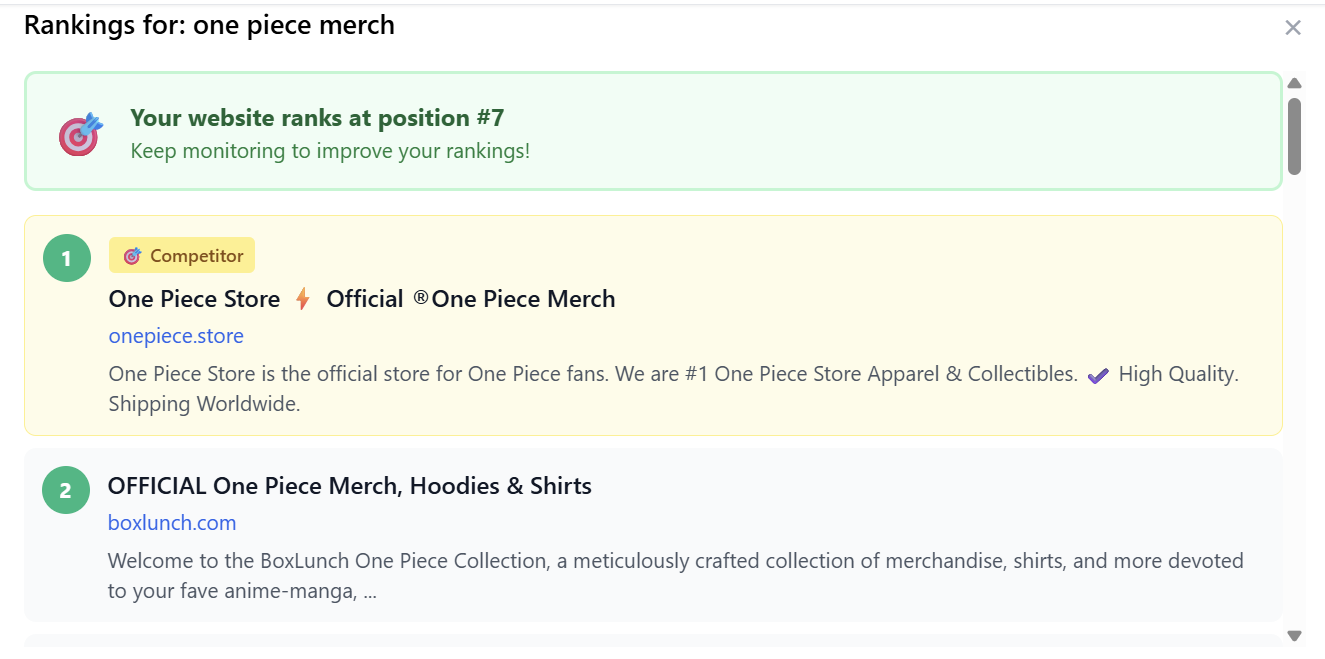
AI-Powered Insights
The system automatically analyzes:
-
Competitor ranking changes
-
Keyword difficulty trends
-
Missing keywords you should target
-
Content opportunities
-
Pages competitors optimized recently
You can view AI insights:
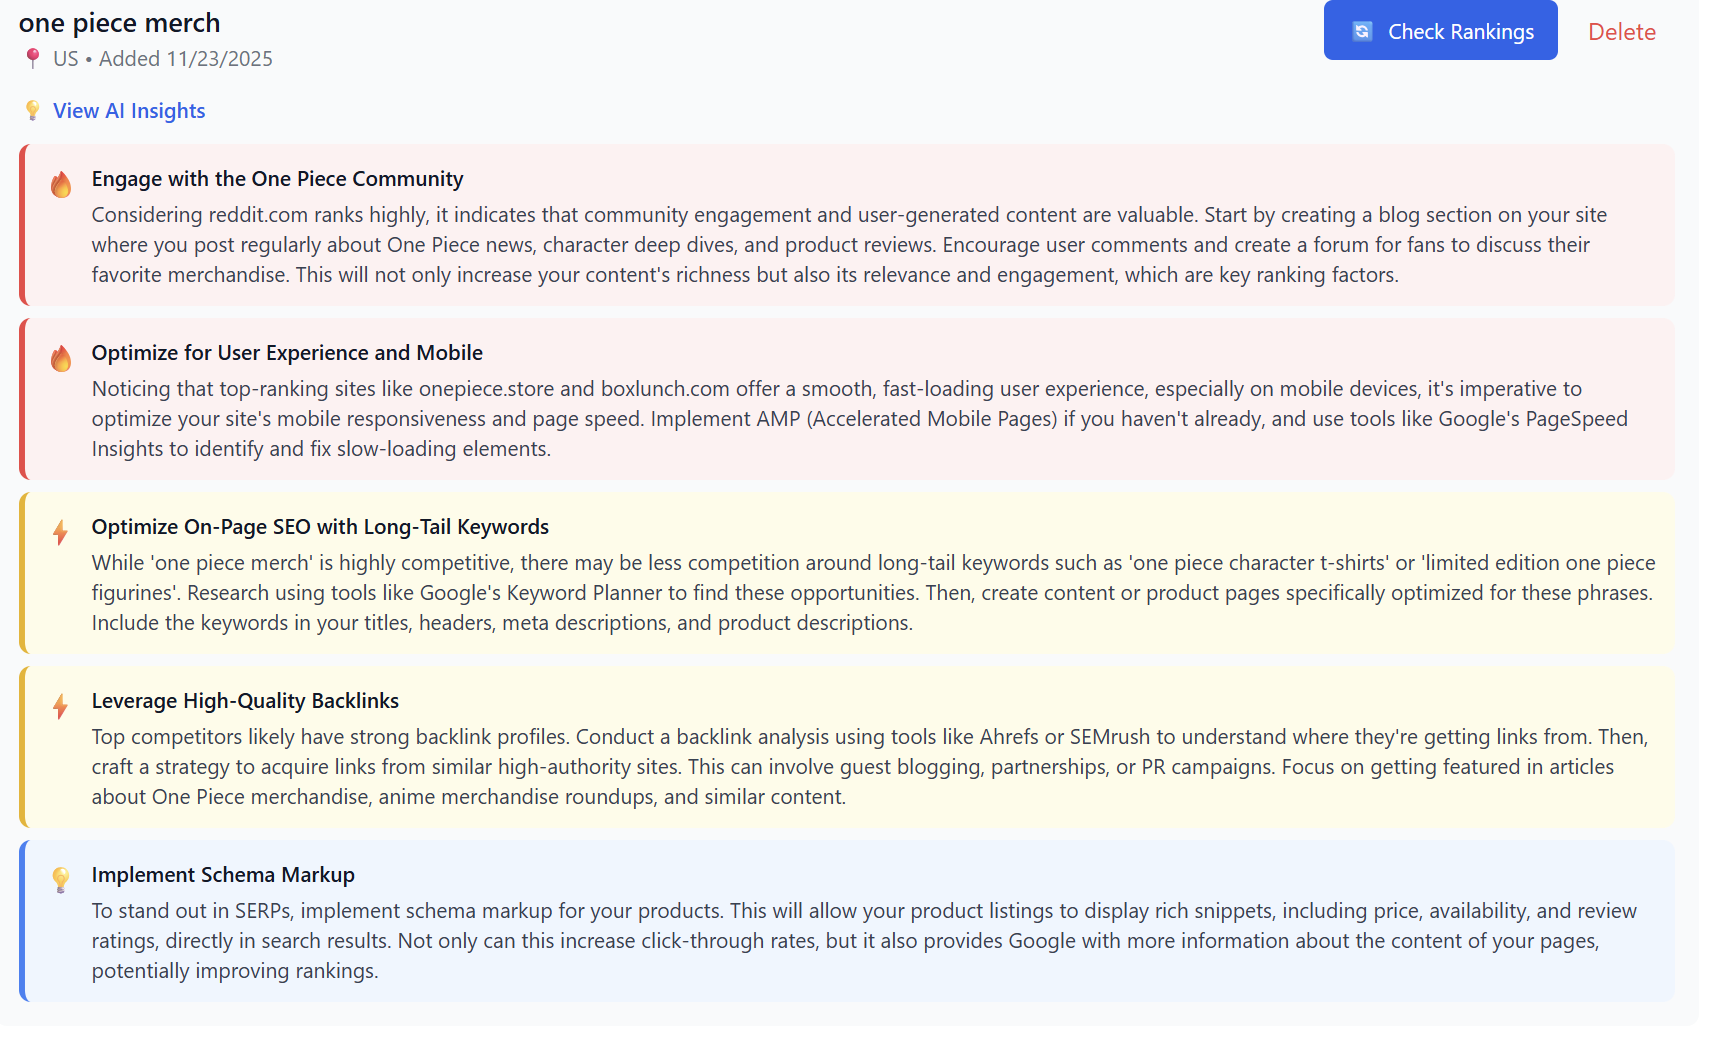
Your New Insights count will increase whenever the system discovers new ranking shifts or SEO opportunities.
How to Use the AI Competitor Monitor Effectively
-
Add all major competitors (3–5 recommended)
-
Track your top keywords—focus on those between #5 and #20
-
Review AI insights weekly
-
Publish content based on competitor weaknesses
-
Monitor ranking improvements after updates
Pro Tips
-
Add keywords with commercial intent for higher ROI (e.g., “buy one piece hoodie”)
-
Add large retailers and niche competitors
-
Let the AI insights guide your blog posts, product pages, or category improvements
-
Check rankings after major Google updates
AI Market Domination
The AI Local Market Domination tool analyzes your local competitors, uncovers their weaknesses, and generates actionable strategies to help you dominate your local area.
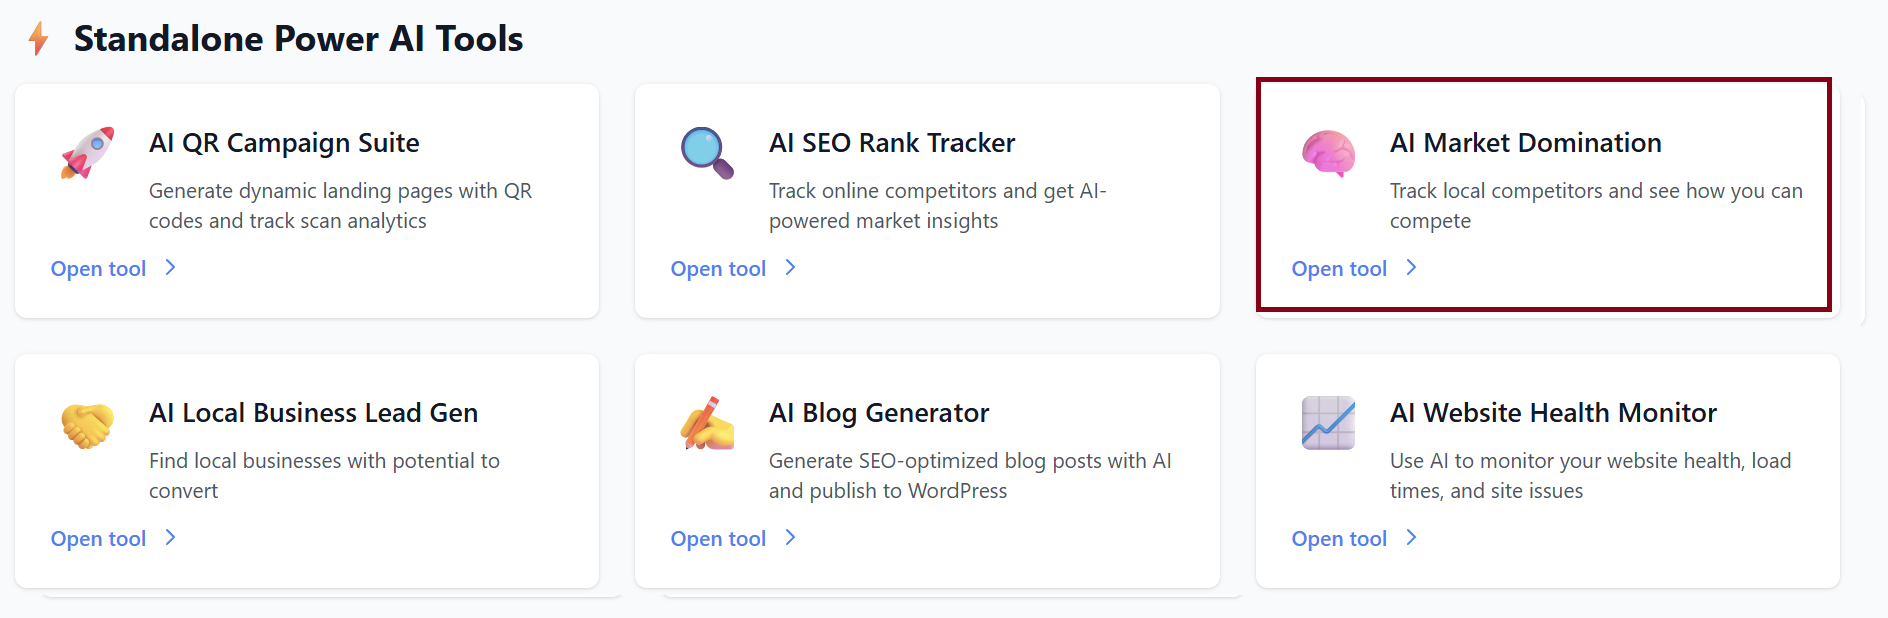
1. Starting a New Market Analysis
Use this section to input the details of your business and define the target area for analysis.
-
Your Business Name
Example: Joe's Pizza -
Business Category
Select your industry from the dropdown (restaurants, tech shops, salons, etc.) -
Business Address
Start typing your address and select the correct listing from the dropdown. -
Search Radius (miles)
Determines how far from your location the tool scans for competitors. -
Max Competitors to Analyze
Set the limit (up to 20 competitors).
Once everything is filled out, click: Start AI Analysis
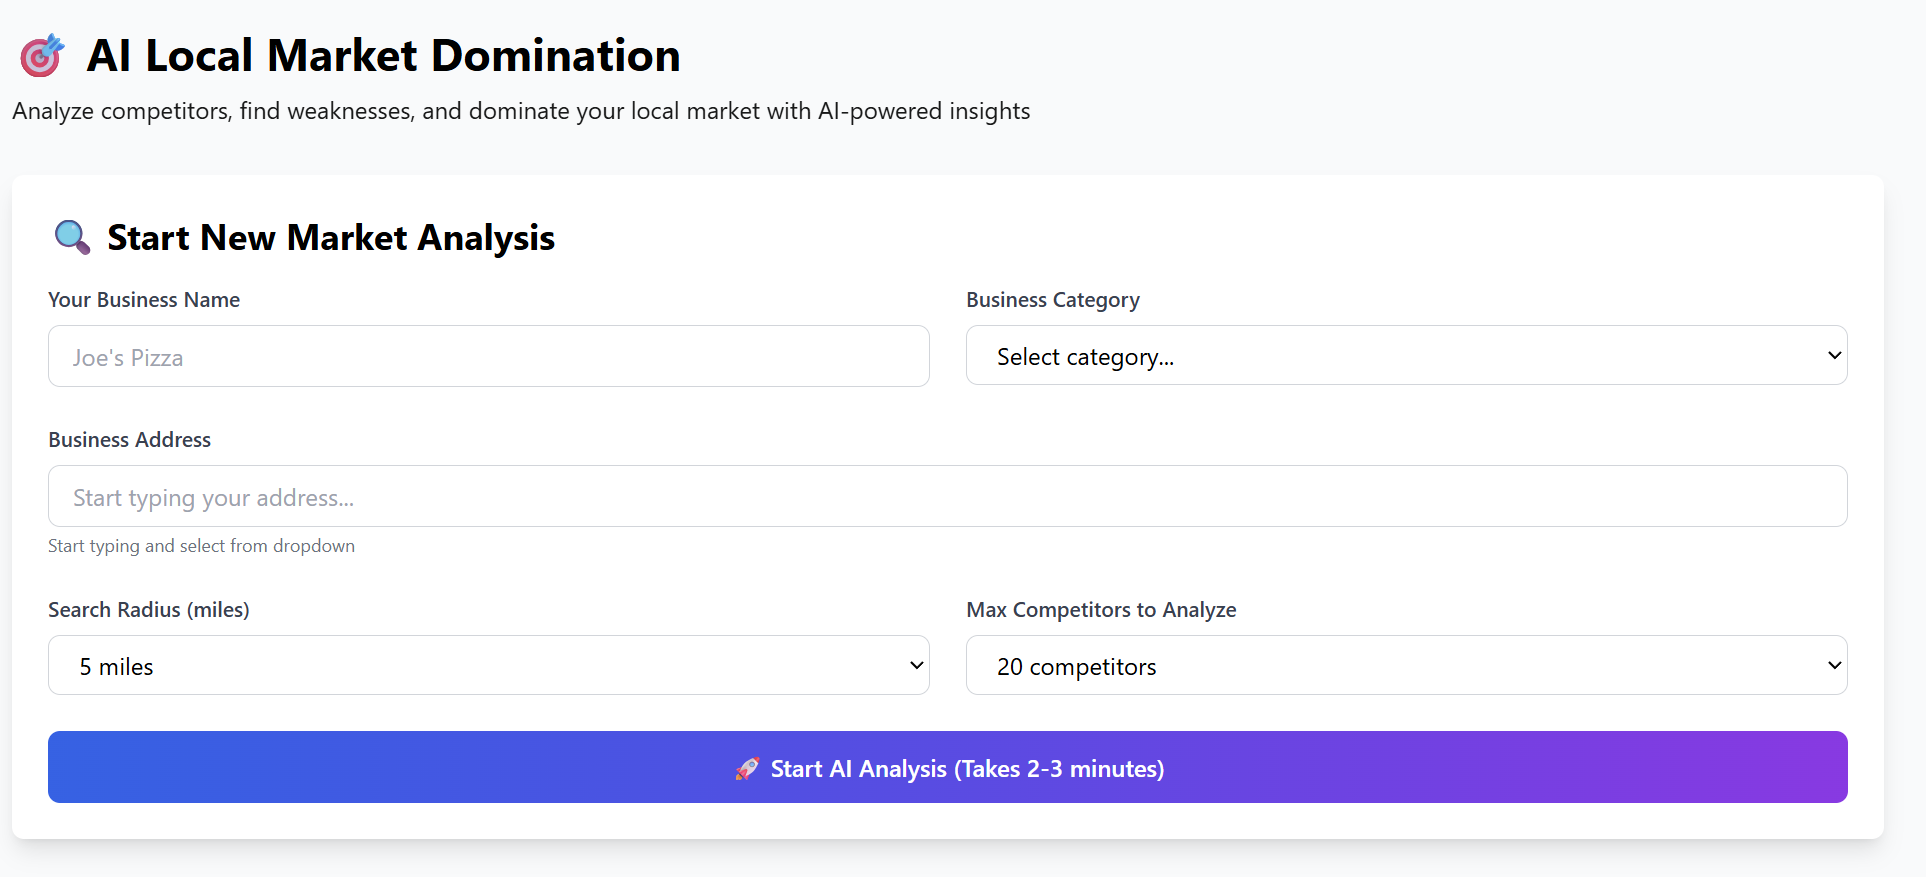
Processing takes 2–3 minutes, during which the tool scans local listings, reviews, websites, hours, and overall online presence.
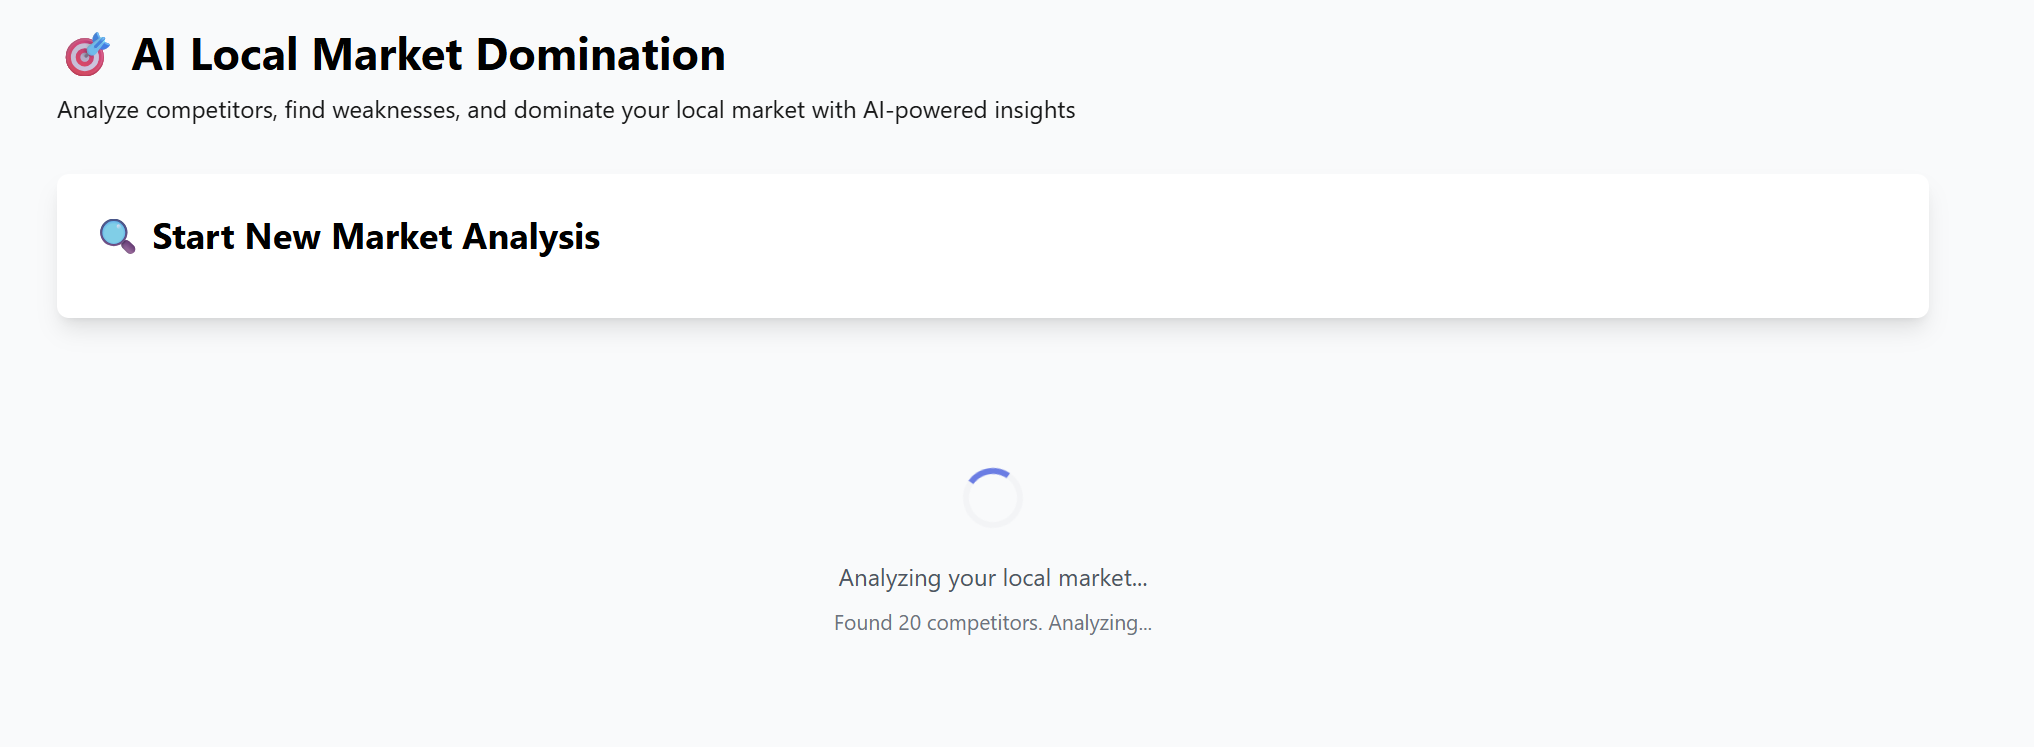
2. Market Analysis Summary (After Processing)
Once the scan is complete, you’ll see a full breakdown of your competitive landscape:
Summary Metrics
-
🏪 Competitors Found: 20
-
⭐ Avg Competitor Rating: 4.1★
-
⚠️ Weaknesses Identified: 71
-
🎯 Strategies Generated: 7
This gives you a fast snapshot of how competitive the area is and how many opportunities exist.
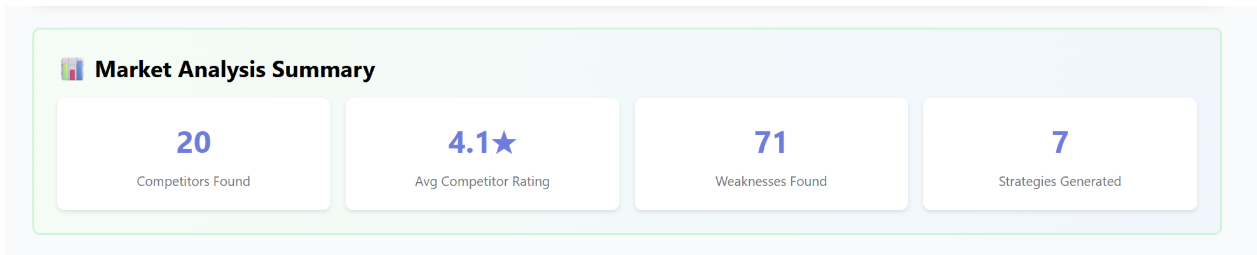
3. AI-Generated Domination Strategy
The tool creates a personalized, multi-step domination plan based on your competitors’ weaknesses.
Each strategy includes:
-
Priority Level (High / Medium)
-
Reasoning / Competitor Weakness
-
📋 Action Steps
-
💰 Expected Impact
Example Strategies Included:
a. Enhance Customer Service Experience
Priority: High
Many competitors have complaints about rude or unhelpful staff.
Action Steps:
-
Launch customer service training
-
Offer satisfaction surveys with incentives
-
Add a responsive support chat
Impact:
+20% retention, +30% positive reviews
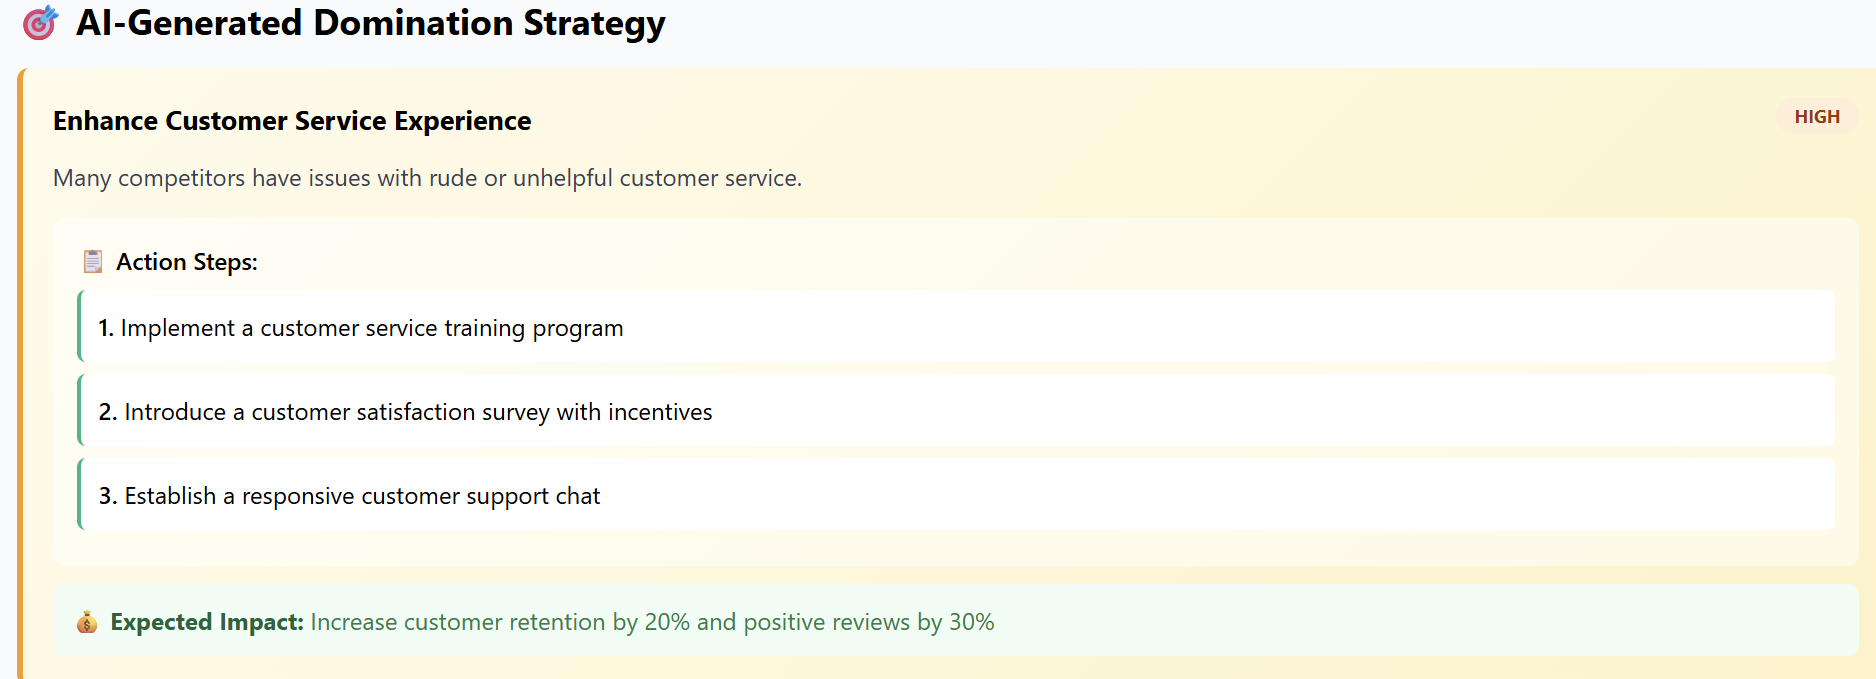
b. Responsive Review Management
c. Additional Strategies Include:
-
Review management
-
Targeted marketing campaigns
-
Improved in-store experience
4. Competitor Analysis (Top 10 Detailed Results)
Each competitor includes:
-
Business name & address
-
Star rating & review count
-
Distance from your location
-
Phone number & website (if available)
-
Weaknesses with scores
-
Suggested exploitation opportunities
Each weakness is scored (0–100) based on how aggressively you can exploit it.
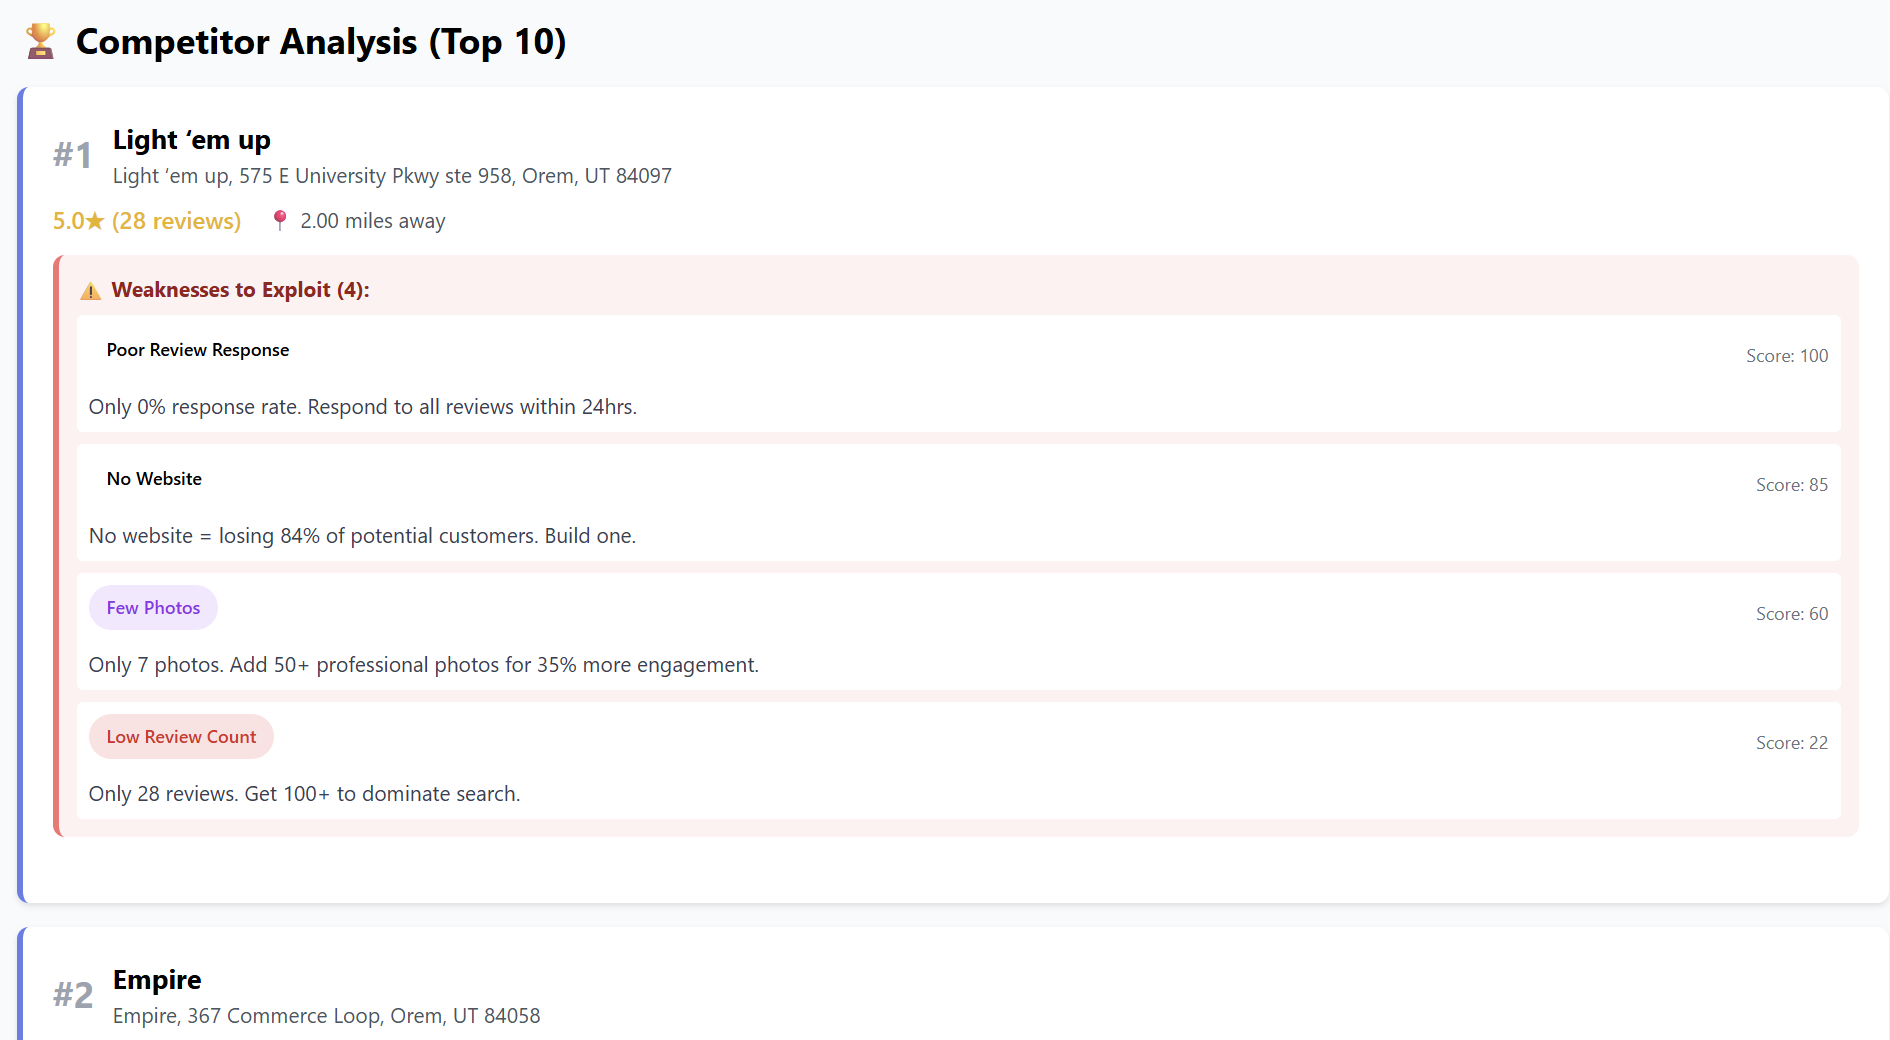
5. Market Insights
The tool auto-summarizes the biggest takeaways:
-
High Weakness Count: 71 total opportunities
-
Below-Average Ratings: Room for easy wins
-
Market is Ripe for Disruption

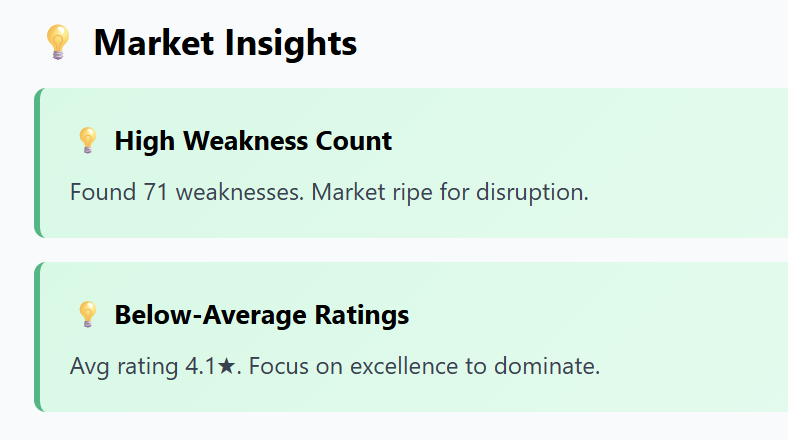
6. Automatic Weekly Monitoring
The system keeps tracking your area and will notify you when:
-
New competitors appear
-
Ratings or reviews shift
-
A competitor improves or worsens
-
Business hours or pricing change
-
New exploitable weaknesses arise
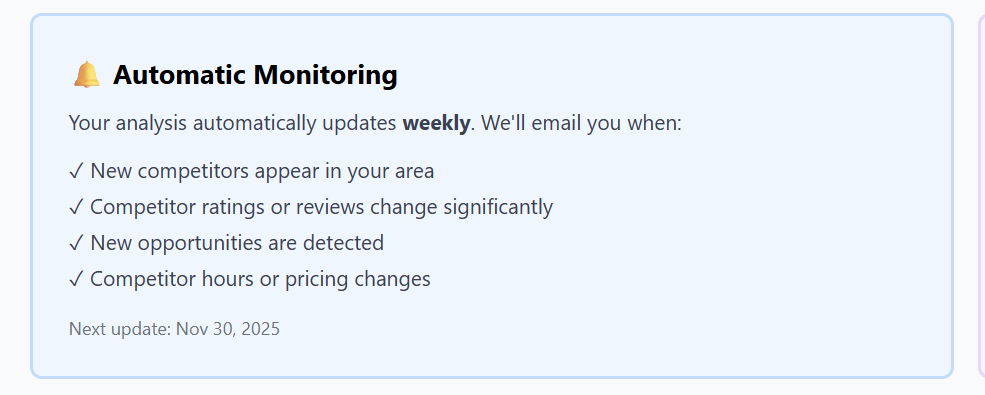
7. Export Report (PDF)
You can download a professional, presentation-ready report:
-
Competitor tables
-
Heatmaps
-
Strategy summary
-
Action steps
-
Weakness opportunities
Perfect for:
-
Team planning
-
Investors
-
Marketing strategists
-
Store operations
8. Analyze Another Location
Run unlimited scans for additional stores or new expansion areas.

AI Local Leads Finder
The AI Local Leads Finder helps you discover local businesses that match your ideal customer profile, identify pain points they’re struggling with, and automatically generate high-converting outreach emails.
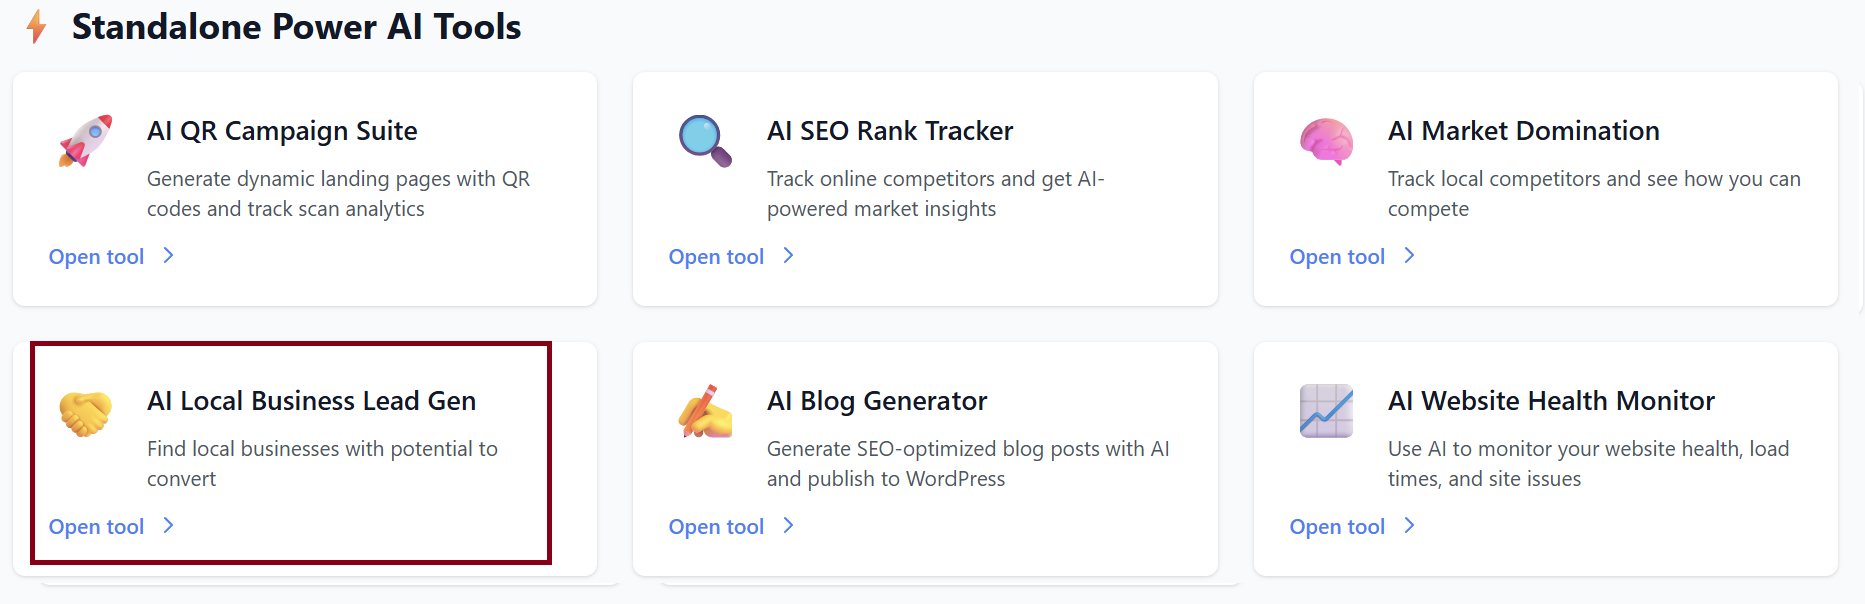
Step 1 — Define Your Ideal Customer
Start by choosing what type of local business you want to target.
You can type a category (e.g., Dentists, Restaurants, Plumbers) or choose from the built-in major groups:
Main Business Categories
-
Food & Dining — restaurants, cafes, bakeries, bars
-
Home Services — plumbers, electricians, HVAC, landscapers, roofer
-
Health & Wellness — dentists, chiropractors, gyms, spas
-
Automotive — auto repair, car washes, dealerships, detailers
-
Beauty & Personal Care — salons, barbers, tattoo studios
-
Professional Services — lawyers, real estate agents, accountants
-
Retail — clothing, electronics, pet stores, florists
-
Construction & Contractors — builders, remodelers, flooring
-
Entertainment & Leisure — hotels, event venues, theaters
-
Other Local Services — IT services, repair shops, tutors, dog groomers
Choose the category that fits the clients you want — then click Next.

Step 2 — Choose Your Location
Tell the system where to search for leads:
-
Enter a city, like Miami, FL
-
Or enter a specific address
Click Next to continue.
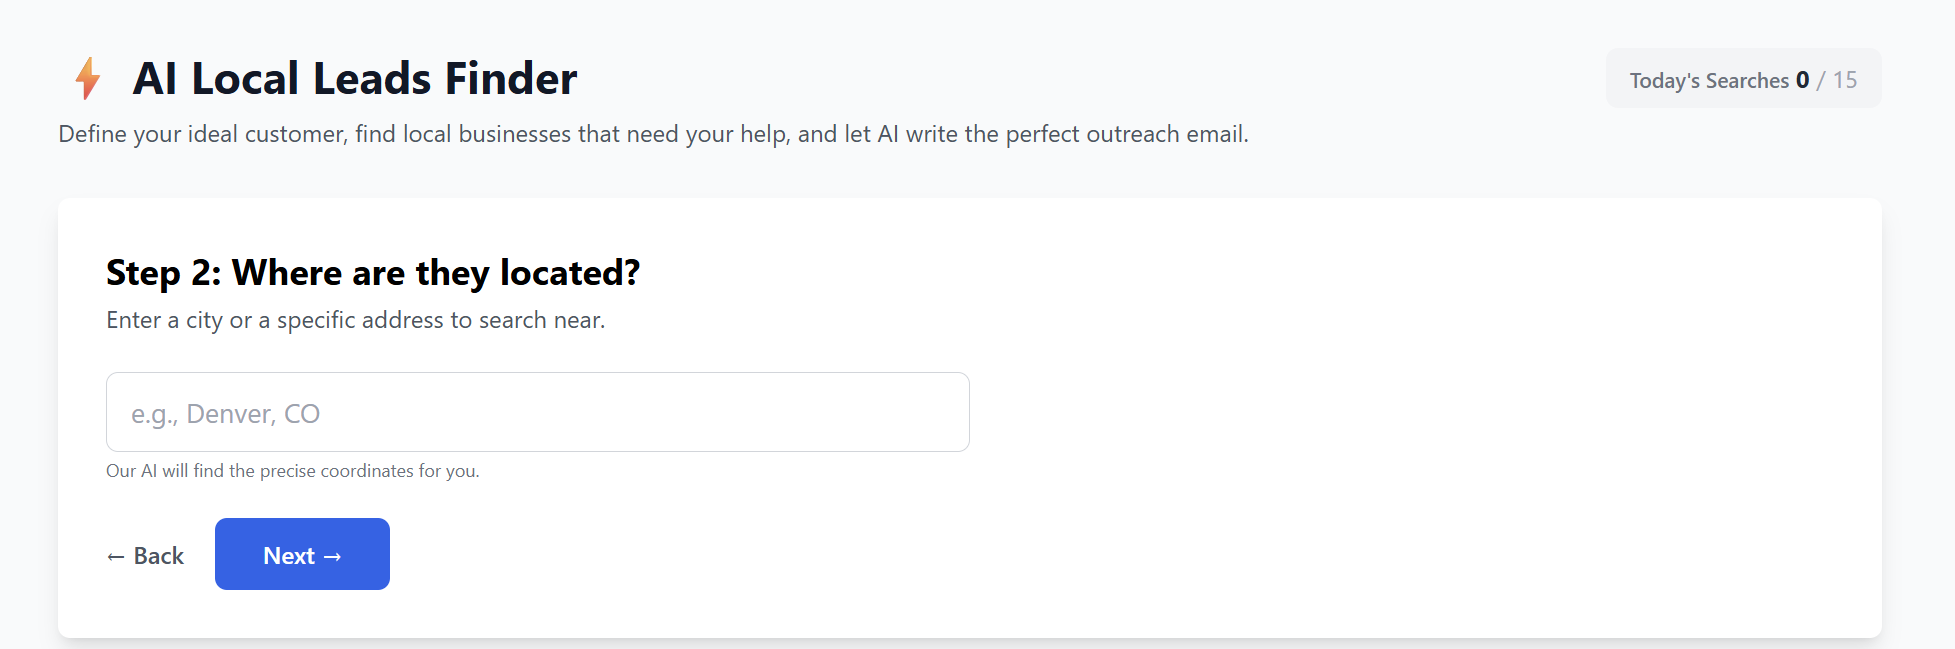
Step 3 — Choose the Pain Point to Search For
Select what type of opportunity or problem you want the AI to find.
Available Opportunity Signals
-
Poor Google Reviews
Locates businesses with below 3.5 stars — ideal for reputation management. -
No Website Listed
Finds businesses missing a website — perfect for web designers & agencies. -
Unclaimed Google Business Profile
Great for SEO agencies and digital marketers. -
Missing Google Photos
Ideal for photographers, marketers, and branding services. -
Few Google Reviews
Targets established businesses with less than 15 reviews — perfect for review growth services.
Once you select a signal, click Find Leads.

Step 4. Results — Leads Found
After a short scan, you’ll see a list of businesses that match:
-
Your industry category
-
Your location
-
Your selected pain point
Each lead typically includes:
-
Business name
-
Address
-
Rating (if relevant)
-
Website status
-
The exact issue detected
From here, the system can:
-
Generate a personalized outreach email
-
Save or export leads
-
Allow you to repeat or refine your search
Recent Searches (History)
Your previous searches appear in the Recent Searches section, letting you:
-
Revisit past lead lists
-
Re-run a search
-
Track outreach efforts
You can access past searches anytime to continue building your pipeline.

AI Blog Generator
The AI Blog Generator allows you to create high-quality, SEO-optimized blog posts in seconds. You can publish automatically to WordPress or download the HTML to use anywhere.
This guide walks you through each feature and how to use the generator effectively.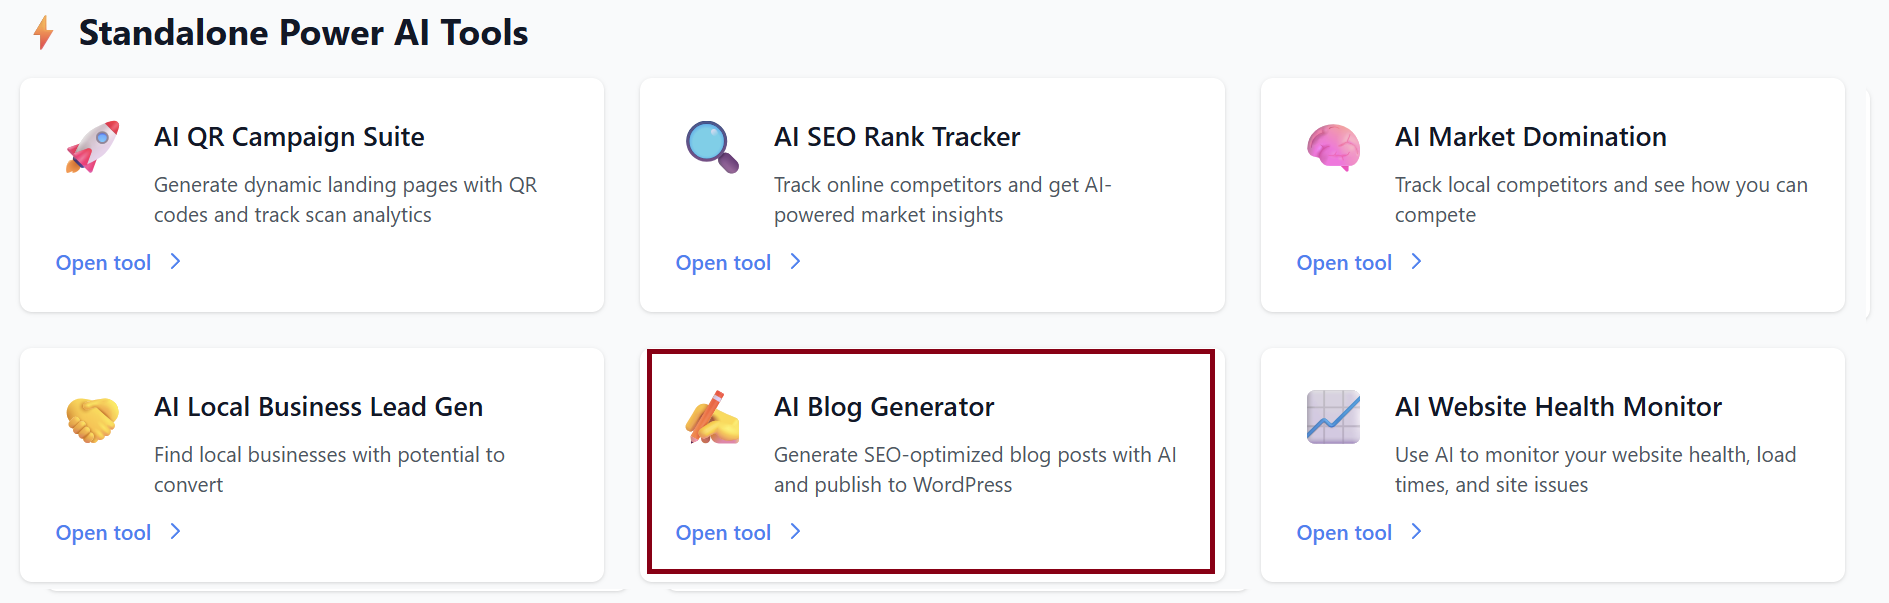
1. Getting Started
When you open the AI Blog Generator, you’ll see two main sections:
-
WordPress Integration (optional)
-
Generate Blog Post
You can use the tool with or without connecting WordPress.
2. Connecting WordPress (Optional)
If you want your blogs to auto-publish directly to your WordPress site, you can connect it using a WordPress Application Password.
How to Connect WordPress
-
Click Connect WordPress.

-
A popup will appear asking for:
-
WordPress Site URL (your website link)
-
Username (your WordPress admin username)
-
Application Password
-
-
Paste your Application Password.
(A link is provided in the popup explaining how to create one.)
-
Click Connect.
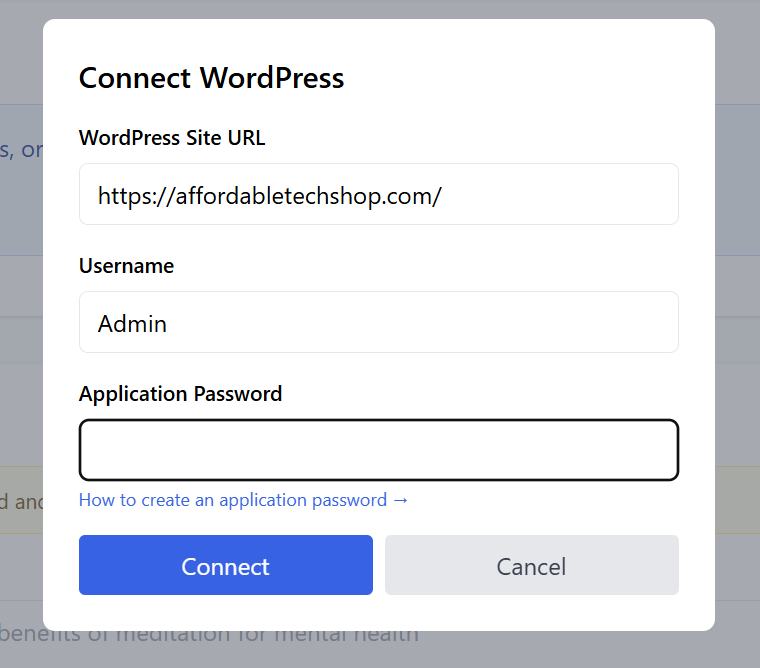
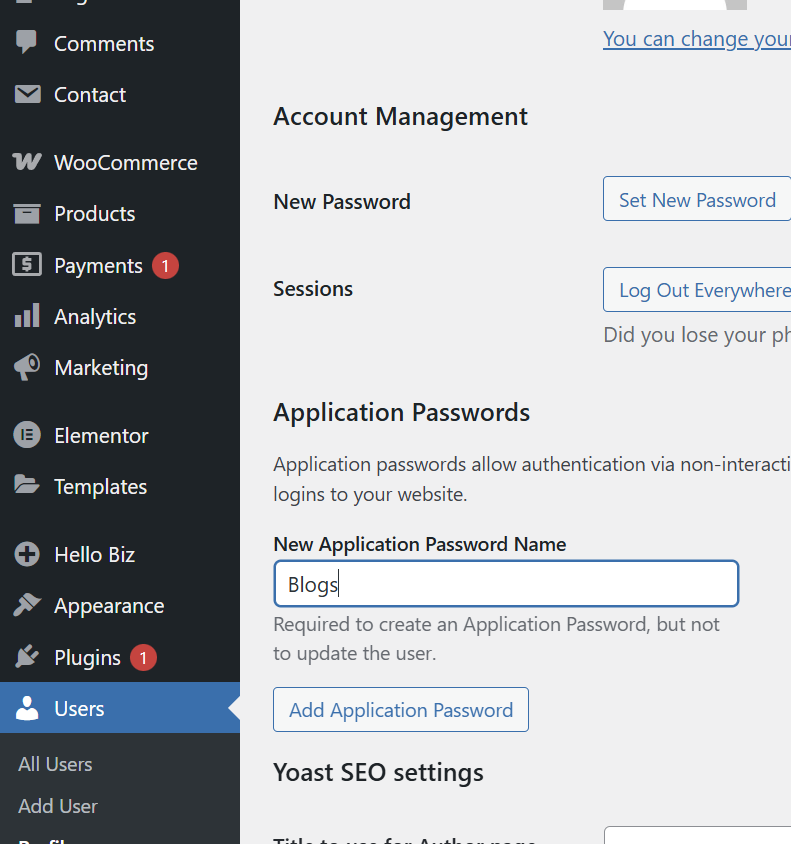
Once connected:
-
Blogs will automatically publish to your WordPress site.
-
No need to copy or upload HTML manually.
If you prefer not to connect, you can still generate the blog normally.
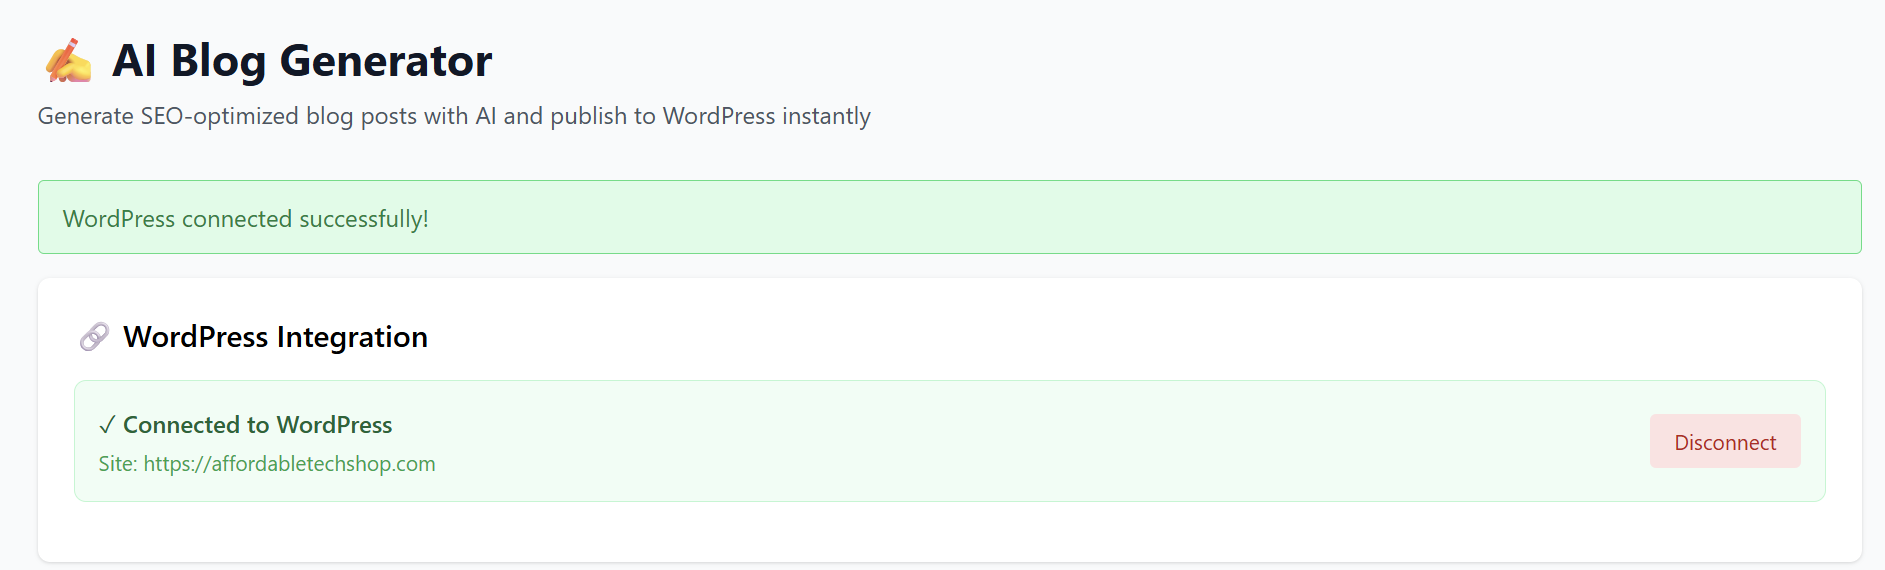
3. Generating a Blog Post
This is the main function of the tool.
Step 1 — Enter Your Blog Topic / Prompt
Type in the topic, description, or instructions for your blog.
Example:
“Write an article about good quality technology at an affordable budget, including wearables, laptops, phones, and assistive tech.”
The more detail you provide, the better the output.
Alternatively, if connected to wordpress, you can click on ' Generate prompt from Website' where AI will analyze your WordPress site to suggest relevant topics.

After analyzing your website, some topic suggestions will be displayed to select from. then select and press generate blog and publish to wordpress button.
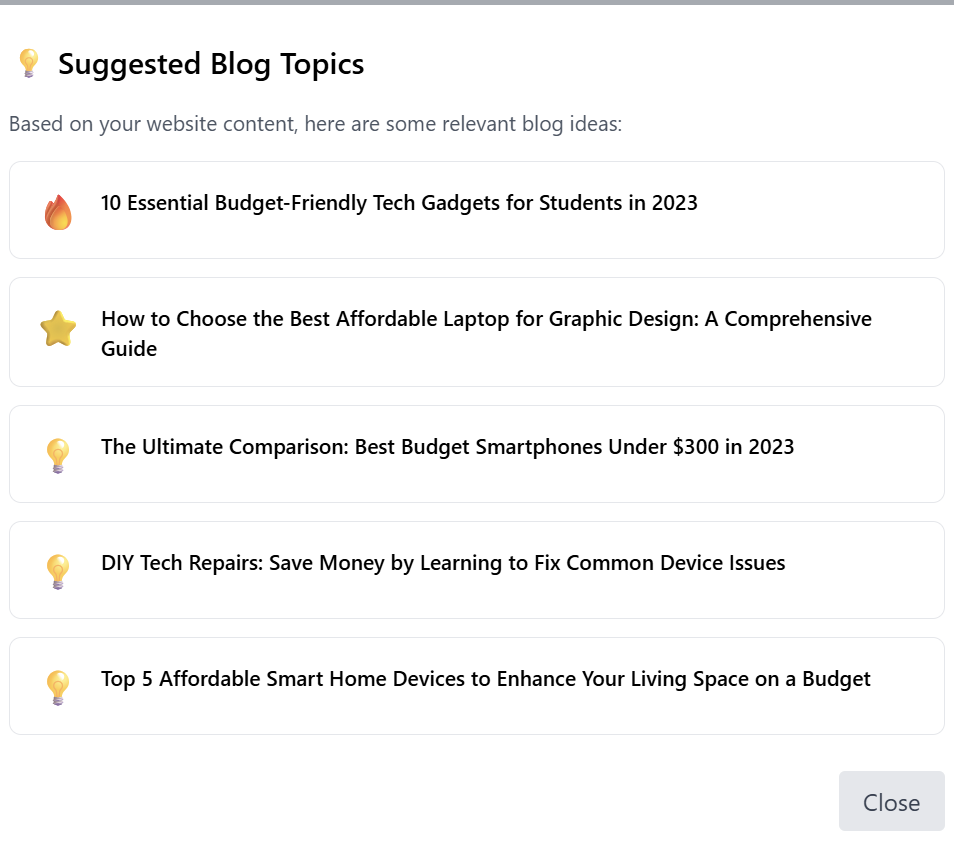
Step 2 — Select Your Tone
Choose the writing style for the blog:
-
Professional
-
Informal
-
Friendly
-
Persuasive
-
Educational
(or any styles you offer)
Step 3 — Select the Length
Choose how long you want the article to be:
-
Short (300–600 words)
-
Medium (1000–1500 words)
-
Long (2000+ words)
Step 4 — Generate a Featured Image (Optional)
Check the box if you want the AI to create a matching featured image.
This can be used for blog covers or thumbnails.
Step 5 — Click “✨ Generate Blog Post”
The AI will process your request.
Your blog will appear in the Generated Blog section below.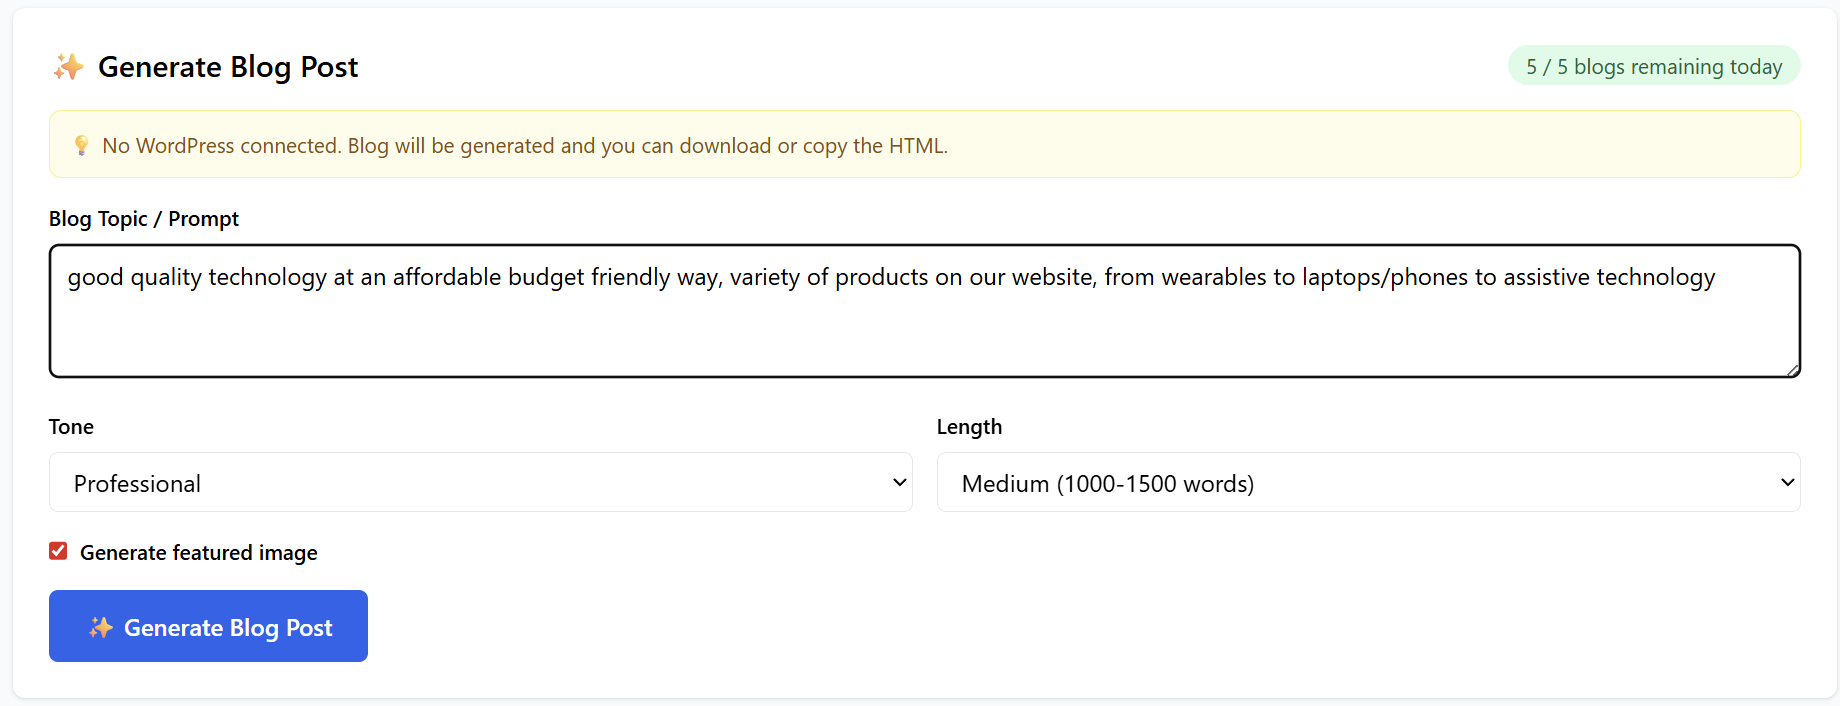
4. Recurring Blog Automation
After connecting your website to wordpress, you will have the option to automate generation of blogs timely.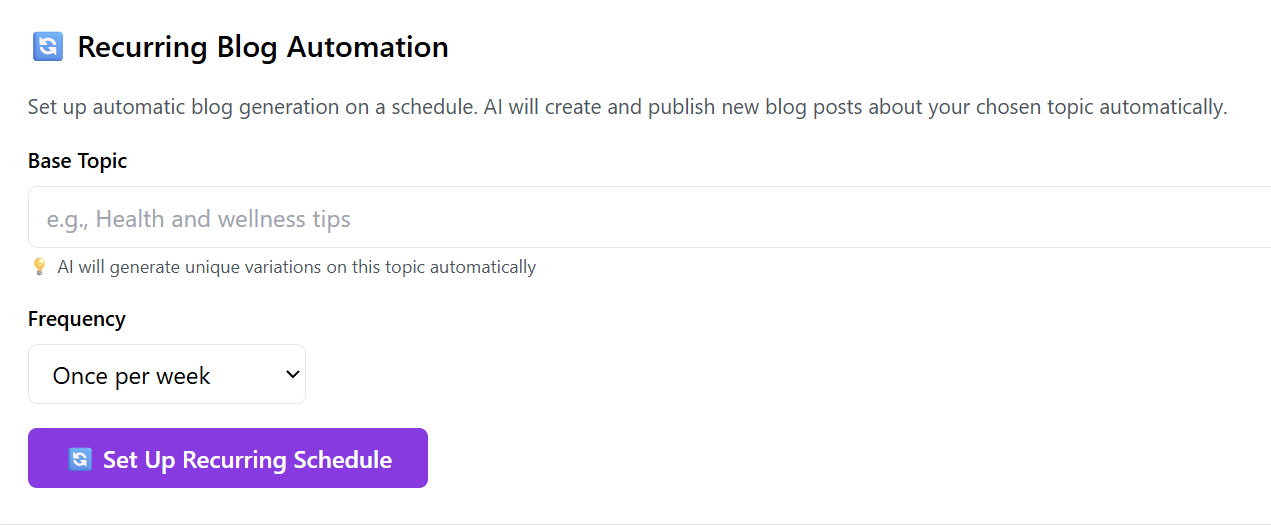
- Base Topic: type in your main topic that you want to geenrate blogs upon and AI will generate different variations on it on schedule.
- Frequency: Select the frequency that you want your blogs to be generated upon ( weekly, monthly...)
- You have the option to stop schedule and create another base topic for different variations.

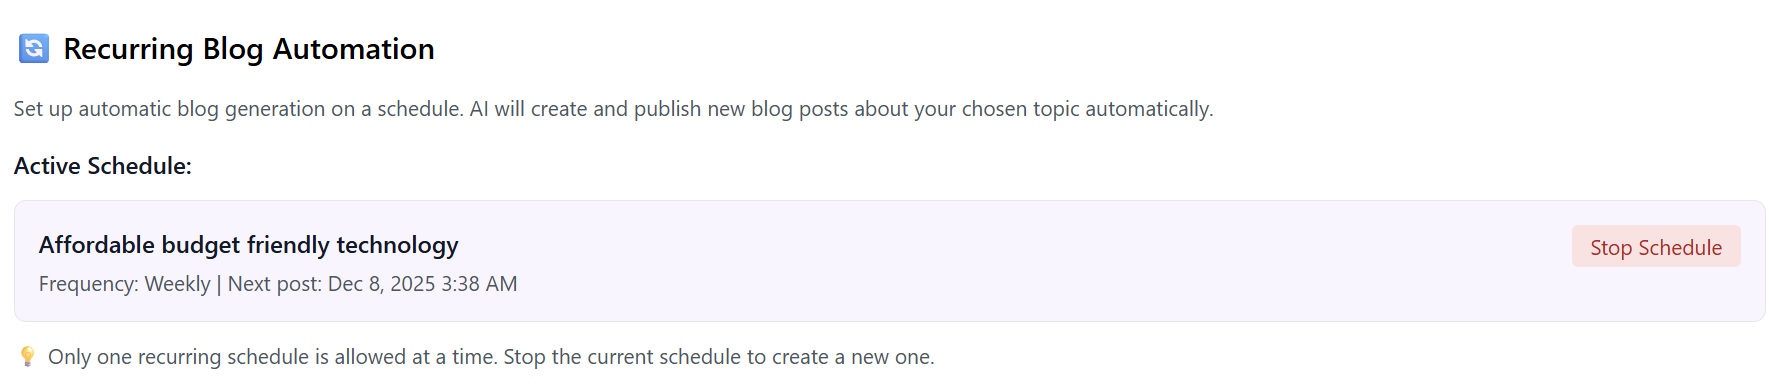
5. Viewing Your Generated Blog
After generation, you will see:
Blog Title: Automatically generated to match your topic
Featured Image: (If enabled)
Full Blog Content: Formatted and SEO-optimized.
Export Options: At the top right of the generated blog, you’ll see:
- Copy HTML – instantly copy the entire blog code
- Download HTML – download an HTML file to your computer
If WordPress is connected, you'll also see:
- Publish to WordPress (or it may auto-publish depending on settings)

5. Generated Blogs History
All previously created blogs will appear under the Generated Blogs section.
You can:
-
View them anytime
-
Copy or download the HTML again
-
Re-publish (if WordPress is connected)
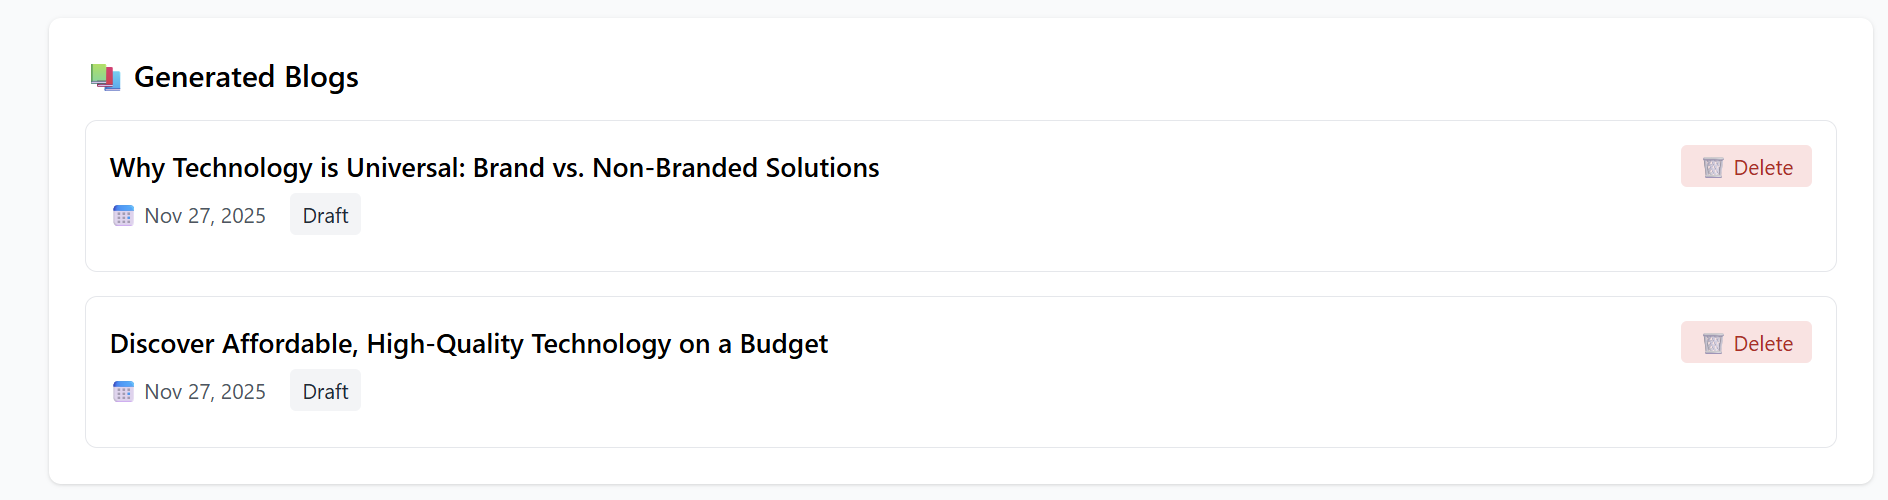
If nothing has been created yet, you’ll see:
“No blogs generated yet. Create your first one above!”
6. Common WordPress Connection Issues
-
Invalid Application Password
Make sure it is copied exactly, without spaces. -
Incorrect Username
Must match your WordPress admin username. -
Incorrect Site URL
Must be the homepage URL of your WordPress site.
7. Tips for Best Results
-
Give clear, descriptive prompts.
-
Define the audience (e.g., small business owners, gamers, beginners).
-
Specify the goal (educate, sell, compare, review, explain).
-
Use the “Professional” or “Educational” tone for SEO-focused blogs.
8. Summary
The AI Blog Generator helps you:
✔ Write full SEO-ready blog posts
✔ Create featured images
✔ Copy or download HTML instantly
✔ Publish directly to WordPress
✔ Save and revisit your generated blogs
Simple, fast, and powerful — everything you need to scale your content creation.
AI Website Health Monitor
This guide walks you through every feature of the AI Local Market Domination tool—from starting a market analysis, to reading competitor insights, to viewing your full health and performance dashboard with AI-powered recommendations.
1. Overview
AI Local Market Domination helps you:
-
Analyze competitors in your local area
-
Identify weaknesses and opportunities
-
Improve your local presence
-
Boost your visibility in maps, search, and local directories
-
Understand how your business compares to others nearby
The system uses real-time data + AI insights to make the analysis simple and actionable.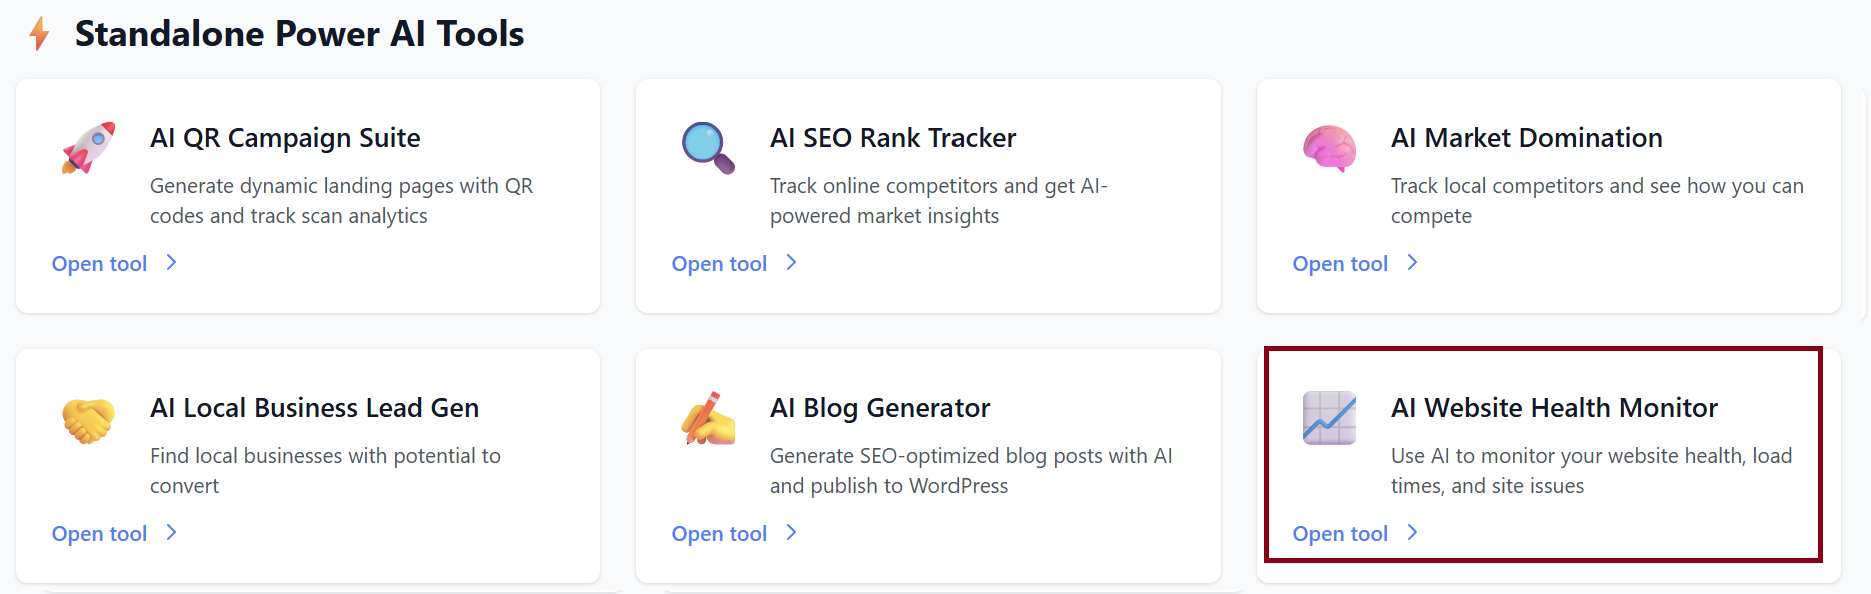
2. Starting a New Market Analysis
When you first open the tool, you will see:

to start a New Market Analysis, fill in the following fields: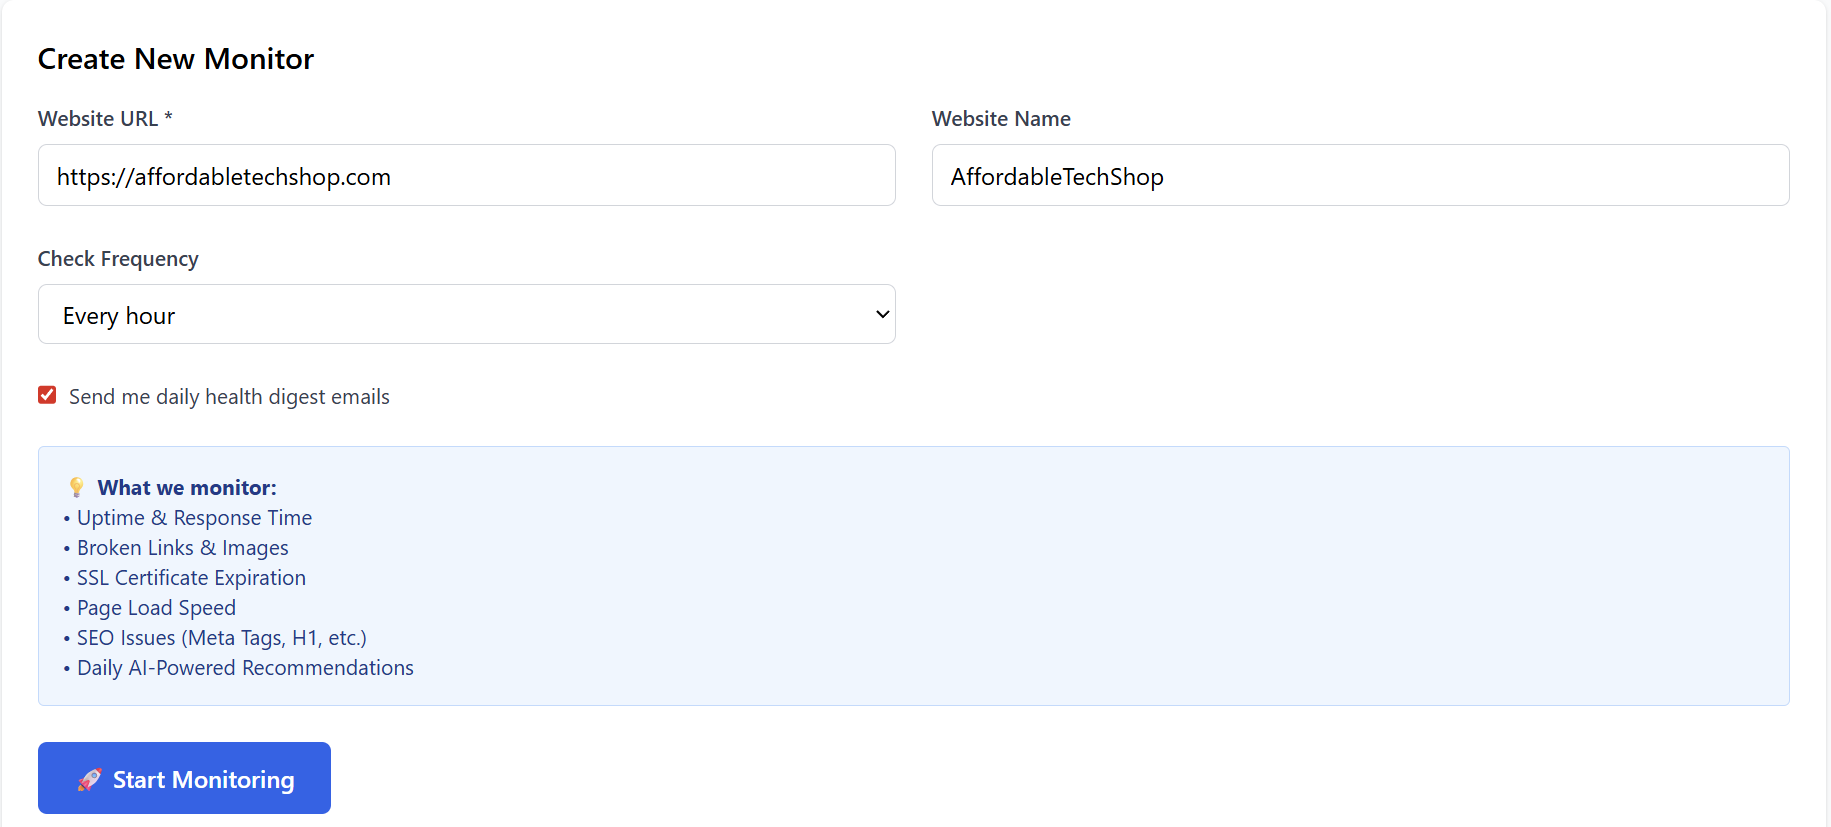
- Your website URL
- Your Website's Name
- select the frequency the checks should be made in (hourly, every 30/15/5 minutes).
The system takes 2–3 minutes to:
-
Find competitors
-
Analyze their strengths and weaknesses
-
Compare them to your business
-
Generate AI insights for improvement
Once the Scan is done, 'Your Monitors' will display the results.
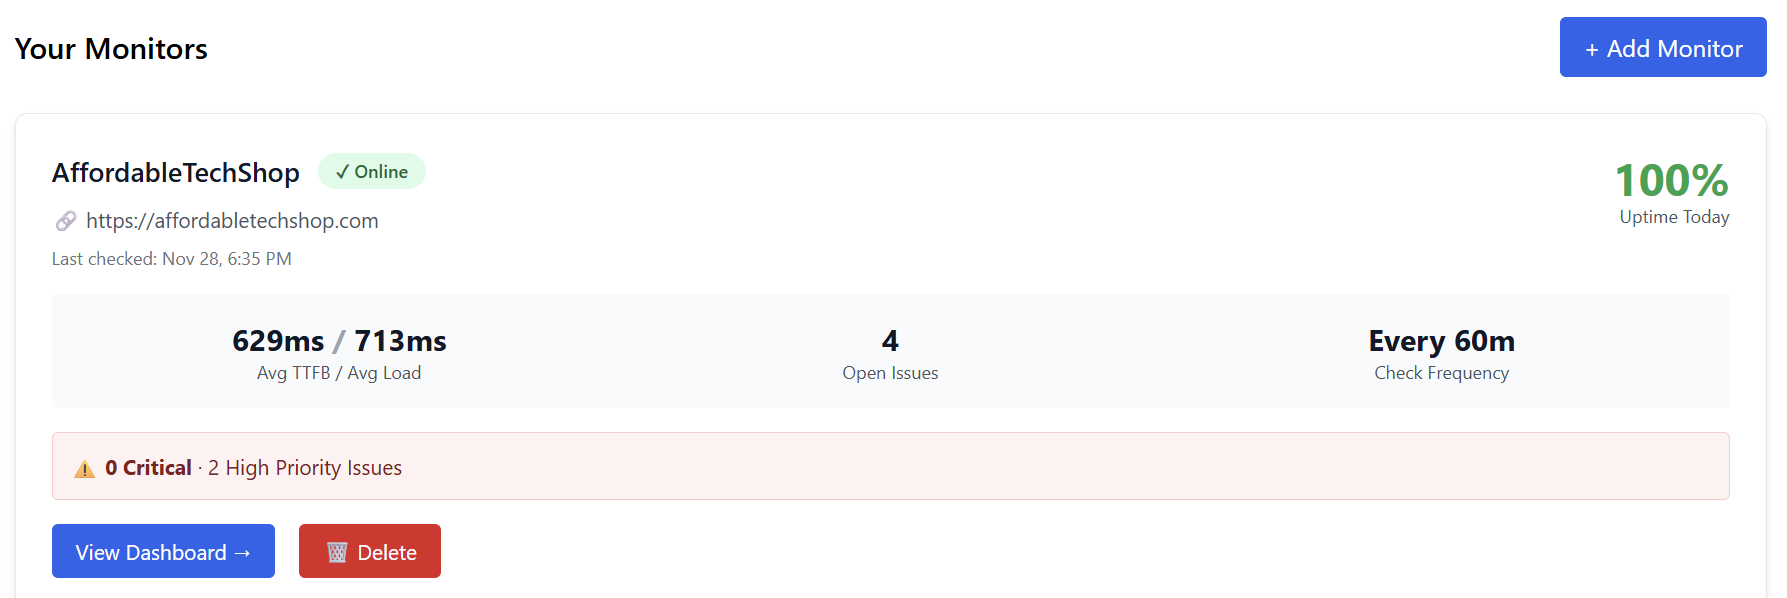
3. Viewing Your Monitor Dashboard
Once the analysis is complete, you can click -> View Dashboard.
This opens a full report showing your website’s health , Example:
-
Performance
-
SEO
-
Security
-
Issues & errors
-
Uptime
-
Response times
-
Content health
-
AI-powered improvement recommendations
Below is a breakdown of each section.
4. Dashboard Breakdown
Business Overview
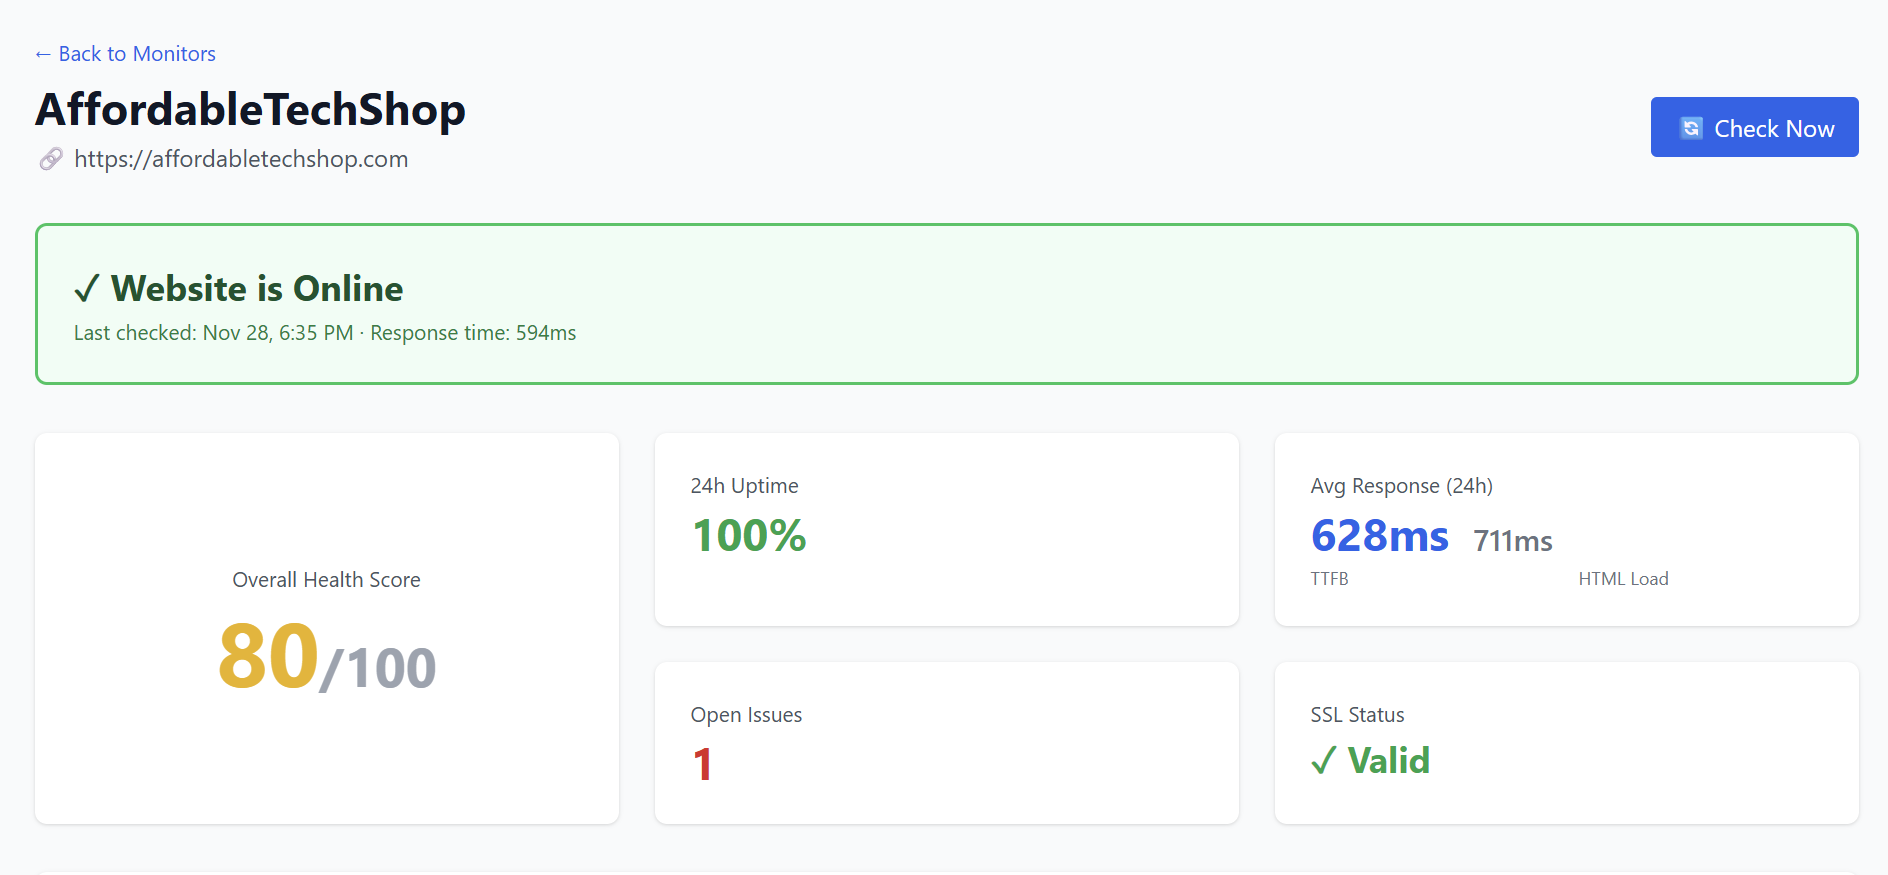
- Check Now: Runs an instant system scan.
- Overall Health Score- > Calculated from:
-
SEO optimization
-
Performance & speed
-
Content structure
-
Server response
-
Security & SSL
The higher the score, the healthier your website.
- Open Issues: Displays any problems detected on the site.
- SSL Status: Shows whether your SSL certificate is:
-
Valid
-
Expired
-
Expiring soon
5. AI-Powered Recommendations
AI automatically categorizes issues by impact:
-
HIGH — Immediate improvements that create major gains
-
MEDIUM — Moderate impact
-
LOW — Optional improvements
Each recommendation includes:
-
What the issue is
-
Why it matters
-
Steps to fix it
-
Expected impact
Below is an example of how recommendations appear:
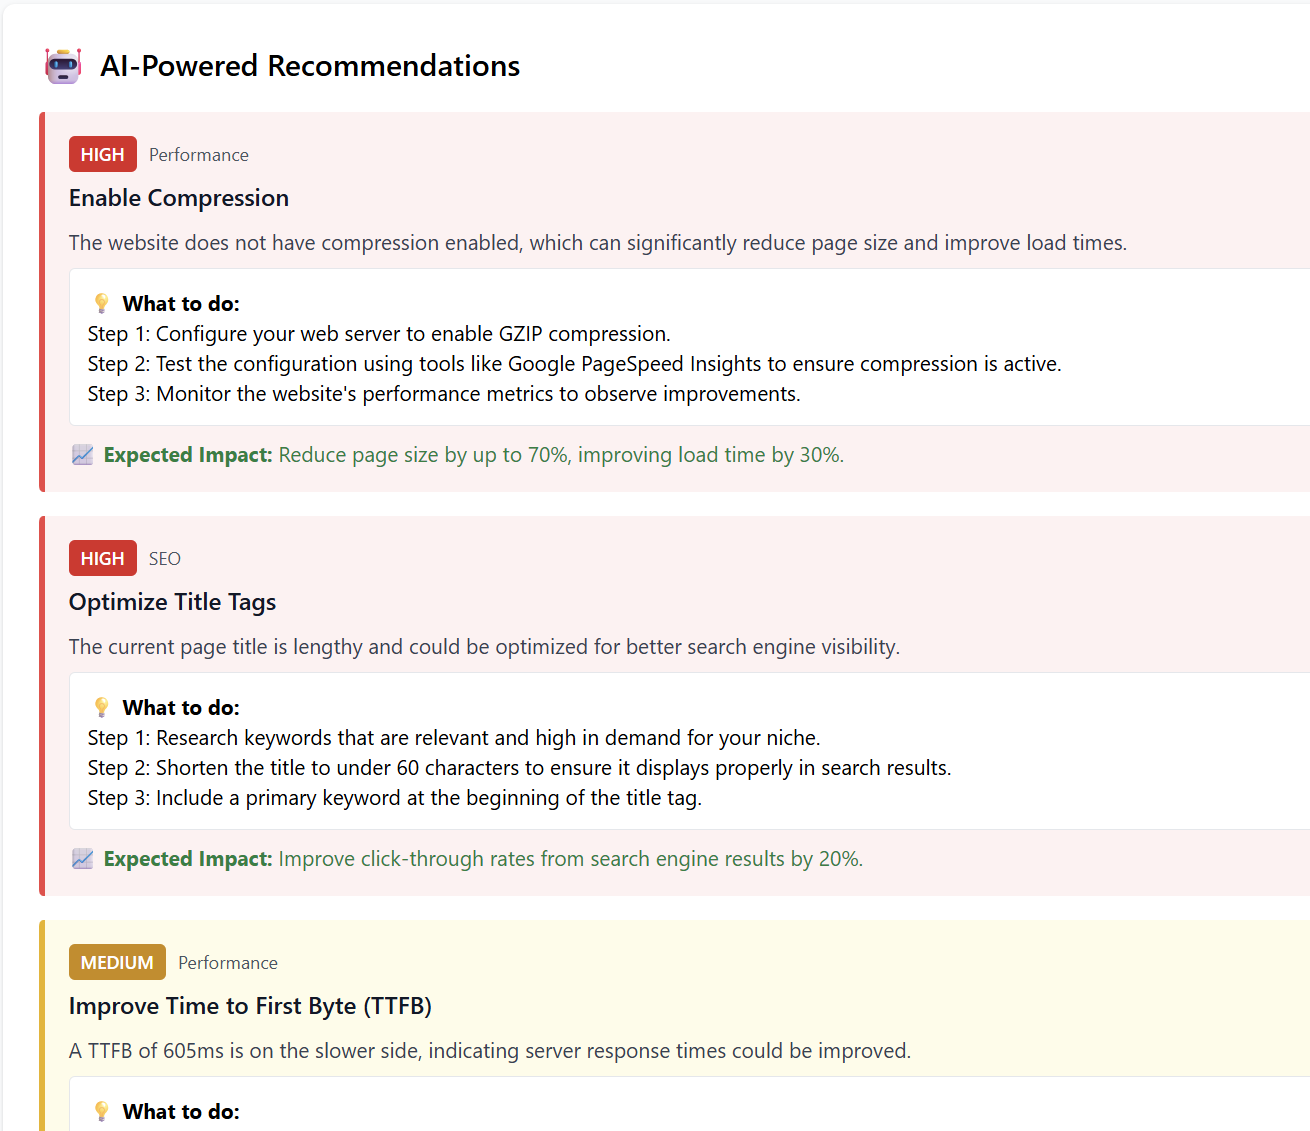
6. 7-Day Trend
Helps track stability and improvements over time.
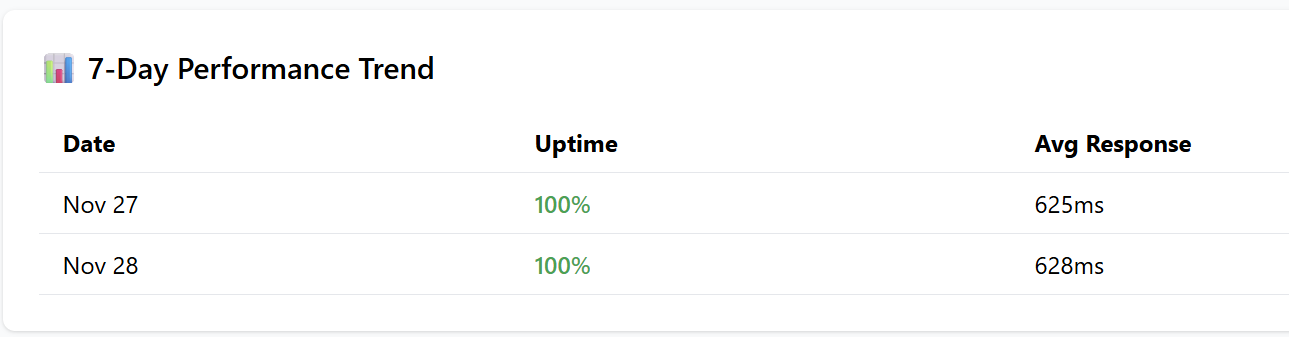
7. All Open Issues
Each issue includes:
-
Category (Performance, SEO, Security)
-
Timestamp
-
Detailed description
-
Fix / Ignore options

8. Content Health
The tool also analyzes:
-
Total words
-
H1 tag presence
-
Meta description
-
Missing alt tags

This helps boost SEO and ADA compliance.
9. Conclusion
The AI Local Market Domination dashboard gives you:
-
Clear website insights
-
Easy-to-follow recommendations
-
Visual performance tracking
-
SEO, performance, and security breakdowns
-
Competitive advantage in your local area
Once you follow the provided suggestions, your:
-
Rankings increase
-
Local visibility improves
-
Website becomes faster and more secure
-
Overall health score goes up
AI Business Intelligence
Welcome to Business Intelligence—your all-in-one dashboard for real-time analytics, anomaly detection, and AI-powered recommendations.
This guide will help you understand each section of the dashboard and how to get the most out of your data.
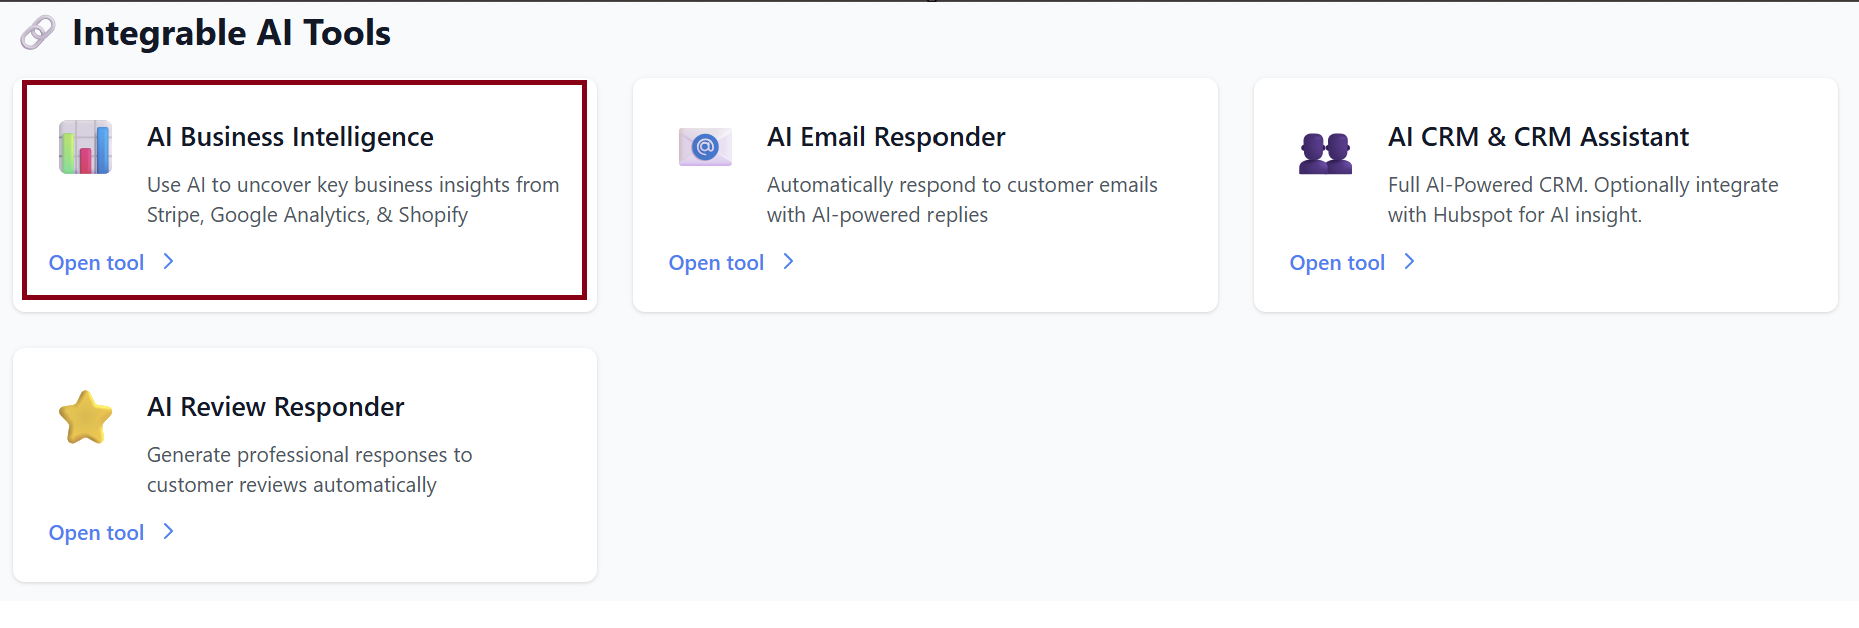
1. Overview
The Overview topic gives you a quick snapshot of how your business is performing today.
Today’s Metrics
Each metric compares today’s performance to yesterday:
-
Today's Revenue 💰
Shows all revenue collected today.-
Arrow ↑ or ↓ indicates growth or decline compared to yesterday.
-
-
Today's Orders 🛒
Number of orders placed today. -
Today's Visitors 👥
Total website visitors today.
These values automatically update in real time as new data comes in.
30-Day Trends
You’ll see easy-to-read charts showing:
-
💰 Stripe Revenue (30 days)
-
🛒 Shopify Orders (30 days)
-
👥 Google Analytics Traffic (30 days)
These help you quickly visualize long-term performance patterns.
2. Integrations
The Integrations tab allows you to connect your business tools so the dashboard can pull in data automatically.
Available Integrations
Stripe – Payment Processing
Use this to sync your revenue.
-
Click Connect with Stripe (Recommended)
→ You’ll be redirected to Stripe’s secure login. -
Alternatively, you can enter your API key manually.
Shopify – E-commerce Platform
Connect Shopify to sync orders and store activity.
-
Click Connect Shopify
→ Approve the app inside your Shopify admin.
Google Analytics – Website Traffic
Sync your website visitor data.
-
Click Connect with Google
→ Sign in to your Google Account and choose a property.
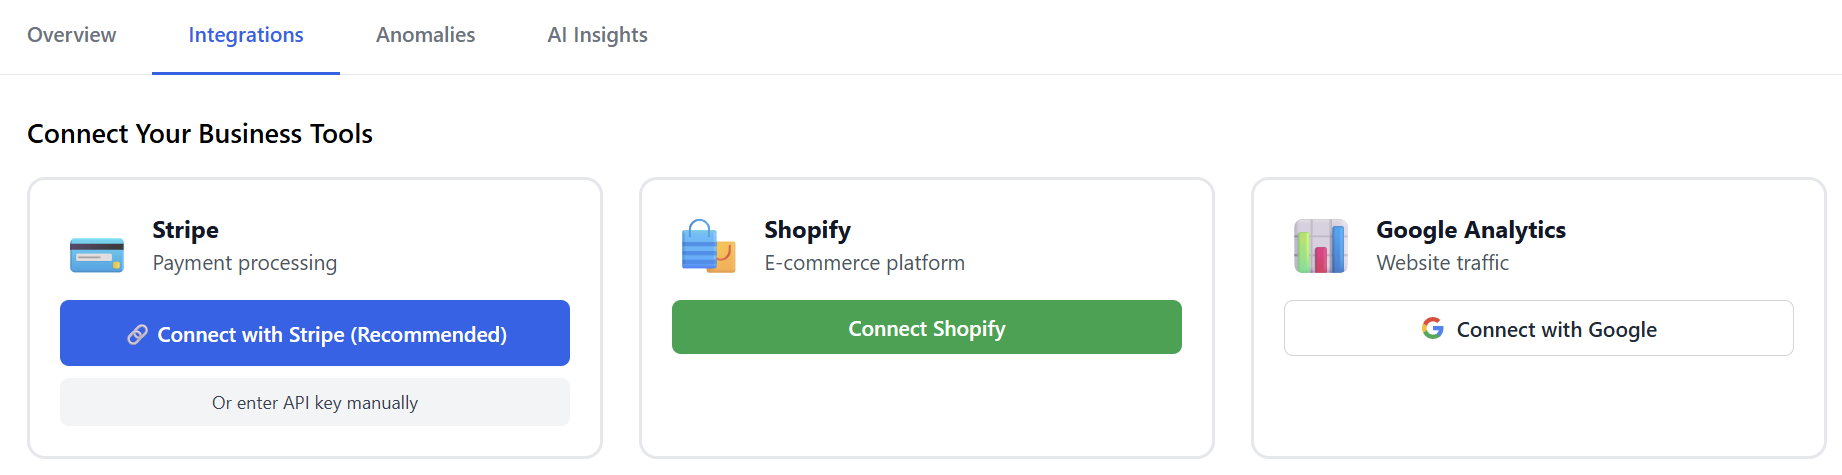
After Connecting
Once integrations are enabled:
-
Metrics begin populating.
-
Trends update automatically.
-
AI Recommendations unlock.
3. Anomalies
The Anomalies tab monitors your data 24/7 to detect unusual patterns, sudden drops, or unexpected spikes.
What You’ll See
-
If everything looks normal:
“No anomalies detected. Your metrics look healthy!”
-
If something unusual happens (example):
-
Revenue spike or dip
-
Sharp increase in failed Shopify checkouts
-
Unexpected drop in website traffic
-
The system will highlight the anomaly with details like:
-
When it happened
-
Severity
-
Possible causes
-
Suggested next steps
This helps you catch problems early—such as technical issues, failed payment events, or marketing performance drops.
4. AI Insights
The AI Insights tab provides smart recommendations based on your connected data.
Examples of AI Insights
-
“Your conversion rate dropped 12% yesterday—likely due to fewer mobile visitors.”
-
“Your average order value is rising. Consider promoting bundles to maximize revenue.”
-
“Traffic is increasing but orders are flat. You may want to review your checkout flow.”
If No Integrations Are Connected
You’ll see:
Once data flows in, insights become available automatically.
Summary
| Tab | What It Does |
|---|---|
| Overview | Real-time revenue, orders, visitors + 30-day trends |
| Integrations | Connect Stripe, Shopify, and Google Analytics |
| Anomalies | Automatically detects unusual activity |
| AI Insights | Gives recommendations to boost performance |
By connecting all integrations, you unlock the full power of the dashboard—real-time awareness, smarter decisions, and peace of mind.
AI Email Auto-Responder
Welcome to Email Auto-Responder, your AI-powered inbox management system designed to streamline customer support, sales communication, and general email handling.
This guide walks you through all features—including adding accounts, managing templates, reviewing emails, and monitoring analytics.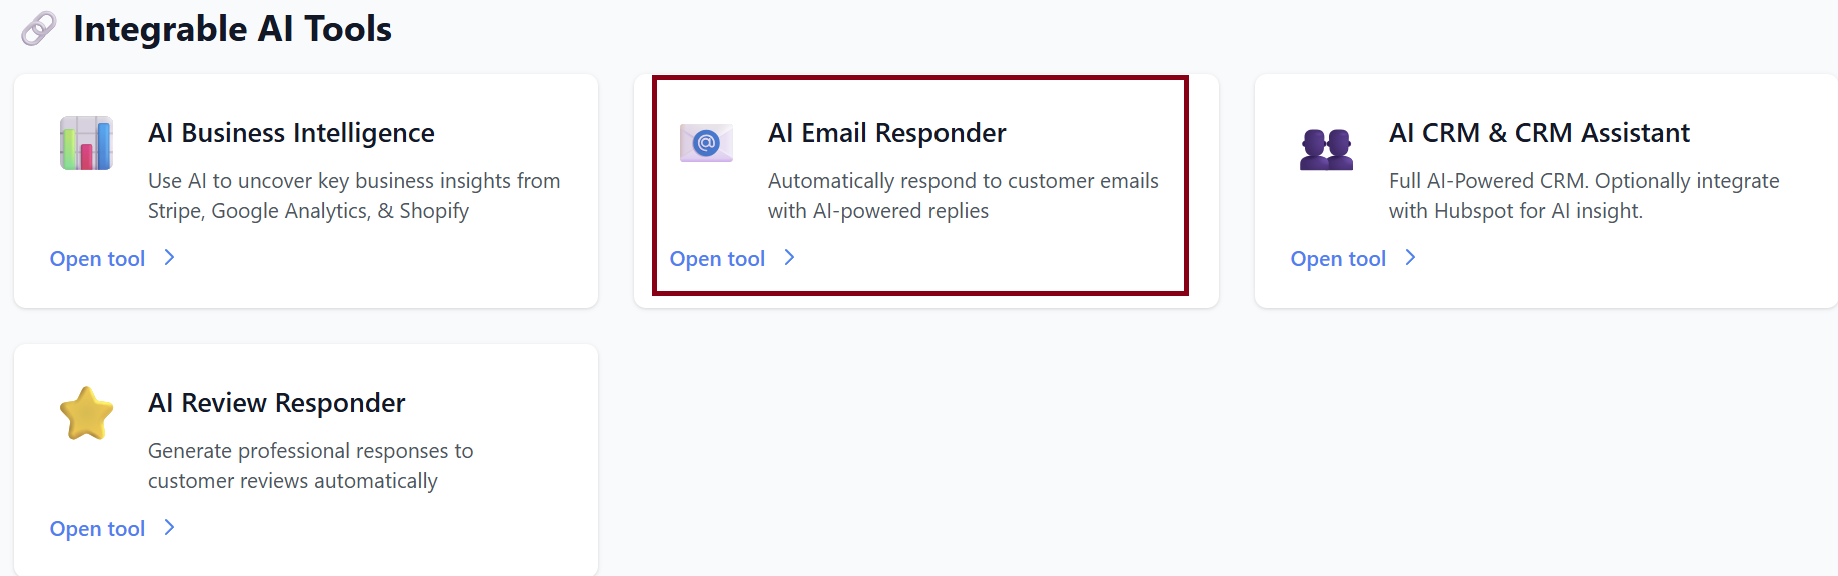
1. Dashboard Overview
When you open the Email Auto-Responder page, you will see a quick summary of your inbox performance:
Top Metrics
-
Email Accounts: Number of connected email inboxes
-
Avg Response Time: Average time it takes your business to reply
-
Needs Response: Number of messages awaiting your attention
-
Response Rate (7d): Percentage of emails responded to over the last 7 days
These values update automatically as emails come in and responses are processed.

2. How Email Auto-Responder Works
The system manages your business emails in six simple steps:
-
Connect Email
Add your business email through IMAP/SMTP. -
AI Monitors
The system checks for new messages every 5 minutes. -
Smart Analysis
AI understands, categorizes, and prioritizes each email. -
Generate Response
AI creates contextual, personalized replies. -
Review (Optional)
You can approve replies before sending or enable auto-send. -
Send & Track
Responses are sent automatically, and conversations are logged for analytics.
If no emails are connected yet, you will see:
“No emails yet — Your incoming emails will show here.”
3. Adding an Email Account
To get started, click + Add Email Account.
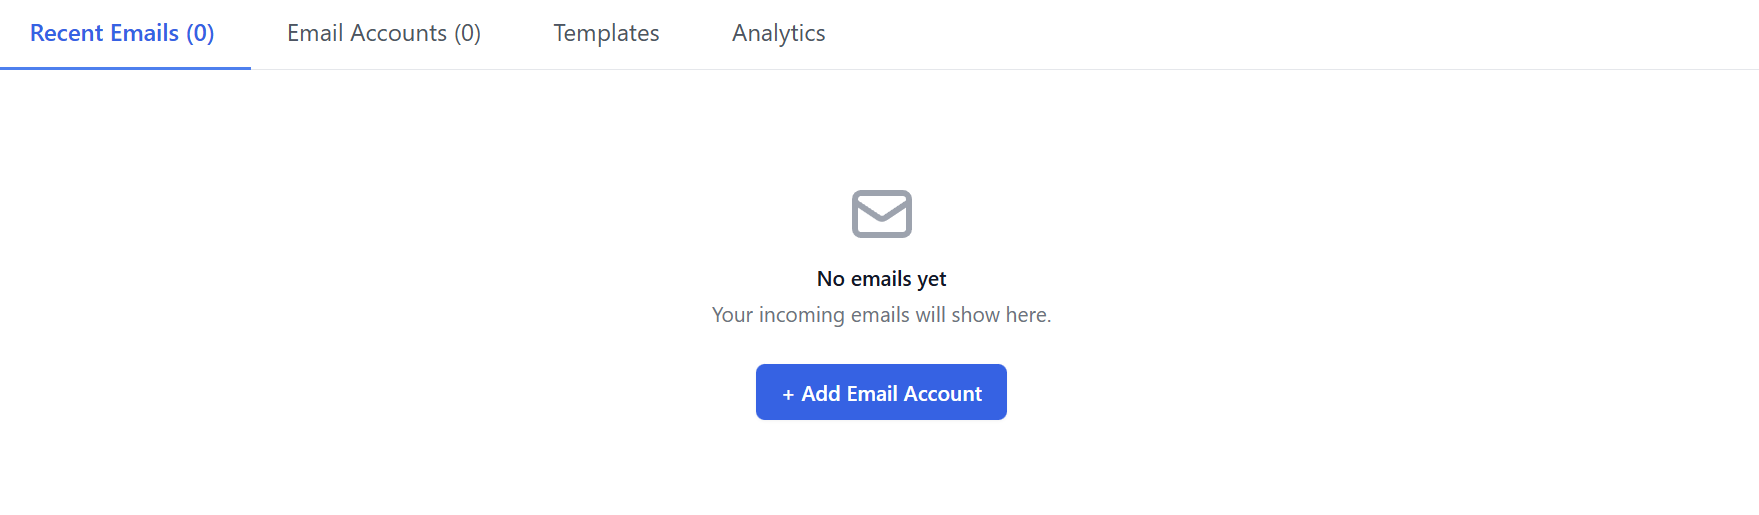
You’ll need to fill in the following details:
Email Credentials
-
Email Address:
Example:support@yourbusiness.com -
IMAP Host:
Example:imap.gmail.com -
IMAP Port:
Default:993 -
IMAP Username:
Usually your full email address -
IMAP Password / App Password:
-
Gmail requires an App Password
-
Do not use your normal password

-
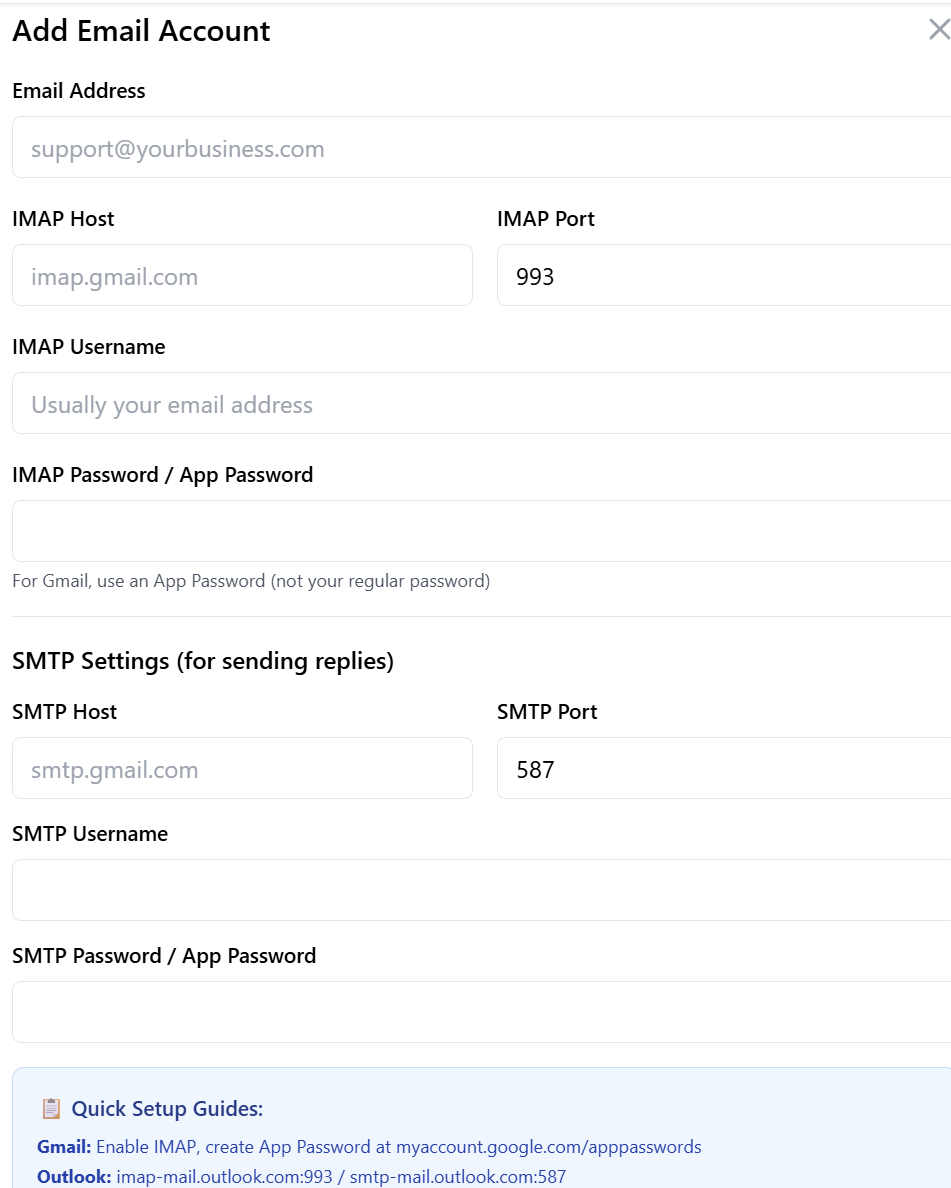
SMTP Settings (for sending replies)
-
SMTP Host:
Example:smtp.gmail.com -
SMTP Port:
Default:587 -
SMTP Username
-
SMTP Password / App Password
Quick Setup Guides
Gmail
-
Enable IMAP
-
Create App Password:
myaccount.google.com/apppasswords
Outlook
-
IMAP:
imap-mail.outlook.com:993 -
SMTP:
smtp-mail.outlook.com:587
Yahoo
-
IMAP:
imap.mail.yahoo.com:993 -
SMTP:
smtp.mail.yahoo.com:587
Once complete, click Add Account & Test Connection.
Your inbox will begin syncing, and new emails will appear under Recent Emails.
4. Recent Emails
After accounts are added, your inbox will display:
-
Sender
-
Subject
-
Category (Sales, Support, General, Out of Office)
-
Status (Needs response, responded, auto-responded)
-
AI-generated suggested replies
You can:
-
Approve AI responses
-
Edit them before sending
-
Or enable Auto-Send per email account or category
5. Templates
Templates help your business maintain consistent, high-quality responses.
Go to the Templates tab → click Create Template.

Template Fields
-
Template Name – For internal use
-
Category – General, Sales, Support, or Out of Office
-
Subject Template (Optional) – Auto-fills subject lines
-
Body Template – The message text itself
-
Set as default template for this category (checkbox)
-
When checked, AI will use it automatically for emails in that category

-
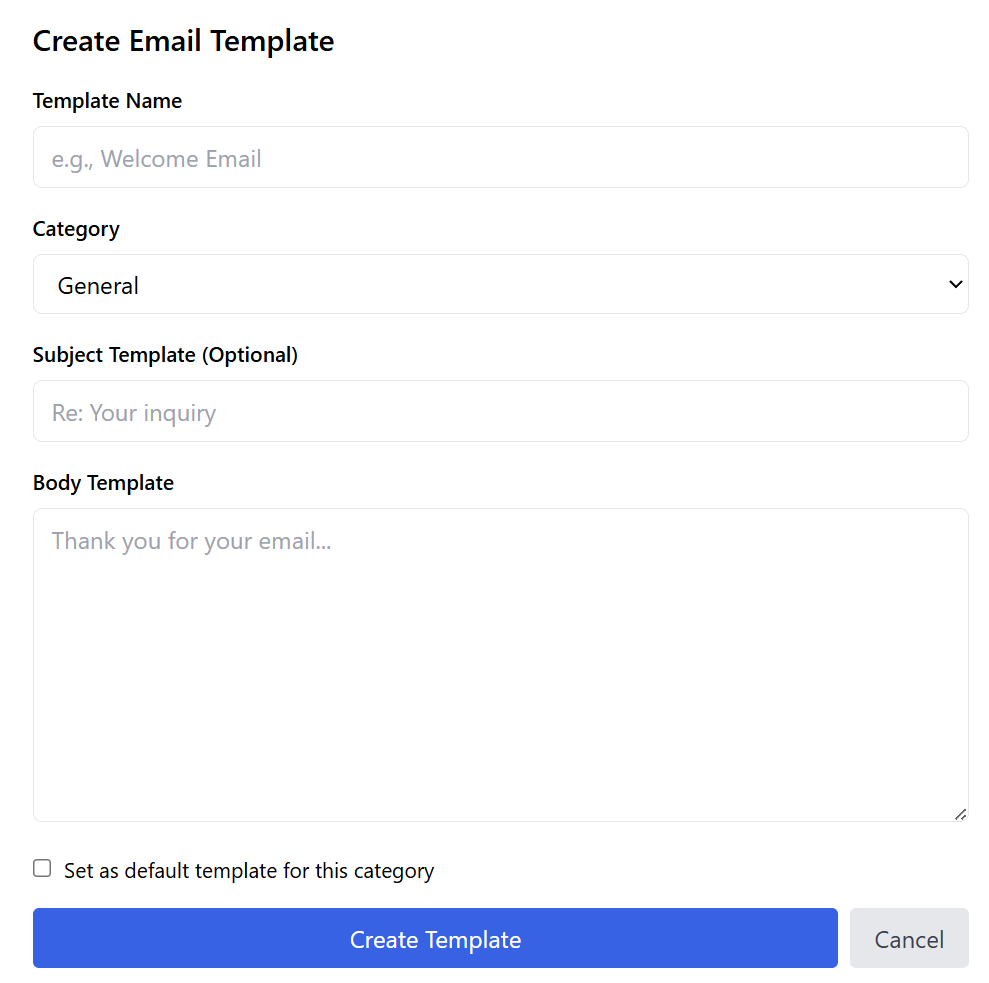
After clicking Create, the template will appear in the Templates list. You can:
-
Add additional templates
-
Edit templates
-
Delete templates
-
Set new defaults

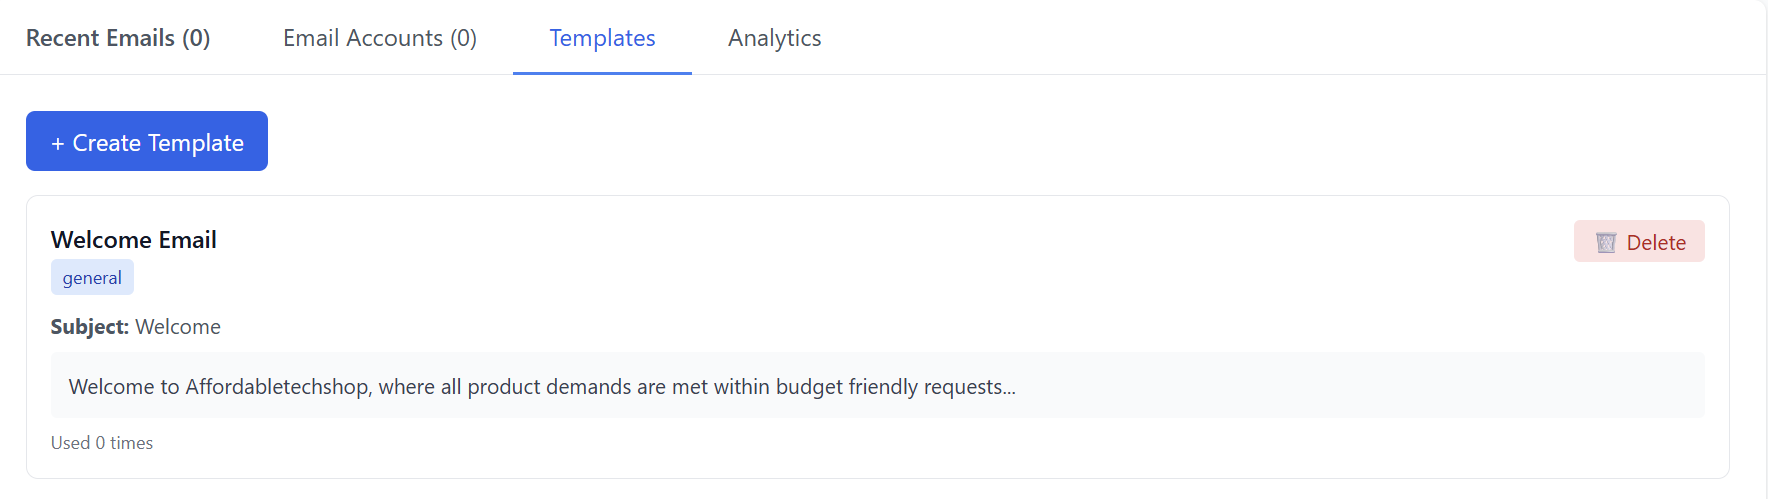
6. Analytics
The Analytics tab provides insight into your email performance.
Metrics Displayed
-
Total Emails – Count of all messages received
-
Response Rate – % of emails you replied to
-
Avg Response Time – Speed of your replies
-
Email Volume (Last 7 Days) – Activity chart
-
Category Breakdown – Distribution of Support, Sales, General, Out of Office emails
Use these insights to measure team responsiveness, identify trends, and improve customer engagement.
7. Settings
-
Auto-send preferences
-
Default reply behavior
-
Signature settings
-
Notification preferences
-
Connecting or removing email accounts
- Notification settings
- Smart Filtering
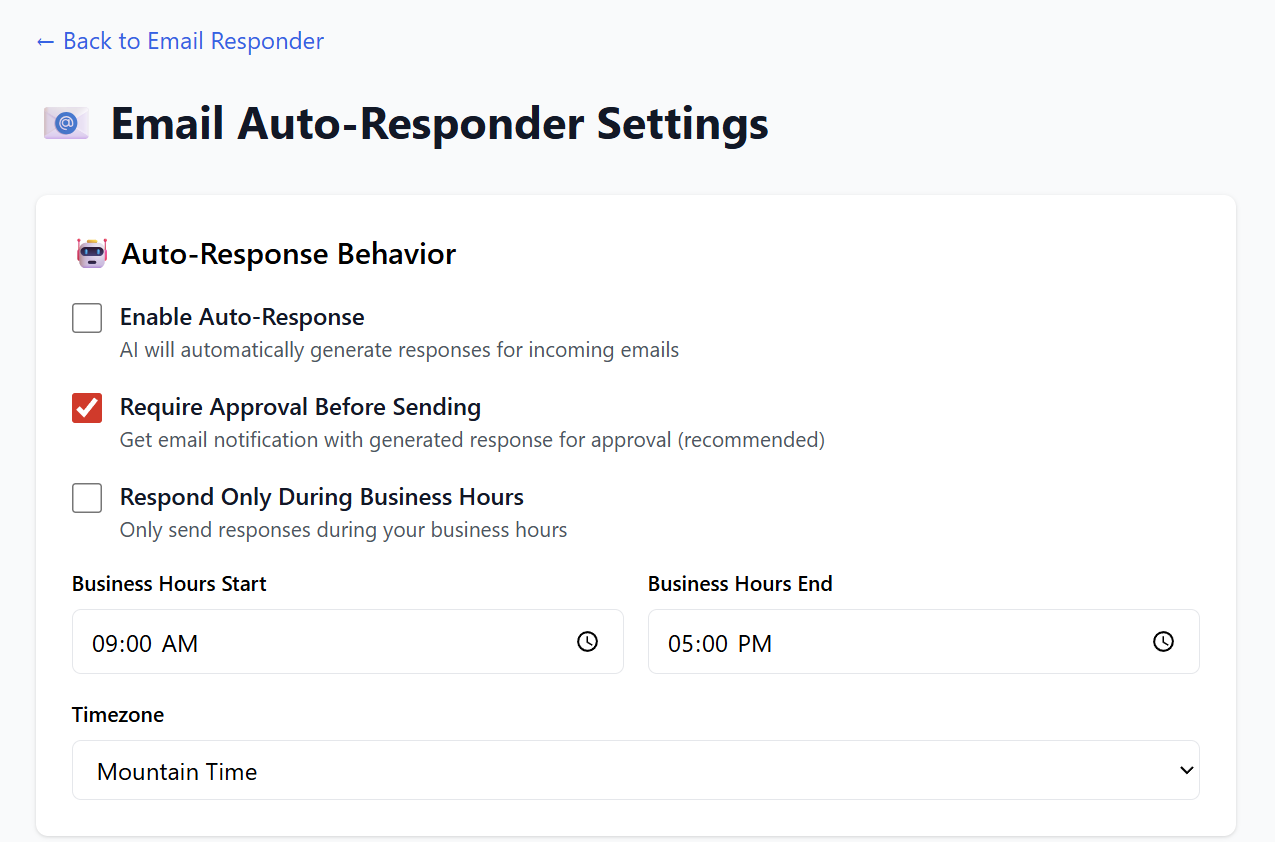
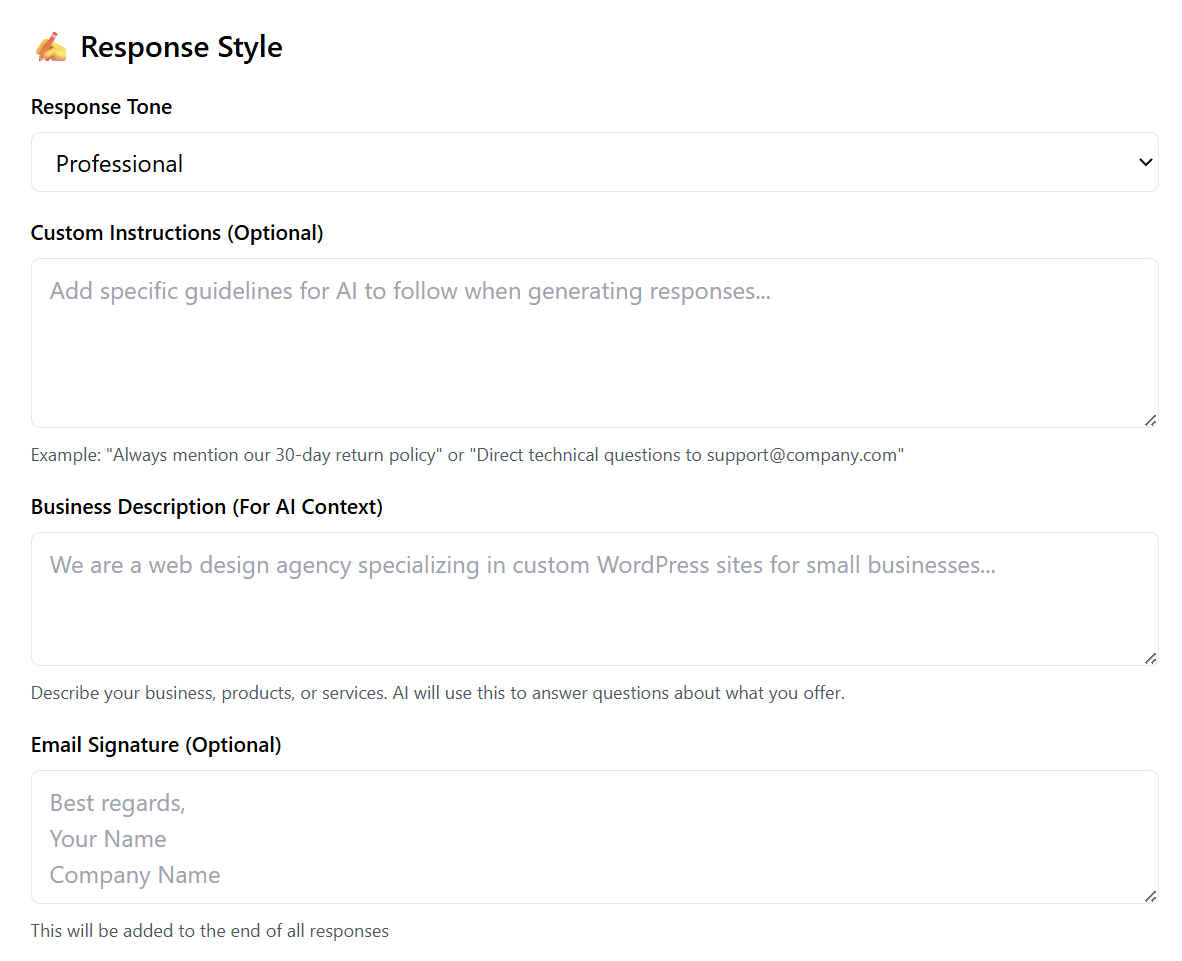
Summary
| Feature | What It Does |
|---|---|
| Dashboard | Shows inbox performance and key stats |
| Add Email Account | Connects IMAP/SMTP inboxes |
| Recent Emails | AI categorizes and drafts replies |
| Templates | Create reusable email response templates |
| Analytics | Tracks response rate, categories, and volume |
| Settings | Controls automation and email behavior |
Your Email Auto-Responder is now ready to automate communication and save you countless hours managing messages manually.
AI CRM
Welcome to AI CRM, your intelligent customer-relationship platform powered by automation, smart insights, and streamlined sales management.
Whether you start fresh with the built-in CRM or connect your existing HubSpot data, this guide will help you get up and running quickly.
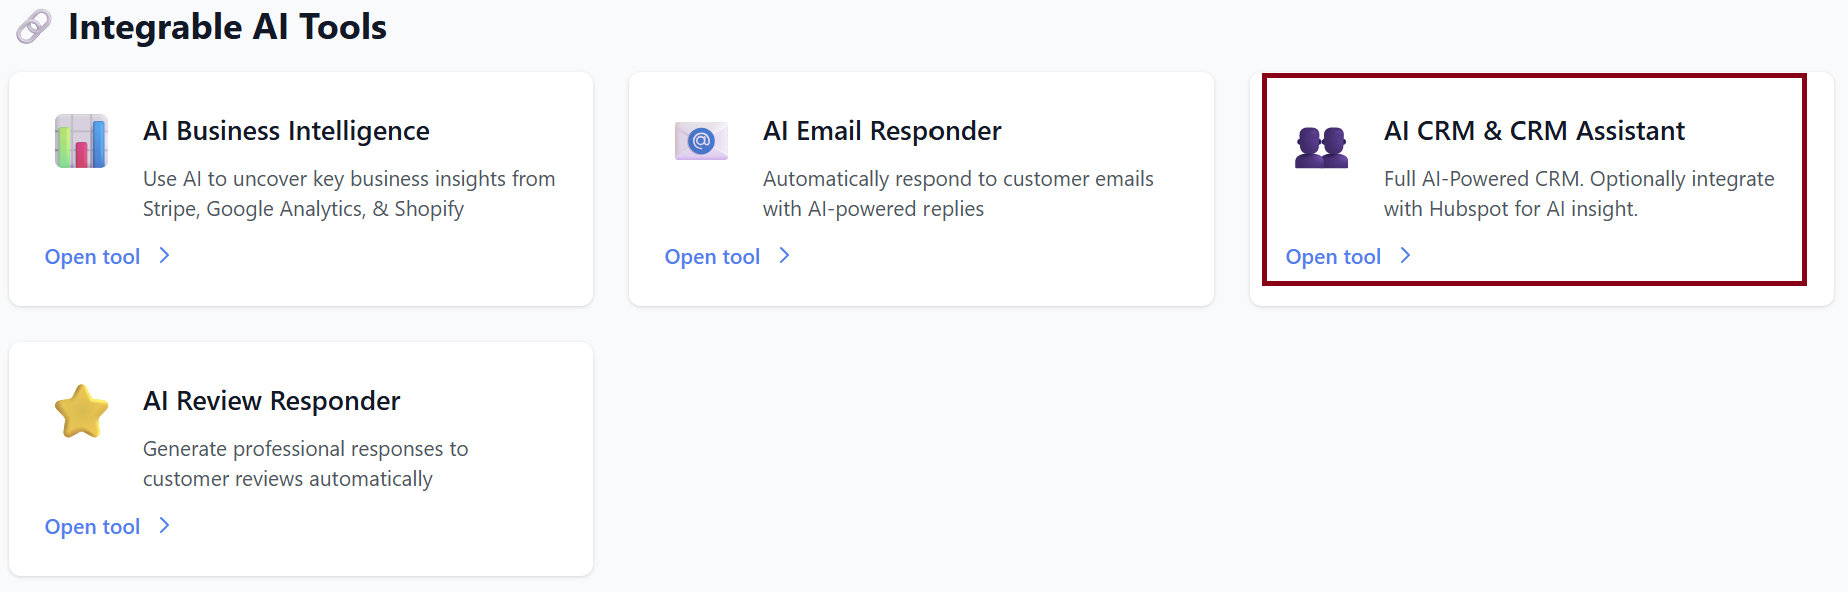
1. Getting Started
When you first open the CRM, you’ll see two options:
➤ Use Built-In AI CRM
Start with a clean, powerful CRM that includes:
-
AI-powered automation
-
Simple, intuitive interface
-
Free forever
-
Ready to use instantly
Click Get Started to activate your built-in CRM.
➤ Connect HubSpot
If you already use HubSpot, you can connect your account to unlock:
-
Data sync
-
AI assistant support
-
Automated insights
-
Workflow enhancements
Click Connect → and follow the login instructions.
2. After Clicking “Get Started”
You will land on your CRM home dashboard, where all metrics initially display as 0 since no data is added yet.
Dashboard Metrics
-
Total Contacts
-
Companies
-
Active Deals
-
Pipeline Value
-
Revenue Won
-
Tasks Today
Each card includes a quick-access View button such as:
-
View All Contacts
-
View All Companies
-
View Pipeline
-
View Tasks


Welcome Section
You are prompted to begin:
-
➕ Add Contact
-
➕ Add Company
-
➕ Add Deal
Below this, you’ll see:
-
Recent Deals (empty until you add one)
-
Recent Contacts
-
Upcoming Tasks
3. Contacts
Use Add Contact to create your first contact:
-
Name
-
Email
-
Phone
-
Company (optional)
-
Notes

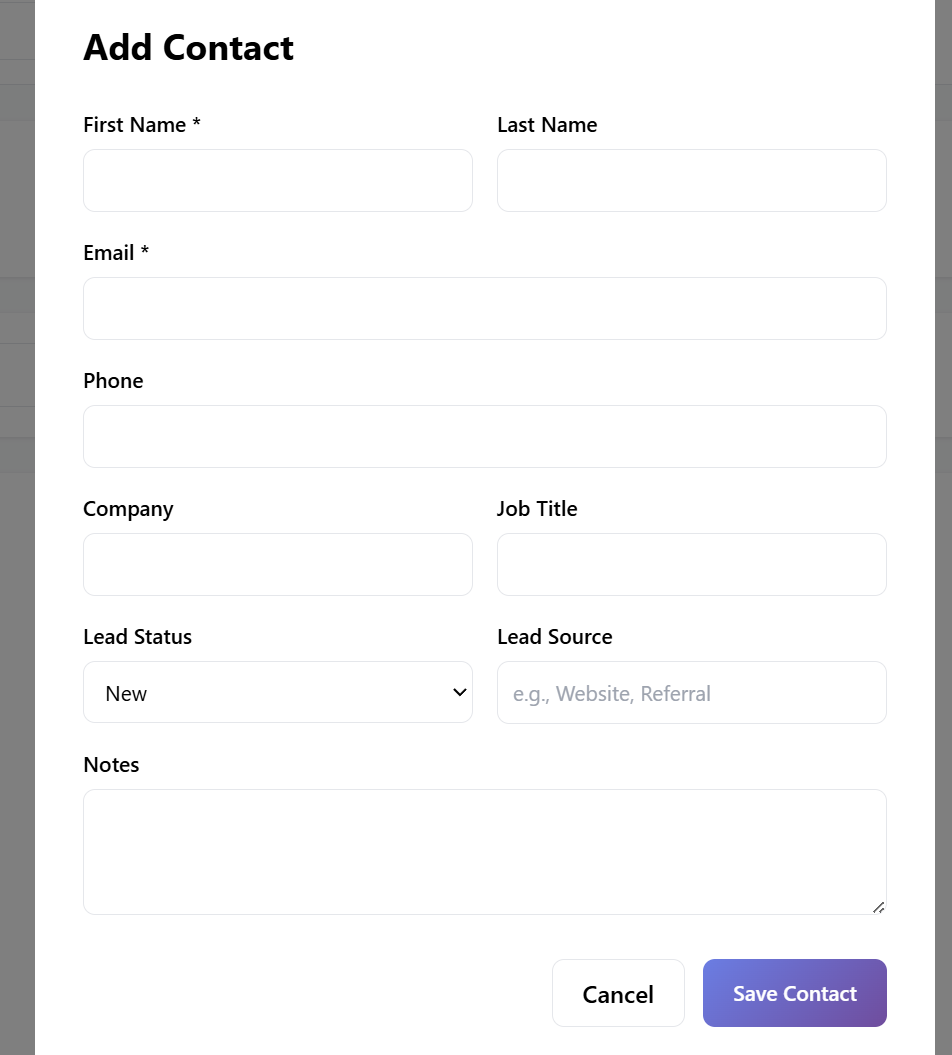
Contacts will appear under View All → Recent Contacts.
4. Companies
Add companies associated with your deals or contacts:
-
Company name
-
Website
-
Industry
-
Notes

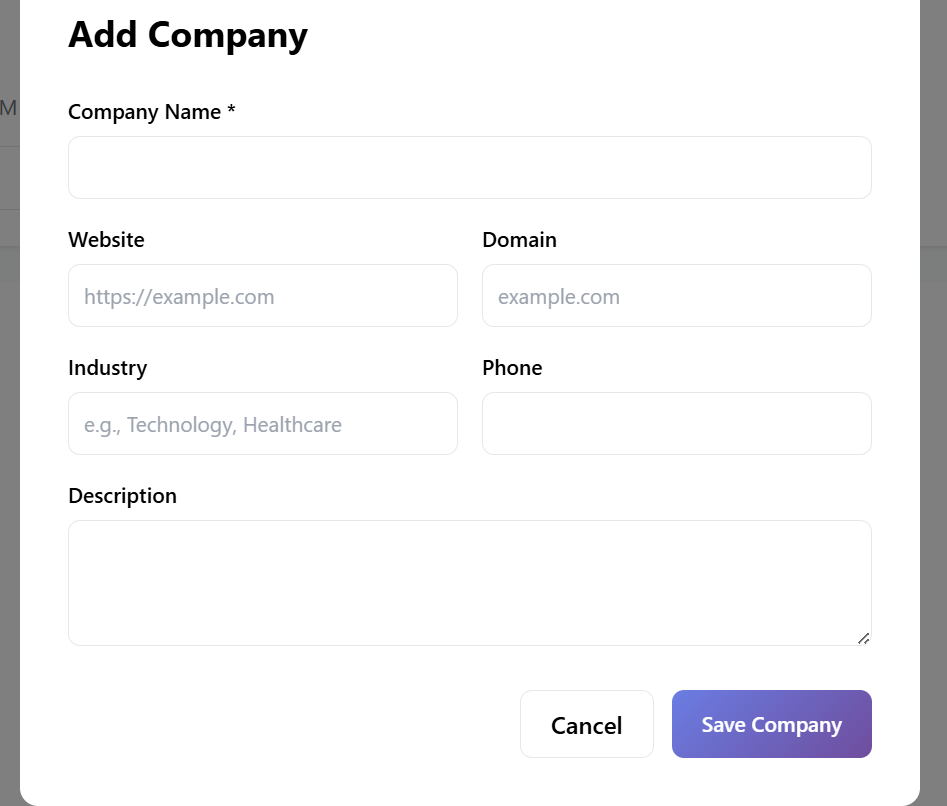
Companies appear under View All Companies.
5. Deals
Deal Filters
You can filter by stage:
-
📋 All
-
🟡 Lead
-
🔵 Qualified
-
🟣 Proposal
-
💗 Negotiation
-
✅ Won
-
❌ Lost
Initially you'll see:
“No deals found — Create your first deal to get started.”
Creating a Deal
Click Create Your First Deal.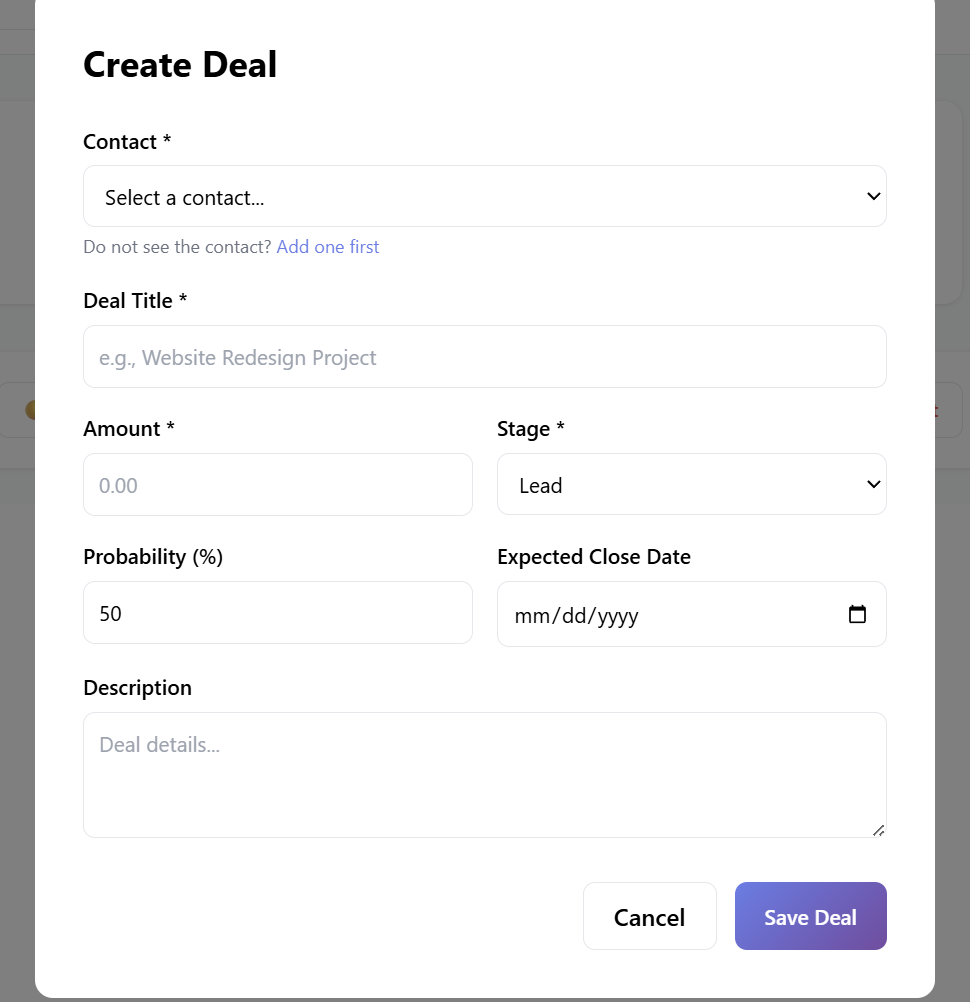
Fill out the fields:
Required Fields
-
Contact* → Select an existing contact
-
If none exist: “Do not see the contact? Add one first”
-
-
Deal Title* (e.g., “Website Redesign Project”)
-
Amount*
-
Stage* (Lead → Won → Lost, etc.)
Optional Fields
-
Probability (%)
-
Expected Close Date
-
Description
Click Create to save the deal.
Deals will now appear in the pipeline and reports.
6. Tasks
The Tasks page keeps your team organized.
Task Filters
-
⏳ Pending
-
✅ Completed
-
📋 All
-
🔴 High
-
🟡 Medium
-
🟢 Low
At first:
“No tasks found — Create a task to get started.”
Creating a Task
Click Create Your First Task.
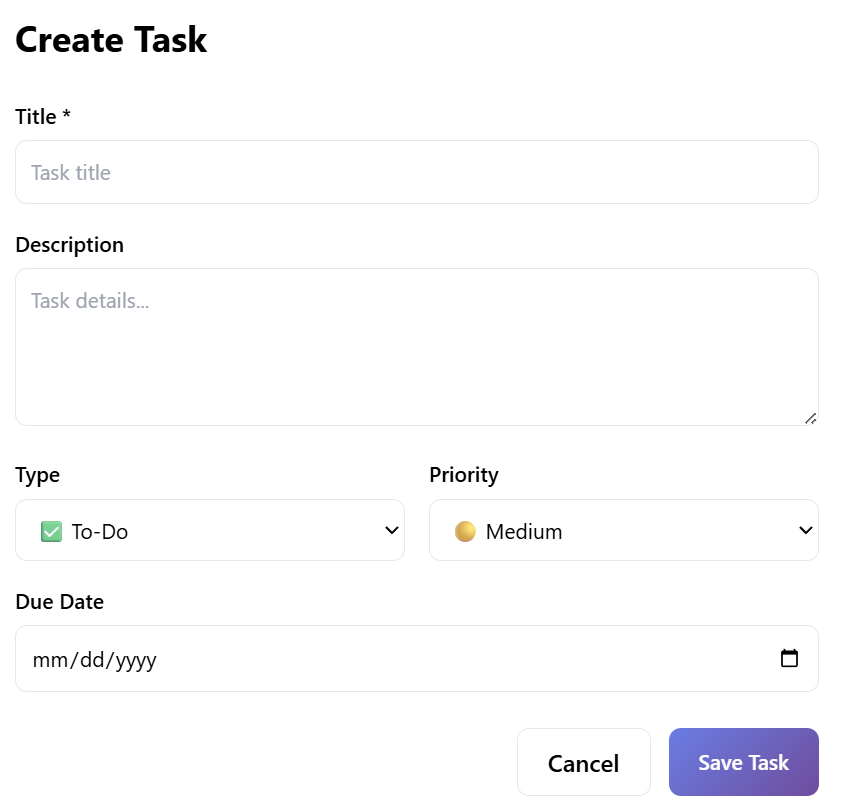
Fields:
-
Title*
-
Description (optional)
-
Type → To-Do
-
Priority → High / Medium / Low
-
Due Date
Tasks appear in dashboards & reminders.
7. Sales Pipeline
The Sales Pipeline is a visual overview of all deal stages.
Stages include:
-
Lead
-
Qualified
-
Proposal
-
Negotiation
-
Won
-
Lost
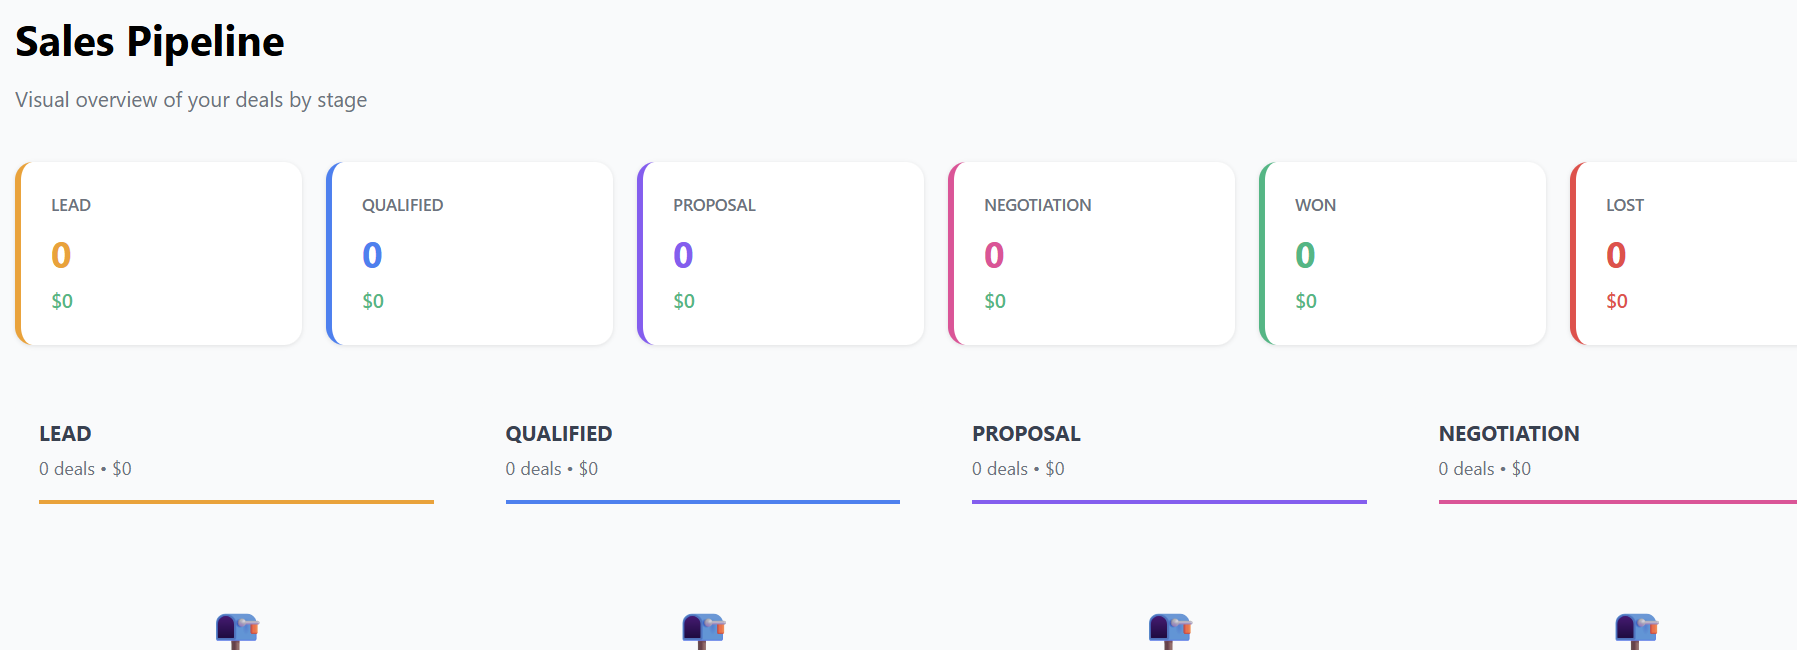
Each stage displays:
-
Number of deals
-
Total value
At first, every section shows:
“0 deals • $0 — No deals in this stage.”
Once deals are added, they’ll appear here with drag-and-drop movement between stages.
8. Reports & Analytics
Access performance metrics for any date range.
Reports Include:
-
New Contacts (Last 30 days)
-
New Deals (Last 30 days)
-
Revenue Won
-
Win Rate
-
Pipeline Value
-
Deals by Stage
-
Activity Summary
-
Top Contacts by Deal Value
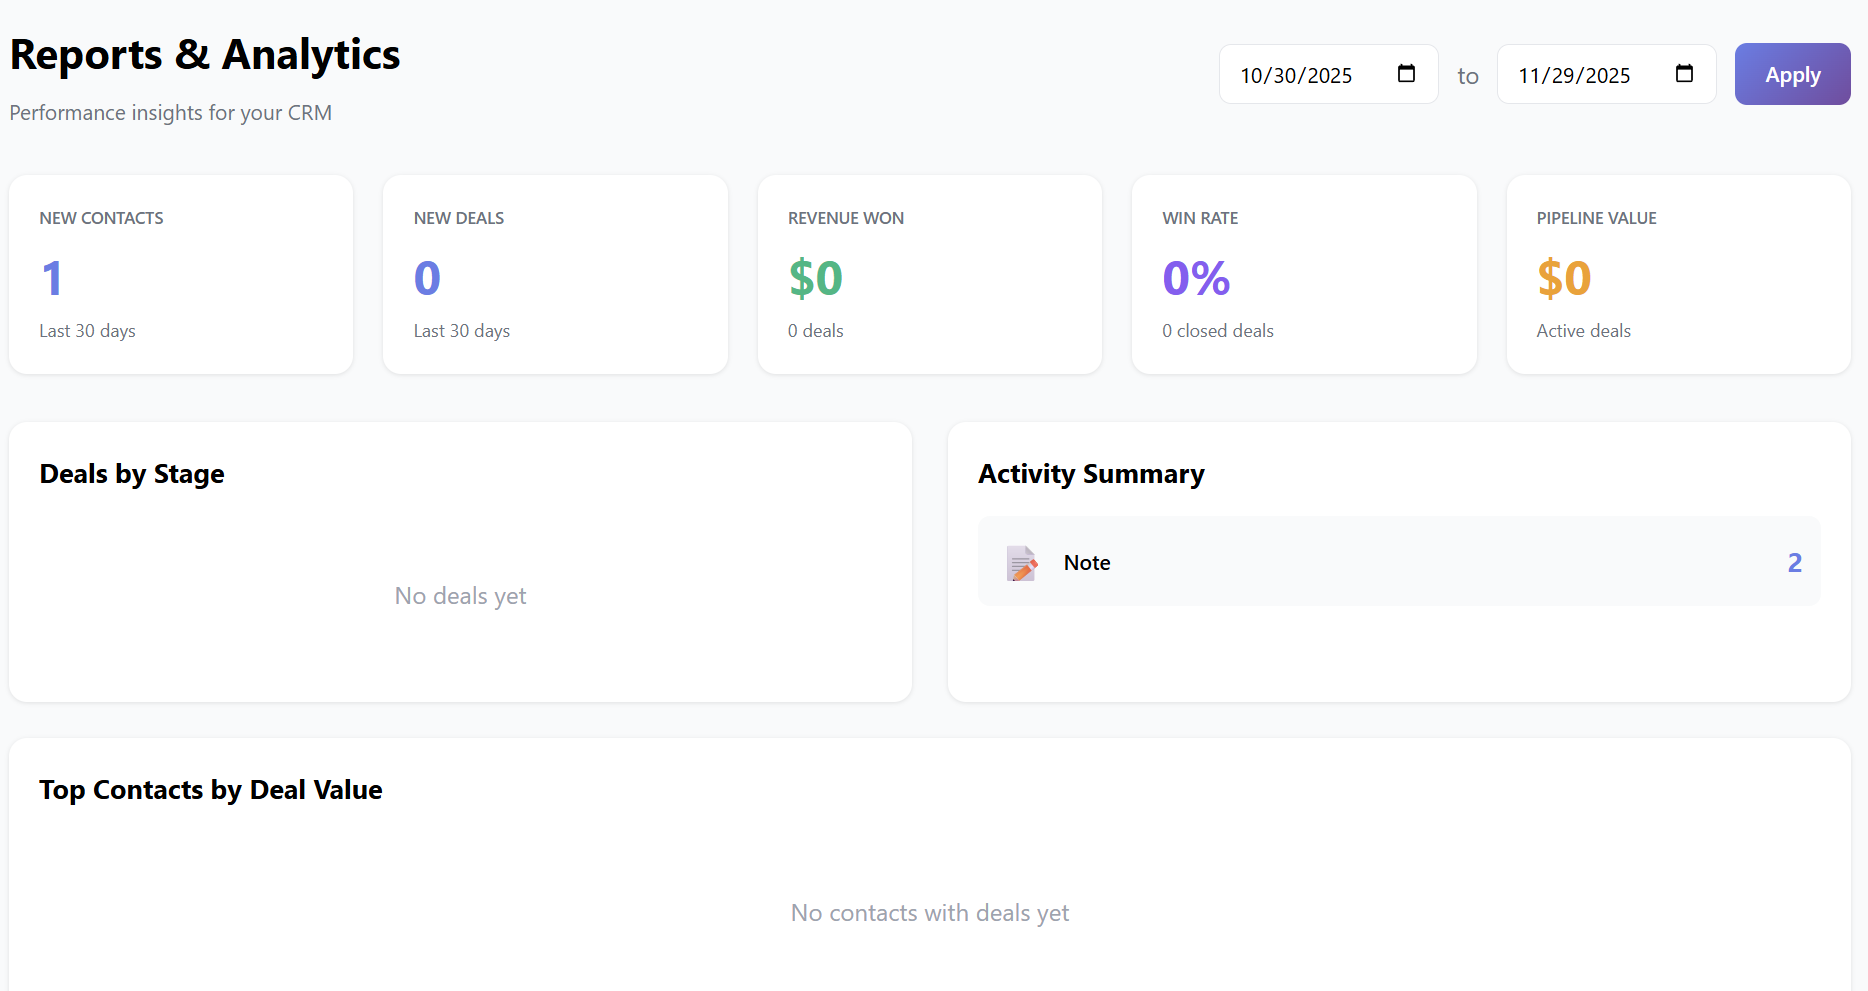
Before adding data, these areas will display “No data yet.”
9. Email Templates
Create email templates for follow-ups, deal updates, and outreach.
Creating a Template
-
Template Name*
-
Template Type (Follow Up, etc.)
-
Email Subject*
-
Email Body*
Save the template to reuse with contacts and deals.
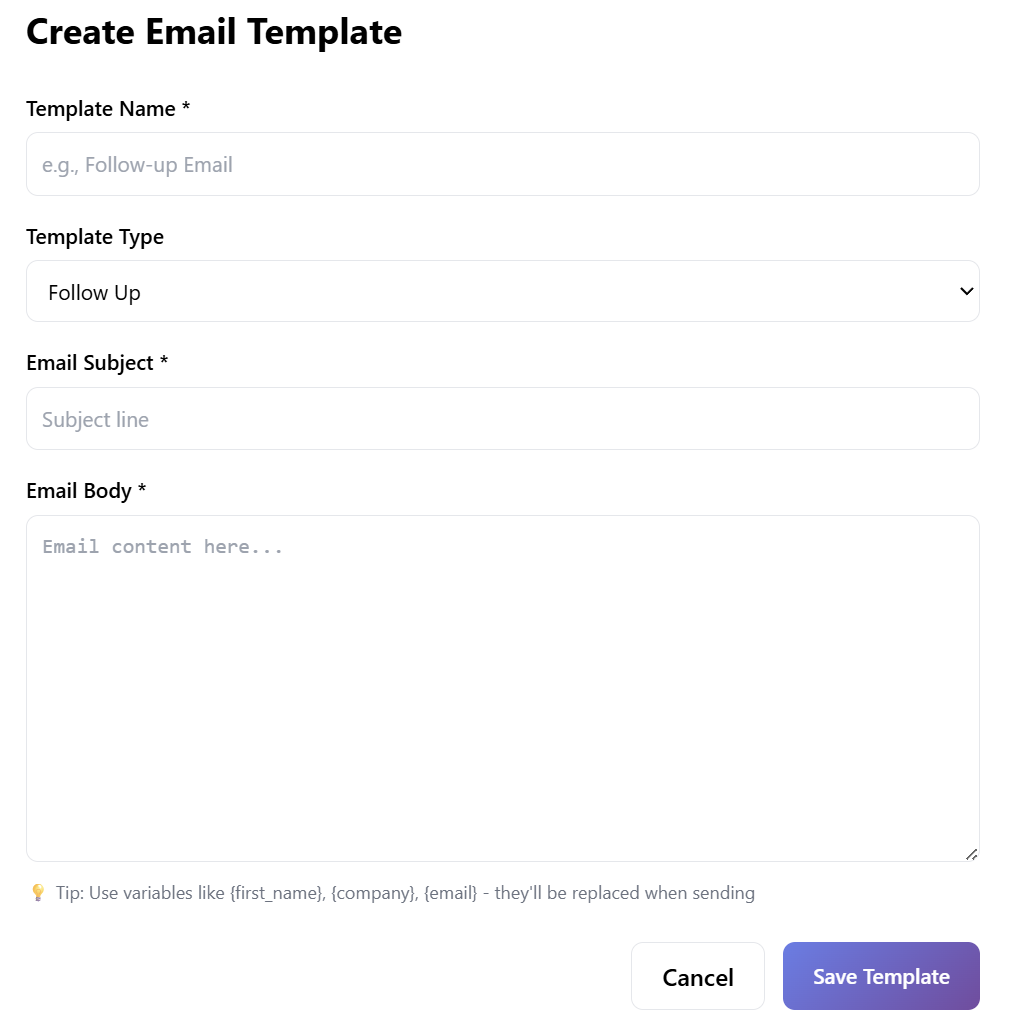
10. AI Insights
The AI Insights tab provides smart recommendations for your CRM.
Insight Categories:
-
⚠️ Deal Risks
-
💰 Upsell Opportunities
-
📞 Follow-ups Needed
-
📉 Engagement Drops
-
⭐ Opportunities to Grow
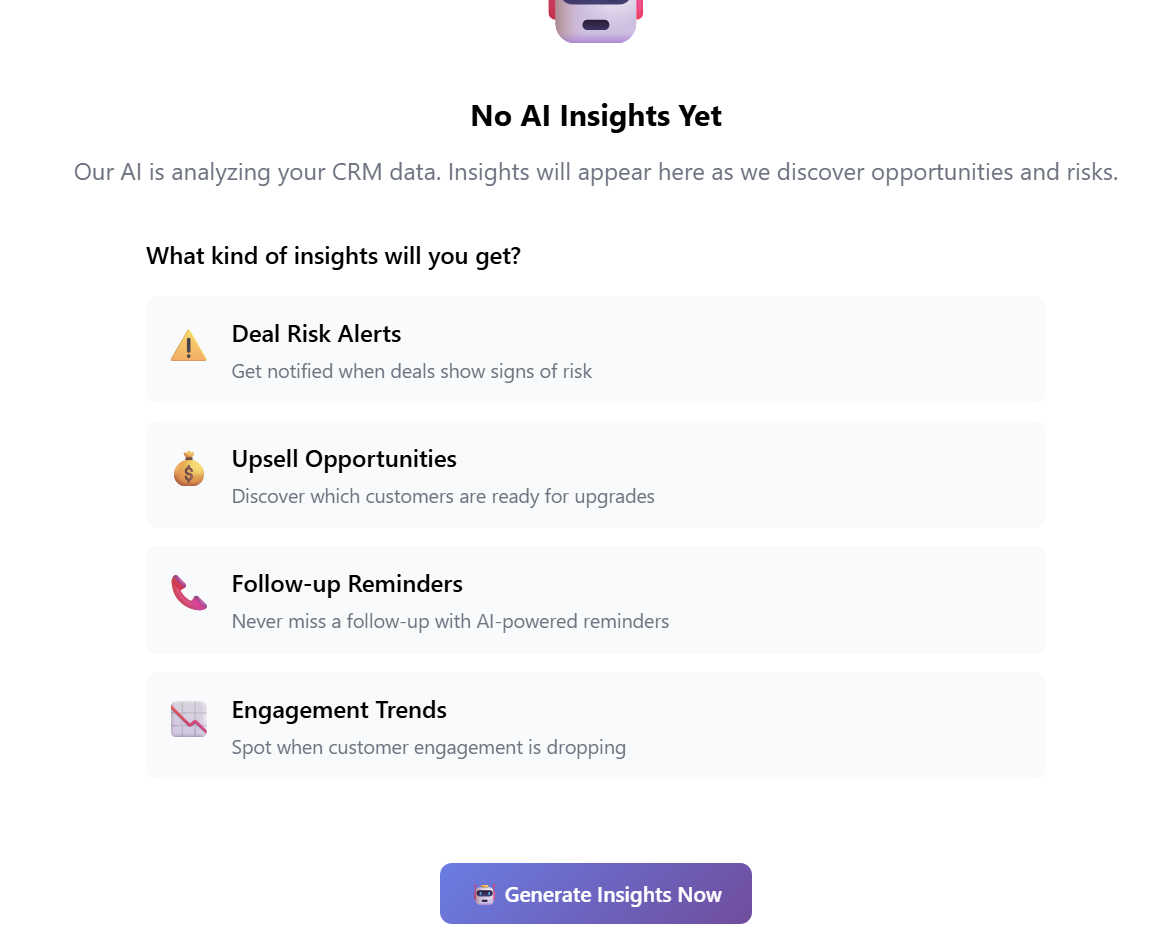
Before your CRM has enough data, you’ll see:
“No AI Insights Yet — Our AI is analyzing your CRM data.”
You can also click:
Generate Insights Now
11. AI Assistant
A live CRM chat assistant that can answer questions like:
-
“Show my contacts”
-
“What deals are in negotiation?”
-
“Add a new task for today.”
-
“What deals do I have closing this month?”
You can also add quick actions:
-
Add Contact
-
View Recent Deals
-
Open Pipeline
The assistant references all your CRM data in real time.
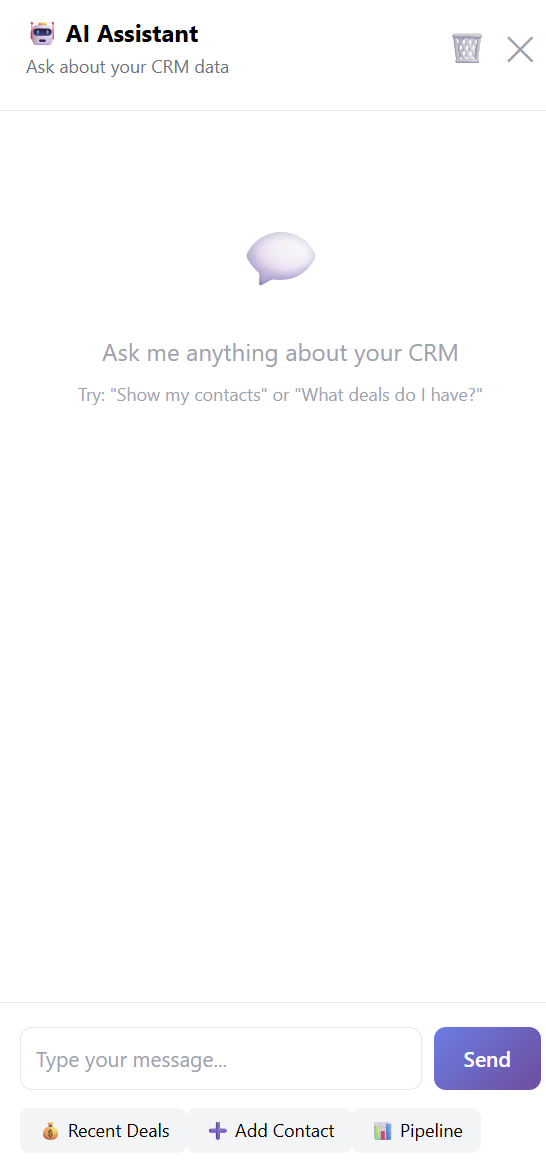
12. Settings
Customize your CRM’s behavior under the Settings tab.
CRM Mode
-
Built-in CRM (active by default)
-
HubSpot Integration

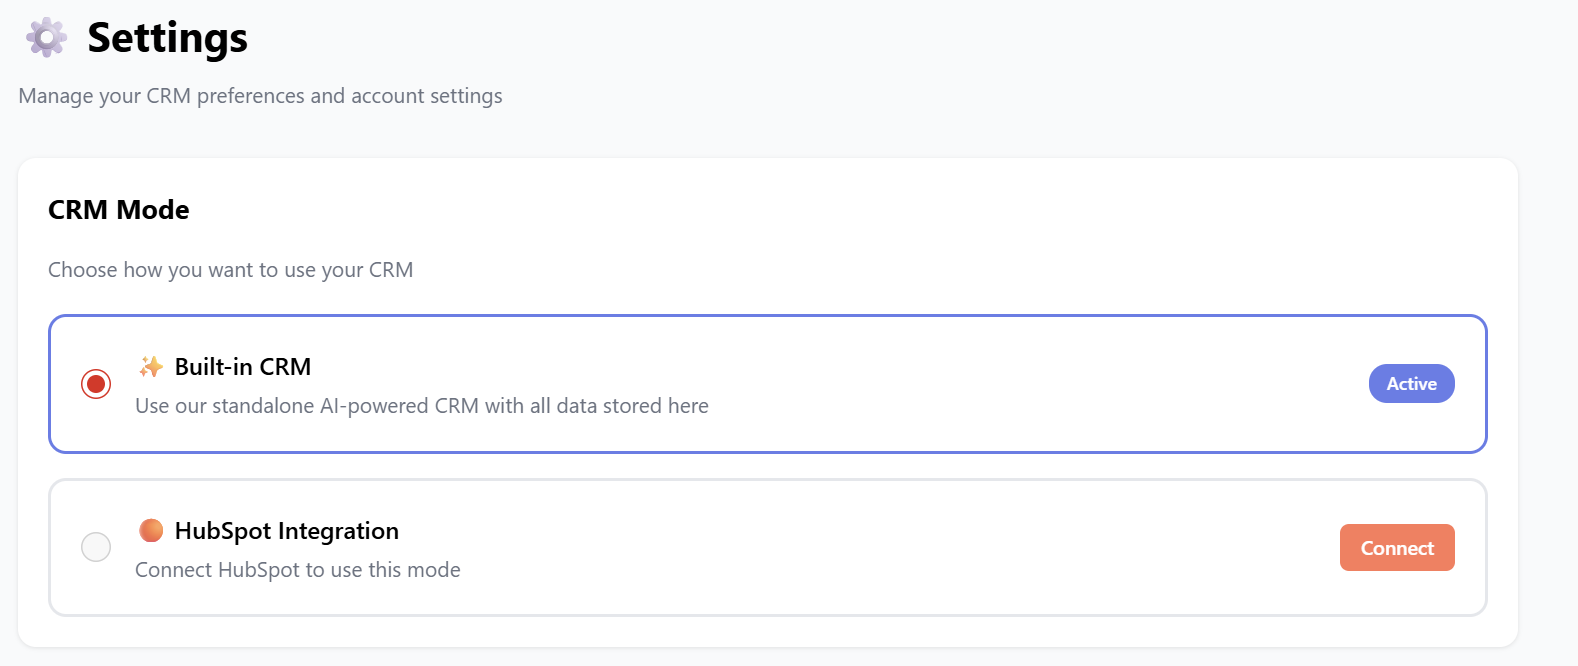
Notifications
Enable email/push notifications for:
-
New deals
-
Task reminders
-
AI insights
-
Deal won celebrations
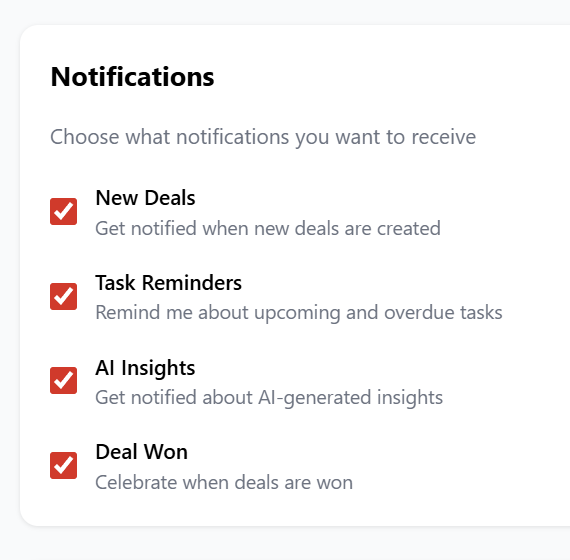
Display Preferences
-
Default dashboard view
-
Items per page
-
Date format
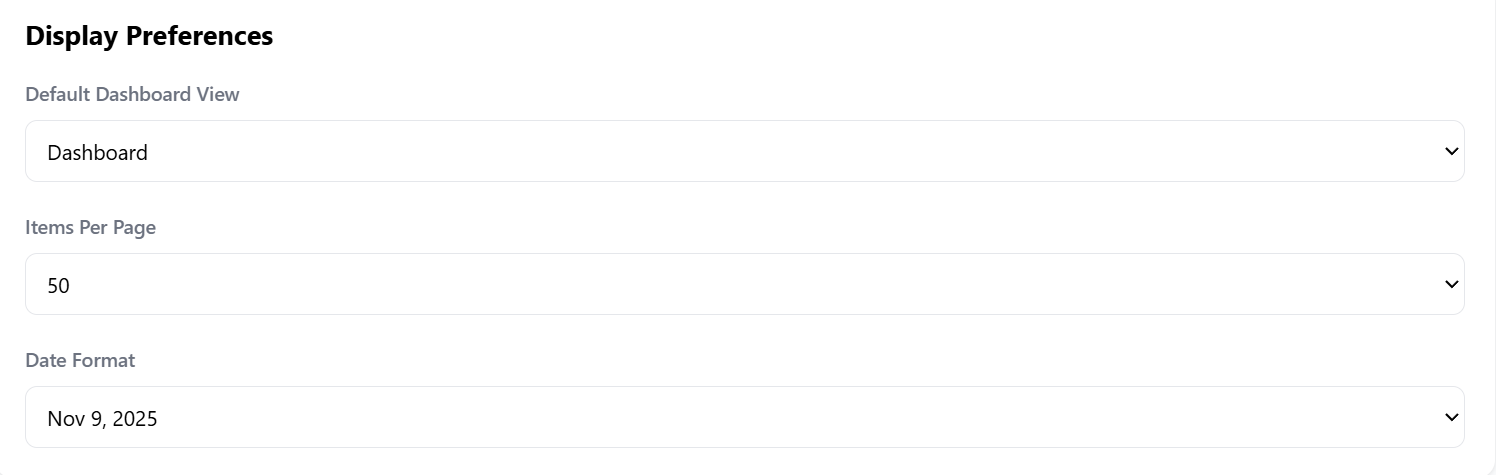
Data Management
-
📥 Export All Data
-
📤 Import Contacts
-
🗑️ Clear All Data (irreversible)
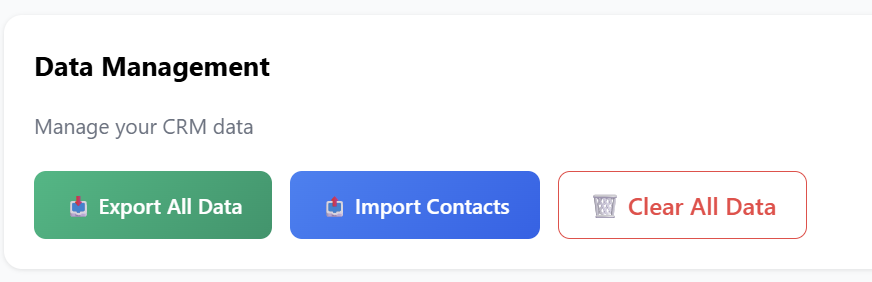
Summary
| CRM Area | What You Can Do |
|---|---|
| Dashboard | View contacts, deals, tasks, and quick actions |
| Contacts | Add, manage, and link contacts to deals |
| Companies | Manage companies and relationships |
| Deals | Track, filter, and manage your sales pipeline |
| Tasks | Organize follow-ups and daily actions |
| Pipeline | Visual view of deal stages and value |
| Reports | Analyze performance, revenue, and activity |
| Email Templates | Create reusable CRM communication templates |
| AI Insights | Receive automated alerts & opportunities |
| AI Assistant | Ask questions and manage CRM through chat |
| Settings | Control data, notifications, modes, and display |
AI Review Responder
AI-powered review monitoring and response generation for your business.
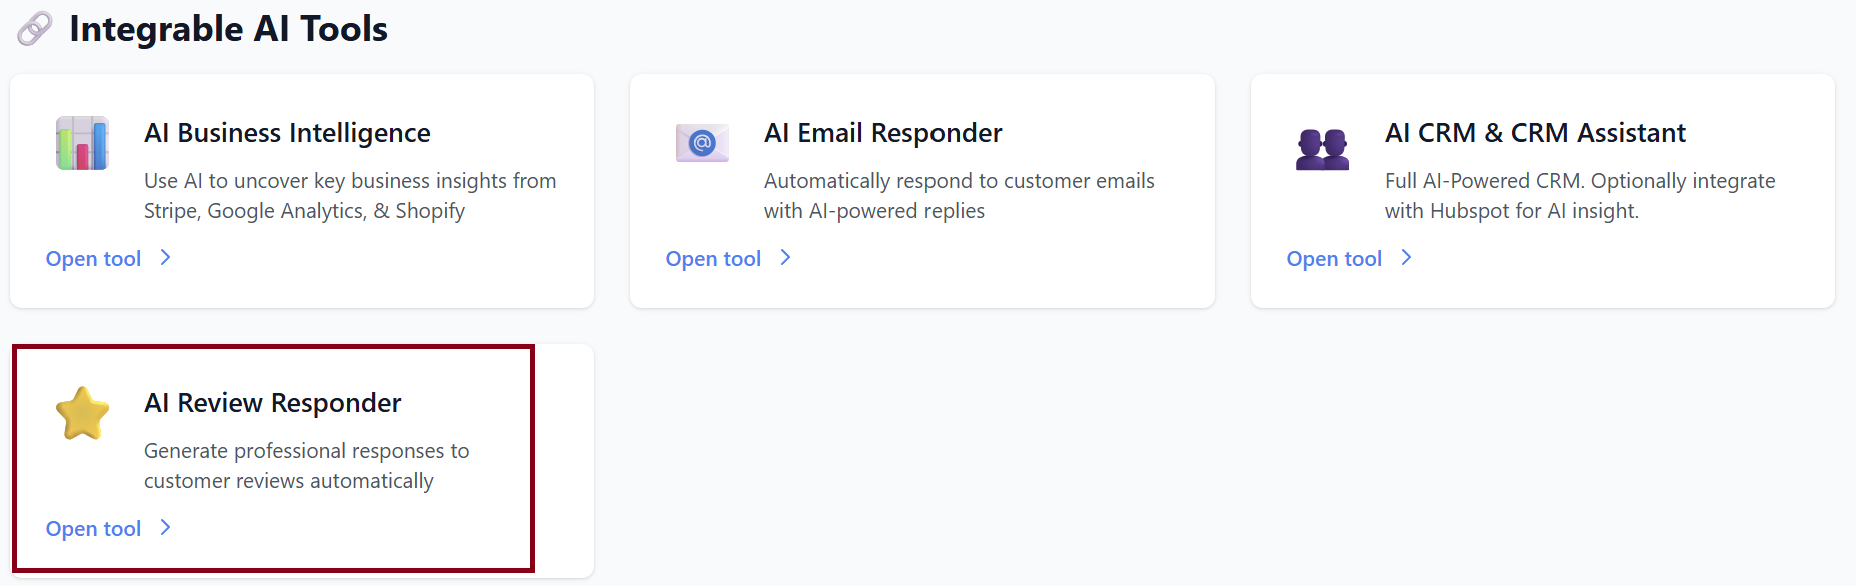
Chrome Extension
At the top of the Review Manager dashboard, you’ll see:
“Get the Chrome Extension for One-Click Posting!”

The Chrome extension allows you to publish AI-generated responses to Google reviews instantly—no copying or pasting.
-
Download Extension – Installs the extension into your Chrome browser.
-
Dismiss – Hides the message.
Review Manager Dashboard
Your main hub for viewing reviews, managing locations, templates, and analytics.
Top Navigation
-
+ Add Location – Add a business location for Google review monitoring.
-
⚙️ Settings – General configuration for notifications and defaults

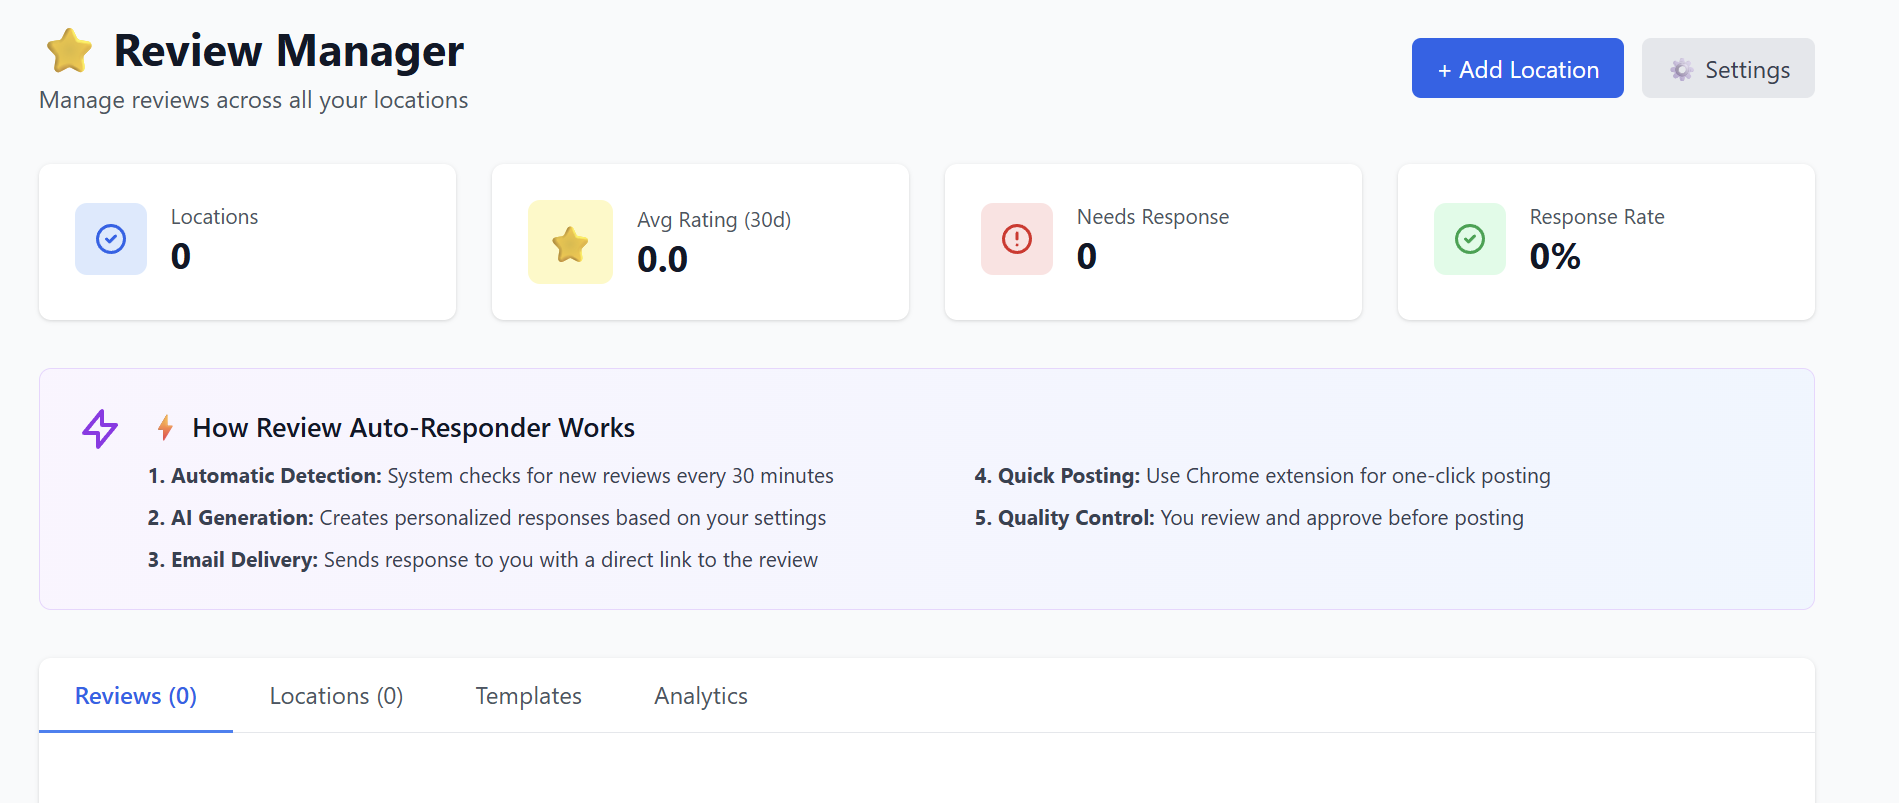
Dashboard Metrics
-
Locations: 0 (until you add some)
-
Avg Rating (30d): 0.0
-
Needs Response: Number of new, unreplied reviews
-
Response Rate: Percentage of reviews you responded to
How Review Auto-Responder Works
1. Automatic Detection
The system checks all connected locations for new Google reviews every 30 minutes.
2. AI Generation
A personalized response is created based on:
-
Review sentiment
-
Review content
-
Your brand tone
-
Any default templates you’ve selected
3. Email Delivery
You receive an email containing:
-
The generated response
-
A direct link to the review
-
A one-click option to open it in Google
4. Quick Posting (Chrome Extension)
If you installed the Chrome extension:
-
Open the review on Google
-
Click “Post with AI”
-
Response is filled in instantly
-
Edit or approve in one click
5. Quality Control
You have full control:
-
Approve
-
Edit
-
Replace with another template
-
Or discard
Reviews Section
Once connected locations start pulling reviews, you will see:
-
Review content
-
Star rating
-
Review date
-
Suggested AI response
-
Buttons: Approve, Edit, Copy, Open Review, or Post (with extension)
Adding a Location
Click + Add Location.
You may be prompted to:
-
Connect your Google Business Profile
-
Select one or multiple business locations
-
Confirm permissions for review monitoring
Once added:
-
Reviews begin syncing within 1–10 minutes
-
New reviews are checked every 30 minutes
Templates
Reusable response templates to standardize tone across review types.
Creating a Template
Click Templates → Create Template.

Fill out the fields:
-
Template Name
e.g., “Positive Review Default” -
Category
-
General
-
Positive
-
Neutral
-
Negative
-
Follow-up
-
-
Subject Template (optional)
Not used for posting—only for internal organization or emails. -
Body Template
This is the actual response the AI uses or adapts. -
Set as Default Template for This Category (checkbox)
If checked, this template will auto-apply to reviews of that category.
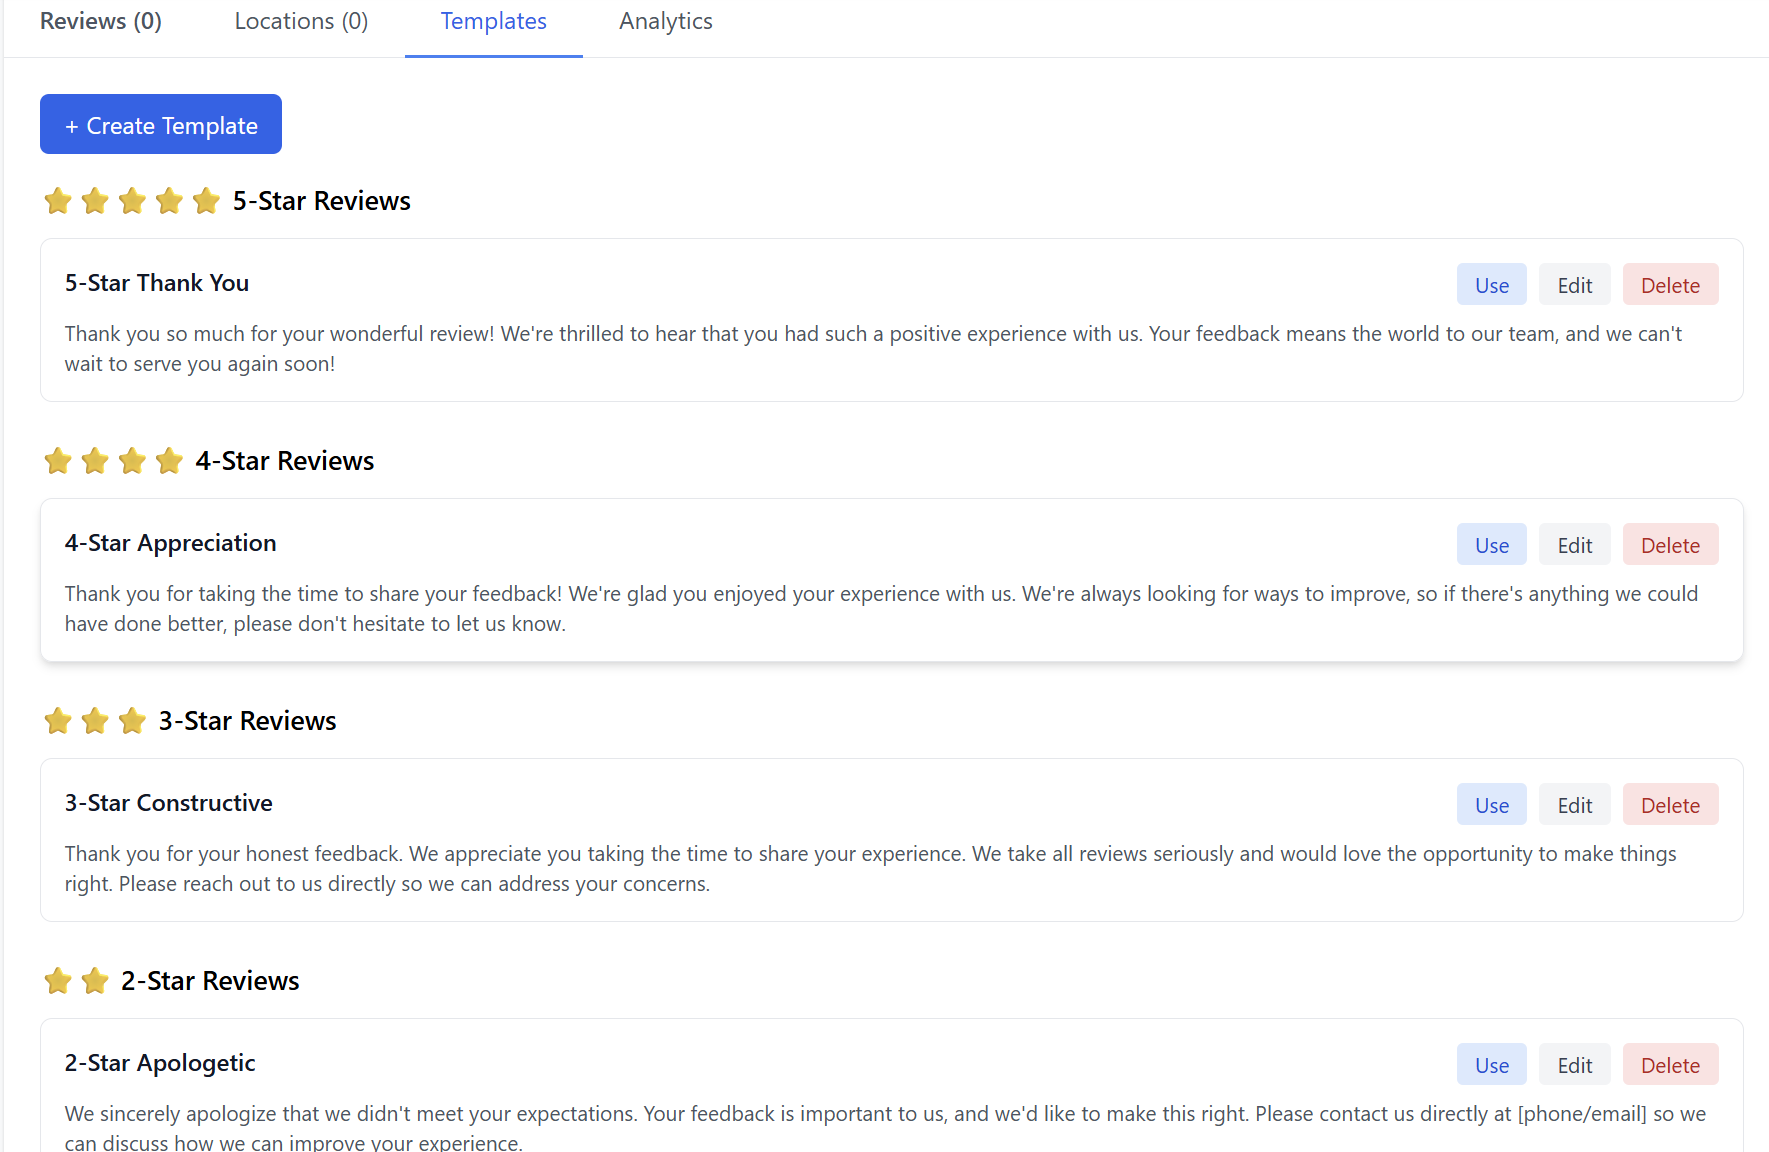
After Creating a Template
It will appear under the Templates tab where you can:
-
Edit
-
Duplicate
-
Delete
-
Mark as default
You can create unlimited templates.
Analytics
Insight into your review activity and AI performance.
Analytics Overview
-
Total Reviews
-
Response Rate
-
Avg Response Time
-
Review Volume (Last 7 Days)
-
Category Breakdown
-
Positive
-
Neutral
-
Negative
-
Needs Response
-
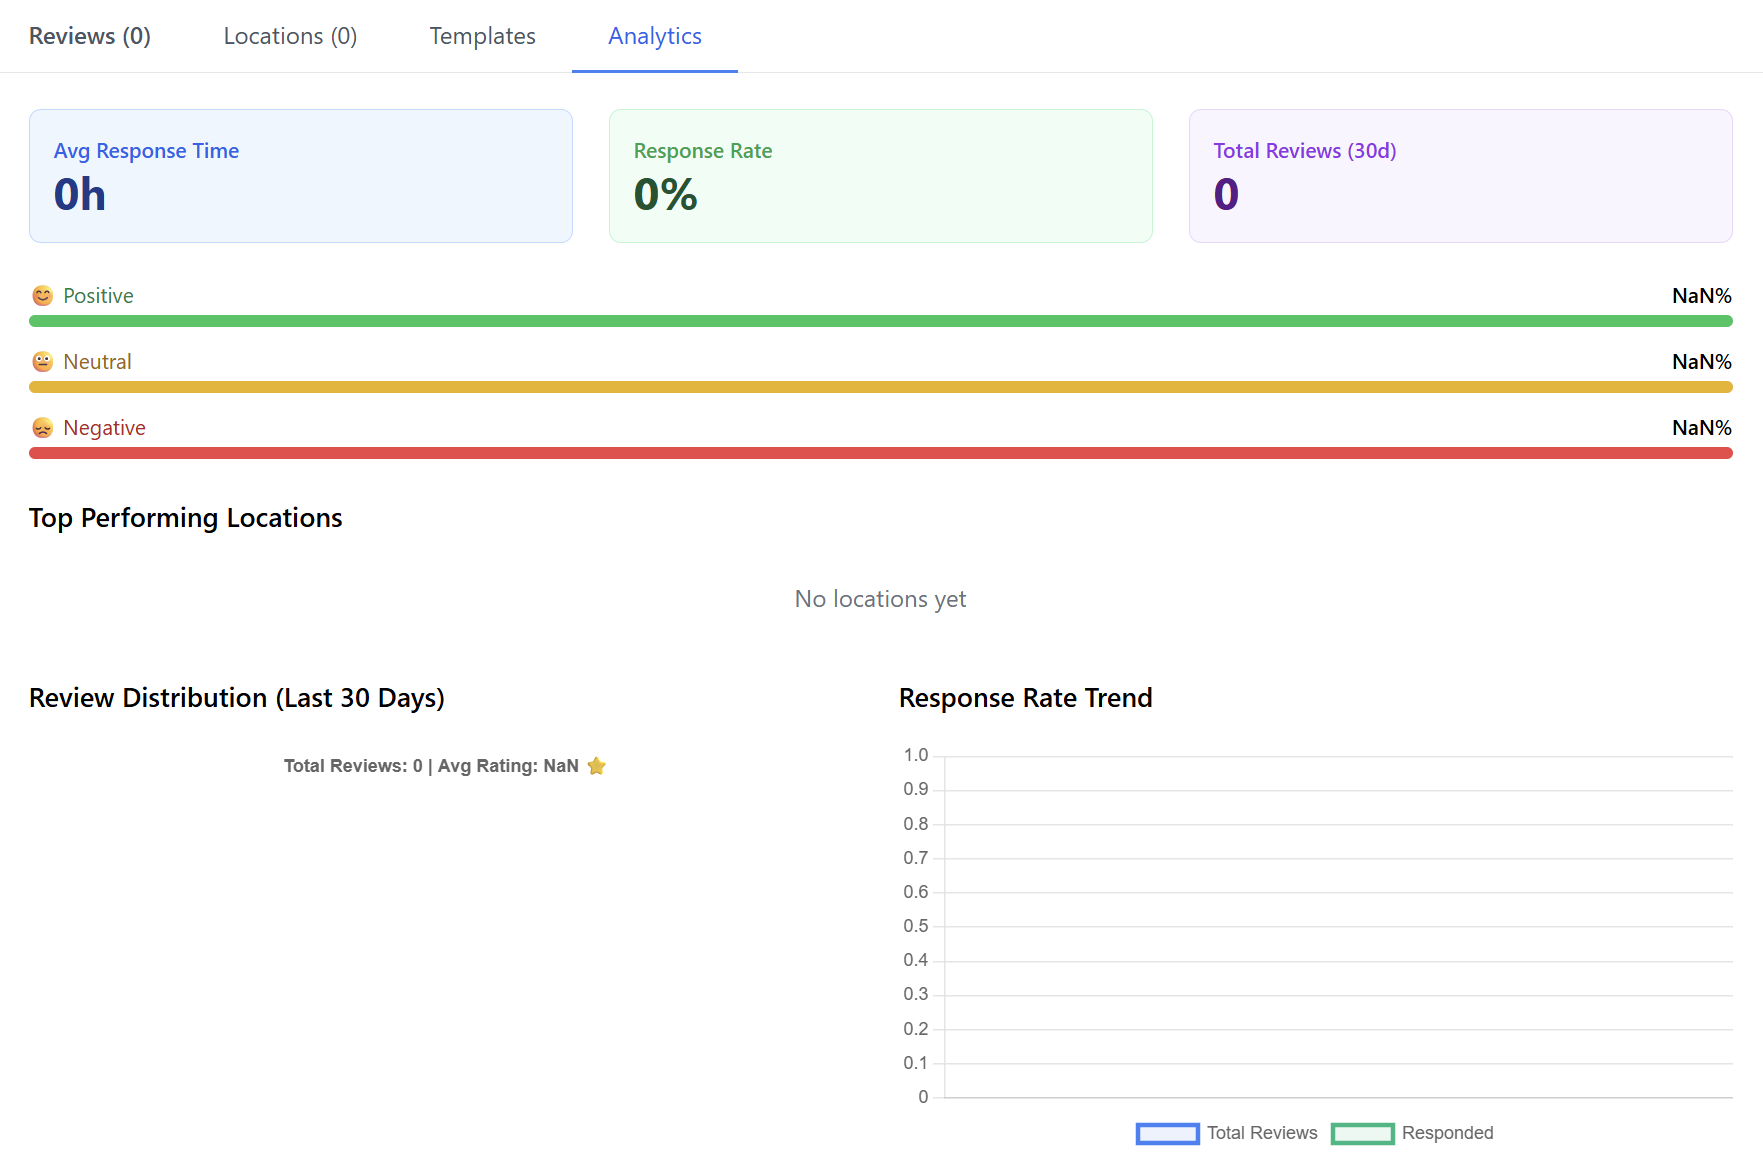
Charts and graphs will appear once you begin receiving reviews.
You’re Ready to Go
After adding your first location and installing the Chrome extension, the AI Review Responder will automatically:
-
Monitor reviews
-
Generate custom responses
-
Email them to you
-
Provide instant posting via Chrome
AI Voice Agent (24/7 Smart Receptionist)
he AI Voice Agent is a professional-grade virtual receptionist that ensures your business never misses a lead. This guide covers how to activate the service as a reseller and how to configure the agent for maximum efficiency.
Part 1: Reseller Activation (Provisioning the Service)
Before your client can use the tool, you must activate it within the Resell Portal.
-
Marketplace: Log in to www.resellportal.com, go to the Marketplace, and select the AI Voice Agent from the Business AI Suite.
-
Assign Client: Choose an existing client or add a new one.
-
Billing Cycle: Select your preferred billing term (Monthly, Quarterly, etc.).
-
Activate: Ensure your wallet has sufficient funds and click Add Service to Client.
-
Onboarding: Your client will receive an automated email with their dashboard login credentials.
Part 2: How the Voice Agent Works (Customer View)
The Voice Agent is an AI-powered system designed to handle inquiries, schedule meetings, and qualify leads.
The Ideal Workflow: Use our Smart Widget on your website. During business hours, the widget displays your live office number. After hours, it automatically switches to show the AI Number. This ensures that while your staff is away, the AI picks up the phone to handle inquiries instantly.
Part 3: Initial Setup & Configuration
1. Choosing Your Permanent Number
When you first open the tool, you will be prompted to choose a phone number.
-
Search by Area Code: Find a local number that fits your business location.
-
⚠️ Important: This number is permanent and cannot be changed or deleted once selected. It will serve as the gateway for your AI Agent.
2. Customizing Your Agent
Click Edit Configuration to define your agent’s personality and knowledge:
-
Basic Info: Set the Business/Agent Name and a custom Welcome Message (e.g., "Hello! You've reached Sunburst Auto Sales, how can I help you today?").
-
Voice Type: Choose a voice persona (Male/Female) that matches your brand tone.
-
-
-
Knowledge Base: Enter your website URL and click Scan. The AI will crawl your site to learn your services, inventory, and FAQs.
-
-
-
-
Custom Knowledge: You can manually add or edit information to ensure the AI has the most up-to-date details not found on your website.
3. Setting Notification Preferences
-
Callback Number: Set a mobile number to receive alerts when a caller requests to speak to a human.
-
Alert Toggles: Choose to be notified via email for every new call, scheduled appointment, or callback request.
Part 4: The 4 Agent Modes
You can set a specific goal for your agent depending on your business needs:
-
📅 Scheduler: The agent’s primary goal is to book appointments. It interacts with the caller to find a preferred date/time, sends an email request to you, and provides a confirmation email to the caller.
-
📋 Collector: The agent focuses on gathering lead data (Name, Email, Phone, and specific project details). This information is sent to you immediately via email.
-
ℹ️ Informer: Ideal for general Q&A. The agent uses your scanned website content to answer frequently asked questions about your hours, location, and services.
-
🎯 Qualifier: The agent asks targeted questions to determine if a caller is a "hot lead" based on your criteria. You receive the qualification results via email.
Part 5: Viewing Call Logs & Transcripts
You can monitor all AI interactions under the Recent Calls section on the main page:
-
AI Summary: A quick bulleted summary of what the call was about.
-
Full Transcript: A word-for-word text record of the conversation.
-
-
Caller Details: View the caller's number and the specific outcome (e.g., "Appointment Scheduled").

-
-
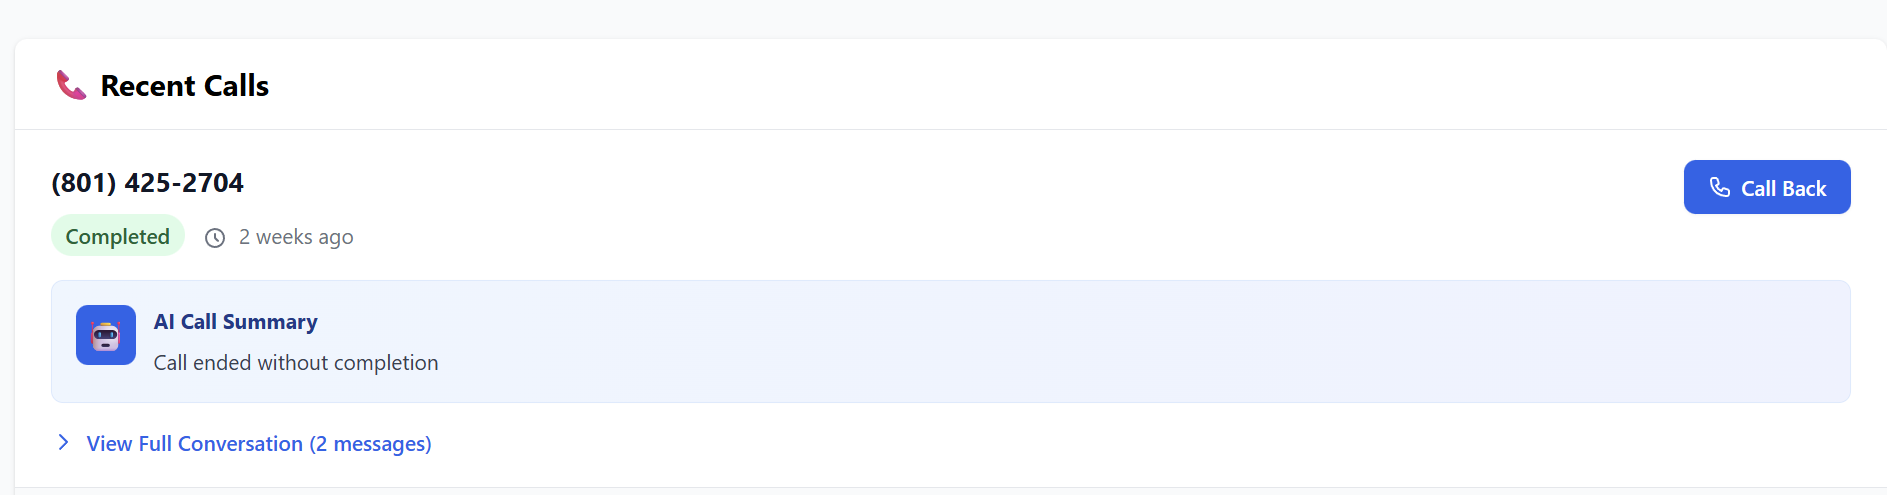
Part 6: Creating the Website Widget
To implement the "Number Switcher" on your website:
-
Create Widget: Click the "Create Widget" button.

-
Configuration:
-
Enter the Live Number (for business hours).
-
The AI Number is auto-filled from your account.
-
Set your Business Hours and Timezone.
-
Select a Color Theme to match your website design.

-
-
Deployment: Click Create Widget, then click Copy Code. Paste this HTML snippet into your website's footer or header.

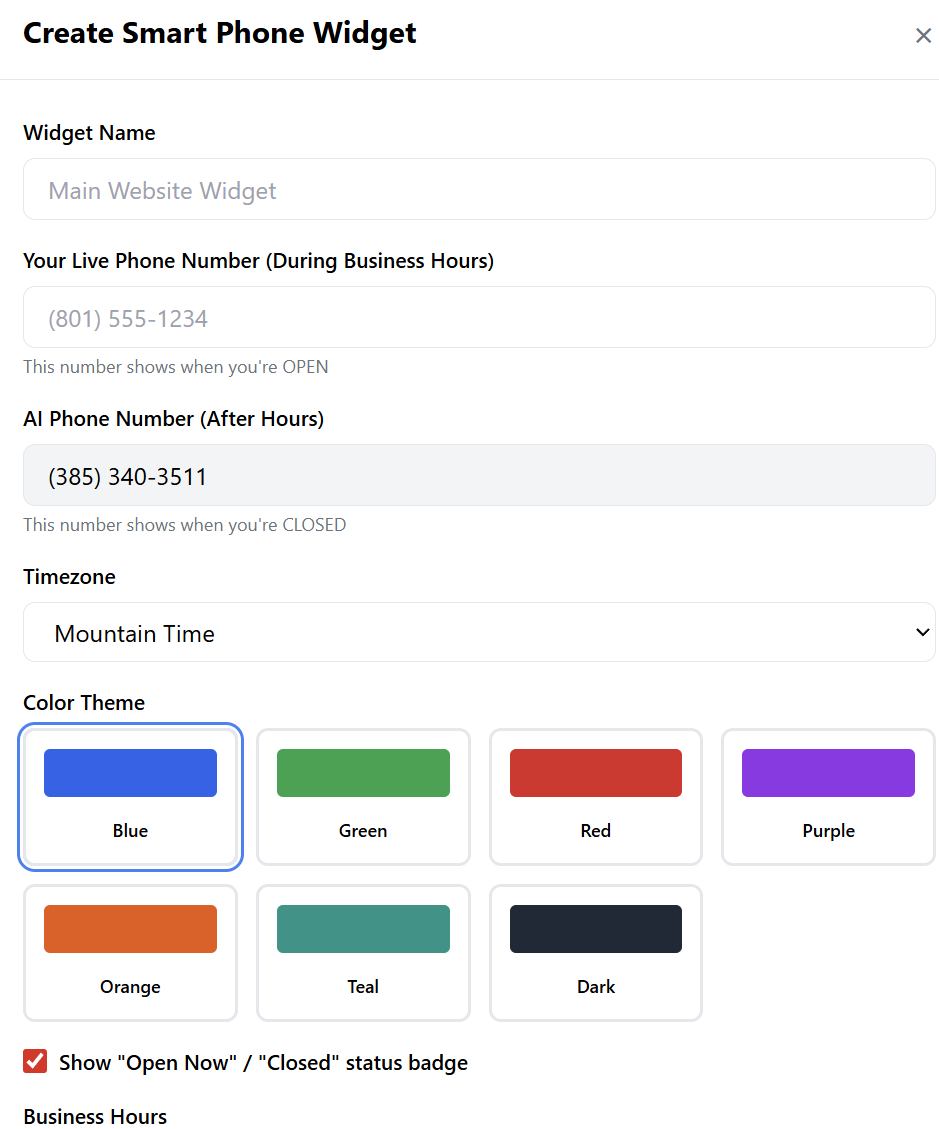
The widget will now automatically toggle between your live staff and your AI Agent based on the time of day.
Summary for Resellers:
The AI Voice Agent is a "sticky" service with high retention. By helping your clients set up their Knowledge Base and Widget, you provide them with a 24/7 sales force that never takes a day off.
AI Contract & Document Manager
The AI Contract & Document Manager is an intelligent repository that does more than just store files. Using advanced AI, it scans uploaded documents to extract key dates, financial values, and involved parties, providing a high-level overview of a business's contractual health.
1. The Executive Dashboard
Upon login, users see a high-level summary of their document portfolio:
-
Key Metrics: View the Total Files stored, number of Active Contracts being tracked, and a countdown of items Expiring Soon.

-
Total Portfolio Value: The AI calculates the total financial weight of all active contracts, giving businesses an instant view of their committed spend or revenue.
-
AI Insights Bar: This smart notification area flags urgent alerts and high-priority items (e.g., "0 urgent alerts, 2 high priority items") so users know exactly where to focus their attention.

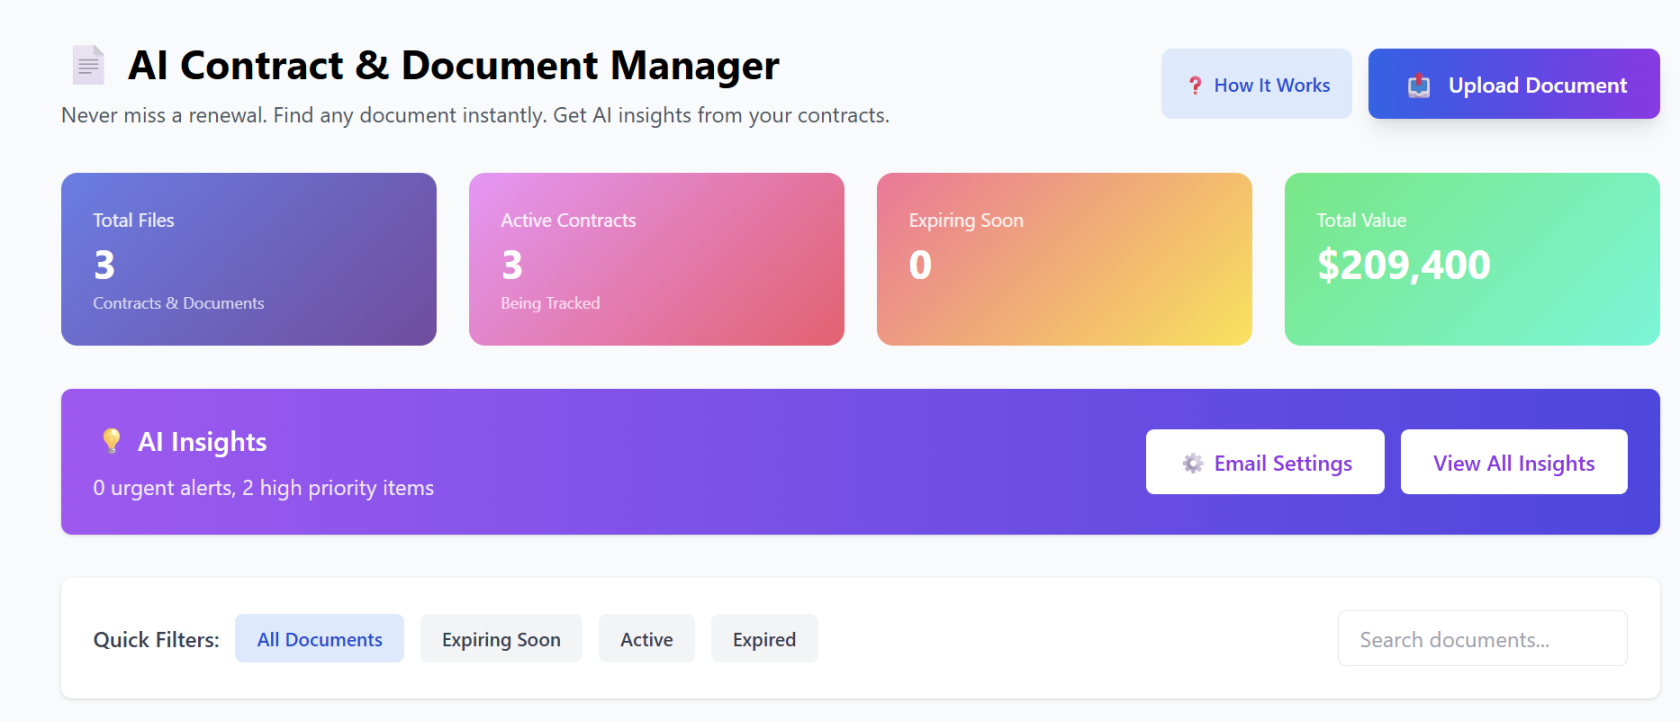
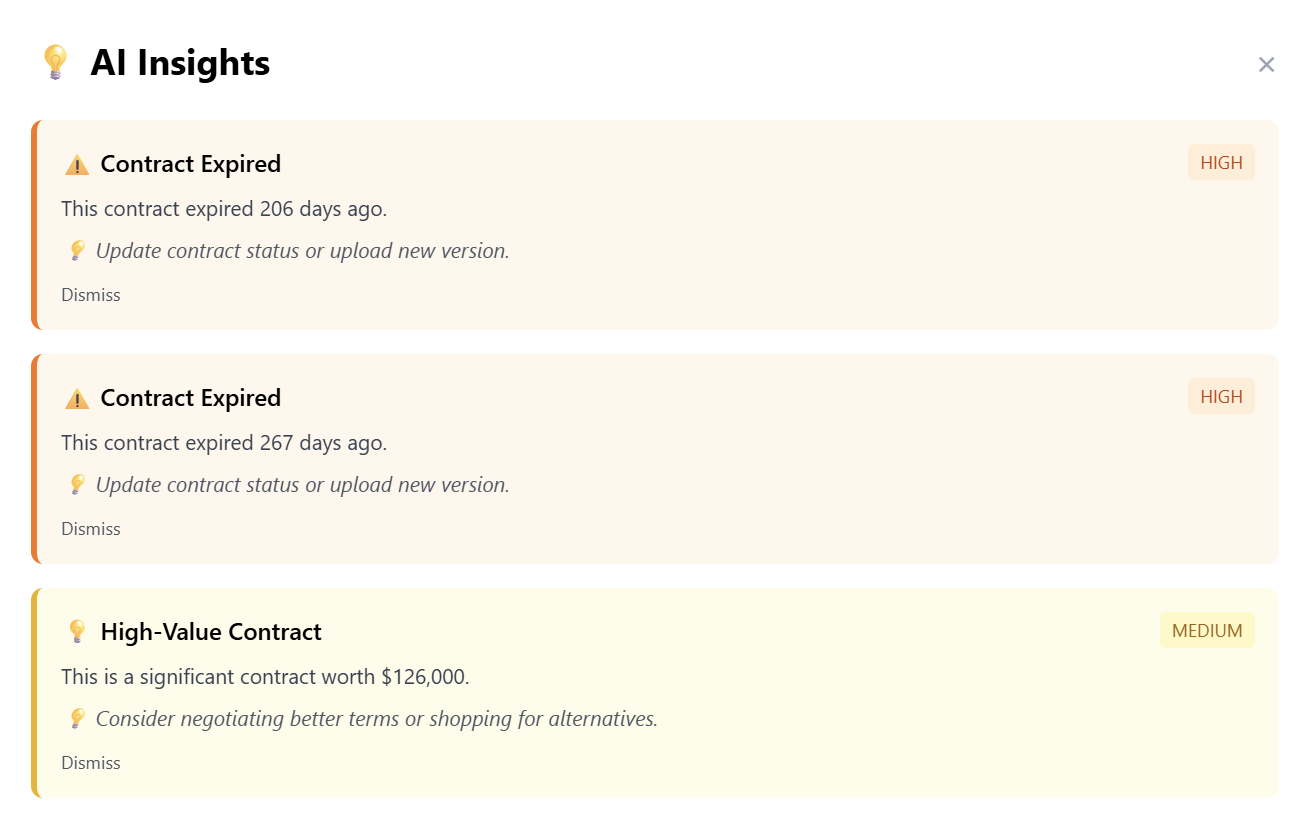
2. Document Organization & Categories
To keep workflows organized, the tool provides a robust categorization system. Users can view documents by specific industry types:
-
Predefined Categories: Including Software & Subscriptions, Leases & Rentals, Vendor Contracts, Employee Contracts, Insurance, and more.

-
Custom Categories: Users are not limited to the defaults. Click "+ Add Category" to create custom folders tailored to a specific business niche.

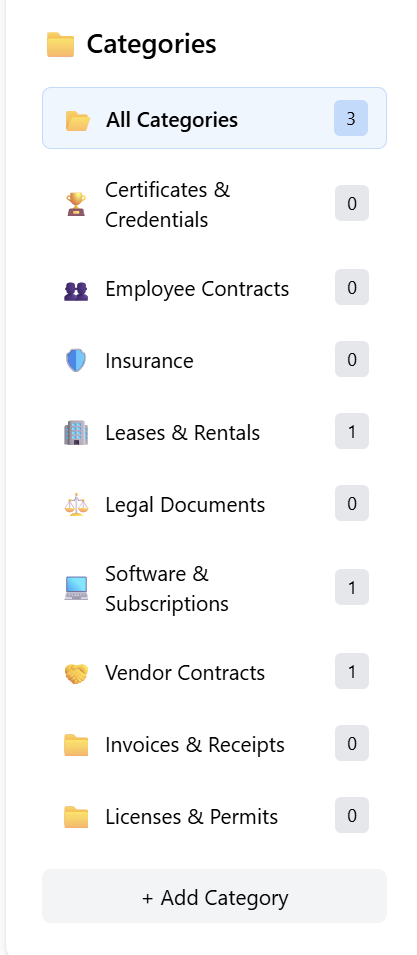
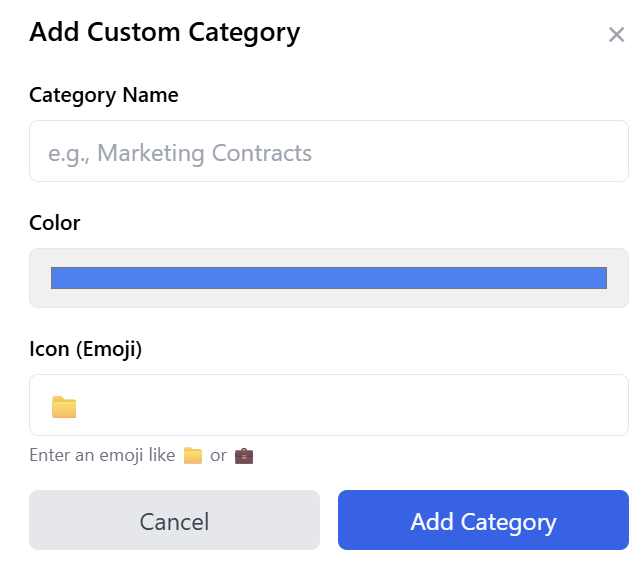
3. Intelligent Document Processing
When a user clicks "Upload Document," the AI goes to work. For every file uploaded (such as a .txt, .pdf, or .docx), the system automatically identifies: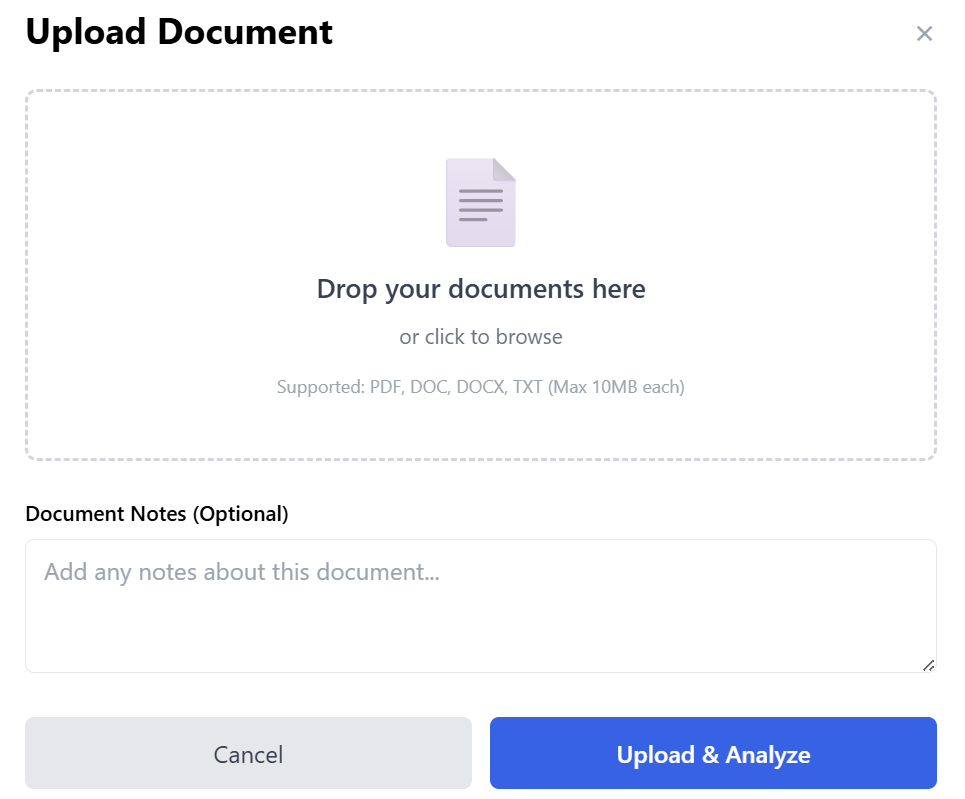
-
Status: Automatically marks documents as Active or Expired based on the date.

-
Summary: Provides a brief AI-generated snippet of what the contract is about.
-
Contract Intelligence: Extracts the Expiration Date, Total Value, and the Parties involved.
-
Management Actions: Users can Download the original file for reference or Delete it if it is no longer needed.

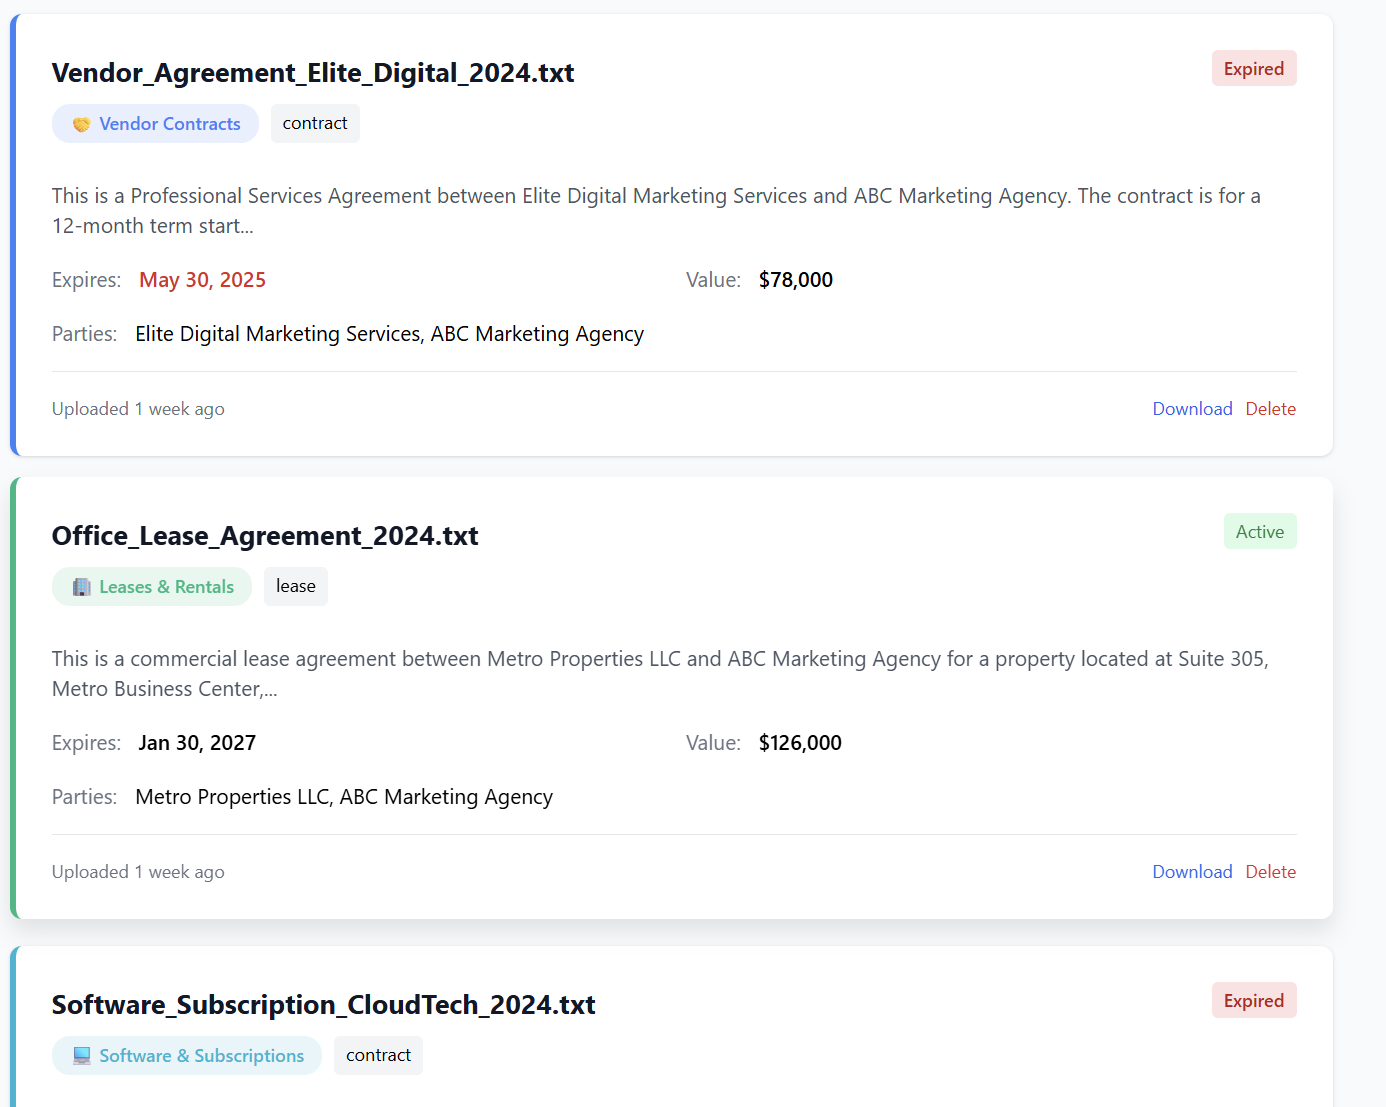
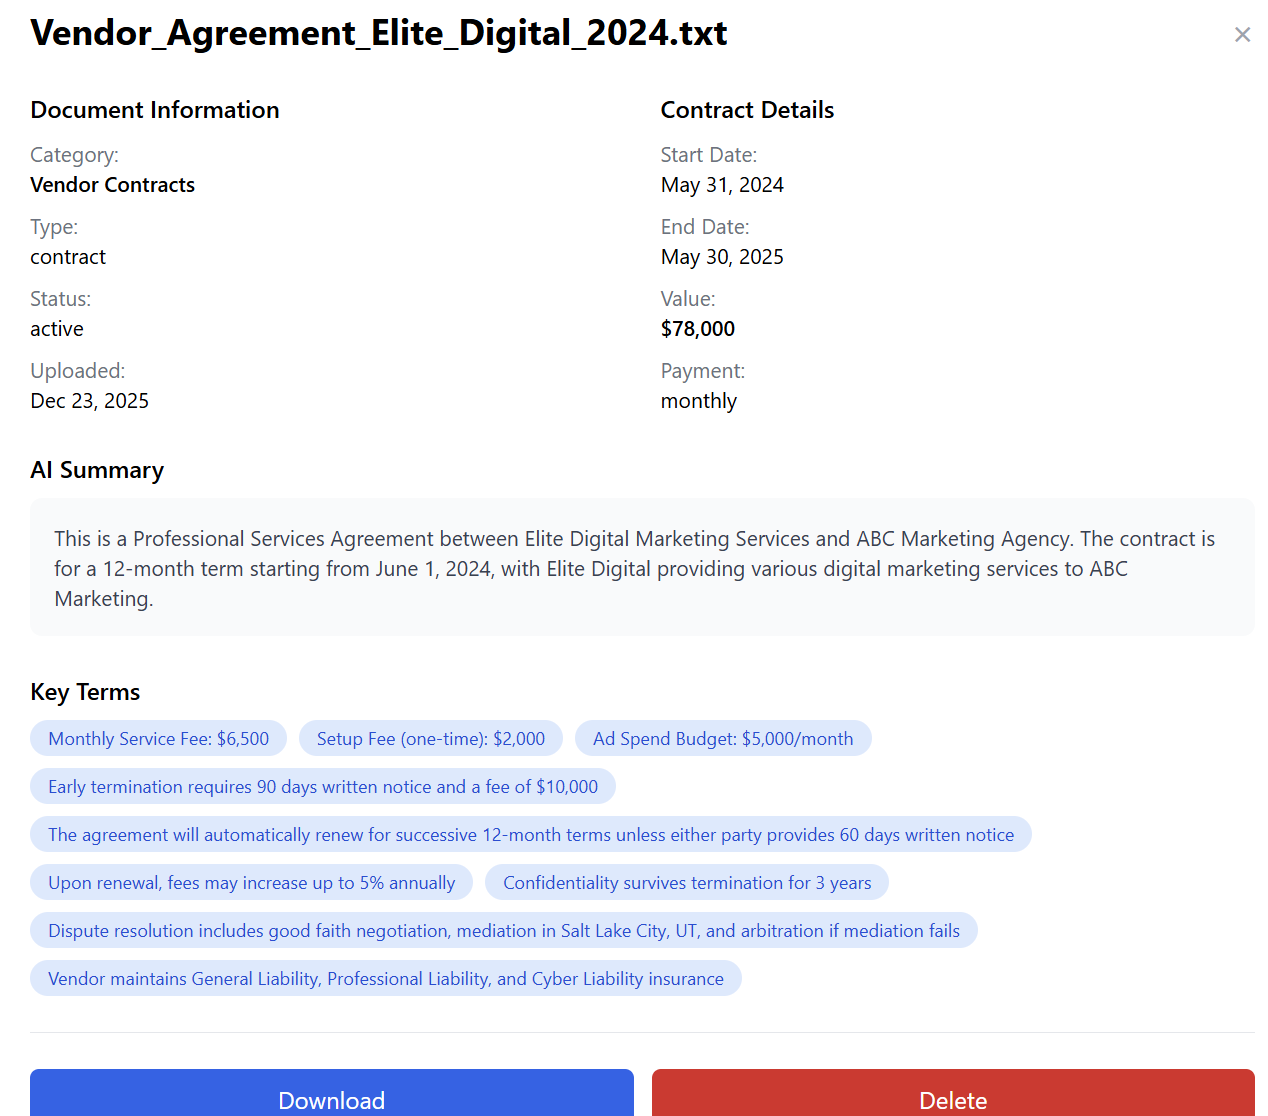
4. Email Notification Settings (Automation)
The true power of this tool lies in its "Set and Forget" automation. Click on "Email Settings" to configure how the business stays informed:
-
Expiration Reminders: Set the system to email you a specific number of days before a contract or license expires (e.g., 30 days before).
-
Auto-Renewal Alerts: Get warned before a contract automatically renews, giving the business time to renegotiate or cancel.
-
Weekly Summary: Receive a weekly digest (e.g., every Monday) that summarizes all expiring contracts and AI insights for the week ahead.
-
Upload Confirmations: Receive an email as soon as the AI has finished processing and "reading" a newly uploaded document.

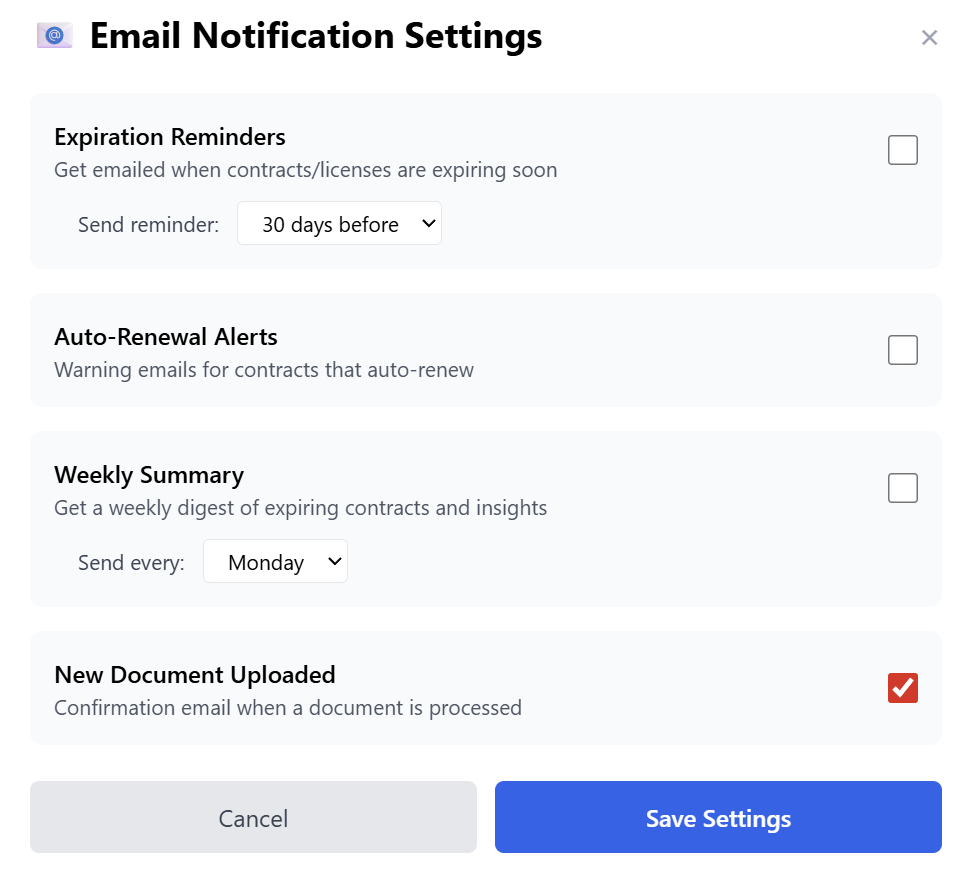
5. Quick Filters & Search
As the document library grows, finding specific information remains easy:
-
Quick Filters: Instantly toggle between All Documents, Expiring Soon, Active, and Expired.
-
Smart Search: Use the search bar to find documents by filename, party name, or category.


Reseller Strategy: Why Sell This?
The AI Contract & Document Manager is an essential "peace of mind" tool.
-
Target Audience: Perfect for property managers (Leases), IT companies (Software Subscriptions), and general contractors (Vendor/Employee Agreements).
-
Value Proposition: Tell your clients: "One missed renewal can cost you thousands in penalties or service interruptions. This tool pays for itself by ensuring that never happens."
Ready to provision? Activate the AI Contract & Document Manager in the Marketplace on www.resellportal.com.
Plugin & Theme White Label
Whitelabel and deploy a suite of premium tools under your own brand name.
-
Navigate to Marketplace: Go to the Wholesale Marketplace tab.
-
Select Client: Choose Add New or an Existing Client.
-
Choose Product: Select WordPress Plugin Installer Pack.
-
Configure Branding:
-
Plugin Name: How the tool will appear in the client's WordPress dashboard.
-
Description: A short summary of the plugin’s functionality.
-
Author Name: Set this to your brand name (e.g., Your Agency).
-
Logo URL: Link to an icon image for the plugin branding.
-
Billing Cycle: Select the renewal frequency.
-
-
Activate: Click Add Service to Client to provision the installer.
-
Manage: Go to the Services tab to view login details or manage the subscription.
Note: Ensure your Reseller Wallet is topped up above $20.00 before activating this service.
Installing and Using the White Label Plugin on WordPress
After generating the white-labeled plugin in ResellPortal and receiving the ZIP file by email from Buy Applications, the next step is to install it on your client’s WordPress site. This section walks you through the full installation and activation process, as well as what to expect once it's live.
Step 1: Download the Plugin ZIP File
-
Check your email inbox (the one linked to your reseller account).
-
Look for an email from us with the subject line including your plugin name.
-
Download the attached ZIP file — this is your custom-branded plugin.

Step 2: Install the Plugin on WordPress
-
Log in to your WordPress admin dashboard (yourwebsite.com/wp-admin).
-
In the left-hand navigation menu, click on Plugins → Add New.

-
At the top of the screen, click the “Upload Plugin” button.

-
Click “Choose File”, select the ZIP file you received via email, and then click “Install Now”.

-
Wait for the upload and installation to complete.
-
Once done, click the “Activate Plugin” button that appears.


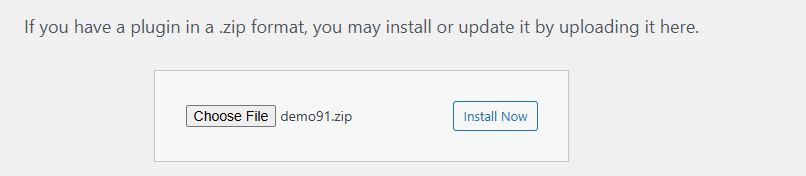
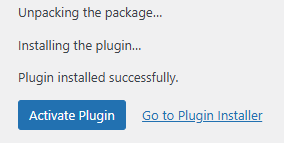
✅ You should now see your white-labeled plugin appear in the left navigation bar of the dashboard, using the custom name, logo, and description you configured earlier in ResellPortal.
Step 3: Access the Plugin Dashboard
-
Click on the newly added plugin in the WordPress sidebar.
-
You’ll be taken to the plugin’s custom dashboard screen.

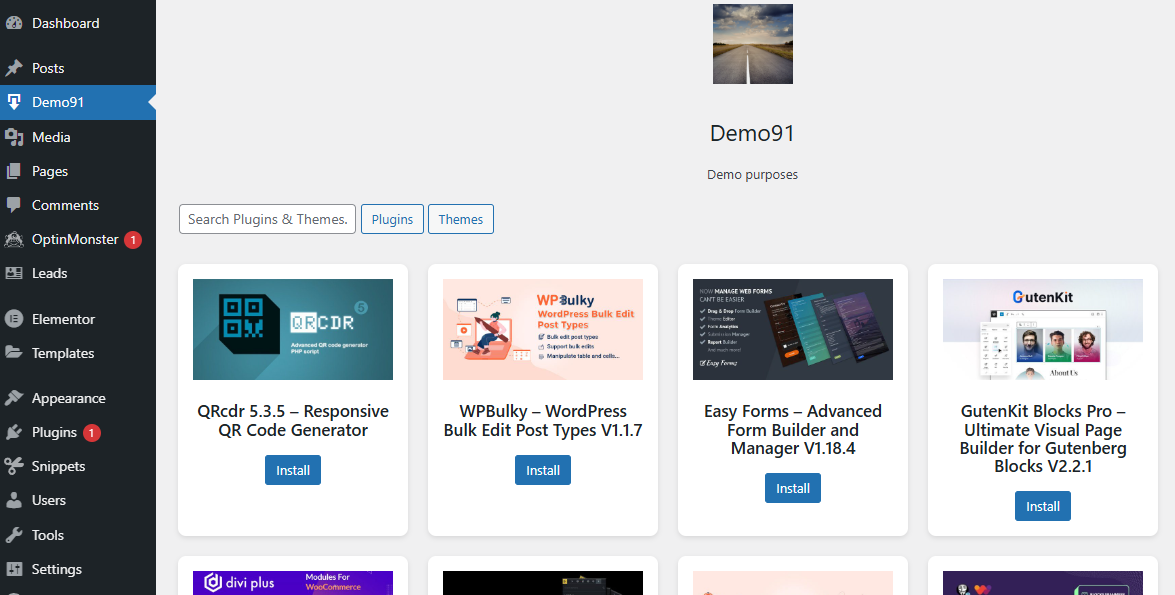
Here you’ll see:
-
Your custom branding: Plugin name, logo, author name, and description.
-
A table interface listing over 1500+ WordPress plugins and themes available for installation.
Step 4: Download Plugins & Themes
-
From the dashboard table, browse or search for the plugin/theme you want to install.
-
Each item includes a download button, version info, and a brief description.
-
Click “install” on any item to instantly install it into your WordPress environment.
🛠 These downloads come with automatic update support, powered by the licensing engine activated via ResellPortal.
Notes for Resellers
-
The plugin only works on the domain it was generated for.
-
You can manage licenses and branding anytime from your ResellPortal dashboard under the Subscriptions tab.
-
Updates for the 1500+ items are automatically pulled in as long as the subscription remains active.
Social Media Automation
Streamline your client's social media presence with automated posting and engagement tools.
-
Navigate to Marketplace: Go to the Wholesale Marketplace tab.
-
Select Client: Choose Add New or an Existing Client.
-
Choose Product: Select Social Media Automation.
-
Configure Account: Simply select your preferred Billing Cycle (Monthly, Quarterly, etc.).
-
Activate: Click Add Service to Client to provision the automation tool.
-
Manage: Go to the Services tab to access the automation dashboard and manage the subscription.
Note: Always ensure your Reseller Wallet is topped up above $20.00 to successfully activate new services.
Using Social Media Automation
The Social Media Marketing Suite is a powerful, all-in-one automation platform designed for creators, agencies, and brands. As a reseller, you can provide your clients with a high-end tool to simplify their publishing, automate content creation with AI, and manage multiple platforms from a single dashboard.
Part 1: How to Resell & Activate
Our system is designed to be "plug-and-play." You handle the client relationship; we handle the technology and hosting.
1. Simple Activation Process
-
Choose a Subscription Plan: In the Resell Portal Marketplace, select a billing cycle (Monthly, Quarterly, Bi-Annual, or Annual) that fits your client’s needs.
-
Activate via Marketplace: Simply enter your client’s email address. The system instantly provisions their isolated, private social media toolset.
-
Automated Onboarding: Once activated, your client receives a branded welcome email with their unique login credentials and links to tutorials.
2. Profit & Growth
-
Recurring Revenue: Set your own retail pricing to ensure healthy monthly margins.
-
Value-Added Services: Increase your revenue by offering managed services, such as content strategy, AI prompt engineering, or team training using the platform.
Part 2: Platform Walkthrough (The User Experience)
Once your client logs into their dedicated dashboard, they have access to a suite of professional automation tools.
1. The Dashboard
Upon login, users are greeted with a Welcome Dashboard providing a snapshot of their activity, content status, and account type.
2. AI Publishing (Automated Content Creation)
This feature allows users to automate the entire lifecycle of a post—from idea to publication.
-
Create a Campaign: Users can name a campaign, select their social channel, and input a Prompt List.

-
Advanced Options:
-
Media & Language: Choose to include images and set the target language.
-
Tone & Creativity: Set the "Tone of Voice" (Friendly, Polite, Formal, etc.) and the "Creativity Level" (Economic to Premium).
-
Hashtags: Automatically generate a specific number of hashtags for every post.

-
-
Scheduling: Set the regularity of the campaign by choosing specific dates, days, and times for the AI to publish automatically.


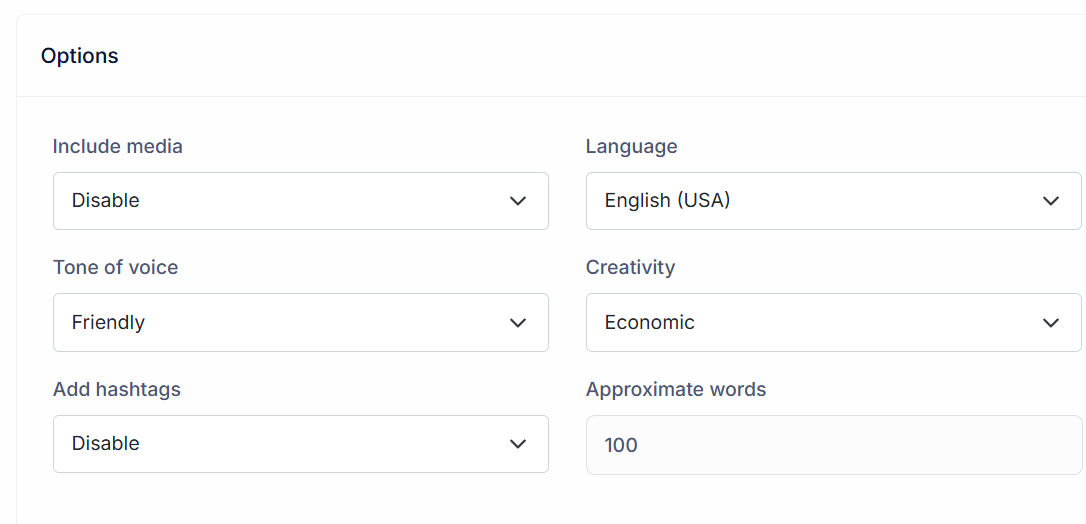
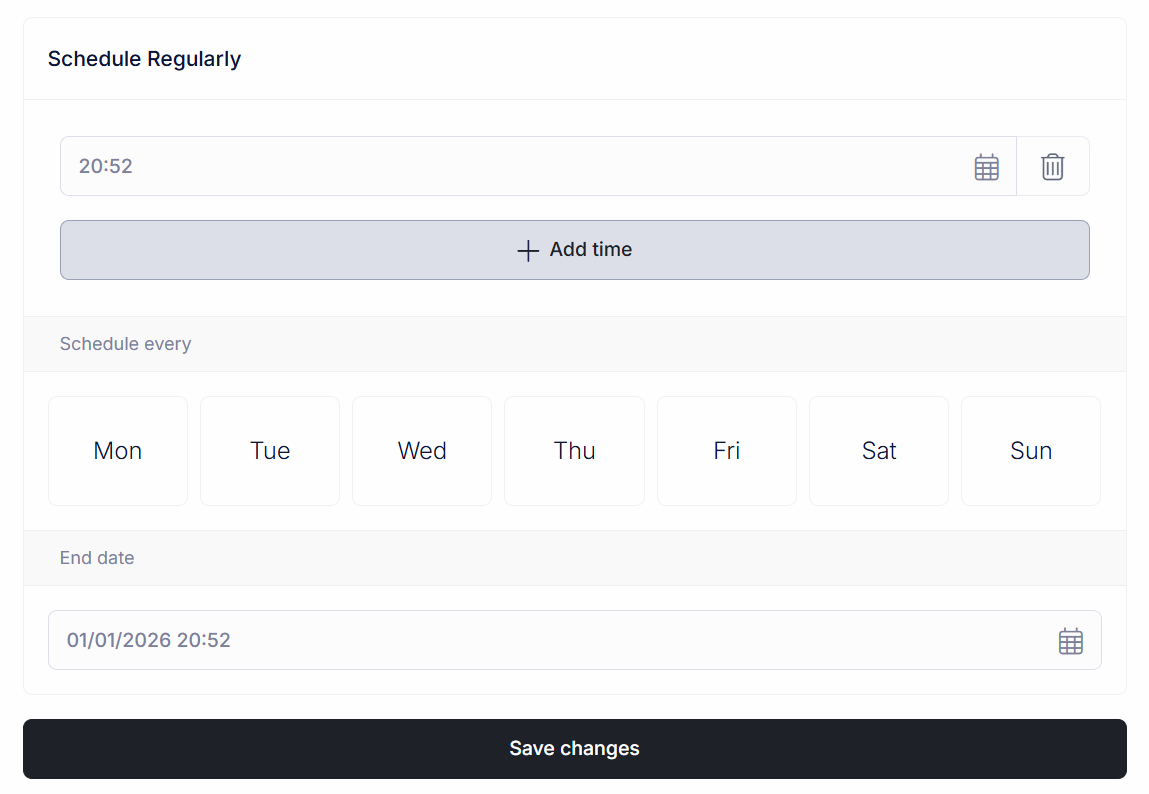
3. Bulk Posts & RSS Schedules
For users who manage high-volume content:
-
Bulk Posts: Efficiently upload dozens of posts at once. Users can download a Bulk Template, upload a media CSV file, and set an Interval per post (in minutes) to avoid spam filters.

-
RSS Schedules: Automate posting from a blog or news site. Users simply enter an RSS URL, customize link settings (or referral codes), and set a schedule to pull content automatically.

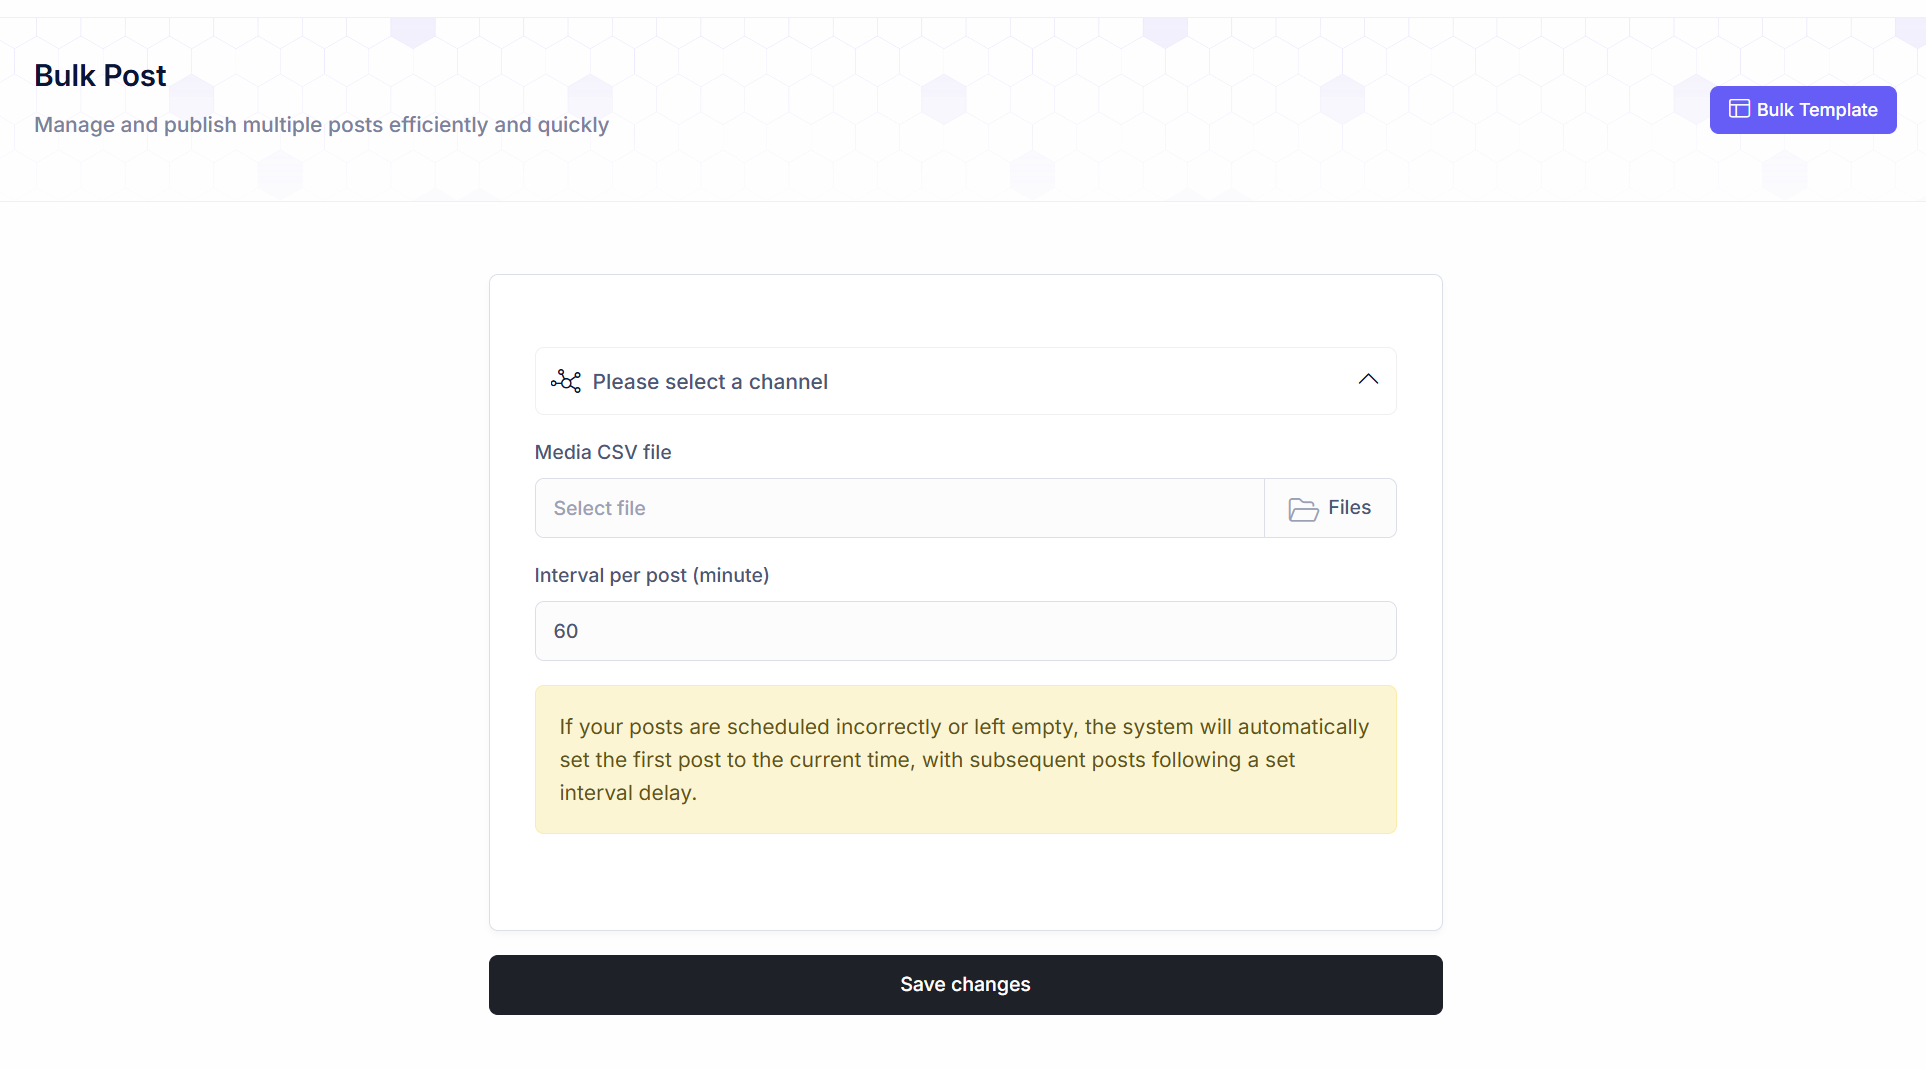
4. Creative AI Tools & Media Search
-
AI Contents: A dedicated space for creative generation. Users choose from a library of AI Templates or create manual prompts. By adjusting language, tone, and word count, the AI generates high-quality copy instantly.

-
Search Media Online: Users can browse and download high-quality images and videos directly within the platform, eliminating the need for external stock photo subscriptions.

-
AI Captions: A library where users can organize, save, and reuse their favorite high-performing captions.

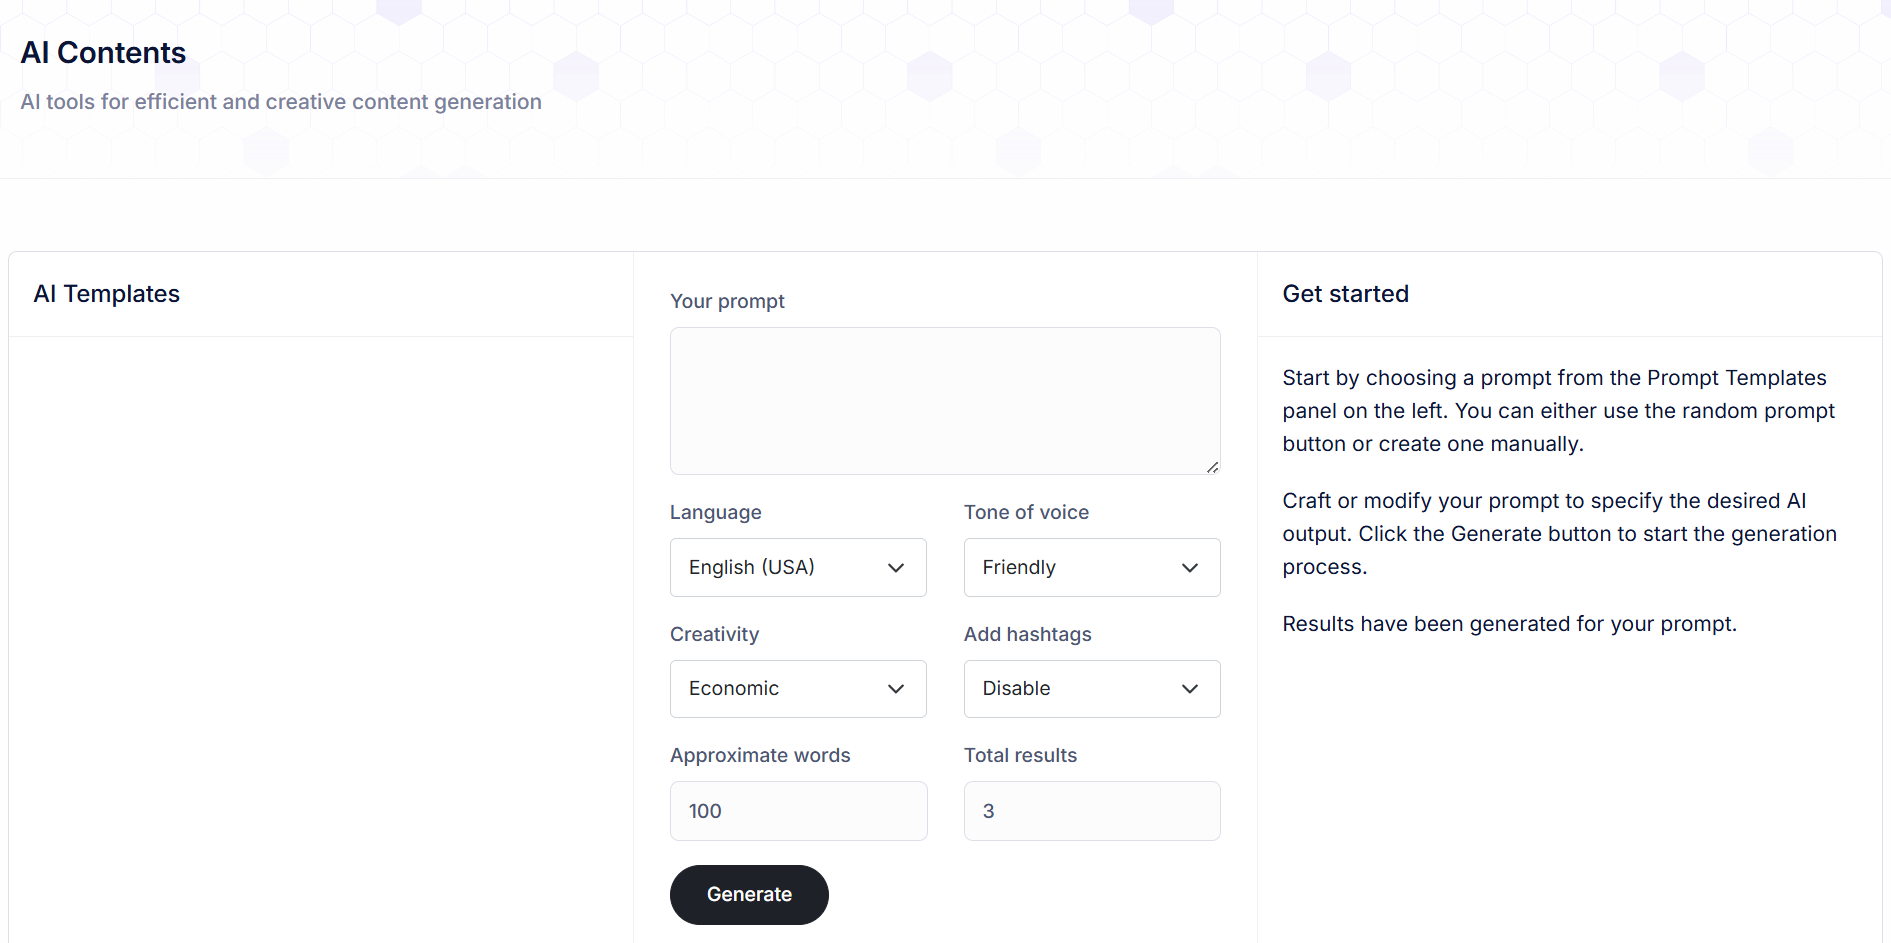
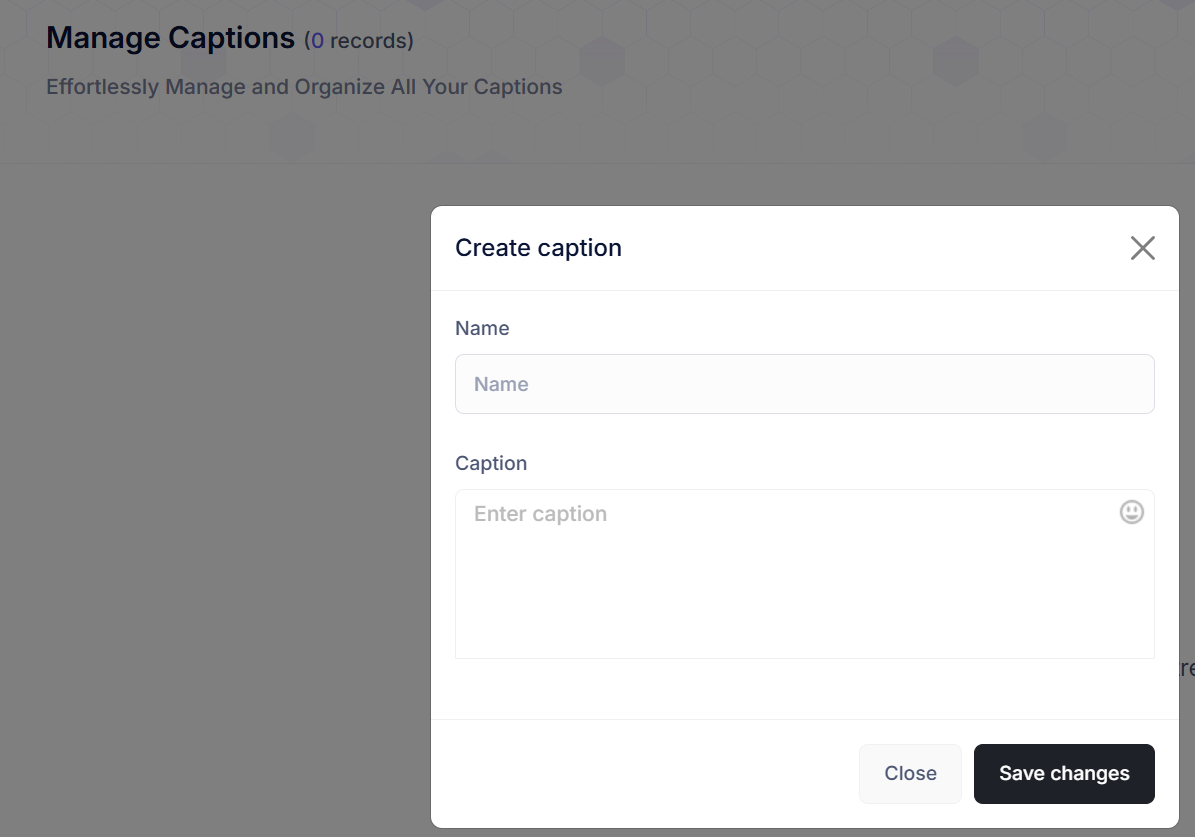
5. Management & Collaboration
-
Files: A centralized file manager to organize images and videos into folders for easy access.
-
Teams: Enables seamless collaboration. Clients can provide shared access to their team members and share resources within the same dashboard.
-
Watermark: Protect brand identity by automatically overlaying a subtle logo or text on all image content.

-
Groups: Organize social media accounts into groups (e.g., "Real Estate Clients" or "Beauty Brand") for faster publishing.
-
Proxies: For advanced users and agencies, the platform allows the management of reliable proxies to ensure high-performance, secure connections to social platforms.

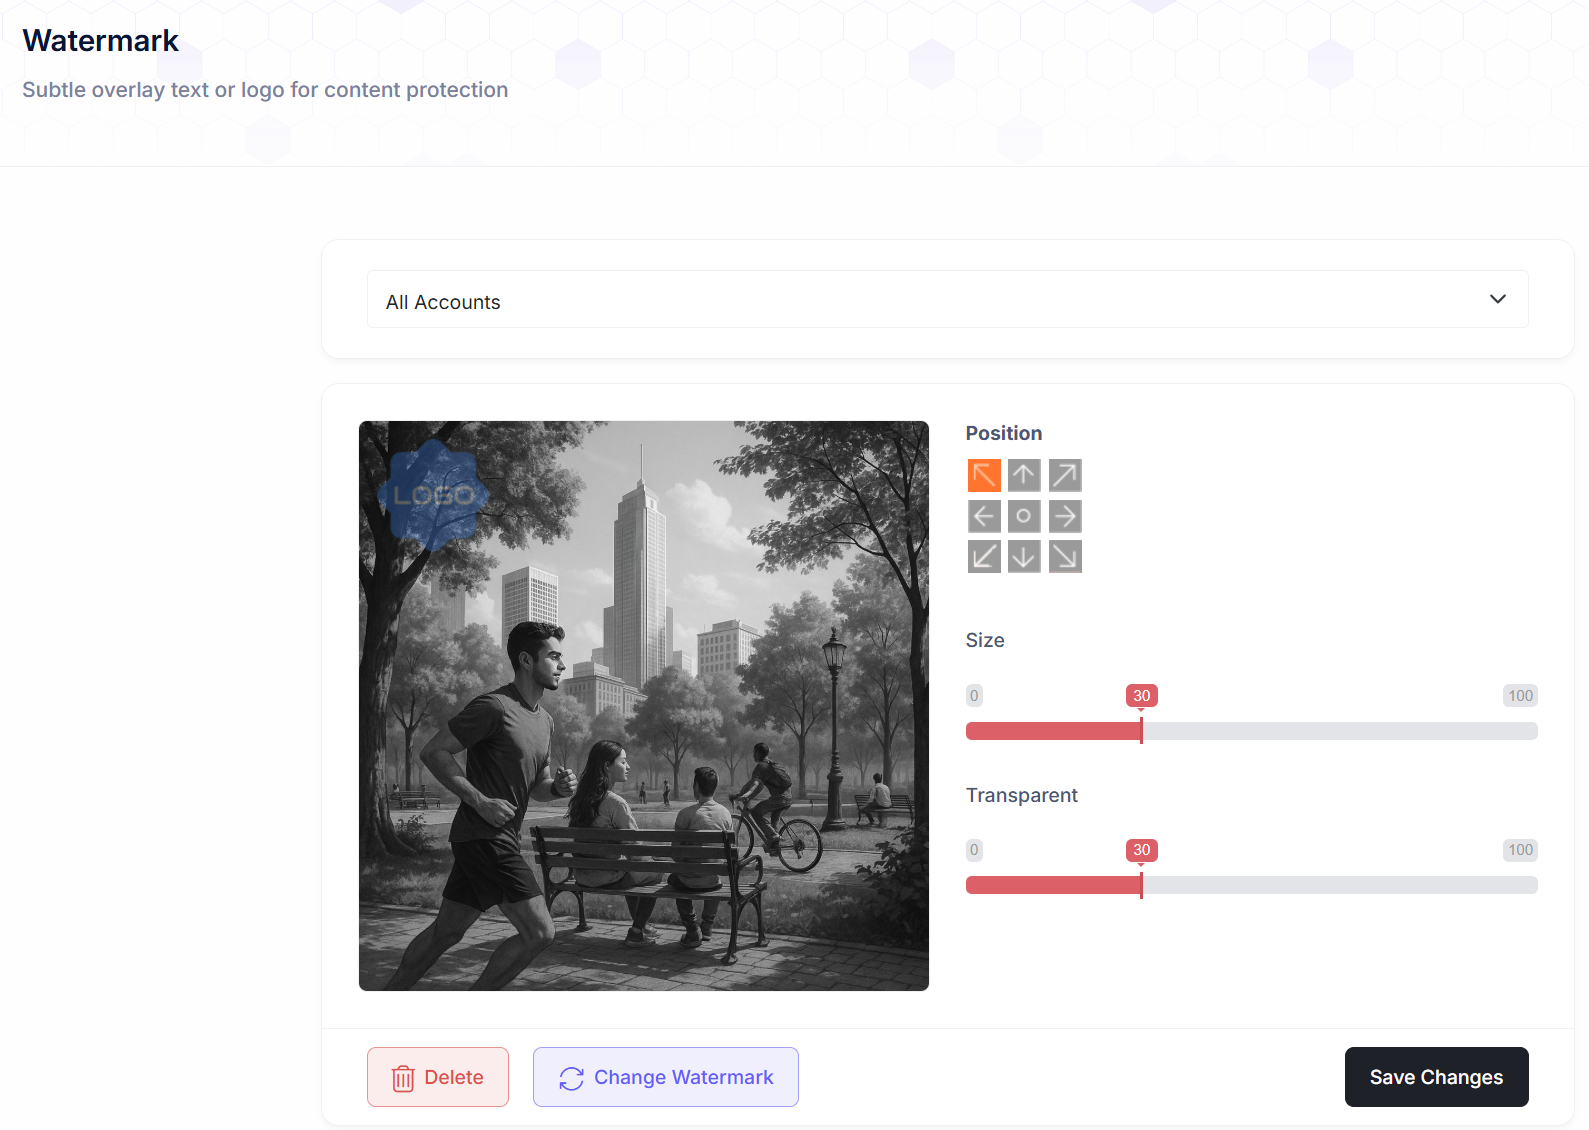
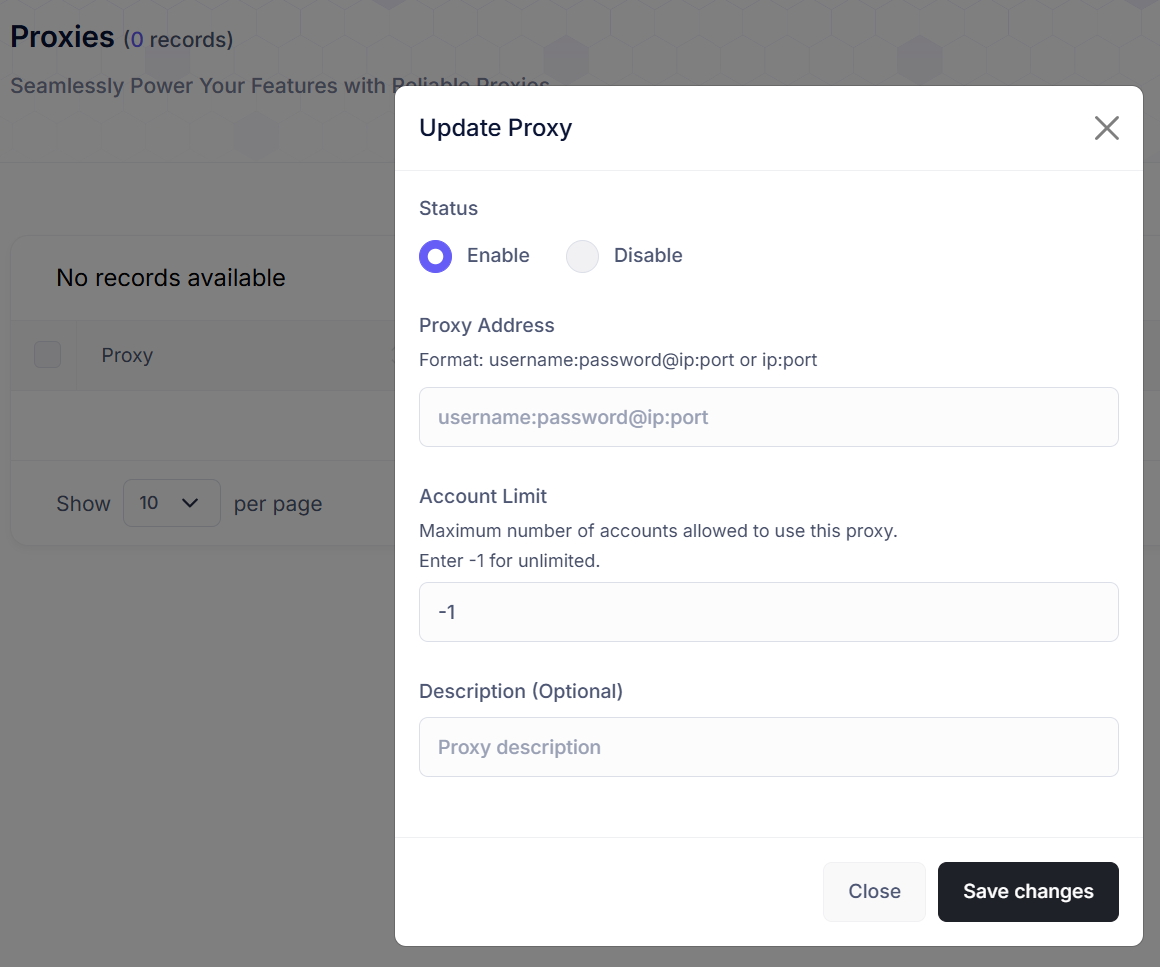
Summary for Resellers:
The Social Media Marketing Suite is more than just a scheduler; it is an AI-driven content factory. By offering this to your clients, you are providing them with a tool that saves hours of manual work every week.
Ready to start? Visit the Marketplace on www.resellportal.com to activate your first client.
Invoicing with AI
Deploy a professional, AI-powered invoicing and billing platform for your clients.
-
Navigate to Marketplace: Go to the Wholesale Marketplace tab.
-
Select Client: Choose Add New or an Existing Client.
-
Choose Product: Select Invoicing with AI.
-
Configure Account:
-
Subdomain: Enter the desired address for the client’s portal (e.g., billing.clientbrand.com).
-
Business Name: Enter the client's official company name.
-
Brand Color: Select a primary color to match the client's brand.
-
Logo URL: Provide a link to the company logo for branded invoices.
-
Billing Cycle: Select the renewal frequency.
-
-
Activate: Click Add Service to Client to provision the platform instantly.
-
Manage: Go to the Services tab to view login credentials and manage the subscription.
Note: Always ensure your Reseller Wallet is topped up above $20.00 to successfully activate new services.
Using Invoicing with AI
Help your clients move from "work done" to "payment received" faster than ever. This guide walks you through the administrative dashboard, the creation of AI-powered documents, and the essential settings to brand your experience.
1. The Command Center (Dashboard)
Upon logging in, users are presented with a high-level overview of their business health. The dashboard is designed for clarity and immediate action.
-
Financial Metrics: At a glance, view revenue for This Month, This Year, and track the health of your accounts receivable with Unpaid and Overdue status cards.
-
Search & Filter: Quickly locate specific transactions by searching for client names or invoice numbers. You can also filter records by status (Draft, Sent, Paid, etc.) or specific date ranges.
-
Quick Action Buttons: Large, intuitive buttons allow for the one-click creation of a New Estimate or New Invoice.

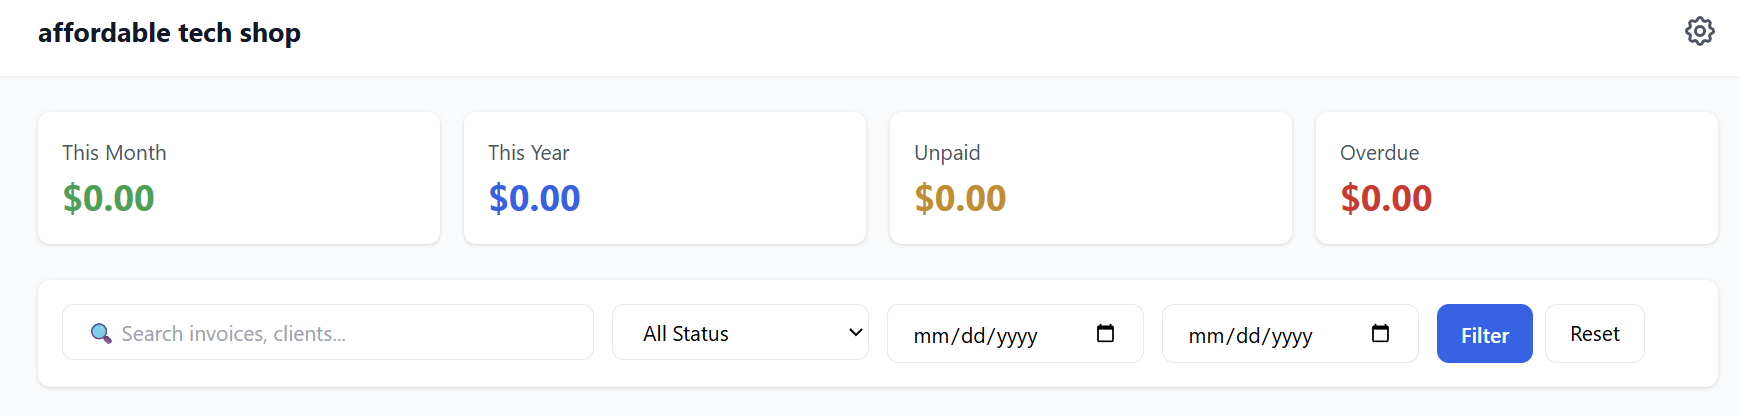
2. Creating Professional Estimates
Estimates (quotes) allow your clients to pitch their services professionally. The creation process is streamlined into three logical sections:

Step 1: Client Selection
-
Existing Clients: Select a client from the dropdown menu to auto-populate their details.
-
New Clients: Click "Add New Client" to create a fresh record on-the-fly without leaving the estimate screen.

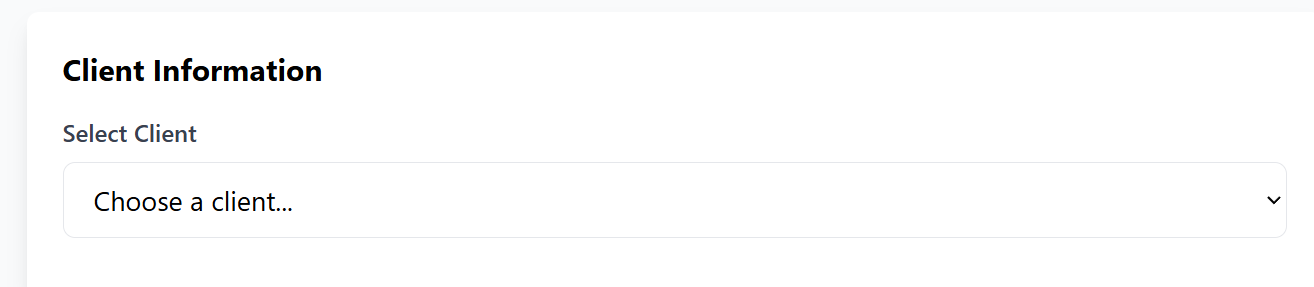
Step 2: Line Items & AI Smart Pricing
This is the platform’s standout feature. Users can add multiple line items for labor, parts, or services.
-
AI Smart Pricing Assistant: When adding an item, users can activate the AI tool. By entering a job description, the AI analyzes market data, location, and complexity to suggest an accurate, competitive price.
-
Customization: Users can manually override any AI suggestion to fit their specific business needs.

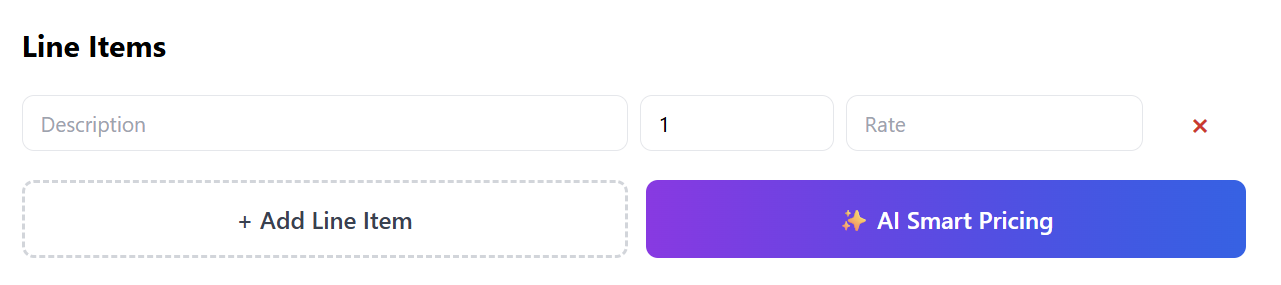
Step 3: Review & Finalize
-
Totals & Tax: The system automatically calculates the Subtotal and Total. Users can set custom Tax Rates per estimate.
-
Notes & Terms: Add personalized notes, payment terms, or special instructions to the footer of the document.
-
Recurring Option: Toggle the "Make Recurring" switch to automatically generate this document on a weekly, monthly, or yearly basis—perfect for maintenance contracts or retainers.

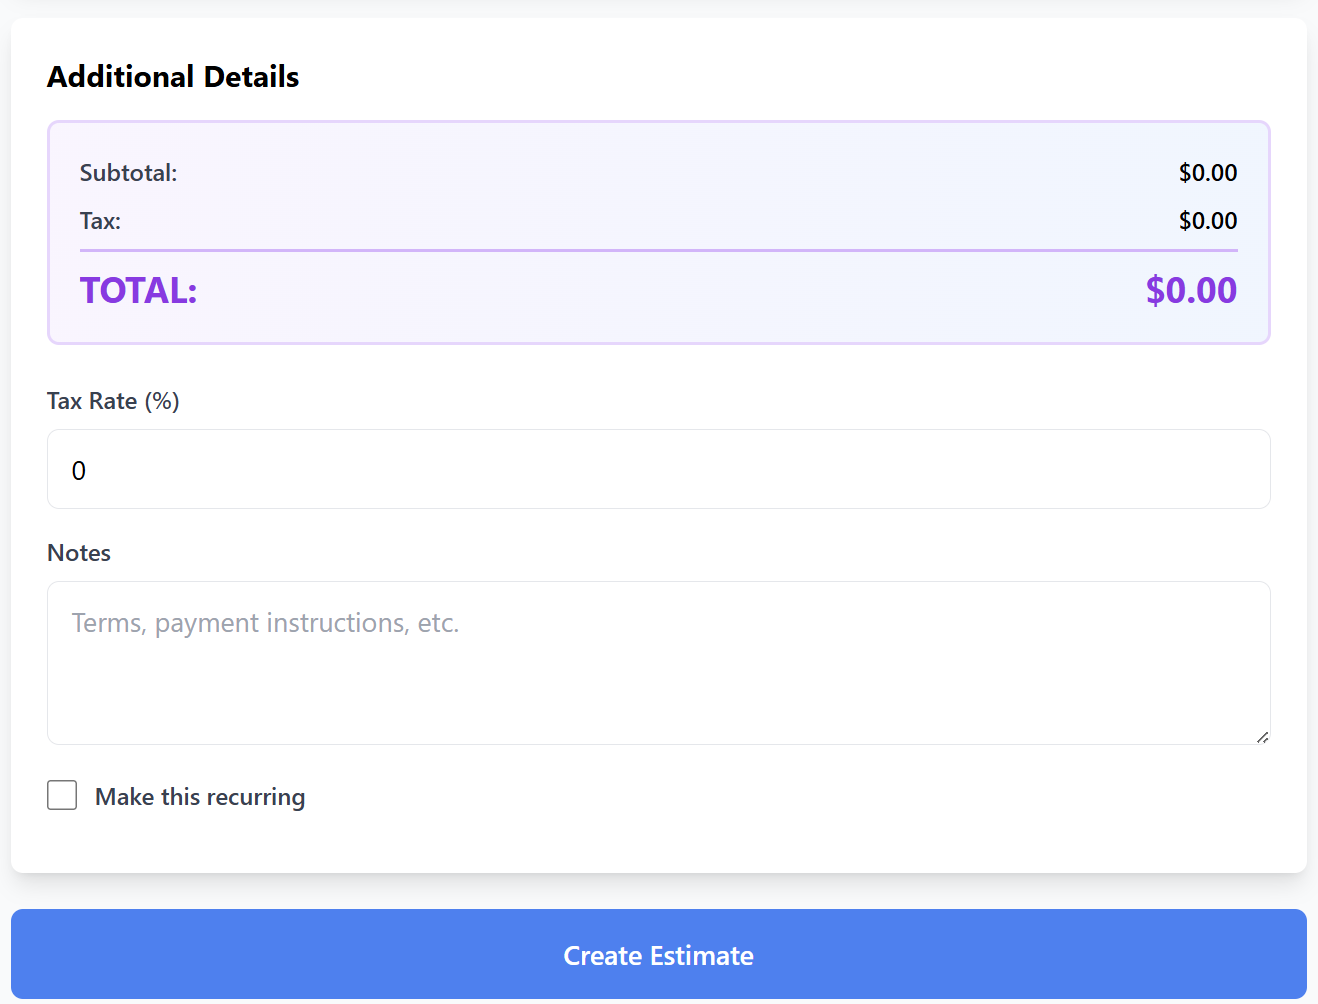
3. Creating & Managing Invoices
The process for creating a New Invoice is identical to the estimate process, ensuring a zero-learning curve for your users.
-
Bill for Work Done: Select the client, add items (using AI pricing if needed), and send the invoice instantly.

-
Estimate-to-Invoice Conversion: Once a client approves an estimate, it can be converted into a live invoice with a single click, carrying over all line items and totals automatically.
-
Branded Payment Links: Every invoice sent includes a secure, one-click payment link (Stripe), allowing the end-customer to pay via credit card or bank transfer immediately.

4. Account & Payment Settings
To ensure the platform works for your specific brand, navigate to the Settings tab to configure your business profile.
Payment Settings
-
Stripe Integration: Click "Connect Bank Account with Stripe" to link your bank. This ensures that when a client pays an invoice, the funds are deposited directly into your account. Resell Portal does not touch your transaction funds.

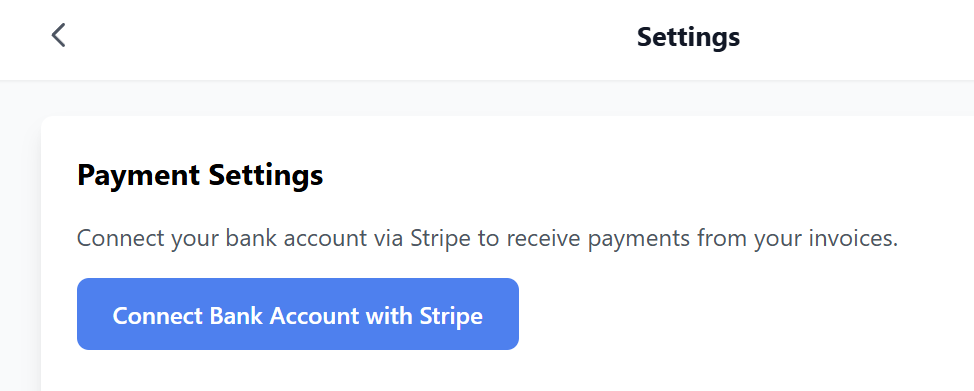
Business Information & Branding
-
Professional Identity: Enter your Business Name, Phone Number, and physical address.
-
Logo Upload: Upload your logo (JPG, PNG, GIF, or SVG up to 2MB). This logo will appear at the top of every invoice and estimate you send.
-
Brand Color: Use the color picker to select a color that matches your brand. This color will be used for buttons, accents, and borders on your professional documents.

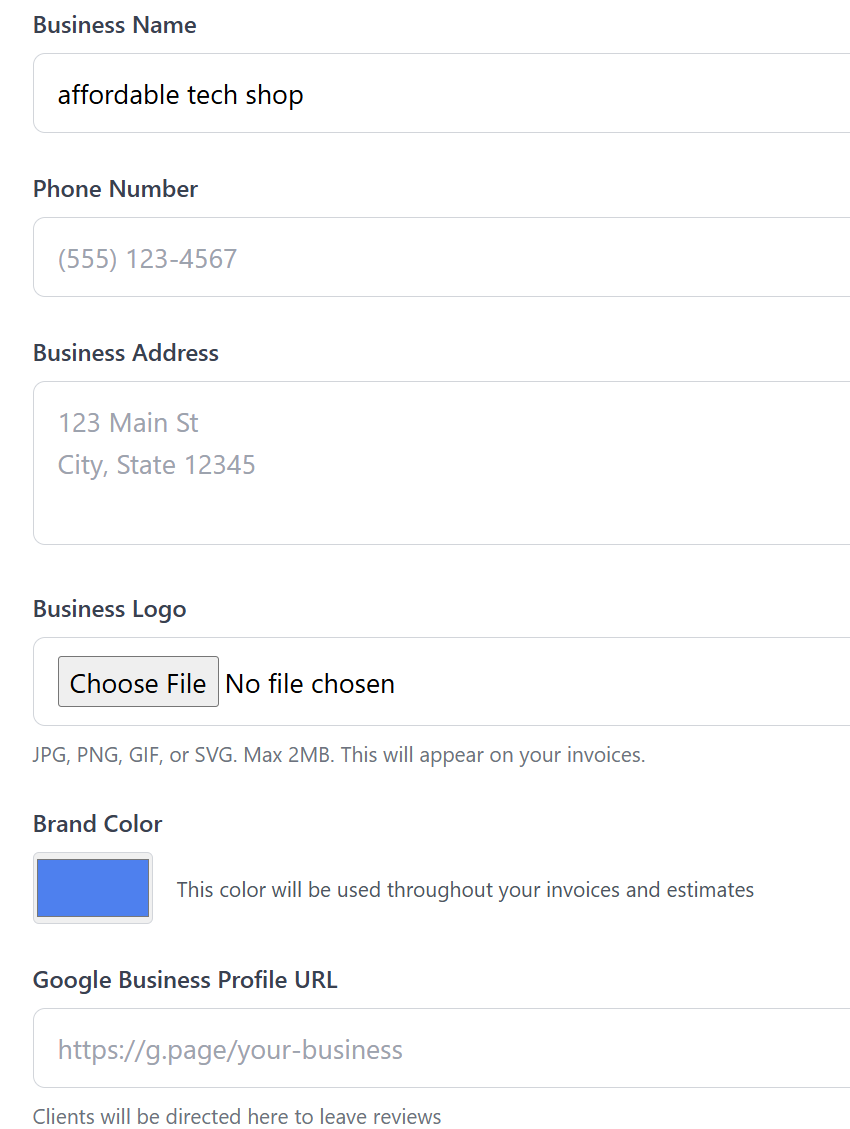
Reputation Management (Automated Reviews)
-
Review Links: Provide your Google Business Profile and Yelp URLs.
-
Post-Payment Automation: Toggle the "Send review requests after payment" option. When a customer pays their invoice, the system will automatically send them a polite email inviting them to leave a review on your selected profiles.

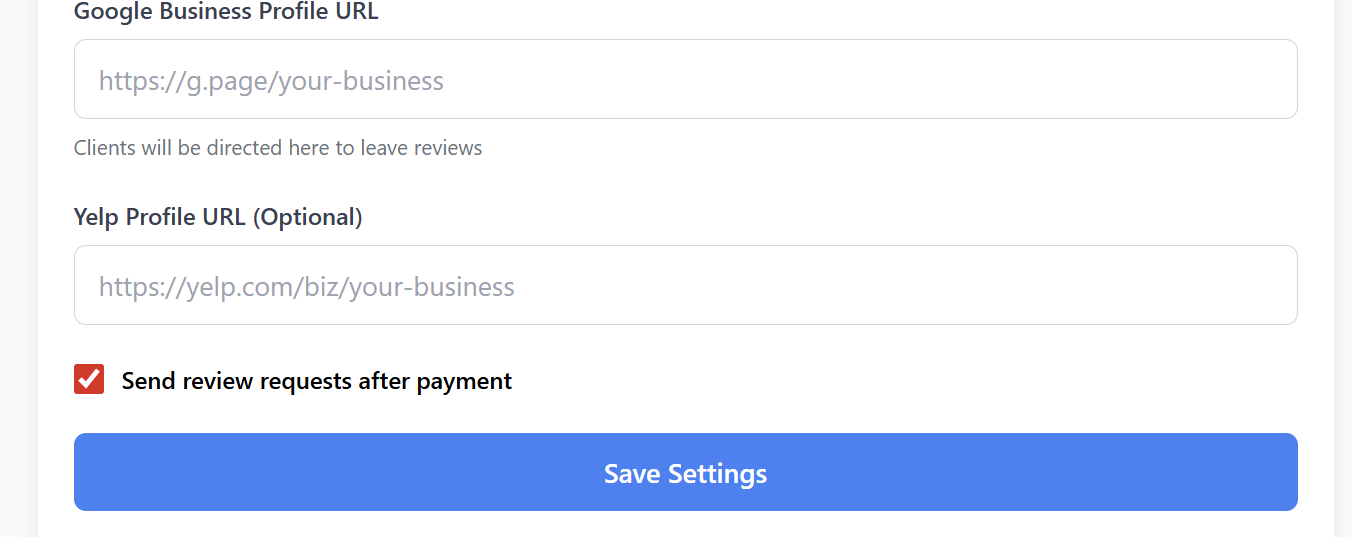
5. Key Benefits for Your Clients
As a reseller, you can highlight these time-saving features to your prospects:
-
AI Intelligence: Never under-price a job again with market-aware pricing suggestions.
-
Automated Reminders: The system automatically chases late payments so your clients don't have to.
-
Professional Branding: Every document is fully white-labeled with the client’s logo and brand colors.
-
Direct Payments: Integrated Stripe payments mean faster collections and zero manual reconciliation.
-
Mobile Ready: Create and manage invoices directly from a tablet or smartphone while still at the job site.
Next Steps:
Ready to empower your clients? Head to the Marketplace on www.resellportal.com to activate the Professional Invoicing + AI Assistant for your next client.
Domain registration
Register and manage client domains directly from your reseller dashboard.
Steps:
Go to Domain Registration
Select a client
Enter a domain
Choose an available option
Manage domains anytime from My Services from storefront.
Registering a Domain
Secure your client’s online identity with a custom domain name. Our Domain Registration service allows resellers to search, register, and manage domains easily — all from your storefront. We support a wide range of domain extensions including:
.com, .net, .org, .io, .co, and many more.
Features Included
-
DNS Management
Full control over DNS records such as A, CNAME, MX, TXT, and more. -
Nameserver Updates
Point domains to any hosting provider using default or custom nameservers. -
Domain Locking
Prevent unauthorized transfers for added security. -
Auto-Renewal
Ensure domains never expire unexpectedly.
Getting Started
-
Go to Domain Registration from your reseller dashboard.
-
Enter the desired domain name (example:
examplebusiness.com). -
Click Check.

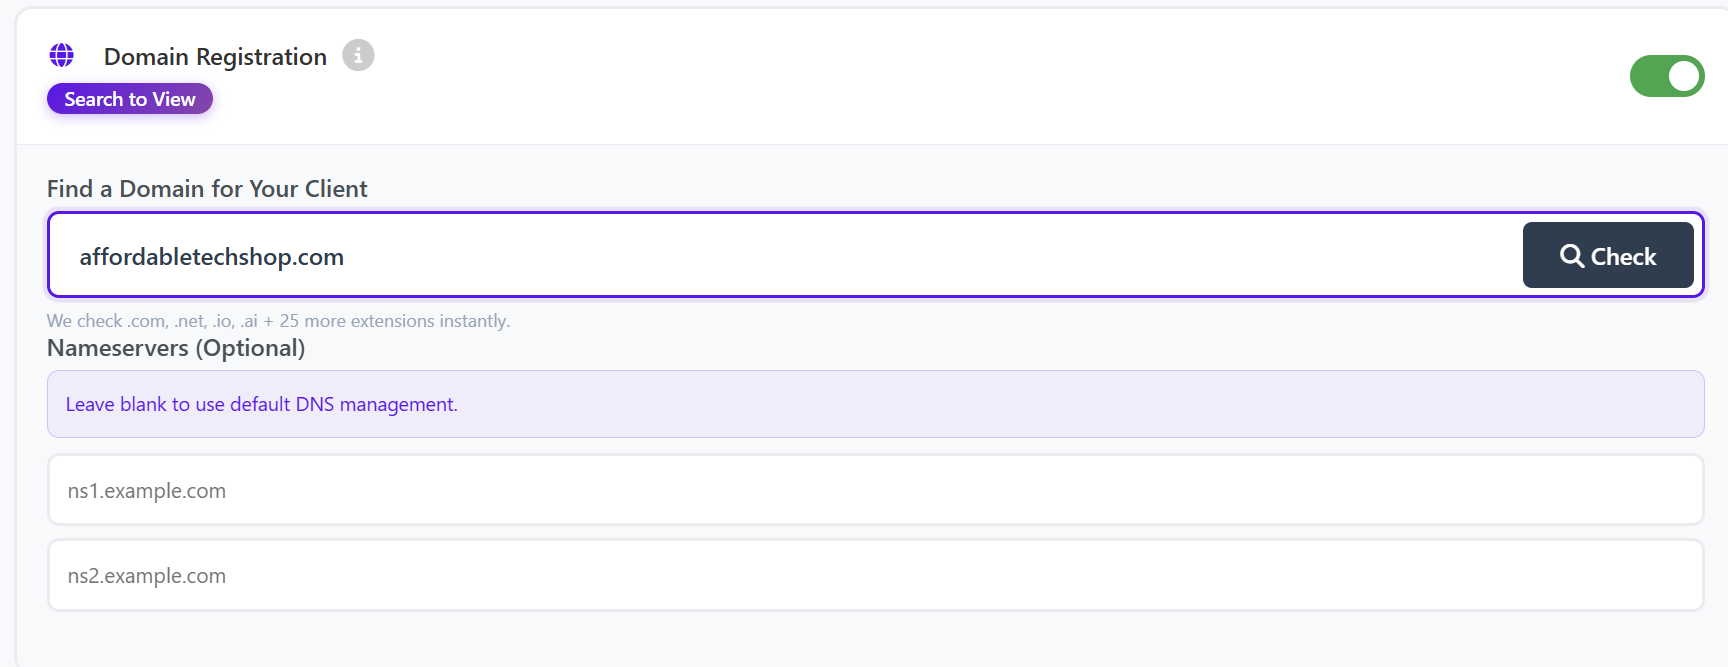
Domain Availability
-
If the domain is already taken, it will be marked as unavailable.

-
Alternative domain extensions will be displayed with pricing.
-
Simply select an available option and continue.
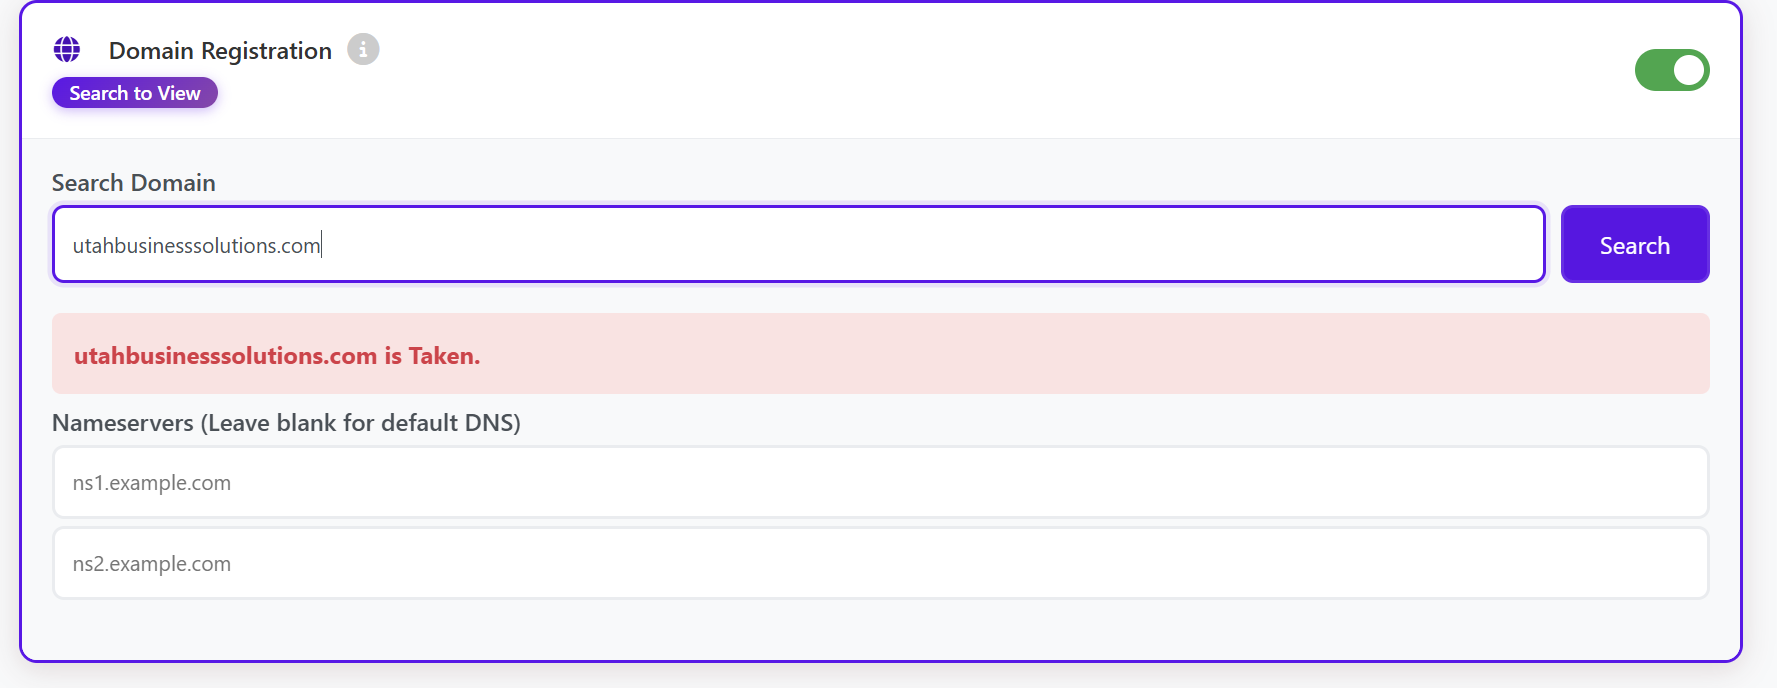
-
Select the desired domain.

-
Complete checkout to activate the service.
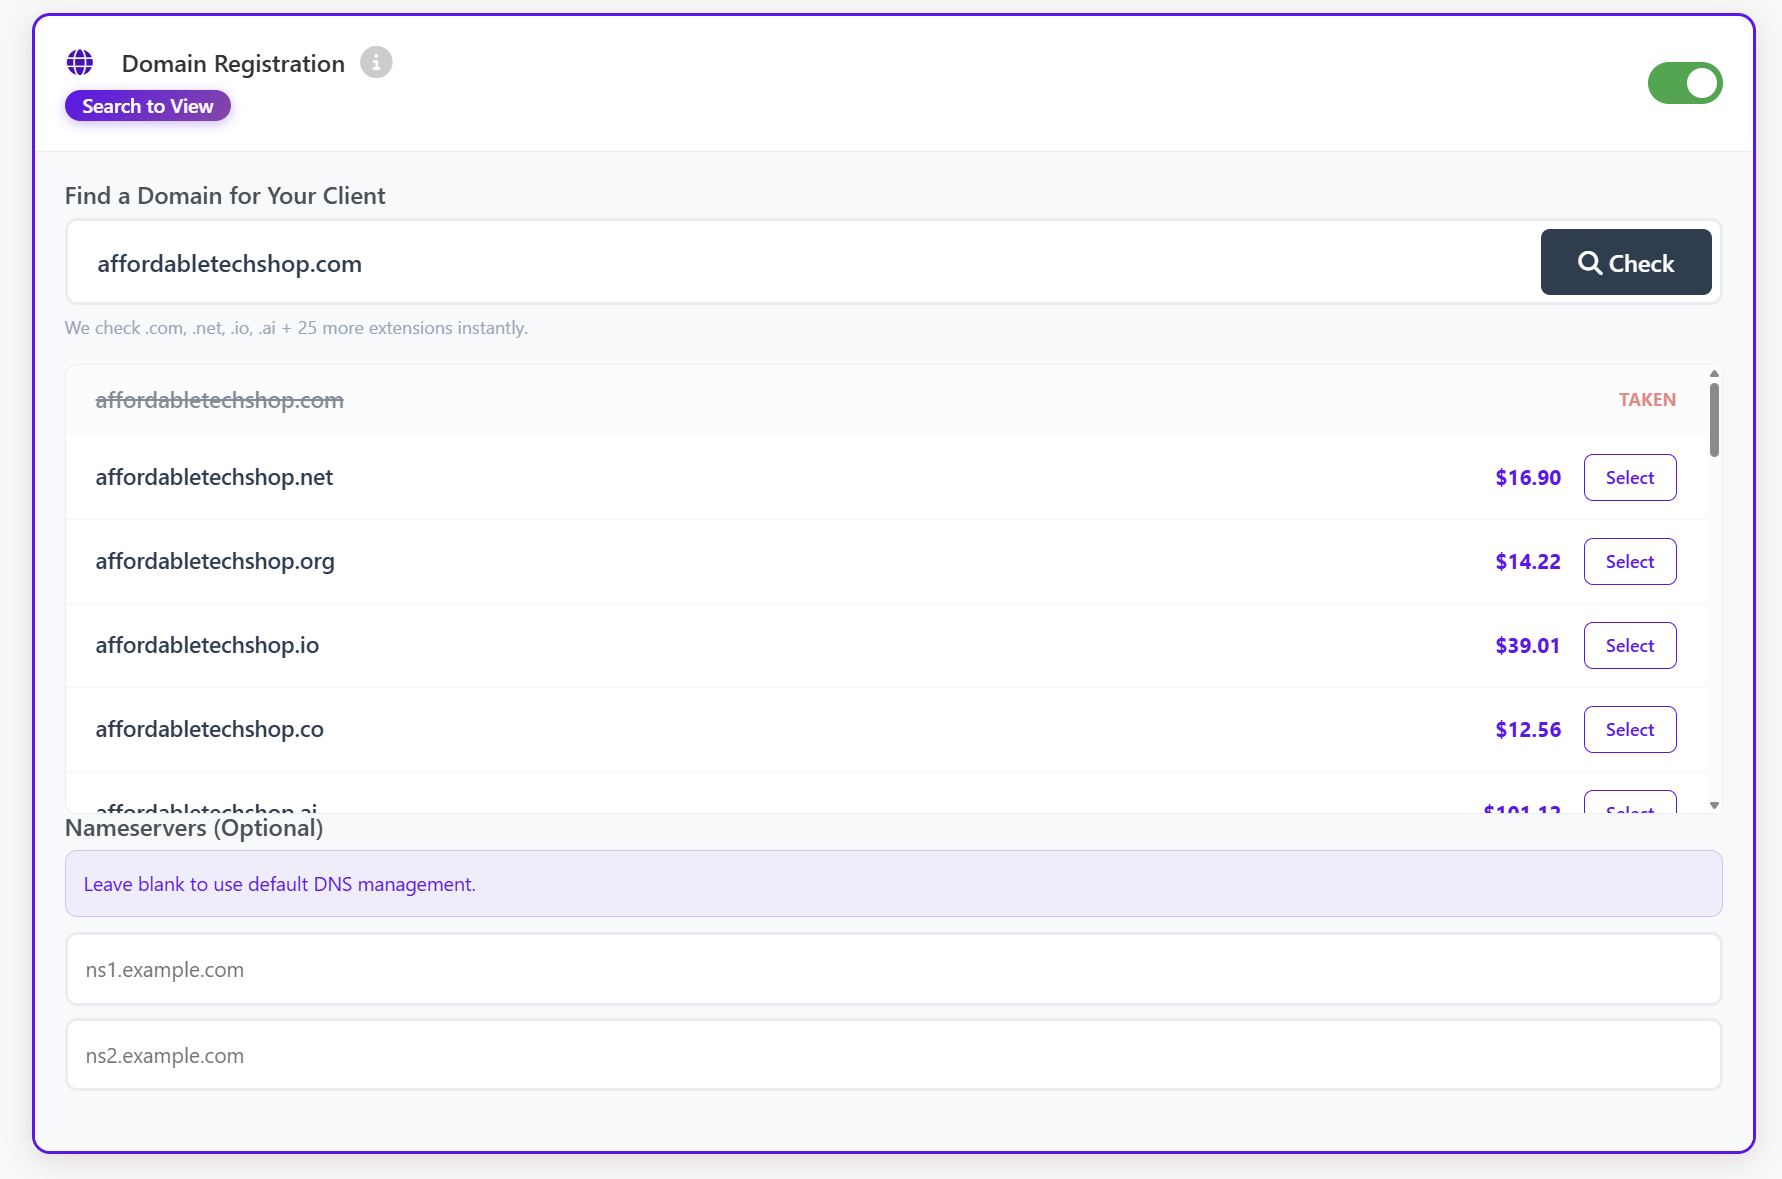
Once activated, the domain will appear in your storefront under My Services.
Client Domain Management
Your clients can manage their domains directly from your storefront.
Accessing Domain Settings
-
Go to My Services.
-
Find the Domain Registration service.
-
Click Manage.

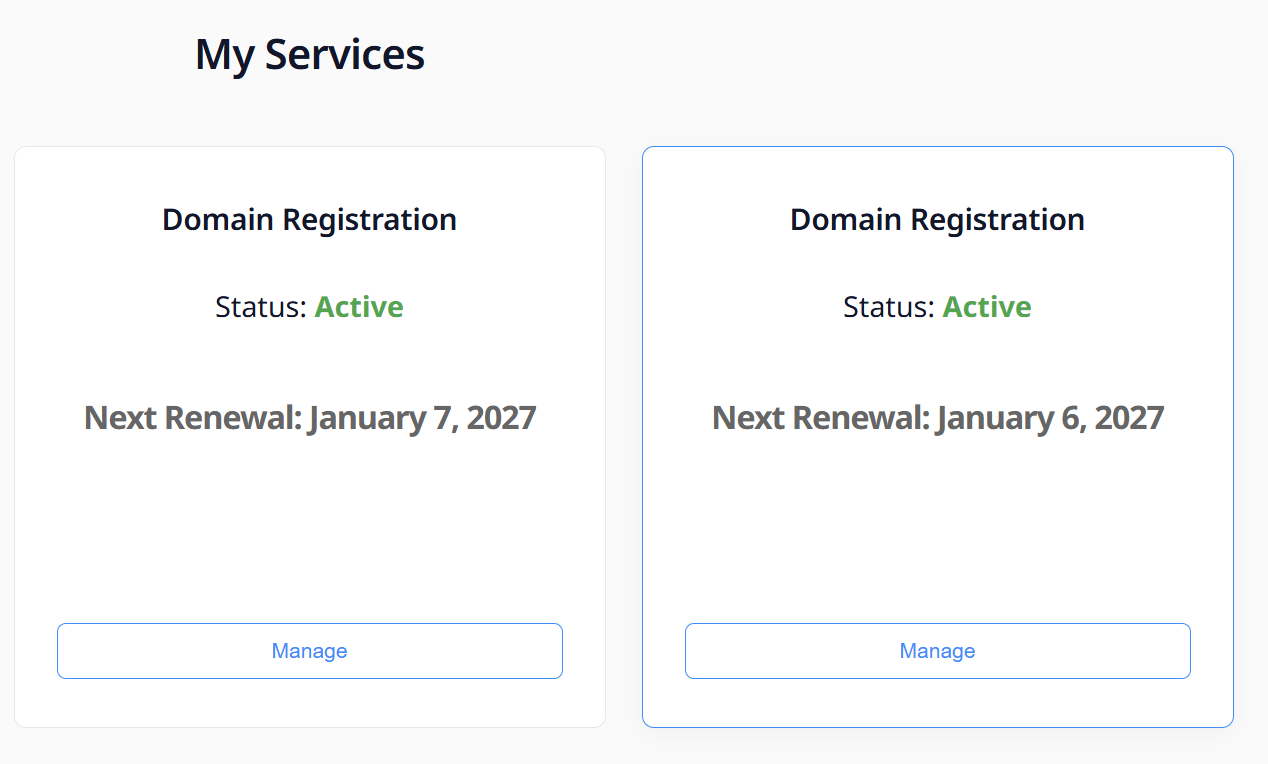
This opens the Manage Domain Registration panel.
Service Overview Panel
Inside the management panel, users can see:
-
Domain Name (example:
resellesim.online) -
Expiration Date
-
Renewal Cost
-
Service Credentials & Information

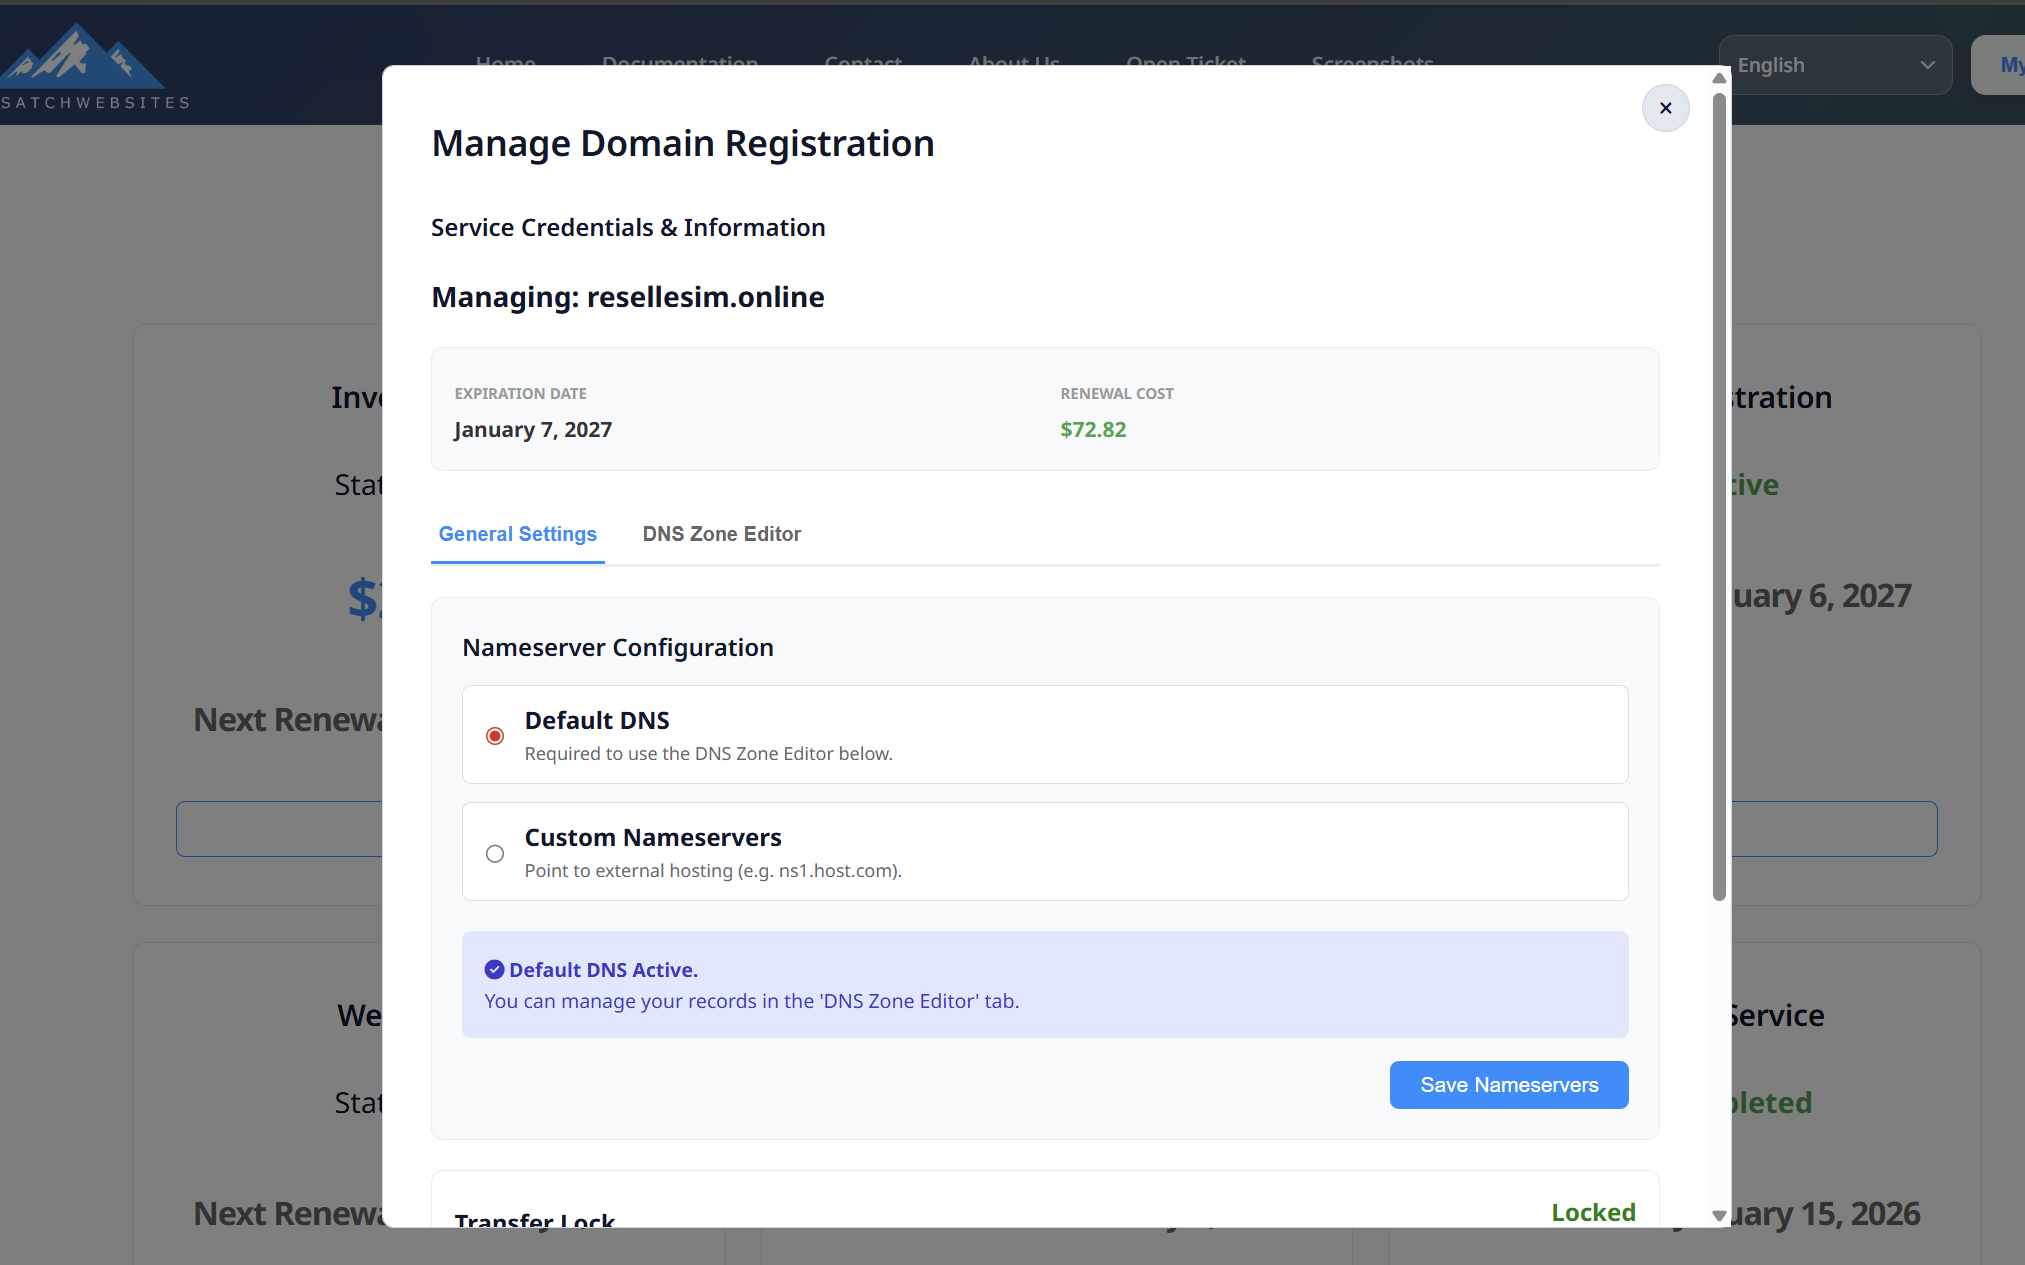
Nameserver Configuration
Users can choose between Default DNS or Custom Nameservers.
Option 1: Default DNS (Recommended)
-
Enables full access to the DNS Zone Editor
-
DNS changes propagate instantly
-
Ideal for websites hosted within the platfor

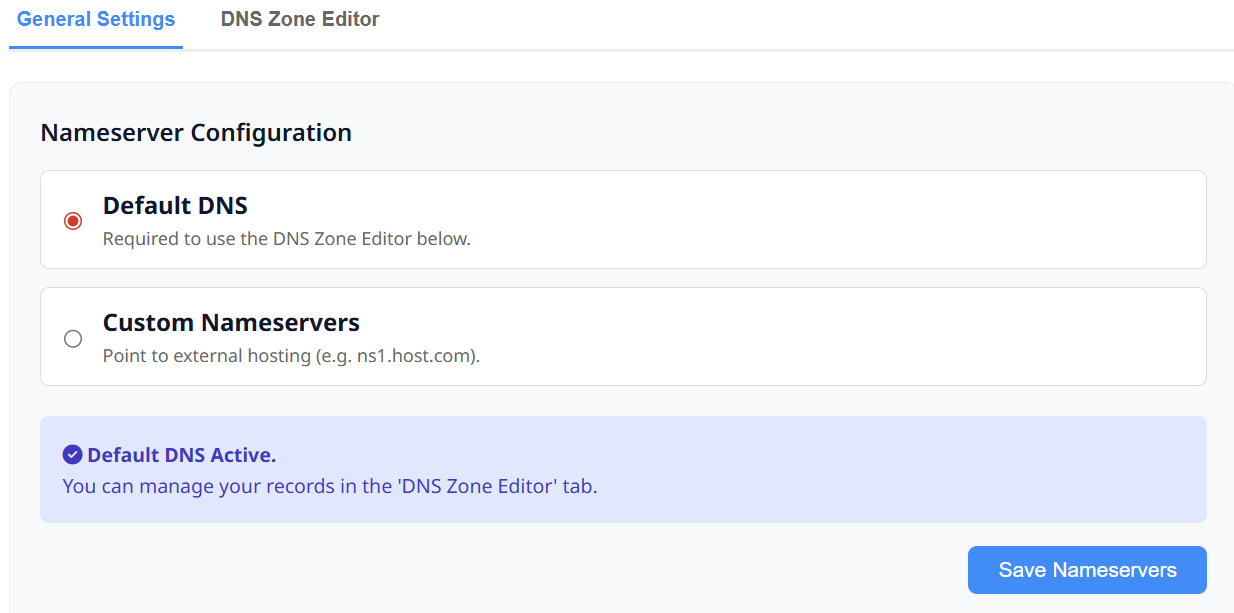
When Default DNS is selected:
-
DNS records can be edited directly inside the platform
-
The DNS Zone Editor becomes active
DNS Zone Editor (Default DNS Only)
The DNS Zone Editor allows users to manage records such as:
-
A Records
-
CNAME Records
-
MX Records
-
TXT Records
DNS Editor Fields:
-
Host
-
Type
-
Priority / Optional
-
Value (IP or Target)
Users can:
-
Add new records
-
Delete existing records
-
Save changes instantly

⚠️ DNS Zone Editor is disabled when Custom Nameservers are used.
Option 2: Custom Nameservers
Use this option if the domain is hosted externally.
When Custom Nameservers are selected:
-
DNS Zone Editor is disabled
-
DNS must be managed at the external hosting provider
Required Fields:
-
ns1.provider.com -
ns2.provider.com
Optional Fields:
-
ns3.provider.com -
ns4.provider.com
-
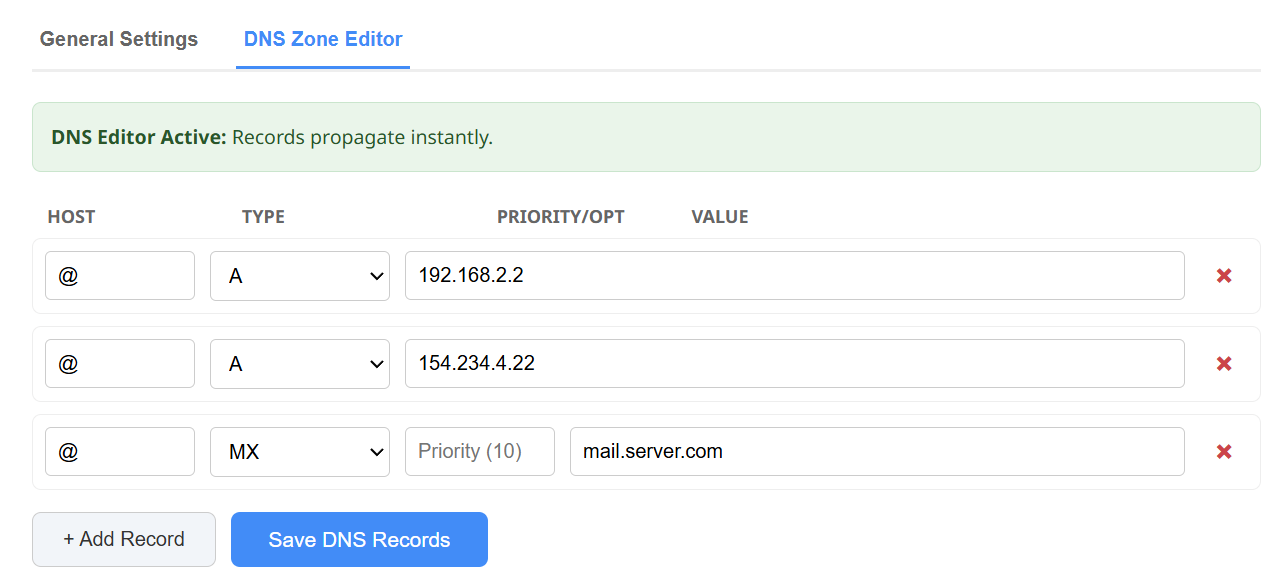
Click Save Nameservers to apply changes.
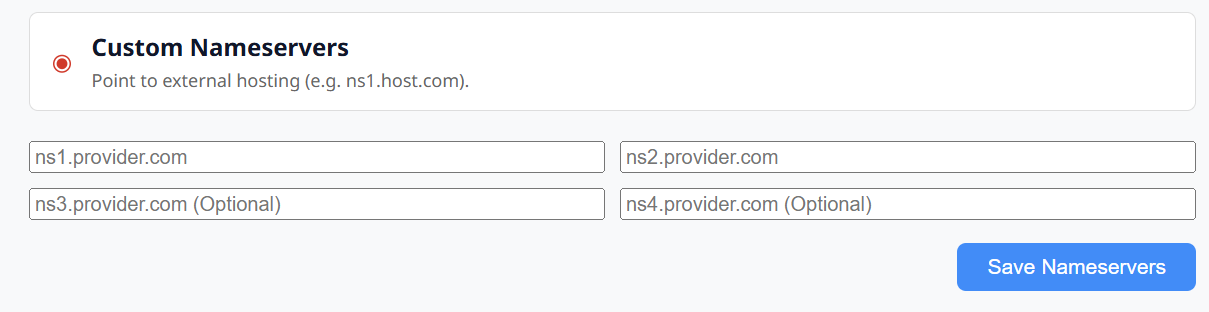
Transfer Lock
-
Enabled by default
-
Prevents unauthorized domain transfers
-
Can be unlocked manually if needed


Cancel Service
If the service is no longer needed:
-
Scroll to Service Actions
-
Click Cancel Service
Important Notes:
-
Cancellation stops future renewals
-
This action is permanent
-
The domain will expire at the end of its term if not renewed


Summary
-
Resellers register domains on behalf of clients
-
Clients manage domains via the storefront
-
Default DNS allows full DNS control
-
Custom Nameservers point to external hosting
-
Secure, flexible, and easy to manage
Document Signing Software
Ready to offer professional document signing to your clients? This guide will walk you through our streamlined 5-step setup process. By following this sequence, you will move from initial branding to a live, client-ready service in minutes.
-
Configure branding in your Whitelabel Settings.
-
(Optional) Set up a CNAME for your own custom domain.
-
Verify the look and feel via your unique Branded Subdomain URL.
-
Activate the service for your client through the Marketplace.
-
Retrieve login credentials from the Services tab.
Setting Up Your Document Signing Service
Welcome to the Document Signing Software setup guide. As a reseller, you can fully whitelabel the signature platform to reflect your own brand identity. Follow these steps to configure your branding, activate the service for your clients, and access the platform.
Step 1: Configure Your Whitelabel Branding
Before activating the service for any clients, you must set up your brand identity. This ensures that the login topics and documents your clients see are branded to your agency.
-
Log in to your Reseller Dashboard.
-
Navigate to Whitelabel Settings > Doc Signer Branding > Customize Doc Signer Software.

-
You will see the Document Signer Branding section. Fill in the following fields:
-
Company/Workspace Name: Enter your agency name (e.g., AppServicePortal). This name will appear on the login topic and in automated emails.
-
Branded Subdomain: Enter your preferred prefix (e.g., your-agency). Your default login URL will be your-agency.docsigner.app.
-
Custom Domain (Optional): If you prefer to use your own domain (e.g., sign.yourdomain.com), enter it here.
-
Note: You must go to your DNS provider and create a CNAME record pointing to docsigner.app.
-
-
Logo URL: Provide a direct link to your transparent PNG or JPG logo (e.g., https://example.com/logo.png).
-
Brand Color: Use the color picker to select the primary theme color for your platform.
-
-
Click Save Settings.

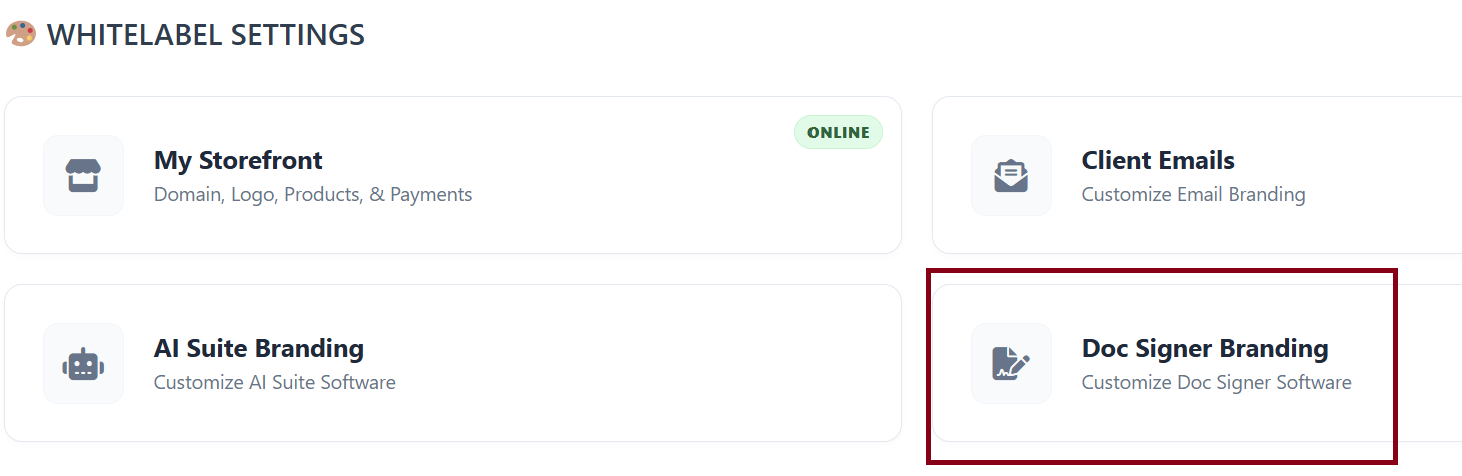
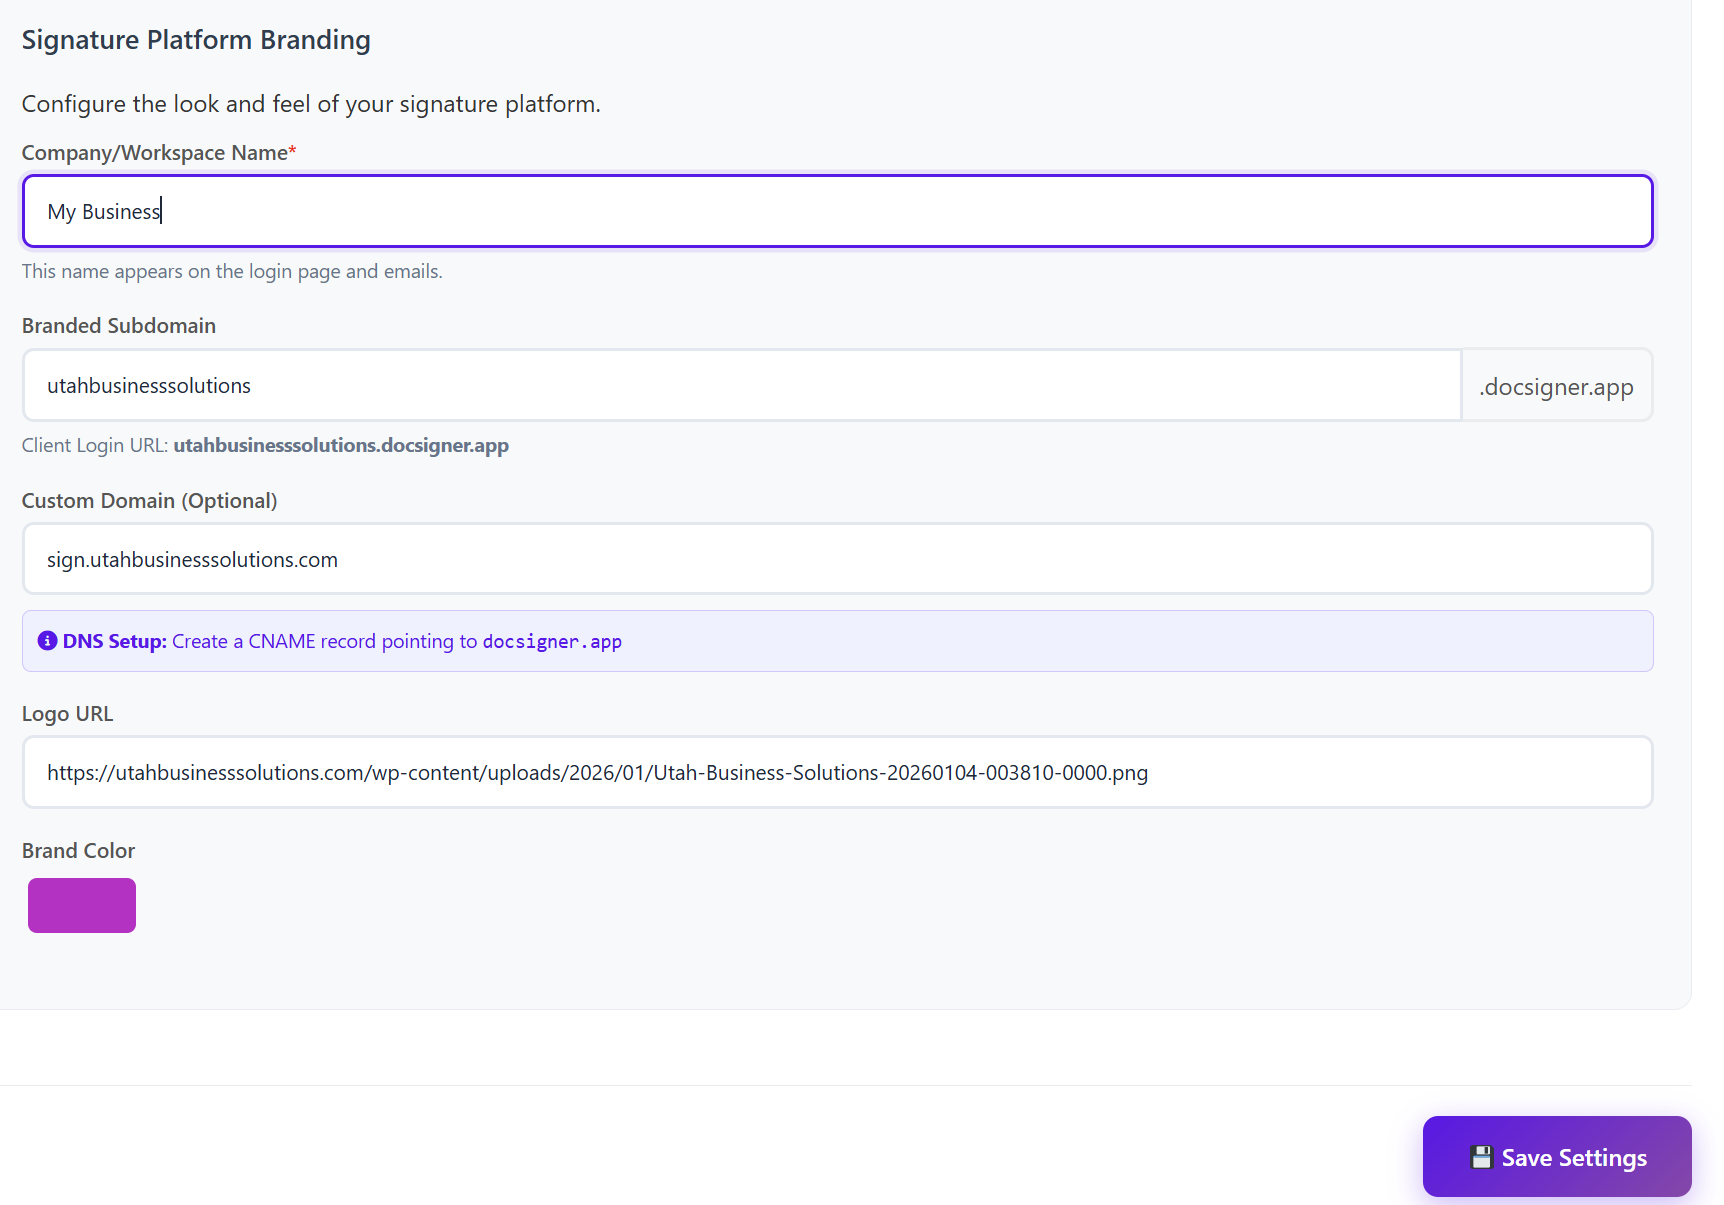
Note: You will not be able to activate the service from marketplace to the client unless this step is done first.

Step 2: Preview Your Branding
To ensure everything looks correct:
-
Locate the Client Login URL that was generated in the "Branded Subdomain" field.

-
Copy and paste this URL into a new browser tab.
-
You will now see your customized login topic featuring your logo and brand colors.

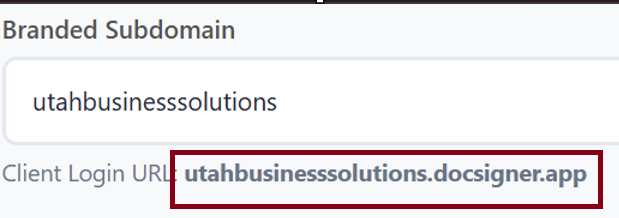
Step 3: Activate the Service for a Client
Once your branding is set, you can provision the software for your customers.
-
Navigate to the Marketplace tab in your dashboard.
-
Find the Document Signing Software and choose to add it to either a New Client or an Existing Client.
-
To activate the service, complete the following:
-
Company/Workspace Name: Enter the client's company name. This name will be displayed on the actual documents that will be sent out for signature.
-
Billing Cycle: Select the preferred billing frequency (Monthly, Quarterly, Bi-Annual, or Annual).
-
-
Confirm and activate.

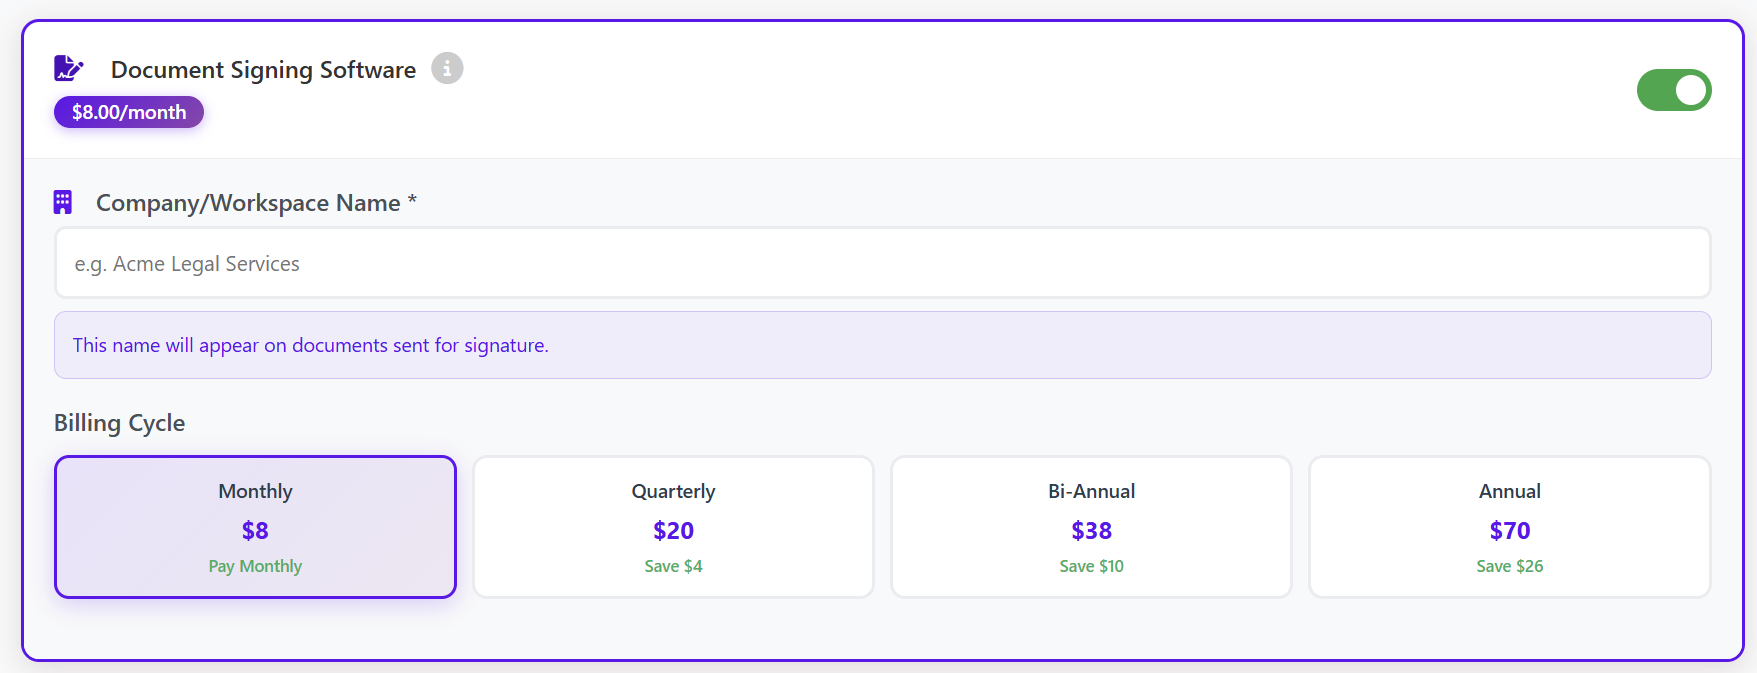
Step 4: Accessing the Platform
After activation, the service is managed within your "Services" tab.
-
Go to the Services tab.
-
Locate the Document Signing service for your client.
-
Here, you will find the Login Credentials (Username and Password) generated for that specific account.
-
To sign in, use the Branded URL you configured in Step 1 and enter the credentials found in the Services tab.

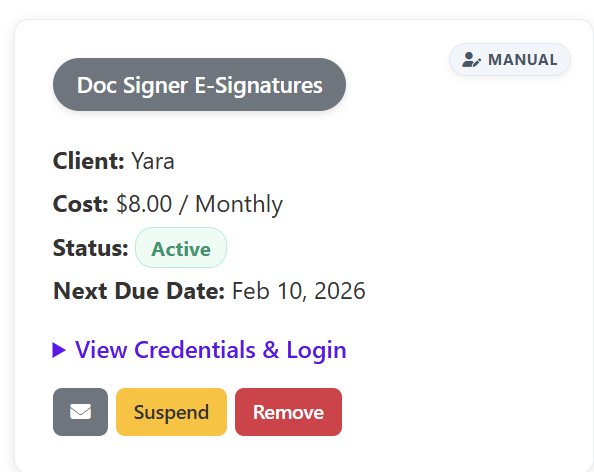
Need Support?
If you encounter any issues during the setup of your whitelabel domain or DNS configuration, please contact our technical support team through your reseller help desk.
Getting Started with Document Signing Platform
Welcome to your Document Signing dashboard. This guide will help you navigate the interface, create your first document, and manage your signature workflows efficiently.
1. The Dashboard Overview
Once you log in, the Dashboard provides a bird’s-eye view of your document activity.
-
Quick Actions: Immediately jump to Upload or AI Draft.
-
Metrics: Track the status of your files:
-
Total Documents: Everything you’ve created.
-
Pending: Waiting for signatures.
-
Completed: Fully signed and finalized.
-
Expiring Soon: Documents nearing their deadline.
-
-
All Documents List: A filterable list (Drafts, Sent, Completed) to help you find specific files quickly.

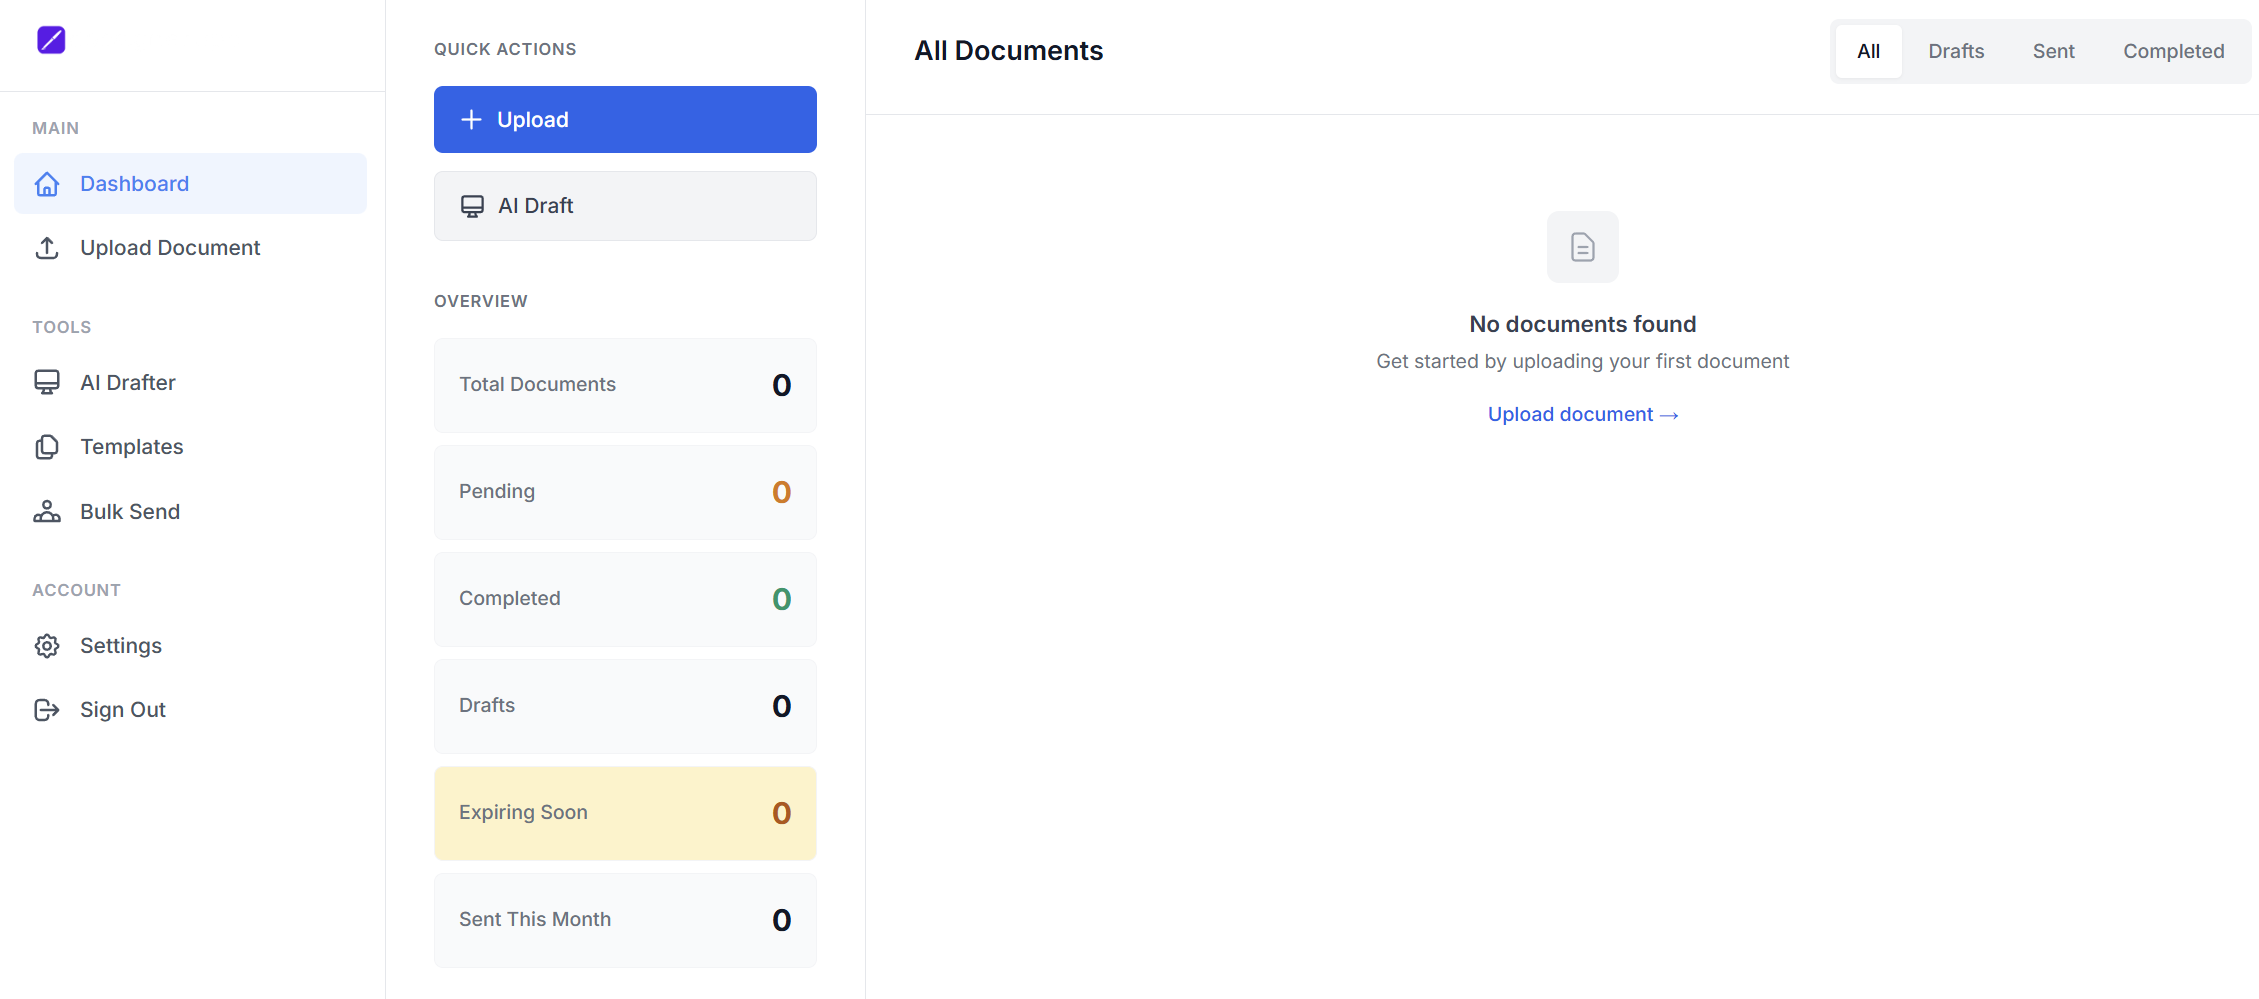
2. Creating Documents
There are two ways to start a signing process:
A. Uploading an Existing File
If you already have a contract ready (e.g., from Word or Google Docs):
-
Go to Upload Document.
-
Document Title: Give your file a recognizable name (e.g., "Service Agreement - Client X").
-
PDF Document: Drag and drop your file or browse your computer.
-
Requirement: PDF format only.
-
Max Size: 25MB.
-
-
Click Upload & Continue to proceed to the signature field placement.

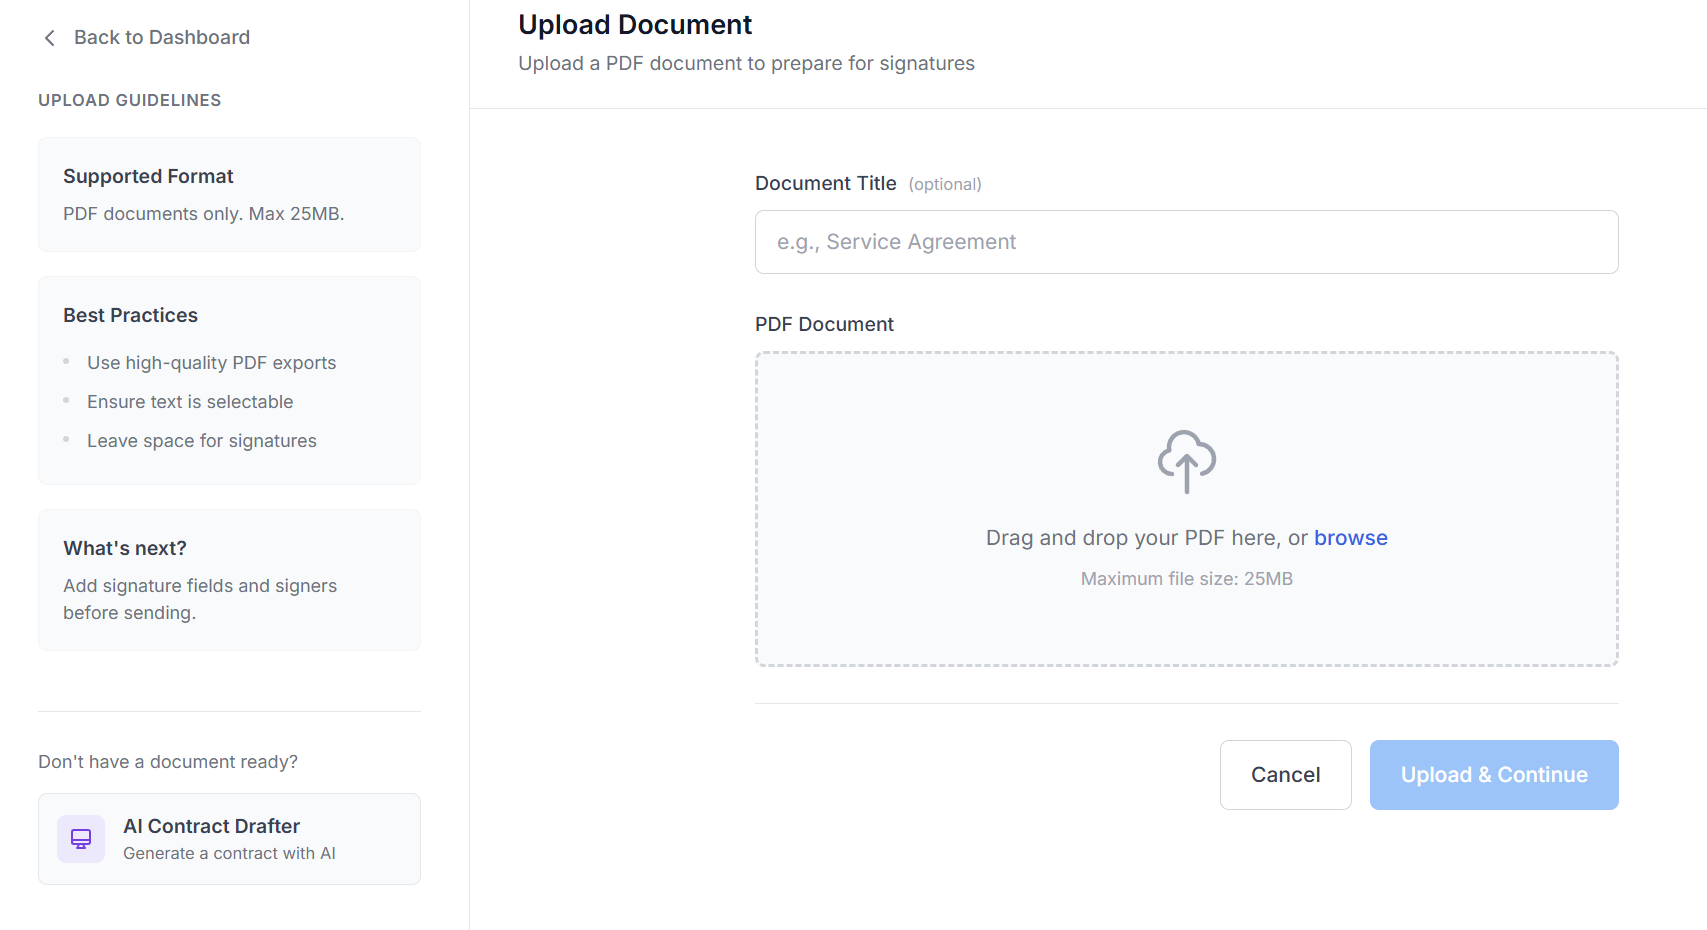
B. Using the AI Drafter
Don't have a document ready? Use the AI Drafter chatbot to generate one in minutes.
-
Select AI Drafter from the Tools menu.
-
The AI assistant will greet you. Select the type of contract you need (Service Agreement, NDA, Employment, etc.).
-
Follow the chat prompts to provide details.
-
The AI will generate a professional draft that you can download, edit, and use for signing.

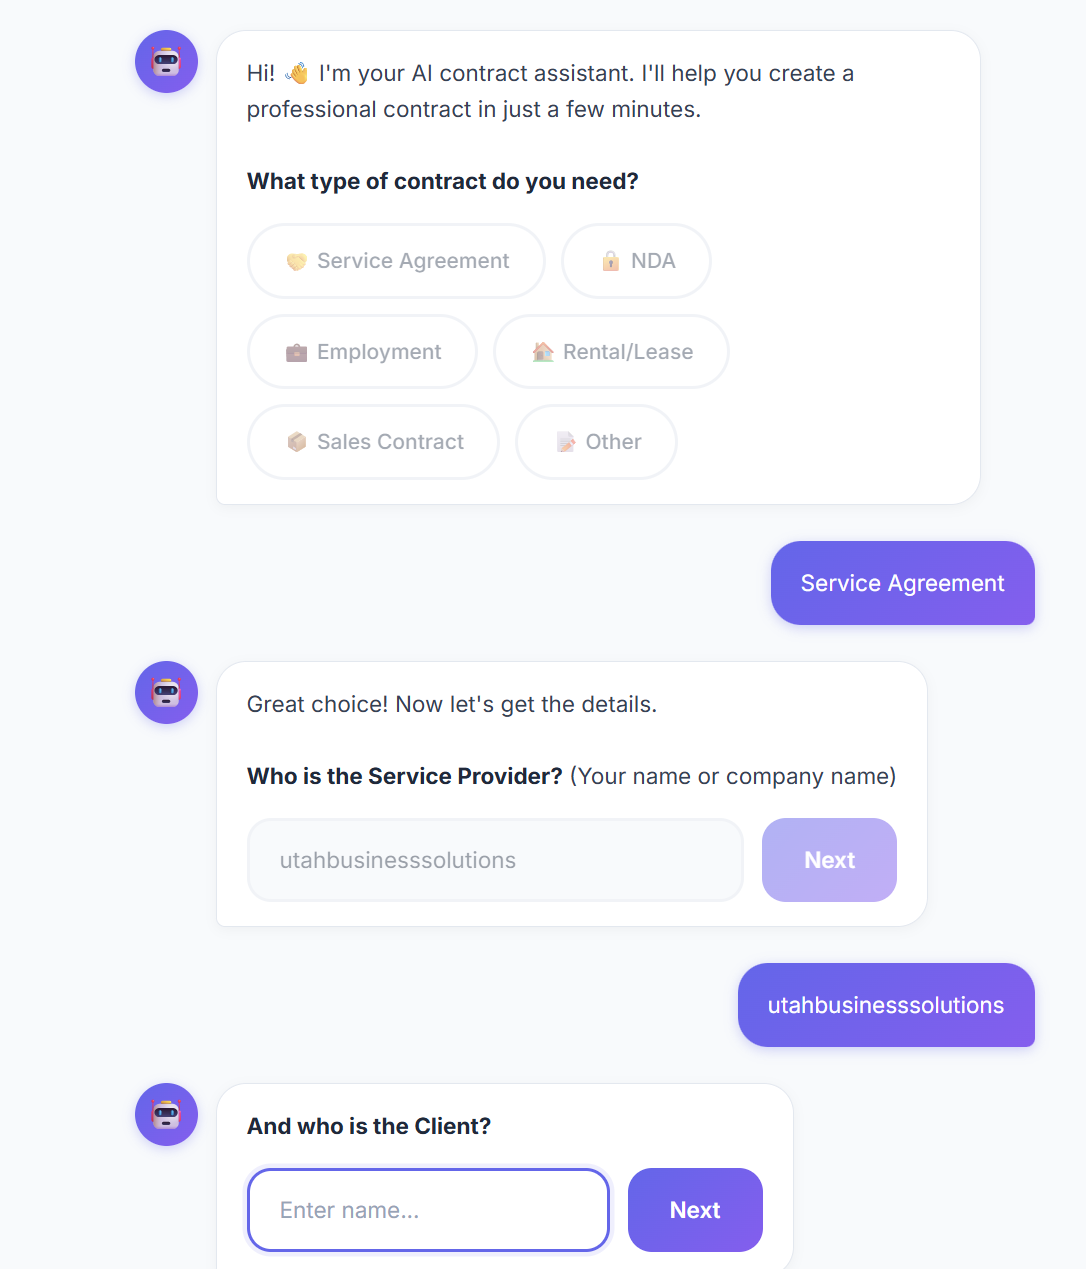
3. Managing Your Documents
Templates
Once you have prepared a document with specific signature fields, you can save it as a Template. This allows you to reuse the same structure for different clients without having to re-add signature boxes every time.
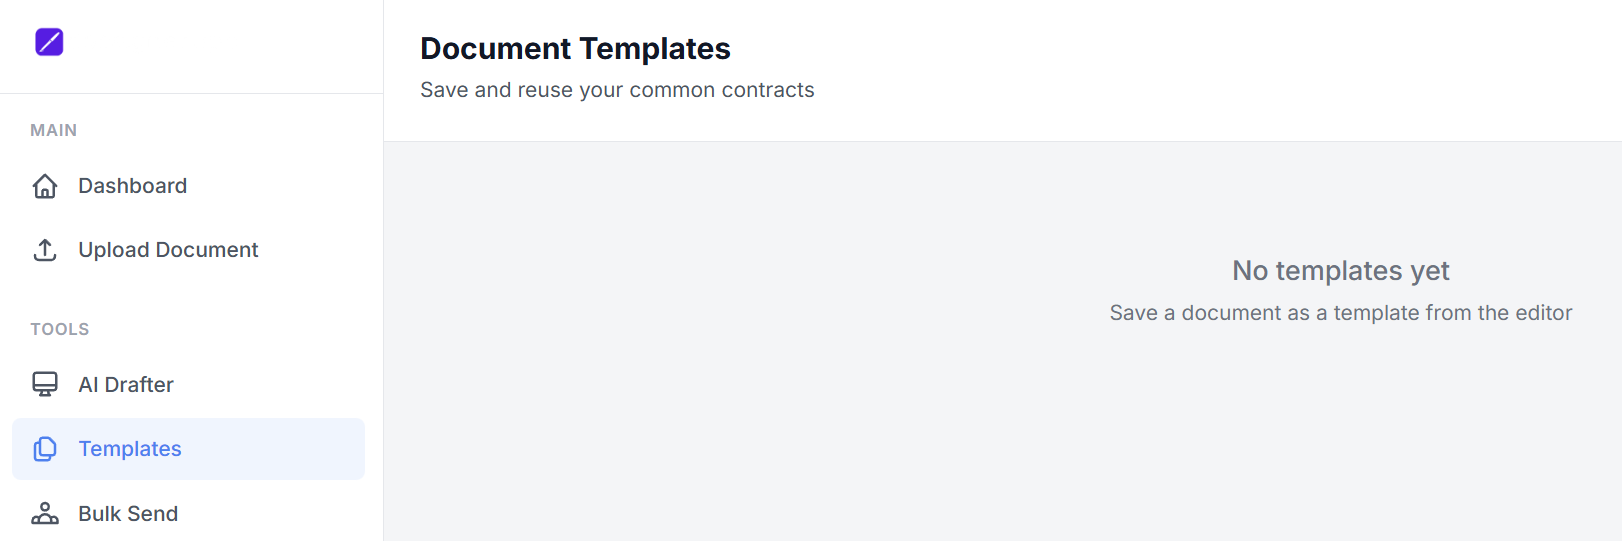
Bulk Send
The Bulk Send feature allows you to send a single document to dozens or hundreds of recipients at once.
-
Batch Name: Label your send (e.g., "Q1 Policy Updates").
-
Source Document: Select a previously created document or template from the dropdown.
-
Recipients:
-
Add them manually (Name & Email).
-
CSV Import: Paste a list (Format: Name, Email per line) and click Parse CSV.
-
-
Click Send to All to distribute the documents simultaneously.

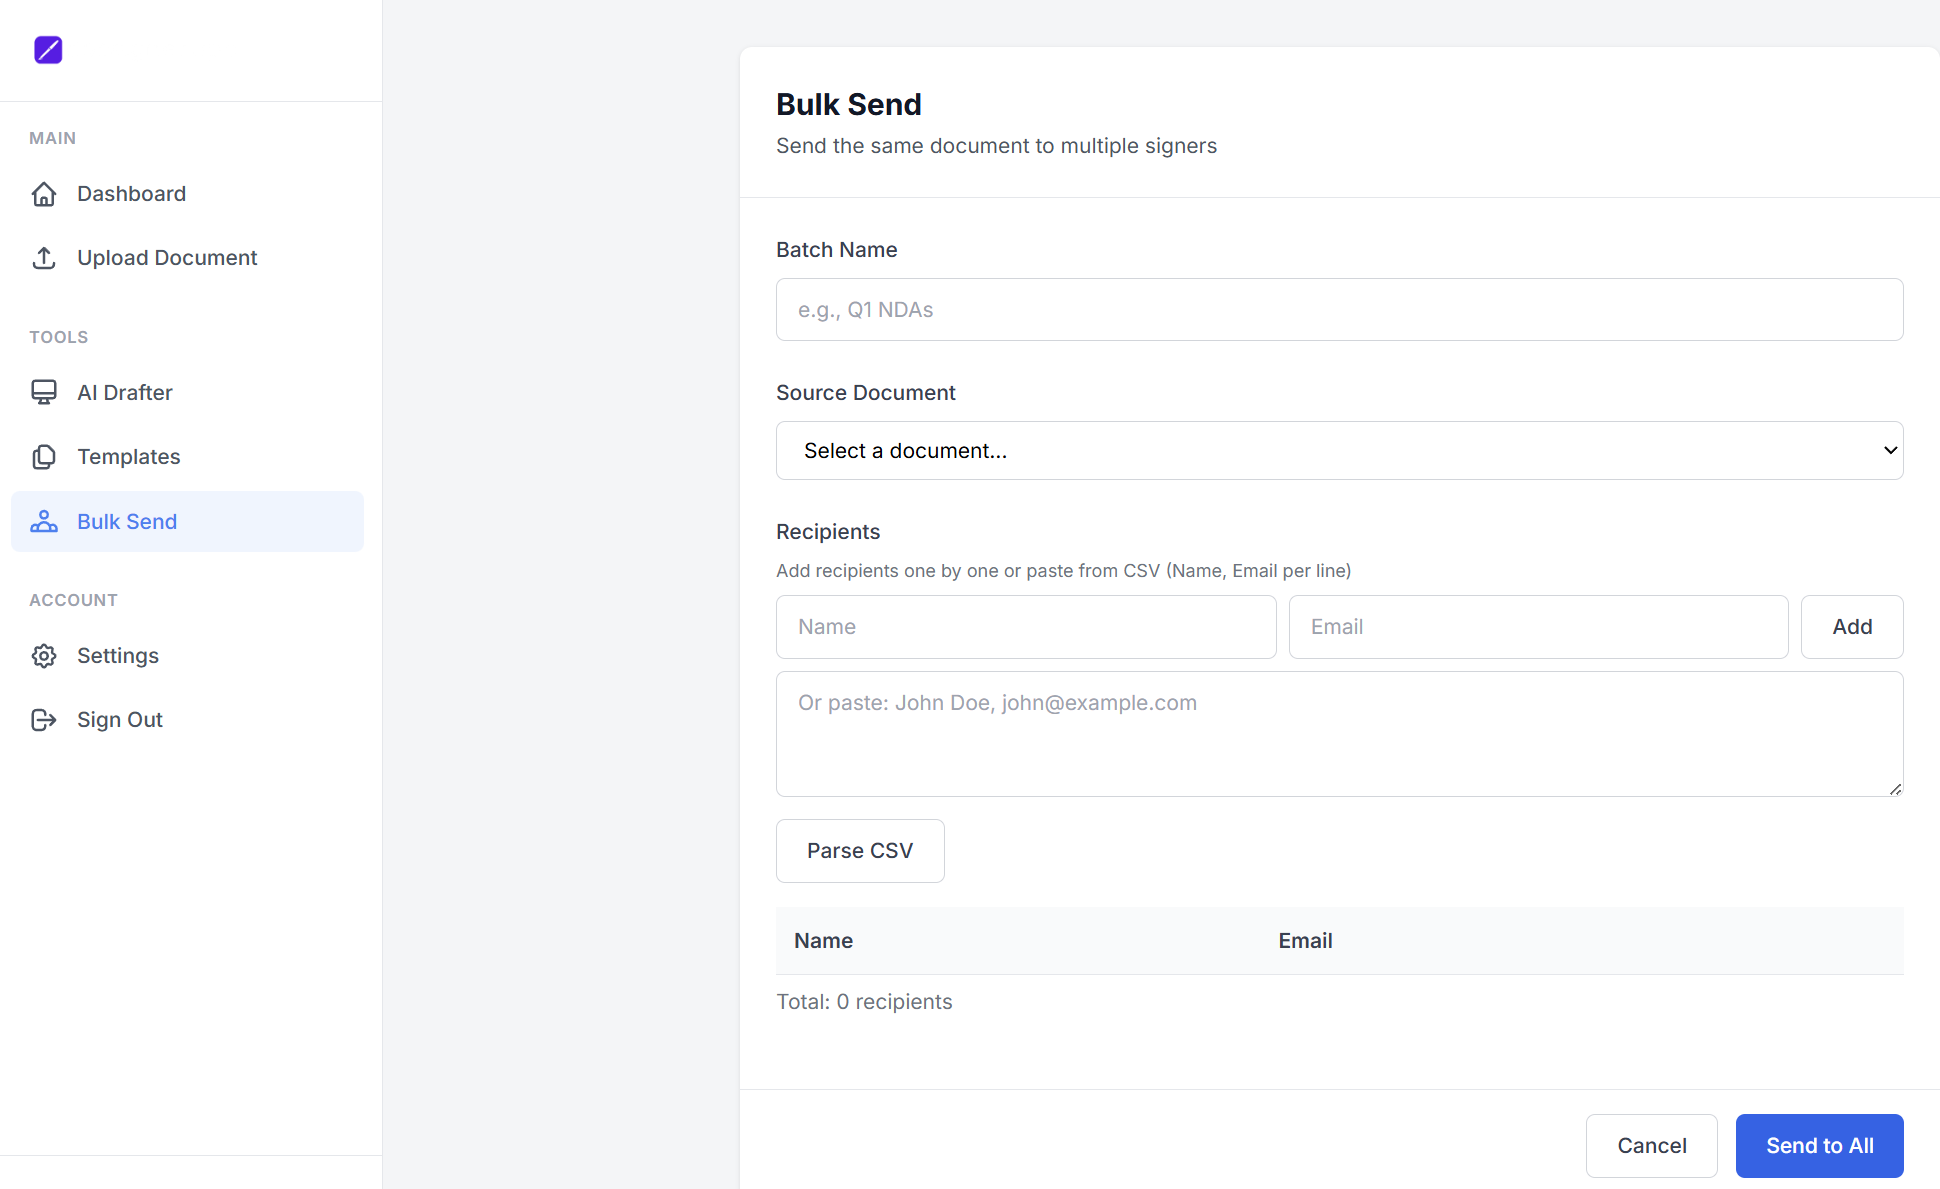
4. Settings & Account Management
Access the Settings tab to customize your personal workspace:
-
Profile: Manage your primary email address for notifications.

-
Branding: Set your Company Name and Logo URL. This ensures that the documents and emails your clients see look professional and consistent with your business.

-
Security: Update your password regularly to keep your account safe.
-
Requirement: New passwords must be at least 8 characters long.
-
You will need to enter your current password to authorize any changes.

-
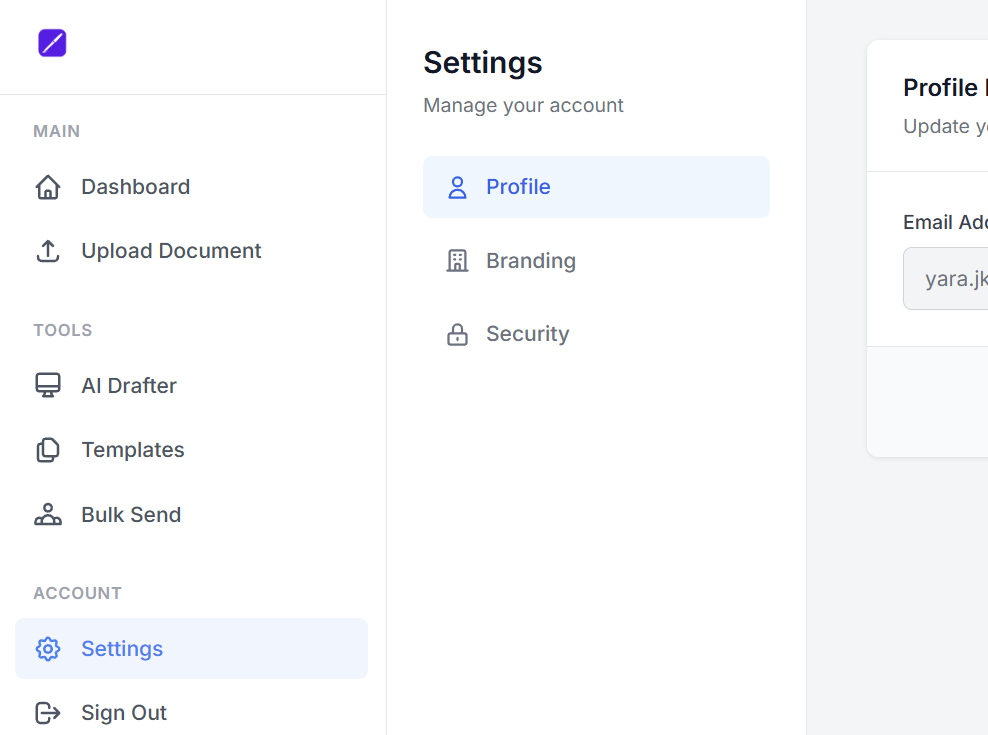
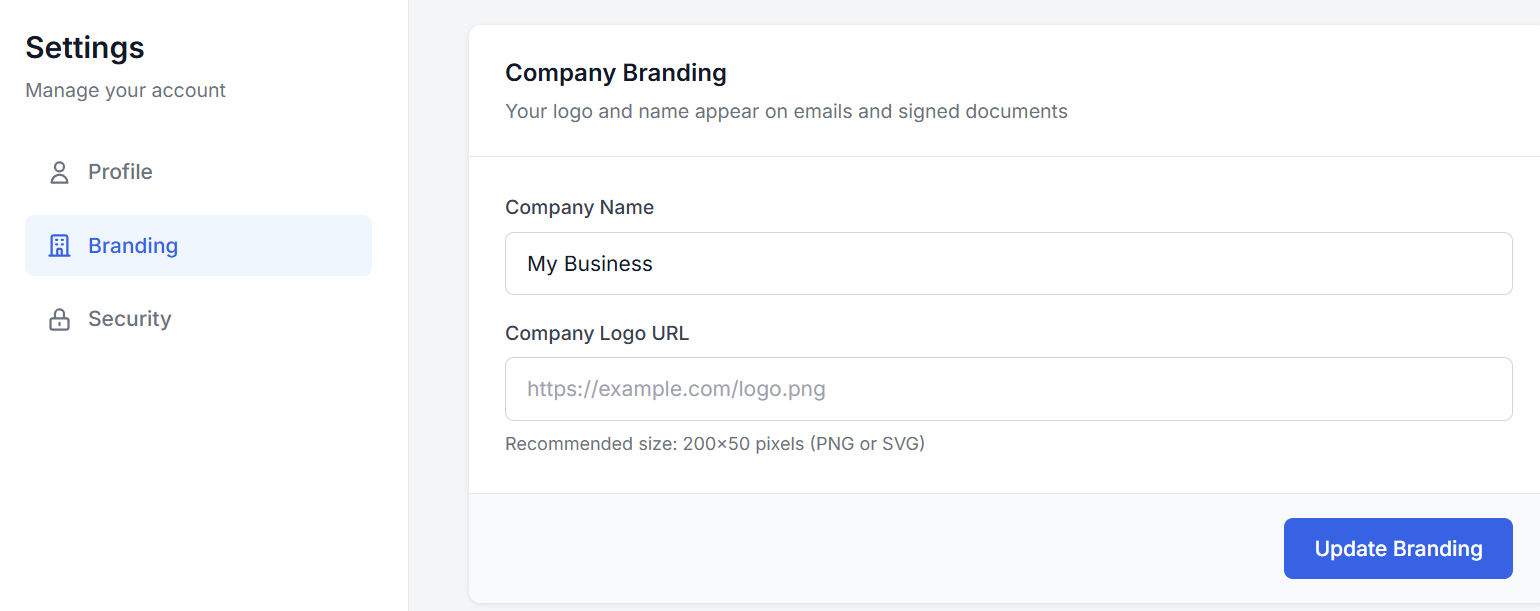
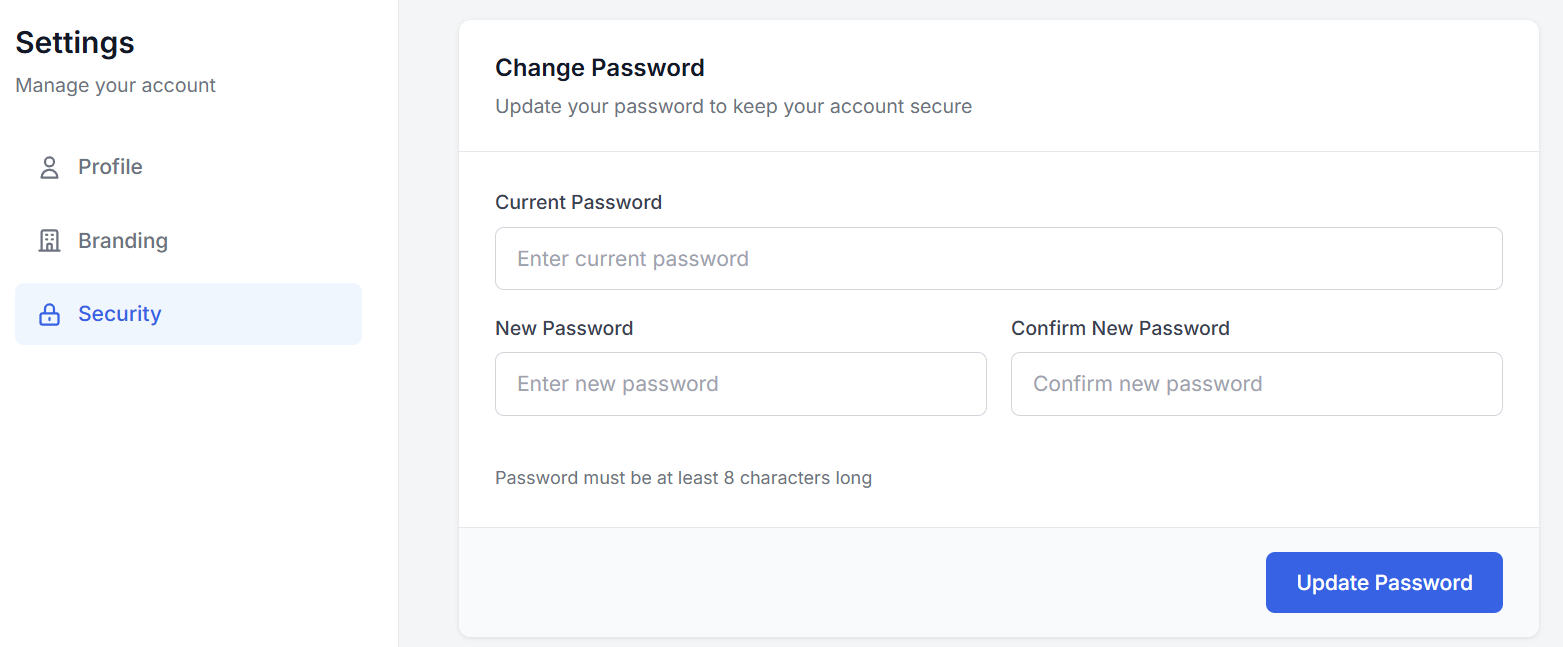
5. Helpful Tips
-
Signature Space: When uploading a PDF, ensure you leave enough white space at the bottom or on the signature page for digital stamps and signatures.
-
Selectable Text: For the best experience, use high-quality PDF exports where the text is selectable rather than a flat "image" scan.
-
Status Tracking: Check your Dashboard regularly to follow up on "Pending" documents that haven't been signed yet.