
Navigating Resellportal: Allowing Clients to Purchase from your Storefront
Use the Storefront feature to enable automatic client purchases from your webstore.
The Storefront (Auto) featuresystem allows you to set uplaunch a fully automatedautomated, branded SaaS store underwithout needing to manually activate products for clients. Once your reseller account. With just a few steps, you can launch a branded storefront whereis clientsactive, customers can browse, purchase, and subscribe to digital productsservices withoutinstantly, youwhile needingStripe tohandles activateall thembilling manually.and payouts directly.
This feature is ideal for resellers who want toto:
-
Sell at scale
or -
Offer 24/7 automated self-service
access -
Avoid manual deployments
-
Run a fully branded SaaS storefront without building a website
or handling each sale directly.
What Is the Storefront?Apublic-facing online storehosted on your subdomain or custom domainClients can browse and purchase SaaS productsPrices are automatically adjusted based on your profit marginProducts are fulfilled and managed automatically by the platformYou receivebi-weekly payoutsfor your profits
Step-by-StepLocationSetupof Storefront SettingsAll storefront configuration is found under:
Whitelabel Settings → Storefront & Branding
This includes domain settings, Stripe connection, branding, profit margins, and portal appearance.
Before You Begin — Requirements
Your storefront becomes automatically enabled as soon as the following requirements are met:
1. Stripe Account Connected
You must connect your Stripe account for client billing.
Go to:Whitelabel Settings → Storefront & Branding → Payment Gateway
Click Connect Stripe
2. Wallet Balance ≥ $20
A minimum wallet balance of $20 is required to keep your storefront online.
Once both conditions are met, your storefront automatically activates.
If either requirement is missing or becomes invalid, the storefront becomes inactive.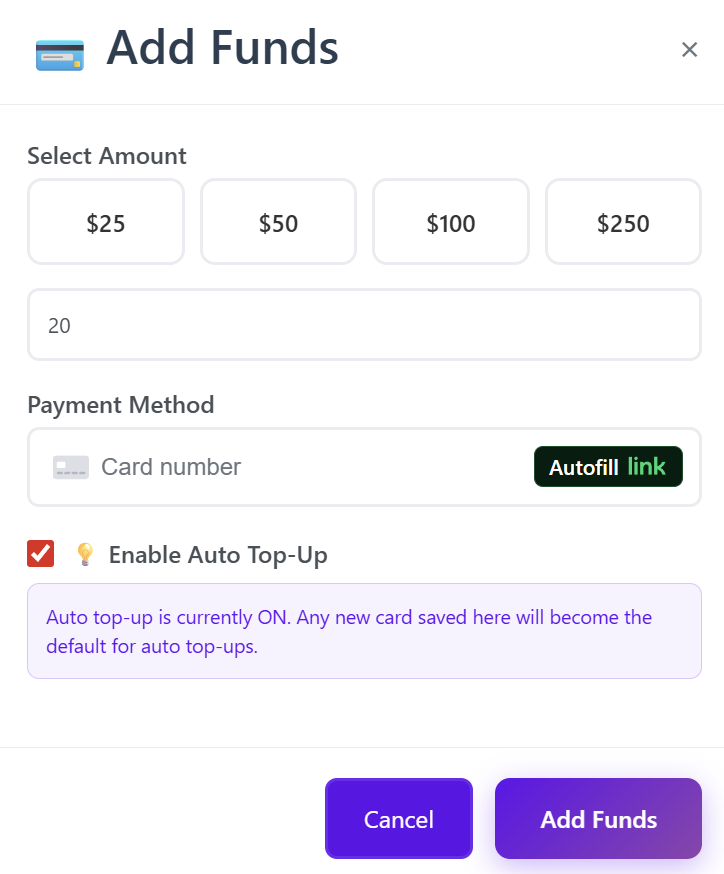
Section 1:
StorefrontDomainMainSetupSettingsYou
youra.canEnablechoosethehowStorefront- storefront is accessed:
-
Go to
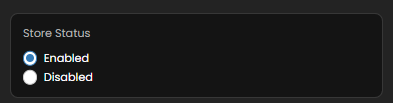
Storefront Settingsinyourdashboard.DNS provider -
ToggleCreatetheaStore StatusCNAMEto “Enabled” to activate your store.record -
You can disablePoint itat any timetomakethe generated domain shown in yourstorefront temporarily inaccessible.
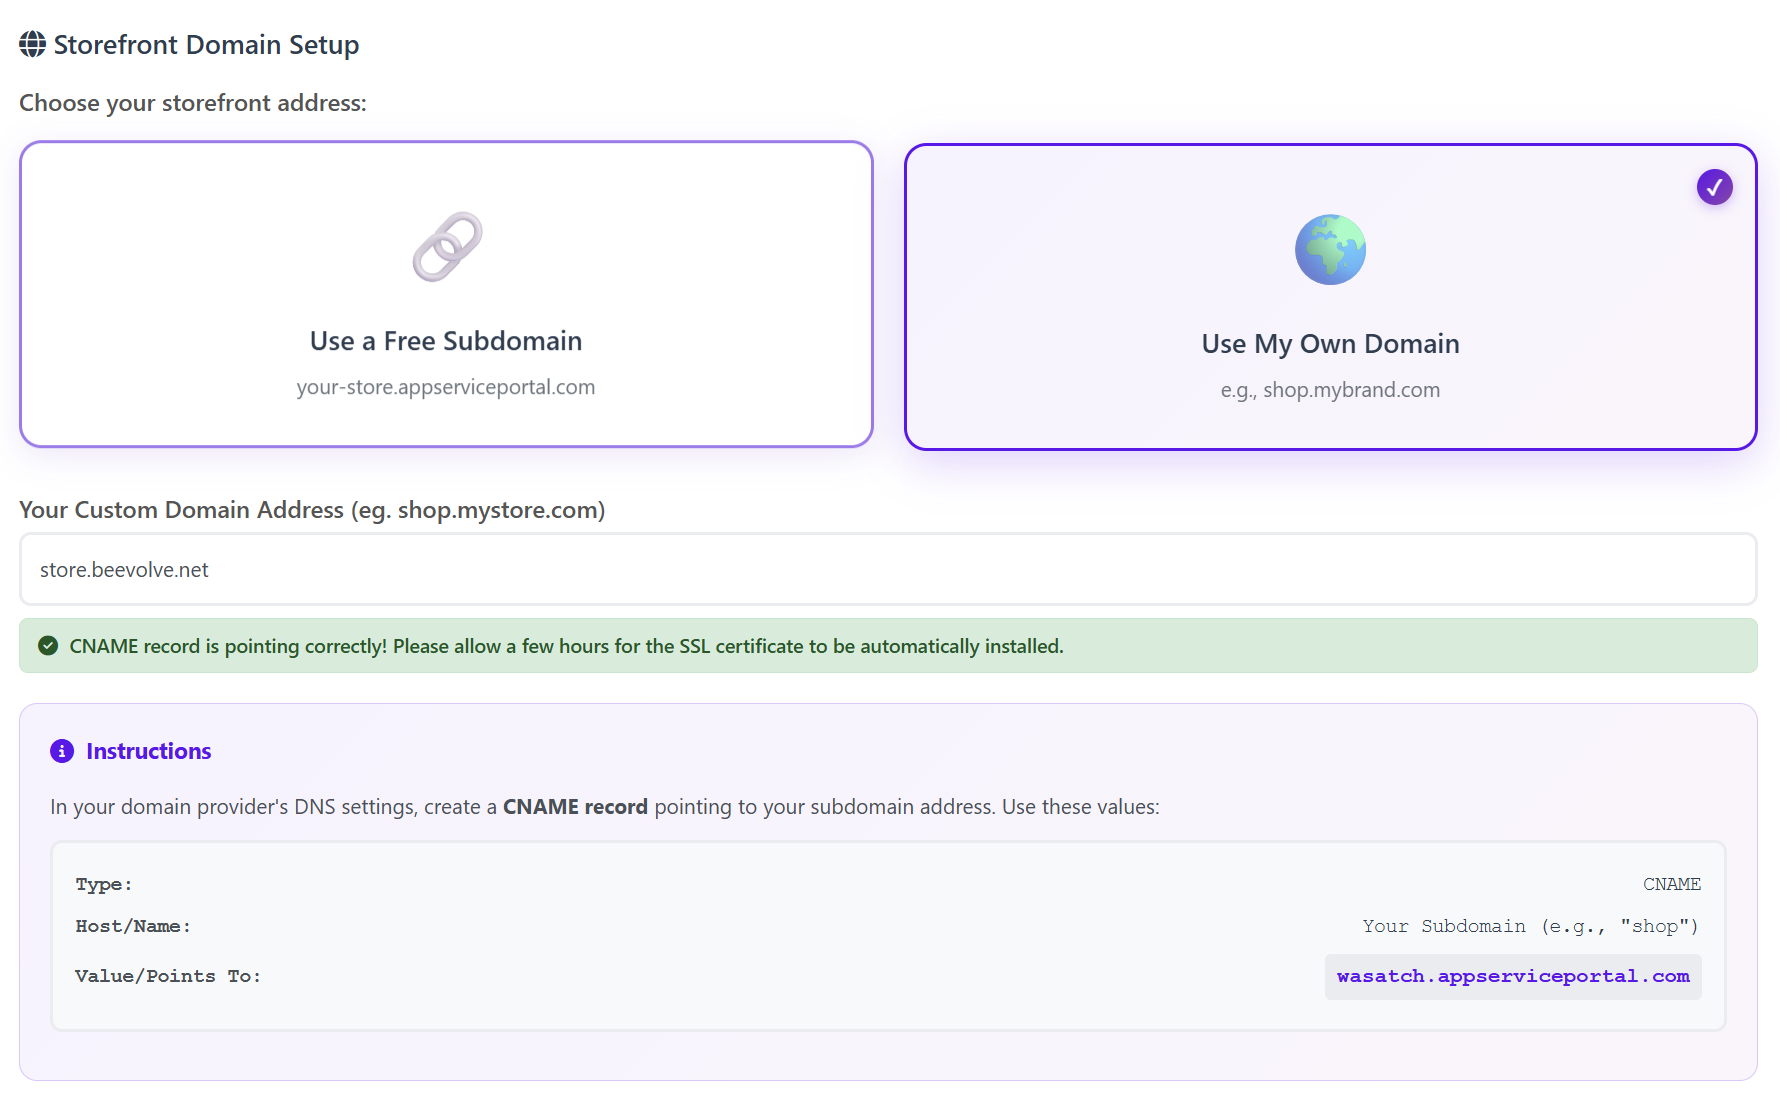
A. Free Subdomain (Instant Setup)
Use a free, hosted subdomain such as:
yourstore.custom.appserviceportal.comJust enter your subdomain name and save.
B. Custom Domain
You can use your own domain, such as:
shop.mybrand.comTo connect it:
-
b.Save
StorechangesAccess Settings -
ChooseWaithowforcustomersSSL to automatically install (usually a few hours) -
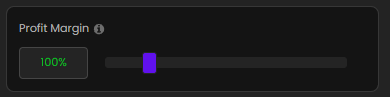
Use yourRange:default0%subdomain– 200%(e.g., yourname.resellportal.store) -
Or connect aRecommended:custom domain100%you own Once you fill in and save(doubles yoursettings,wholesaleyou’llprice,be able tocopy your live storefront URLfrom this section.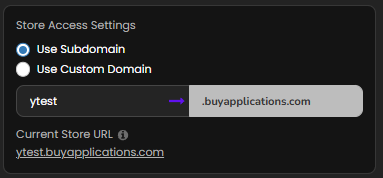


The system will accessshow if your storefront:CNAME is correctly pointing.
Section 2: Storefront Profit Margin
Set your global profit percentage.
This margin applies to all storefront products automatically.

c. Set Your Global Profit Margin
Choose aprofit margin percentage(up to 500%) that applies to all products.Your profit is added to the platform’s base price to form the final sale price.

Example:Example Pricing
If
Wholesale: $10,10
Profit and you set aMargin: 100%
Customer margin, the customer paysPays: $20
Your — you earnProfit: $10 on(Paid everyout saledirectly orby renewal.Stripe via payouts)
d.
Products Supportautomatically Emailuse
- this
- formula — no manual pricing required.
Section 3: Store Appearance & Branding
EnterCustomizeahowvalidsupport email addresswhere clients can contact you for assistance. This email appears in theyour storefrontfooterand clientinvoices.
portal look:
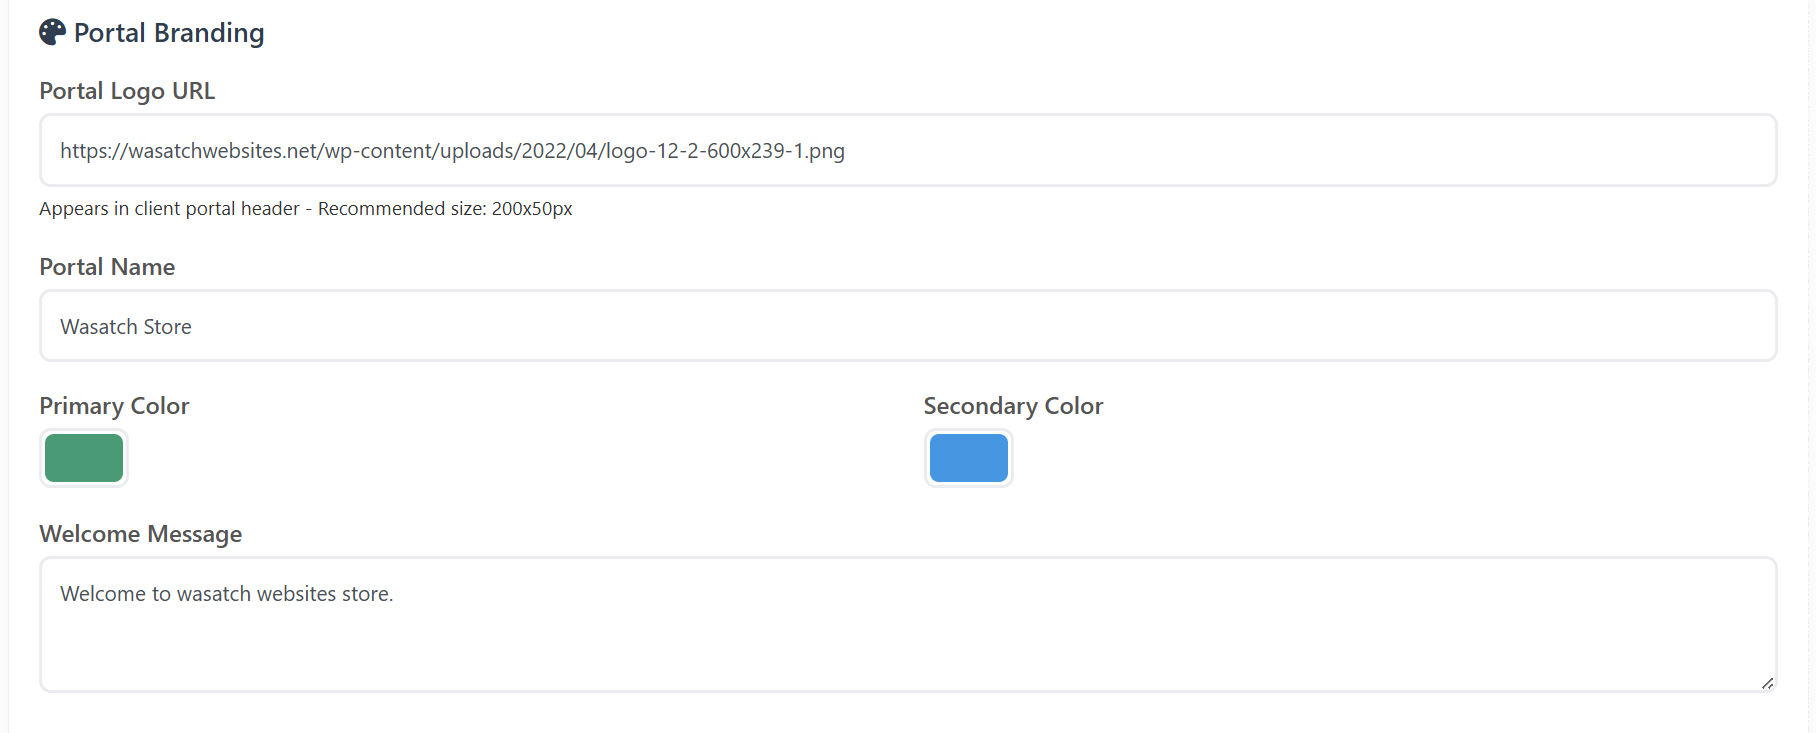

Branding
Section 2: Store AppearanceOptions
Customize the visual identity of your storefront to reflect your brand:
-
UploadPortal Logo URL– Shown in the header and checkout pages
-
FaviconPortal Name– Browser tab icon (small icon that appears in the browser tab)
-
ChoosePrimaryColors:Color -
Secondary Color
-
Welcome Message (client portal welcome text)
Homepage Description
You can set your storefront’s main introduction text to:
-
Primary Color (used for headers, buttons, and footer) Primary Font ColorBackground ColorSupport Bubble Color (chat or help bubble)

Social Media Links (Footer)
Add links for:InstagramFacebookYouTubeX (formerly Twitter)
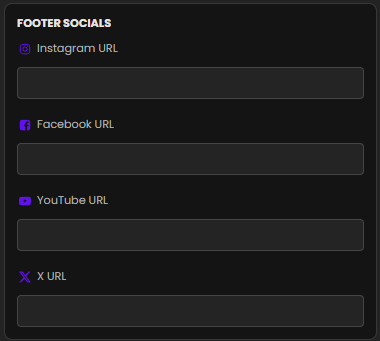
These links appear in the footer for added credibility and branding.
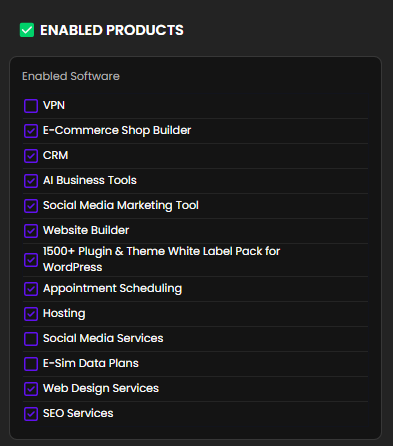
Section 3: Product Selection
Here you decide which digital products you want to offer inExplain your storefront.
Toggle products ON/OFF to include or exclude them from your public store.Only activated products will be visible to buyers.
Section 4: Front Page Description
This is where you set the tone of your storefront.
Write acustom descriptionthat will appear on your store’s homepage.services-
Introduce your
brand, explain your services, or highlight what makes you unique.brand -
UseHighlightsimple,whatclearcustomerslanguage to build trust and convert visitors into buyers.
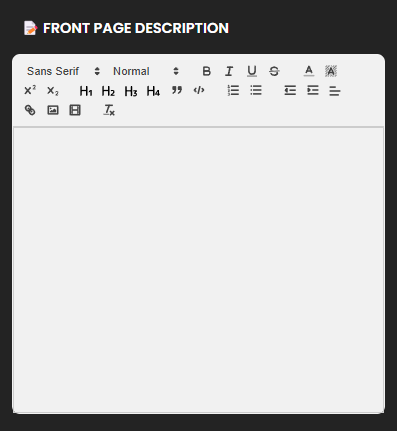
This text appears on your storefront homepage.
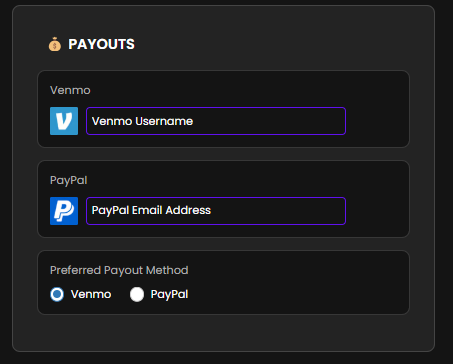
Section 5:4: PayoutClient Email Branding
Email branding is now located separately under:
Whitelabel Settings → Client Email Branding
SetYou upcan how you get paid:customize:
-
EnterEmailyourLogoVenmo usernameand/orPayPal emailaddress.URL -
ChooseCompanyyourpreferred payout method(Venmo or PayPal).
Name -

-
Email Button Color
-
Email Footer Text
-
Company Address
-
Support Email
-
Enable/Disable Support Chat Bubble
-
Custom CSS for the client portal
All emails sent to your clients (login credentials, product activation, receipts, notifications) reflect your branding.
PayoutSection Schedule:5: Payment Gateway (Stripe)
Your storefront uses your connected Stripe account for:
-
ProfitsAllarecustomerdisbursedpayments -
Subscription billing
-
Refunds (if you choose to issue them inside Stripe)
-
Payouts to your bank account
Since Stripe handles payouts, the platform bi-weeklyno longer shows payout history,.
All payouts appear in your Stripe Dashboard.
Section 6: Enabling Products & Services
You can choose which services or products you want available on your store by going to the 1stManage Active Storefront Products section in the white label settings page.

Section 7: How the Storefront Works
Once your Stripe account is connected and 15thyour ofwallet eachhas month.$20+:
-
Your storefront is automatically activated
-
Your
totaldomainprofitbecomes(basedpubliclyon sales margin) will be paid out accordingly. Once all sections are completed, clickSave Settingsat the bottom of the page.accessible-
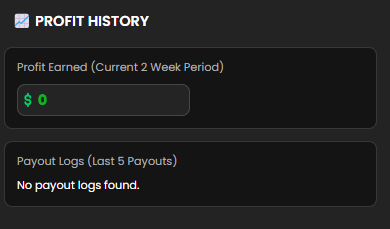
ThisCustomerswillcanapply allbrowse yourchangesproductand make your storefront live and functional. Profit History: View earnings for the current 2-week periodcatalog-
PayoutTheyLogs:purchaseSeeusingtheStripelast 5 payout records including date, amount, and method
-
UseServicesthisareareaautomatically provisioned -
Clients receive branded emails
-
Stripe sends your payouts directly to
trackyourperformance,bankmonitor sales cycles, and reconcile payouts with your payment account.account
Final Step: Save All Settings
Profit Tracking & History
A dedicated section shows your financial performance:
No manual activation is required.
Summary of KeyBenefits
| Feature | Benefit |
|---|---|
Billing |
|
| Automated |
No manual activation |
| No Website Needed | Your storefront is instantly deployed and hosted |