
Activating Appointment Booking
The Appointment Booking service allows you to provide your clients with a fully branded, professional scheduling system. This guide will walk you through the steps to activate this service for your clients within the Resell Portal.
1. Prerequisites
Before activating the service, please ensure:
-
Wallet Balance: Your reseller wallet is topped up with sufficient funds to cover the initial billing cycle.
-
Client Information: You have already created the client profile in your "Clients" tab, or have their details ready to add as a new client.
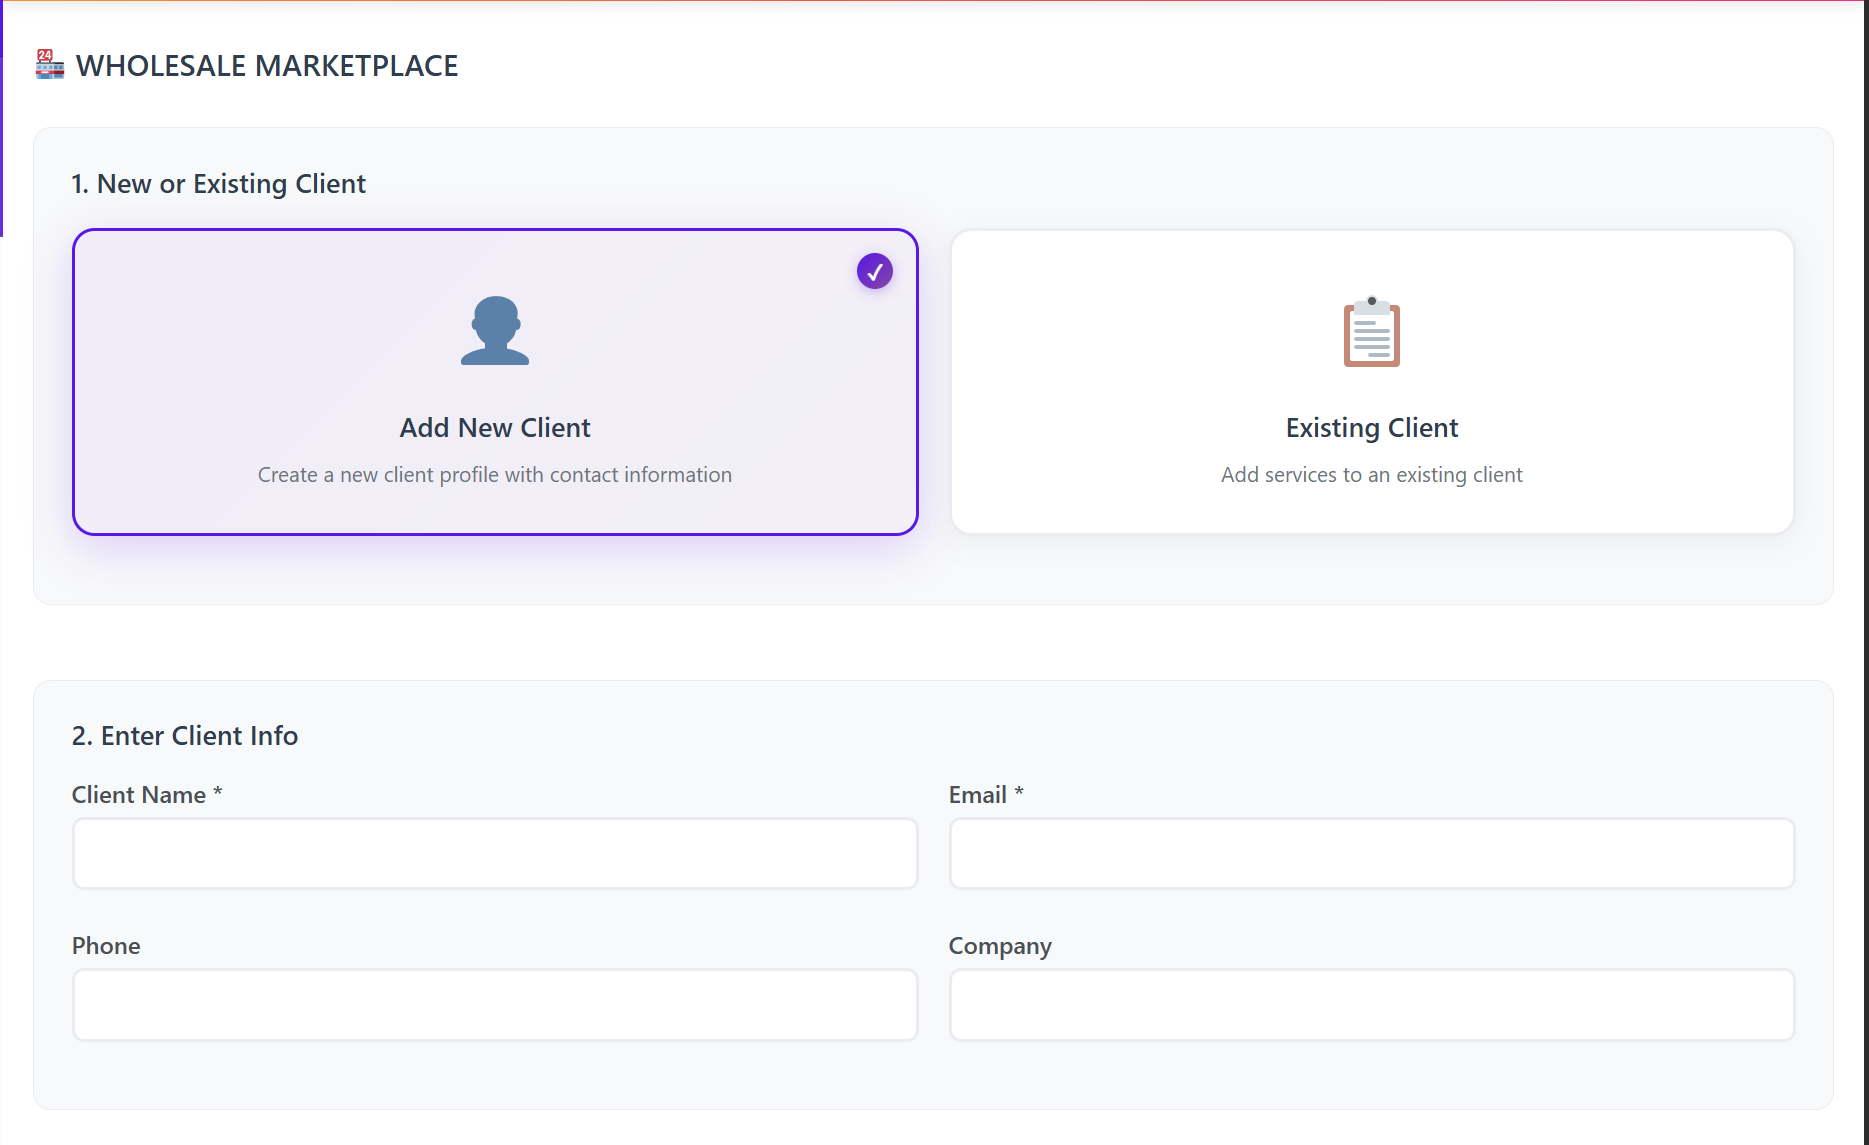
2. Accessing the Marketplace
To begin, log in to your Resell Portal dashboard:
-
Navigate to the Marketplace tab in the left-hand sidebar.
-
Select the Client you wish to activate the service for (or click "Add New Client").

-
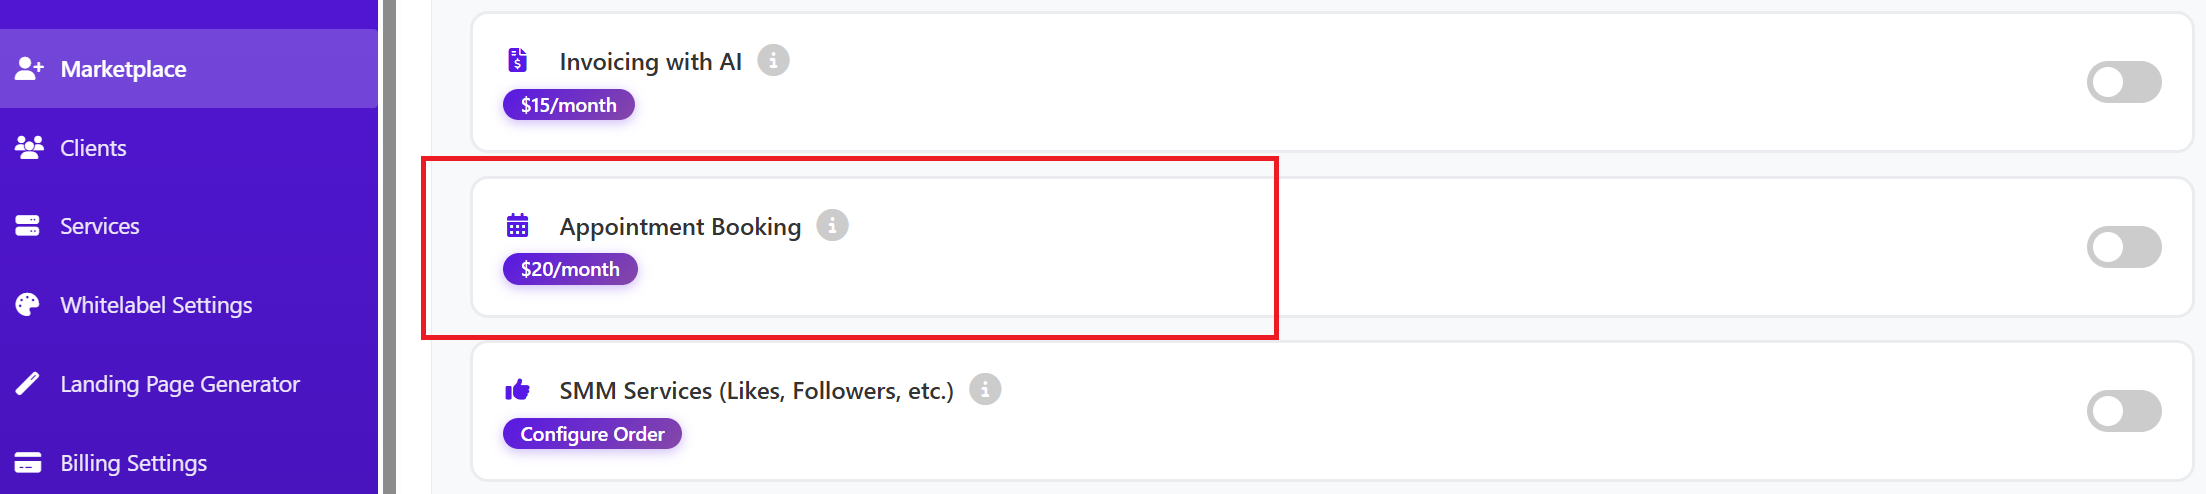
Browse the product categories and locate the Appointment Booking service.

3. Configuring the Service
Once you select the Appointment Booking service, you will see the configuration form. Complete the following fields:
-
Subdomain: Choose a unique prefix for your client's booking
pagetopic (e.g., your-client-name). The final URL will look like your-client-name.quickreserve.net. -
Business Name: Enter the client’s official business name as it should appear on the booking
page.topic. -
Branding Colors: Select the Primary and Secondary colors that match your client's brand. These will be applied to the booking interface.
-
Logo URL (Optional): Provide a direct link to the client’s logo image (PNG or JPG) to display it on their booking
page.topic. -
Billing Cycle: Select your preferred billing term. Options include:
-
Monthly: Standard rate.
-
Quarterly/Bi-Annual/Annual: These options offer significant discounts (Save up to $60/year).

-
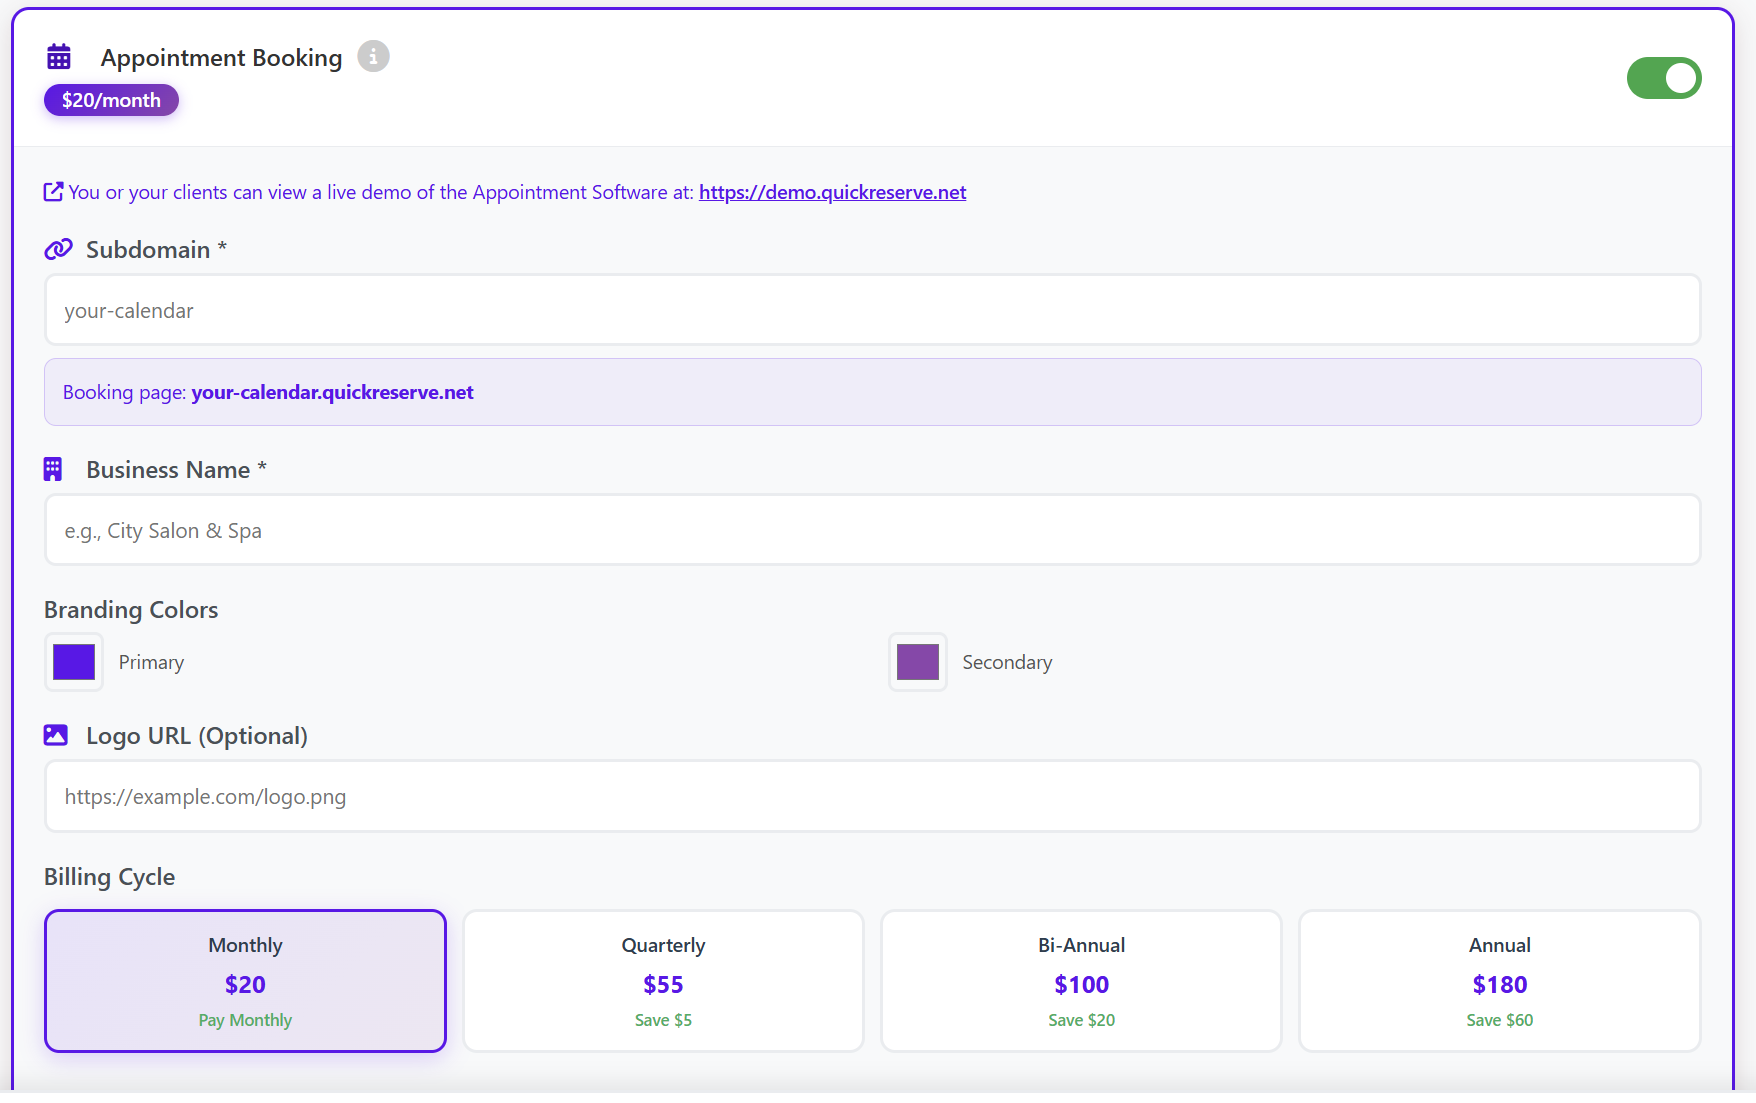
Pro Tip: You can view a live demo of the software at any time via the link provided at the top of the configuration
pagetopic to show your clients how the final product looks.
4. Finalizing Activation
After filling in the details:
-
Scroll to the bottom of the
pagetopic and click Add Service(s) to Client. -
The system will process the payment from your wallet and provision the service immediately.
5. Managing the Service & Credentials
Once activated, you can manage the service through the Services tab in your sidebar.
-
View Credentials: Click on "View Credentials & Login" to see the
administrativelogin details for the booking software. -
Status Tracking: You can monitor the service status (Active/Suspended), check the next due date, or remove the service if needed.
-
Email Confirmation:
Both you and your client (if configured)You will receive an automated email containing the activation confirmation and the logincredentials.credentials for ADMIN to be able to set up the booking page.
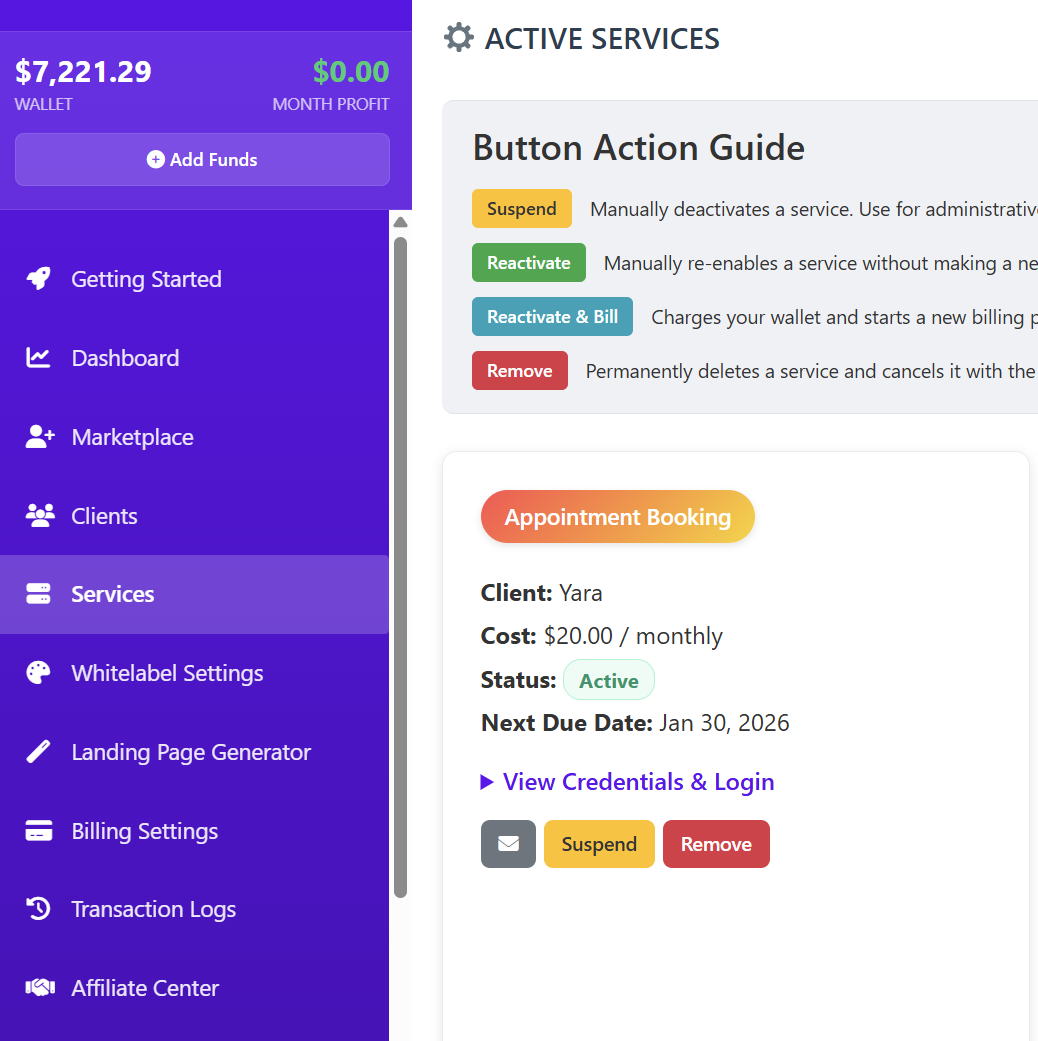
The Services tab allows you to manage active subscriptions and access login details.