
AI QR Campaign Generator
Create, customize, and schedule dynamic QR code campaigns with branded landing pages—perfect for promotions, events, coupons, product launches, or store announcements.
The AI QR Campaign Suite allows you to design branded landing pages and generate dynamic QR codes that redirect users to your promotional page. The landing page and QR settings can be customized with colors, logos, CTAs, and optional scheduling.
Once created, campaigns are saved inside your “My Campaigns” dashboard with analytics such as scans and activation status.
Accessing the AI QR Campaign Suite
-
Log in to your dashboard.
-
Ensure your wallet has been topped up.
-
Go to Add Client / Services and activate AI QR Campaign Suite if not already activated.
-
After activation, go to Services → AI QR Campaign Suite to begin creating campaigns.
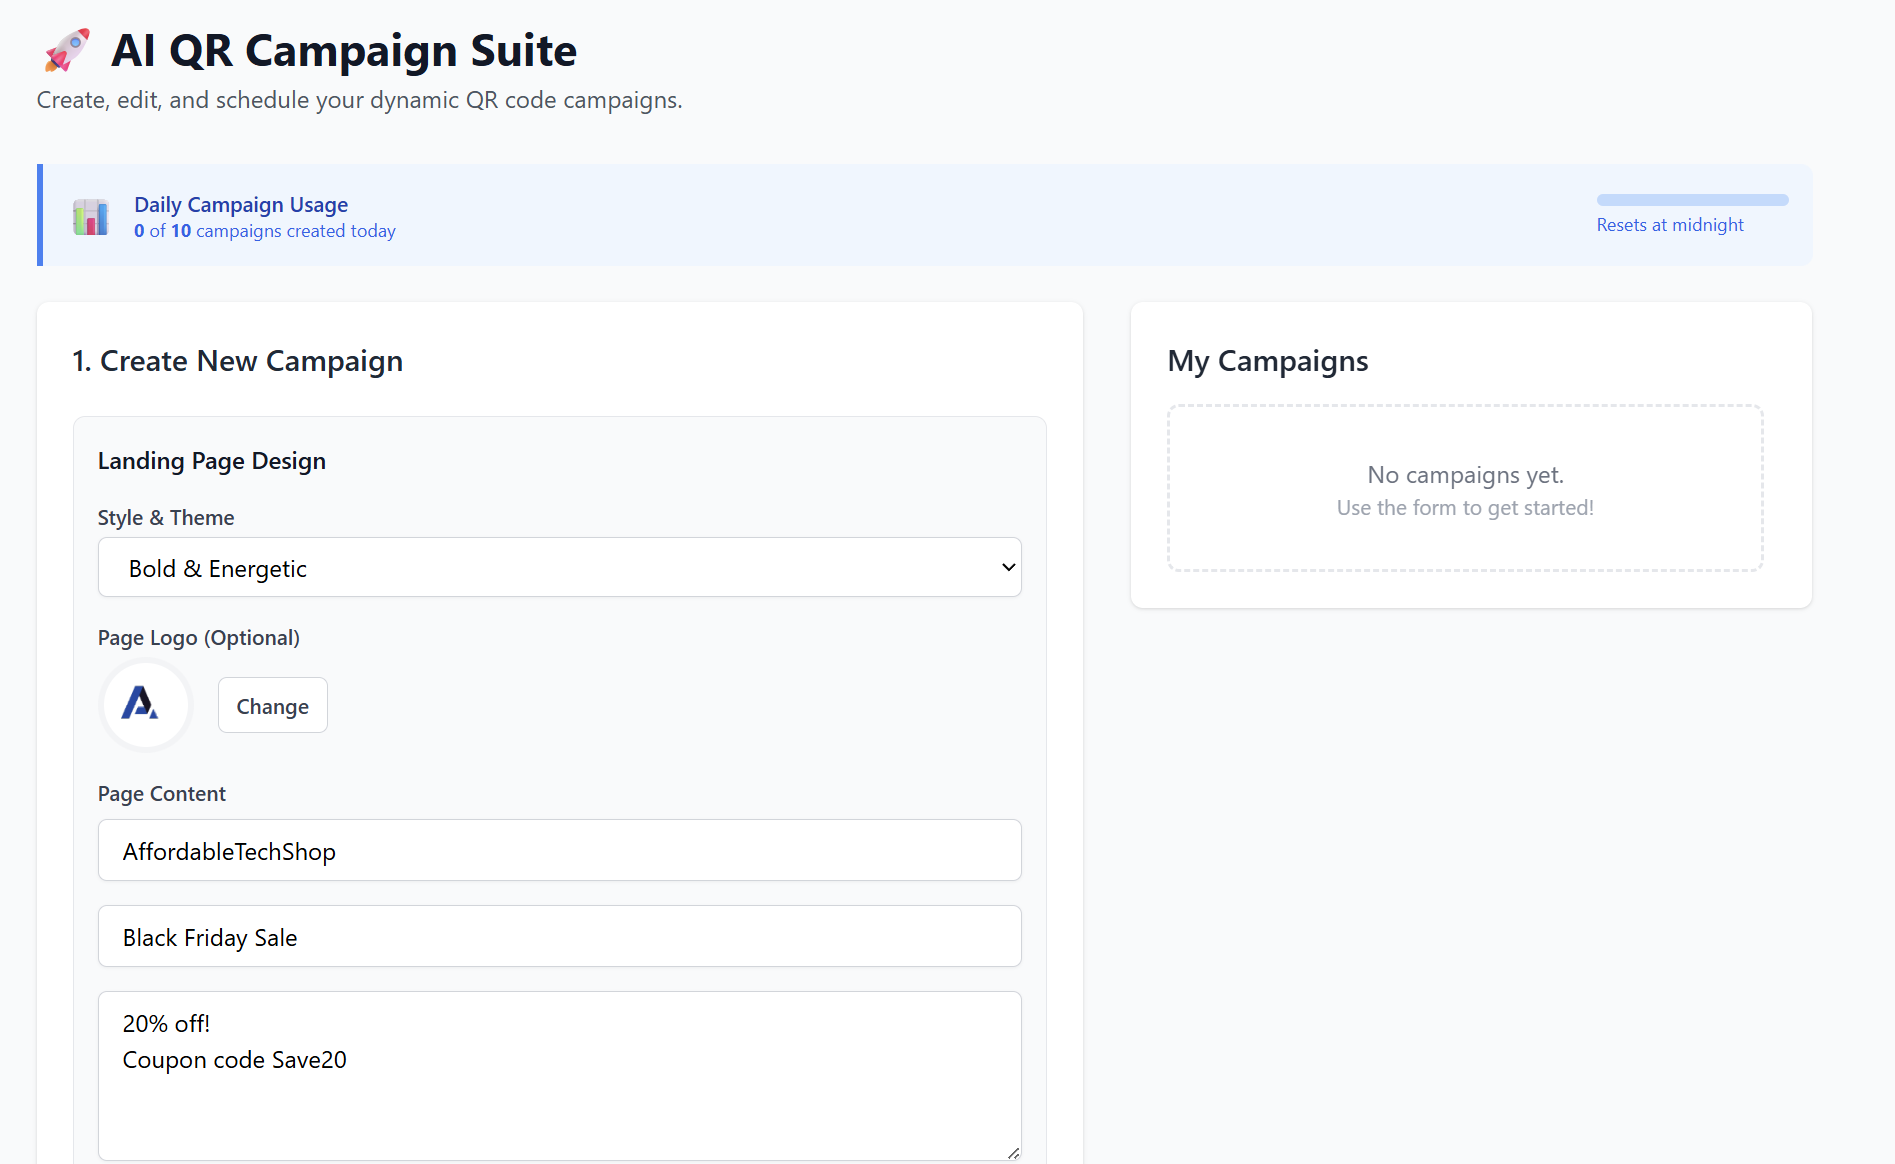
1. Create a New Campaign
Inside the AI QR Suite, you'll see the Create New Campaign section. Follow the steps below:
Step A — Landing Page Design
This is the page visitors will see after scanning your QR code.
Choose a Style & Theme such as:
-
Modern & Clean
-
Bold & Energetic
-
Minimal
-
Premium
…and more depending on your account.
The theme determines the layout, font style, spacing, and visual aesthetic.
2. Add Page Logo (Optional)
Upload your business or brand logo (PNG, JPG, GIF, WebP).
This will appear at the top of the landing page.
3. Fill in Page Content
You will see multiple content fields:
-
Your Business Name (required)
Example: AffordableTechShop -
Main Headline (required)
Example: Black Friday Sale -
Key Details (multi-line)
Add supporting promo info, such as:
Step B — Call-to-Action (CTA)
A strong CTA boosts conversions.
Step C — QR Code Design
Customize your QR code to match your brand.
1. Dot Color
Set the color of the QR dots (usually black, but any color is allowed).
Tip: Choose a strong contrast for better scanning.
2. Background Color
Set the QR code’s background color (default: white).
3. Center Logo (Optional)
Upload a small logo to appear in the middle of your QR.
Perfect for branding—stores, agencies, or events.
Step D — Scheduling (Optional but powerful)
Schedule when the QR campaign should be active.
-
Start Date & Time
-
End Date & Time
If someone scans the QR outside the active window, they will be redirected to:
-
Fallback URL
Example: https://yoursite.com Ideal for expired promotions or closed events.
Step E — Internal Campaign Name
This is for your internal tracking only.
Examples:
-
Q4 Holiday Promo
-
Black Friday 2025 QR Code
-
Grand Opening Campaign

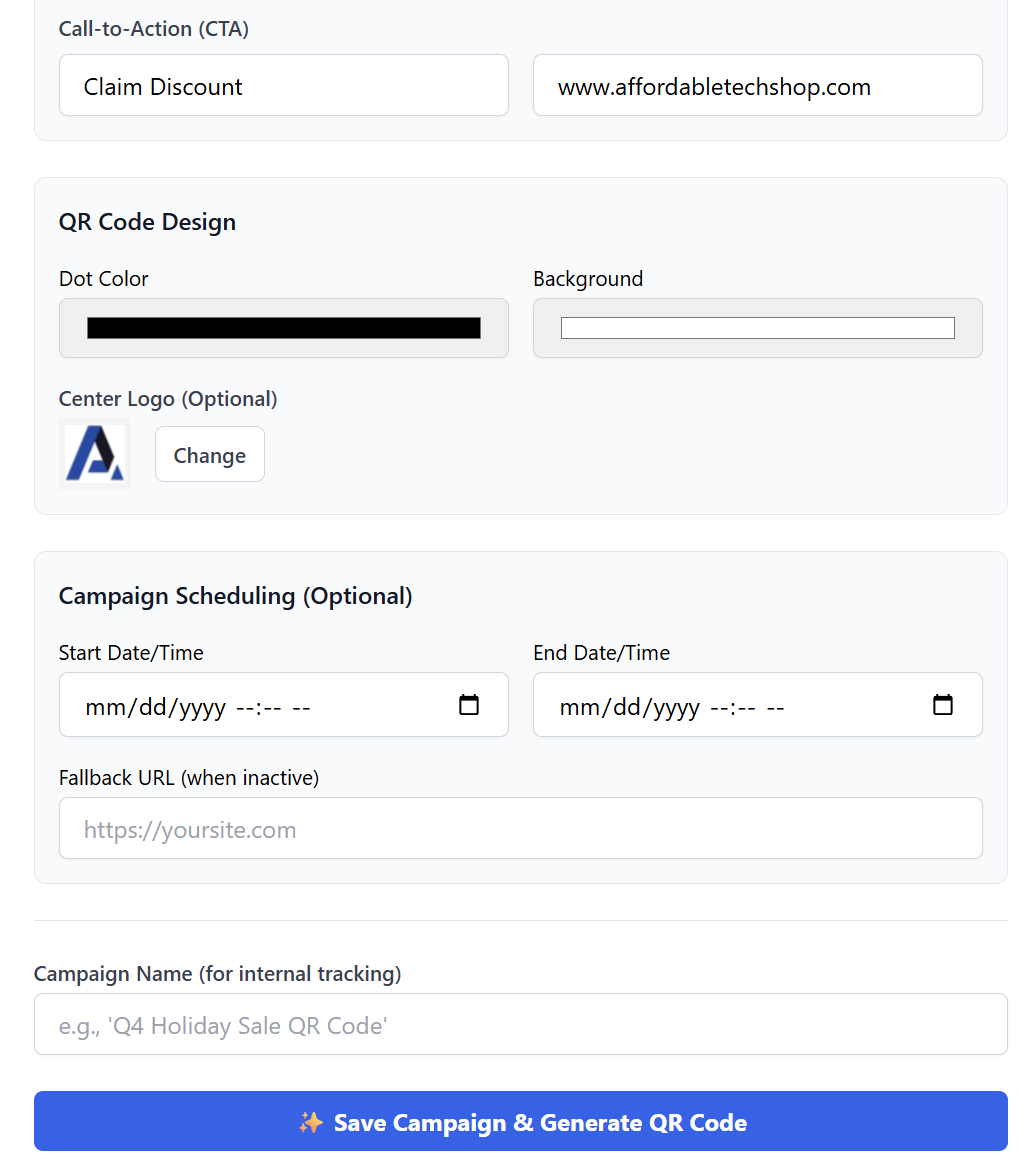
Step F — Save & Generate
Click ✨ Save Campaign & Generate QR Code.
You will then see:
Your QR Code
-
Viewable immediately
-
Buttons to:
-
Copy Link
-
Download PNG
-
Live Page Preview
Scroll through your landing page to confirm design accuracy.
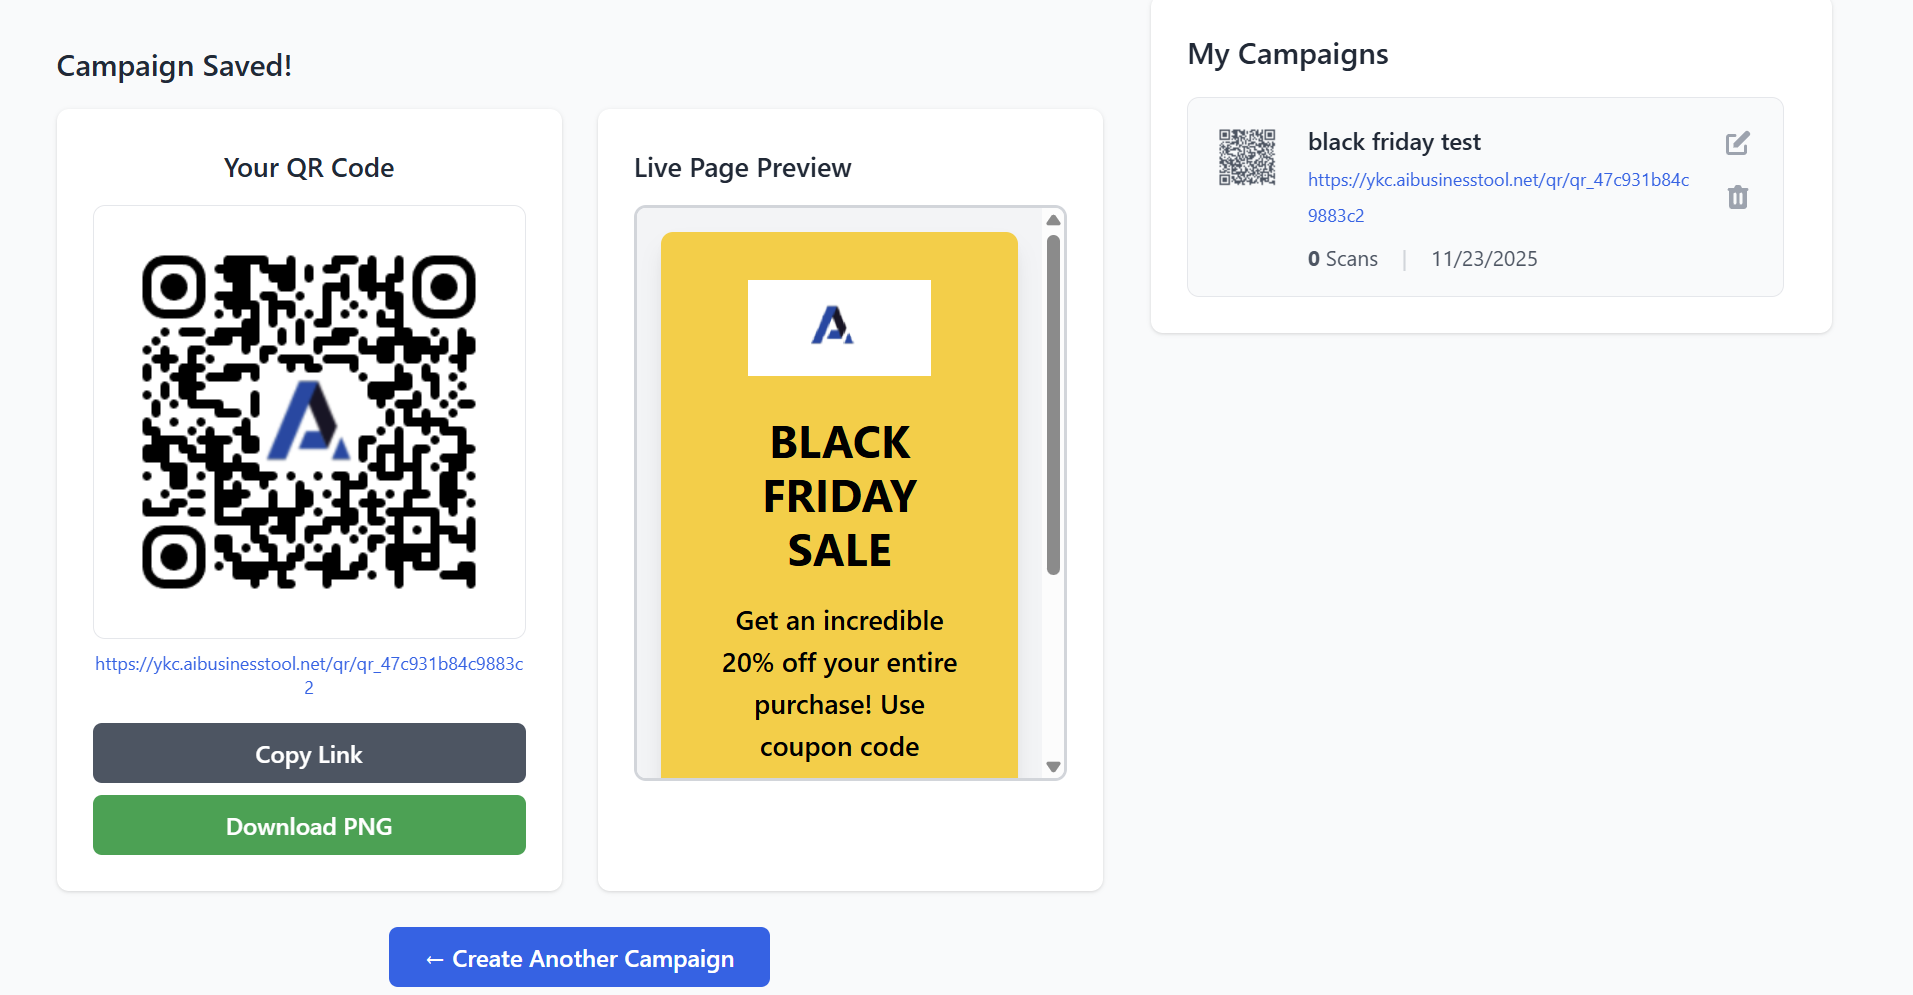
Your Campaign Saved in Dashboard
It will appear under My Campaigns with:
-
Name
-
QR link
-
Scan count
-
Creation date
-
Edit/Delete buttons
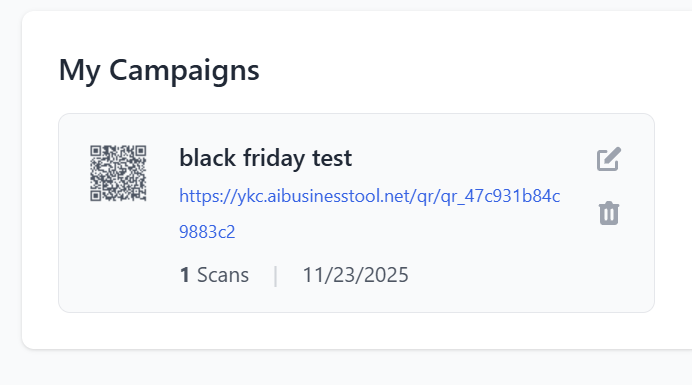

Managing Existing Campaigns
Go to My Campaigns to:
Edit Campaign
-
Change CMS content
-
Update colors or logos
-
Reschedule
-
Update CTA
-
Regenerate QR if needed
Delete Campaign
Remove it from your dashboard permanently.
View Scan Data
Scan count shows how many times the QR code has been used.
Best Practices
-
Use high-contrast colors for QR readability.
-
Keep landing page content short and clear.
-
Always test the QR using your phone before printing.
-
If running limited-time promotions, use scheduling + fallback URL.
-
Brand your QR with a center logo for professionalism.