
Using Accounts
The Accounts module in ResellPortal CRM is designed to help you manage and organize businesses or organizations you interact with. Each account acts as a central hub where you can store essential information, track interactions, and link related contacts, leads, and opportunities. Here’s a detailed guide to using the Accounts section effectively.
1. Navigating to the Accounts Module
-
Log in to your ResellPortal CRM dashboard.
-
Locate the main navigation menu on the left-hand side.
-
Click on Accounts to access the module.
You’ll see a list view displaying all existing accounts.
2. Creating a New Account
To add a new account:
-
Click the "Create" Button:
-
In the Accounts module, click the + Create button at the top-right corner.

-
-
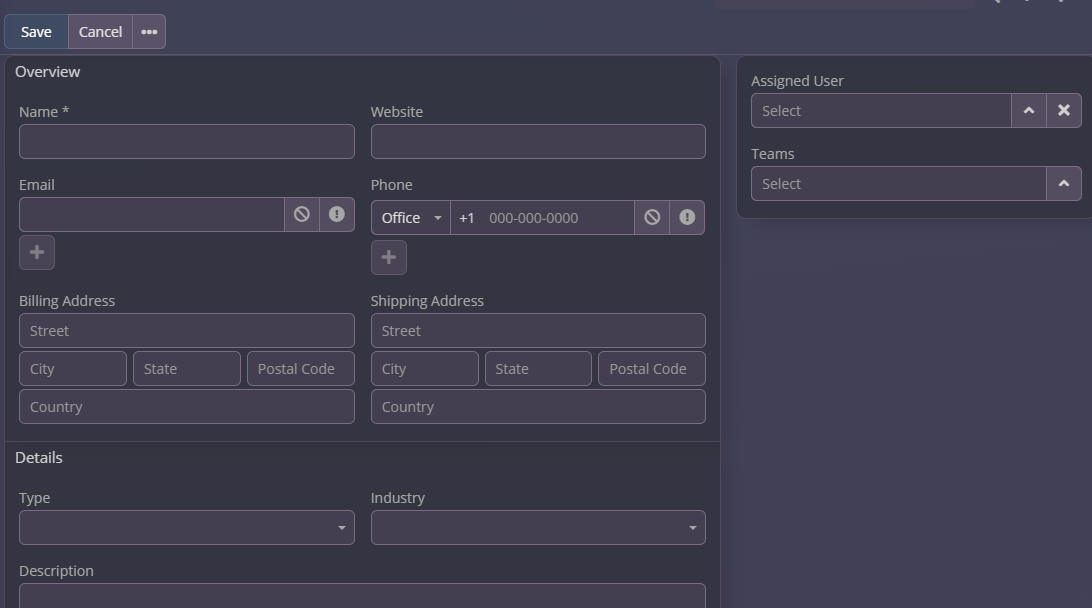
Fill Out the Account Details:
-
Account Name (Required): Enter the name of the business or organization.
-
Industry: Select the industry category (e.g., Retail, Technology).
-
Type: Indicate whether it’s a customer, prospect, partner, or vendor.
-
Billing Address: Enter the billing address of the account.
-
Shipping Address: If different, specify the shipping address.
-
Phone Number: Add the main contact number for the account.
-
Website: Enter the account’s website URL.
-
-
Save the Account:
-
Click the Save button at the bottom to store the new account.
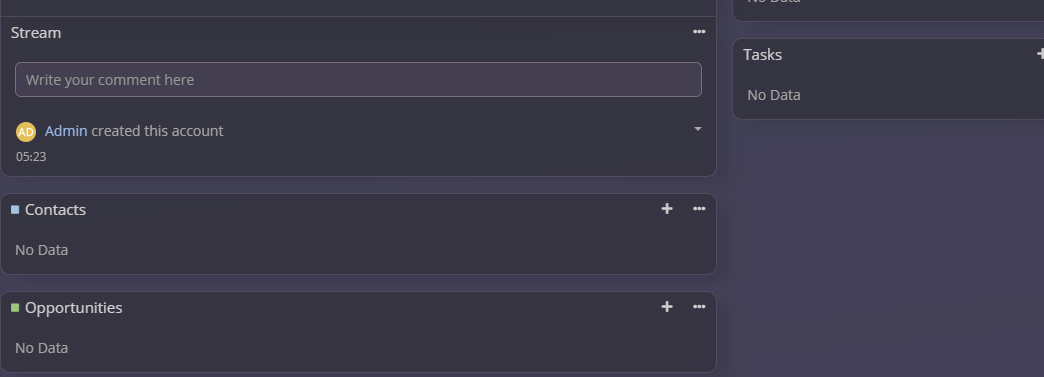
Note: You can Link Related Records by Using the "Contacts," "Opportunities," or "Tasks" sections to link relevant records that appear after saving.

-


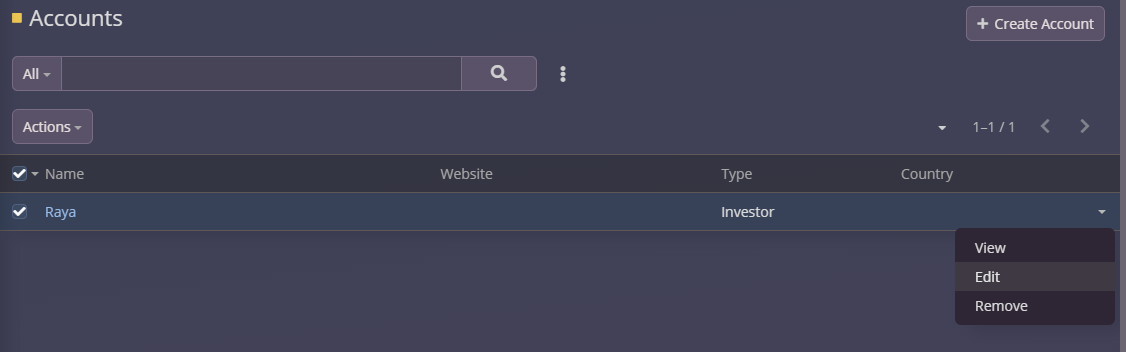
3. Viewing and Editing Accounts
Accessing an Account Record:
-
From the Accounts list view, click on the desired account’s name to open its detailed record view.
Editing Account Information:
-
In the account record view, click the Edit button at the top-right corner.
-
Update the necessary fields (e.g., phone number, address, or industry).
-
Click Save to apply the changes.

4. Linking Contacts to an Account
Contacts represent individuals associated with an account. To link contacts:
-
Open the desired account record.
-
Scroll down to the Contacts subpanel.
-
Click the Link button to associate an existing contact or the + Create button to add a new one.
-
If creating a new contact, enter the individual’s details (e.g., name, email, phone).
-
Save the contact. It will now appear in the Contacts subpanel.


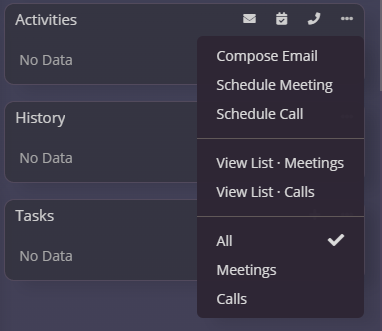
5. Managing Interactions and Activities
The Accounts module allows you to track interactions and activities, such as meetings, calls, and tasks:
-
Adding Activities:
-
In the account record, locate the Activities subpanel.
-
Click + Create to add a new activity, such as a call, meeting, or task.
-
Enter relevant details like date, time, and description.
-
Save the activity.
-
-
Viewing Interaction History:
-
The History subpanel displays completed activities, emails, and notes linked to the account.
-

6. Filtering and Searching Accounts
Use filters and search options to locate specific accounts quickly:
-
Search Bar:
-
Use the search bar at the top of the Accounts list to find an account by name, industry, or type.
-
-
Filters:
-
Click the Filters button to apply advanced filters based on criteria like creation date, assigned user, or status.
-
-
Saved Filters:
-
Save frequently used filters for quick access.
-
7. Deleting or Archiving Accounts
Archiving an Account:
-
Archiving preserves the account’s data but removes it from active lists.
-
Open the account record.
-
Click the Archive button.
Deleting an Account:
-
Use this option only if the account is no longer needed, as deletion is permanent.
-
Open the account record.
-
Click the Delete button.
-
Confirm the deletion.
8. Reporting and Insights
The Accounts module offers reporting tools to analyze account data:
-
Generating Reports:
-
Navigate to the Reports section from the main menu.
-
Create a new report focusing on the Accounts module.
-
Choose criteria such as industry, account type, or activity history.
-
-
Visualizing Data:
-
Use charts and graphs to display trends, such as accounts by industry or sales performance by account.
-
-
Exporting Data:
-
Export account data in CSV or Excel format for external analysis.
-
9. Best Practices for Managing Accounts
-
Keep Data Updated: Regularly review and update account information to ensure accuracy.
-
Use Notes: Add notes to account records to document key interactions or insights.
-
Leverage Automations: Set up workflows to automate tasks like follow-up reminders or email notifications.
-
Collaborate: Use the "Assigned To" field to delegate account ownership and tasks effectively within your team.
By mastering the Accounts module, you’ll unlock the full potential of ResellPortal CRM to build stronger relationships and drive your business forward. For additional help, contact our support team or refer to the full CRM documentation.