Using Contacts
The Contacts module in ResellPortal CRM is designed to help you manage individual relationships linked to businesses or organizations (Accounts). Each contact holds key details about the person, including their role, communication preferences, and interaction history. This guide will walk you through effectively using the Contacts module.
1. Navigating to the Contacts Module
-
Log in to your ResellPortal CRM dashboard.
-
Locate the main navigation menu on the left-hand side.
-
Click on Contacts to access the module.
You’ll see a list view displaying all existing contacts, including names, associated accounts, and email addresses.
2. Creating a New Contact
To add a new contact:
-
Click the "Create" Button:
-
In the Contacts module, click the + Create button at the top-right corner.
-
-
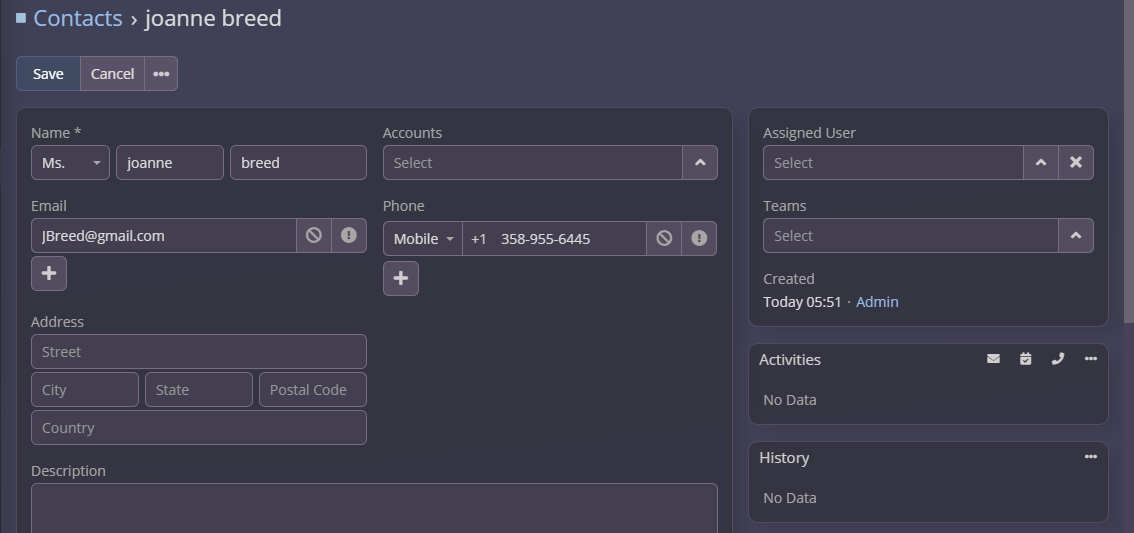
Fill Out the Contact Details:
-
First Name and Last Name (Required): Enter the individual’s name.
-
Email Address: Add the primary email address for communication.
-
Phone Number: Include the main contact number.
-
Associated Account: Link the contact to an existing account for better organization.
-
Address: Enter the contact’s physical or mailing address, if applicable.
-
-
Save the Contact:
3. Viewing and Editing Contacts
Accessing a Contact Record:
-
From the Contacts list view, click on the desired contact’s name to open their detailed record.
Editing Contact Information:
-
In the contact record view, click the Edit button at the top-right corner.
-
Update any necessary fields, such as email, phone number, or associated account.
-
Click Save to apply the changes.
4. Linking Contacts to Accounts
Each contact should be associated with an account for better data organization and tracking. To link a contact to an account:
-
Open the desired contact record.
-
Locate the Account field in the record.
-
Select an existing account or create a new one directly from the dropdown.
5. Tracking Interactions and Activities
The Contacts module allows you to log and monitor all interactions with individuals:
-
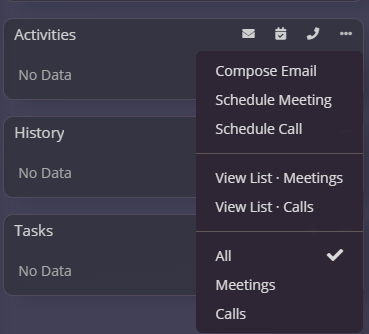
Adding Activities:
-
Viewing Interaction History:
-
The History subpanel displays completed activities, notes, and emails linked to the contact.
-
-
Logging Notes:
-
Use the Stream section to document key insights or conversations related to the contact.
-
6. Searching and Filtering Contacts
Quickly locate contacts using the search and filter options:
-
Search Bar:
-
Use the search bar at the top of the Contacts list to find a contact by name, email, or phone number.
-
-
Filters:
7. Deleting Contacts
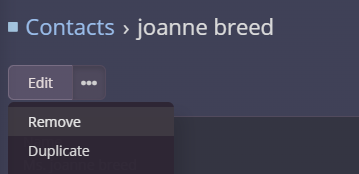
Deleting a Contact:
-
Deleting permanently removes the contact from the CRM. Use this option carefully.
8. Best Practices for Managing Contacts
-
Keep Contact Details Current: Regularly review and update email addresses, phone numbers, and titles.
-
Document Interactions: Use notes and activity tracking to maintain a history of communications.
-
Link Contacts to Accounts: Always associate contacts with relevant accounts for better organization.
-
Segment Your Contacts: Use filters and tags to categorize contacts based on industry, location, or status.
-
Leverage Automation: Set reminders or workflows for follow-ups and scheduled calls.
By mastering the Contacts module, you can strengthen individual relationships, improve communication efficiency, and drive your business goals forward. For further assistance, contact our support team or explore the full ResellPortal CRM documentation.


