Using Leads
The Leads module in ResellPortal CRM is designed to help you capture, track, and manage potential customers effectively. Leads are individuals or organizations that have shown interest in your product or service but are not yet fully qualified. This guide will walk you through how to use the Leads module to convert prospects into long-term customers.
1. Navigating to the Leads Module
-
Log in to your ResellPortal CRM dashboard.
-
Locate the main navigation menu on the left-hand side.
-
Click on Leads to access the module.
You’ll see a list view displaying all existing leads, including their names, statuses, and associated accounts or contacts.
2. Creating a New Lead
To add a new lead:
-
Click the "Create" Button:
-
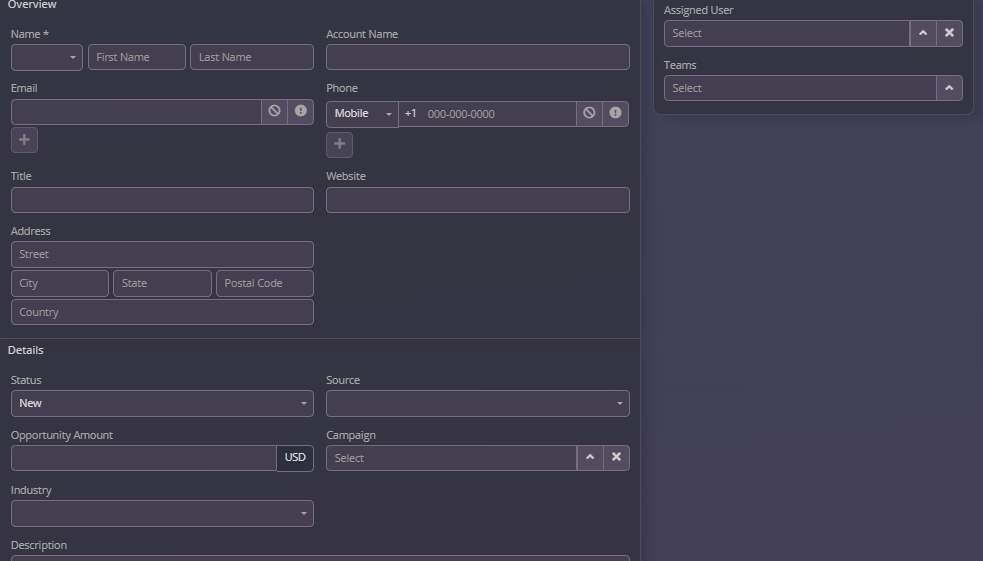
In the Leads module, click the + Create button at the top-right corner.
-
-
Fill Out Lead Details:
-
First Name and Last Name: Enter the lead’s personal information.
-
Company/Organization: If applicable, enter the lead’s associated company.
-
Email Address and Phone Number: Provide contact details for communication.
-
Lead Source: Indicate how the lead was acquired (e.g., website inquiry, referral, trade show).
-
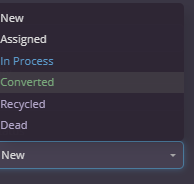
Status: Select the current status (e.g., New, In Progress, Qualified, Disqualified).
-
Industry: Specify the industry if applicable.
-
-
Add Additional Information:
-
Include notes about the lead’s needs, timeline, or any relevant context.
-
-
Save the Lead:
3. Viewing and Editing Leads
Accessing a Lead Record:
-
From the Leads list view, click on the desired lead’s name to open their detailed record.
Editing Lead Information:
-
In the lead record view, click the Edit button at the top-right corner.
-
Update any necessary fields, such as email, status, or notes.
-
Click Save to apply the changes.
4. Qualifying a Lead
Qualifying a lead means assessing their potential to become a customer. To qualify a lead:
-
Open the lead record.
-
Review the lead’s details and interaction history.
-
Update the Status field to reflect their progression (e.g., Converted).
-
If the lead is ready to convert, link them to an account and/or contact or create a new one.
5. Tracking Interactions and Activities
To maintain a comprehensive history of your engagement with a lead:
-
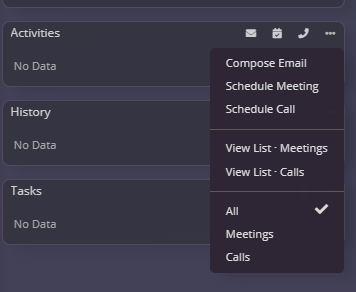
Adding Activities:
-
Logging Notes:
-
Use the stream section to document important conversations or observations about the lead.
-
6. Filtering and Searching Leads
Quickly locate specific leads using the search and filter options:
-
Search Bar:
-
Use the search bar at the top of the Leads list to find a lead by name, company, or email.
-
-
Filters:
7. Converting Leads
Once a lead is qualified, you can convert it into an account, contact, or opportunity:
-
Open the lead record.
-
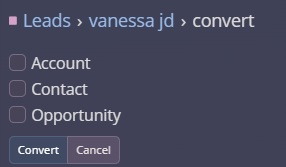
Click the Convert button.
-
Choose the desired action:
-
Create Account and Contact: Automatically generate an account and contact record based on the lead’s details.
-
Create Opportunity: Link the lead to a new sales opportunity.
-
-
Review and confirm the information, then complete the conversion process.

8. Deleting or Archiving Leads
Deleting a Lead:
-
Deleting permanently removes the lead from the CRM. Use this option carefully.
9. Best Practices for Managing Leads
-
Follow Up Promptly: Timely communication can significantly improve lead conversion rates.
-
Qualify Leads Effectively: Use clear criteria to assess whether a lead is worth pursuing further.
-
Document Interactions: Keep a detailed record of communications and activities to maintain continuity.
-
Segment Leads: Use filters and tags to categorize leads based on their industry, status, or source.
-
Automate Workflows: Set up reminders and automated tasks for follow-ups to ensure no leads fall through the cracks.


